


Steps to Screen Record Mac
Choose a Recording Mode
Choose a Mac recording mode. You can record full or partial screen with internal audio, microphone, headphone, and webcam.
Edit the Mac Recording
Edit your Mac recording. You can adjust zoom-in effect, apply mouse cursor effects, add captions, or make any other edits to make your recording more engaging.
Export & Share
Export the screen recording to save it to your computer. Or you can upload to share it with others via a link.
Why Use This Mac Screen Recorder

Screen Record Mac with Simple Clicks
With the ability to capture internal audio, microphone input, and webcam, you can create engaging and dynamic Mac recordings with simple clicks. Whether you want to record the full screen to demonstrate software tutorials or focus on a specific area to highlight intricate details, you are flexible to capture exactly what you need.
Screen Record Mac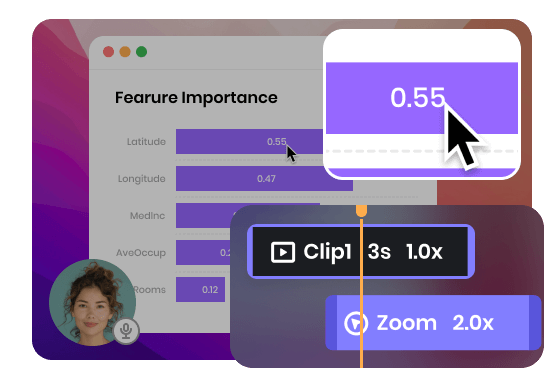
Apply Zoom-in Effect to Make a Dynamic Effect
While screen recording on Mac, you can apply an auto zoom-in effect that dynamically focuses on your mouse clicks. This will enhance the visual clarity and engagement of your recordings. After completing the recording, you can also add, remove, or adjust each zoom-in effect frame by frame, allowing for precise control over the focus and attention within your video.
Screen Record Mac
Generate Captions Automatically in Minutes
Captions provide a text-based representation of the spoken words and audio elements in your Mac recordings. Automatically generate captions to improve the accessibility of your screen recording. This will streamline the captioning process and eliminate the need for manual transcription or captioning, saving you time and reducing the risk of errors.
Screen Record MacTry More Video Editing Tools
FAQs About Mac Screen Recorder
Does Mac allow screen recording?
Yes, Mac allows screen recording through its built-in screen recording feature or third-party tools.
What is the shortcut for screen record on Mac?
On Mac, you can use the keyboard shortcut Command + Shift + 5 to access the screen recording options. Pressing this shortcut will bring up the screen capture toolbar, which allows you to choose between capturing the entire screen or a selected portion. From there, you can also select whether to include audio and set other recording options.
Where do screen recordings go on Mac?
By default, screen recordings on Mac are saved to the desktop. After completing a screen recording via QuickTime, a preview thumbnail appears in the bottom-right corner of the screen. You can either click on the thumbnail to open it in the QuickTime Player for editing and saving, or you can find the recording file directly on your desktop.
How long can you screen record on a Mac?
The duration of screen recordings on a Mac is not strictly limited by the operating system. However, there are factors that can affect the length of your screen recordings, such as available storage space and system resources.
Can Mac screen recordings be edited?
Yes, Mac screen recordings can be edited. After completing a screen recording, you can open the recording file in video editing tool like Clippa to make edits. Clippa provides a range of editing features that allow you to trim, cut, merge, add transitions, overlay text, and perform other modifications to your Mac screen recording.
 FocuSee
Mac Screen Recorder
Easily screen record Mac with internal audio and webcam. Apply auto zoom-in effect and generate captions for an engaging and accessible Mac screen recording.
Screen Record Mac