Taking a screen recording of tasks on your smartphone (Android or iPhone) is super easy. And everyone knows how to do it. However, it’s not common for most people to take a screen recording with their PC or laptop. Some may seek to screen-record team meetings.

How to Screen Record on Windows
The good news is that screen recording can be done on your Windows 10/8, and even on some low-end PC. While performing tasks, you can have a screen recorder that is automatically saved to your Video folder. Screen recording has greater benefits than screenshots especially when there is a bulk of work you need to capture. Or you want to give a presentation.
Also read:
How to Screen Record on Surface Pro >
How to Screen Record on Thinkpad >
How to Record Multiple Screens on Windows/Mac ? >
Table of Contents:
Does Windows 10 Have a Screen Recorder?
How to Screen Record on Windows with Zoom Effects?
How to Screen Record on Windows 10?
How to Screen Record on Windows 7?
Method 1. Screen Record on Windows via Microsoft Stream
Does Windows 10 Have a Screen Recorder?
Being the latest version of Windows, it has a screen recording feature that enables you to make recordings without installing any third-party software. Windows 10 offers this feature free of charge. Although other toolkits offer better recording features, screen recording on Windows 10 has the basic effects that would also make your recording come out great. With a little editing, your video comes out clean and ready for use. Screen recording on Windows 10 is easy to achieve, once you have the stepwise guide.
How to Screen Record on Windows with Zoom Effects?
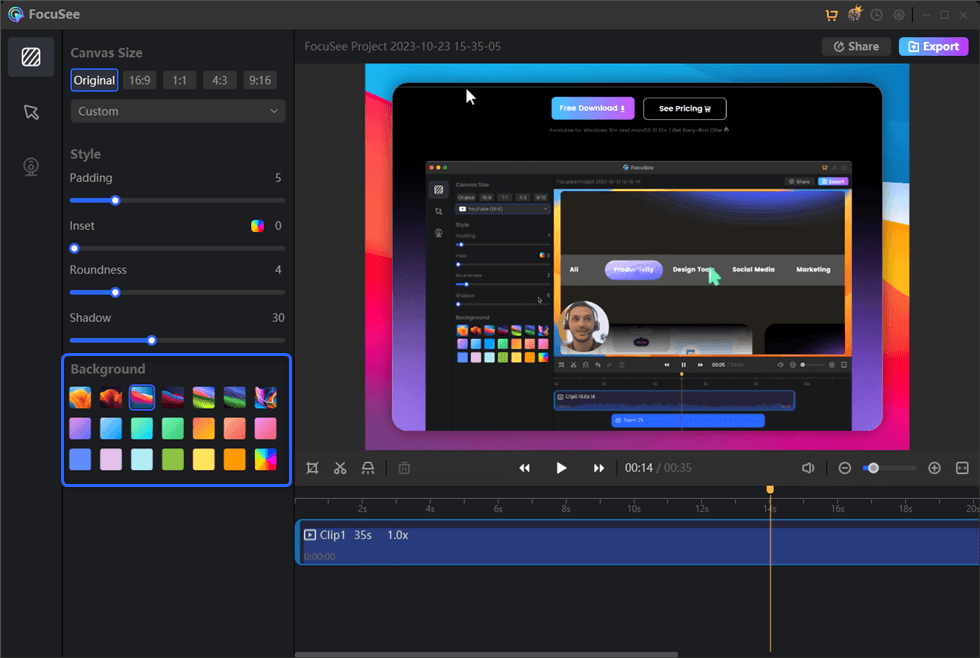
First of all, we would like to introduce a general & complete solution for both Windows and Mac users to screen record on their computers. No matter whether you are using Windows 11, Windows 1o, or former Windows versions, you can all use FocuSee to screen record. As one of the best screen recorders for Windows in 2024, FocuSee can catch and record your screen in high resolution. Now, free get FocuSee, check its key features, and take the steps below to screen record on Windows with simple clicks.
Key Features of FocuSee
- Auto-generate and edit captions as needed
- Choose from side-by-side, overlay, or screen-only layouts
- Trim, cut, crop, speed up, or slow down sections for concise videos
- Select preset sizes for YouTube, Twitter, TikTok, and other platforms
- Enhance video appeal with various mouse styles and click effects
- Customize auto-zoom effects, including zoom level, duration, and position
How to Screen on Window via FocuSee
Step 1. Install FocuSee for free on your Windows or Mac computer and launch it > Run the application and click on the “Custom” option on the welcome page.
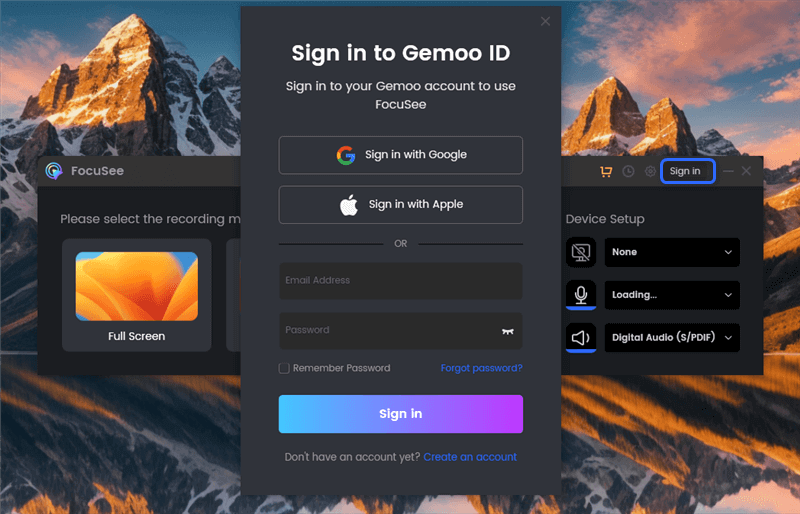
Create an Account and Activate FocuSee
Step 2. When ready, click the “Record” button to start the recording process. During the recording process, FocuSee will automatically apply a zoom effect based on mouse cursor clicks and movements.
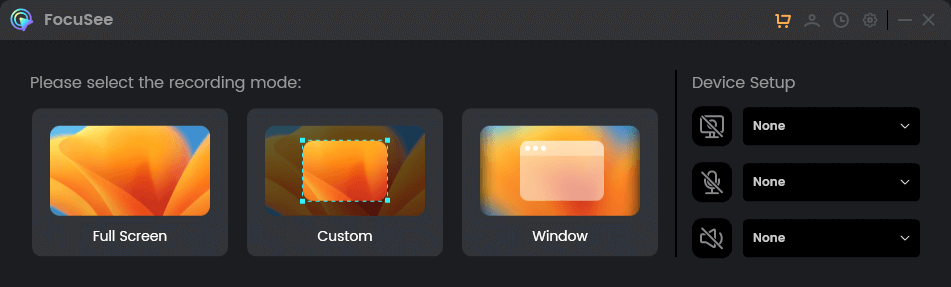
Choose a Recording Mode
Step 3. When you need to stop recording, you can click the red “Stop” icon on the left toolbar. You will then enter the video editing interface.
Change out a Virtual Background
Step 4. Export the recorded video as an MP4 or GIF file, or easily share it via a link.
How to Screen Record on Windows 10?
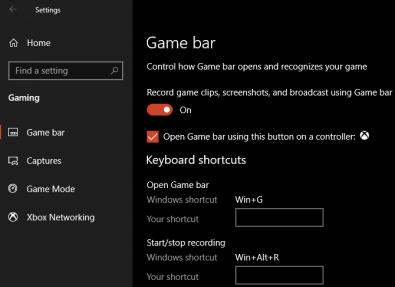
In spite of using FocuSee to complete screen records on your Windows 10 computer, you can screen record on Windows 10 via the Xbox Game Bar. The Xbox Game Bar is one of the best screencast software. It enables you to take screenshots, screen record, chat with Xbox friends, and lots more. All of these without stopping your game!
Check out the steps involved to seamlessly screen recording on Windows 10:
Screen Record on Windows with Game Bar
Step 1. Open the app you want to record. The screen record feature works on apps from the Windows Store and general desktop apps. Some applications are exempted, however, such as File Explorer, Maps, and Weather.
Step 2. Open Game Bar. Click on the Start menu, click on Settings, and Gaming, then Click on Game Bar. Alternatively, you can use the keyboard shortcut Windows key + G. Press the two keys simultaneously to open the Game Bar.
Step 3. Click the Start Recording Button. Click on Captures, then click on the circle with a dot to start the screen recording. Or use the shortcut Windows key + Alt + R. To screenshot, click the Camera icon.
Click the Start Recording Button
Once the recording starts, a timer pops up showing the duration of the video. The microphone picks the desktop sounds only. All external sounds would not be included in the screen recording.
Step 4. Click on the Stop Recording Button. Click on the Stop button to stop the recording. Or press the Windows key + Alt + R at the same time.
Step 5. View the Recording. Once the recording stops, a pop-up shows ‘Game clip recorded. Your recording will be saved in MP4 format. The file is stored in the Videos folder under the Captures subfolder in File Explorer. Also, you can find the videos in the Xbox app, trim, and edit them. A video can be shared to Xbox Live only if it’s a game.
How to Screen Record on Windows 7?
Screen recording on Windows 7 and other former Windows computers is achieved by downloading and installation of software for such purposes. Sometimes, they come in the form of an online toolkit that doesn’t require a download. Here, we would consider two methods to screen record on your computer including Windows 7 computers.
Screen Record on Windows via Microsoft Stream
To make use of Microsoft Stream, you must have the latest version of your browser (Microsoft Edge or Google Chrome). This is because the screen record is executed online. The screen recording on Microsoft Stream is limited to 15 minutes. Check out how to start a screen recording:
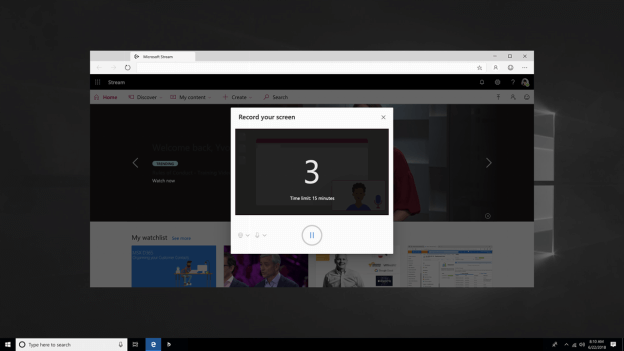
Screen Record on Windows via Microsoft Stream
Step 1. Open Microsoft Stream. Click on Create, then Record screen. A pop-up would be displayed. Select Allow to enable Microsoft Stream to access your microphone and camera. Selecting Block would make the screen record impossible, be sure to allow access to your camera and mic.
Step 2. Set up a Camera and Microphone. You can choose between the camera icon and the microphone icon. The Camera Icon when selected, captures videos of your recording. On the other hand, the Microphone icon picks up all audio sounds (external and internal) during your recording.
Step 3. Start Recording. Click on the Record button to begin recording. Then choose what part of your screen you want to record- the entire screen, an application, or the browser tab. A countdown starts and your recording begins! You can also Pause and Resume the recording as you wish.
Step 4. Stop Recording
Click on the Stop Recording button to end your recording. Click Next to review the recording.
Step 5. Review Recording. You can check out the recorded file by clicking on the Play button. Click on Record if you want to redo the screen record.
Step 6. Upload to Stream. Upload the screen recording to Stream. After this, you can save and share the video.
Screen Record on Windows via Screen Recorder
Step 1. Open Screen Recorder. Download and install the application from your browser. An open screen recorder, then selects how you want your recording either full screen or a special window.
Step 2. Enable Audio Recording. Click the Audio icon to ensure that sounds would be picked when the screen recording starts. You can also adjust the volume levels.
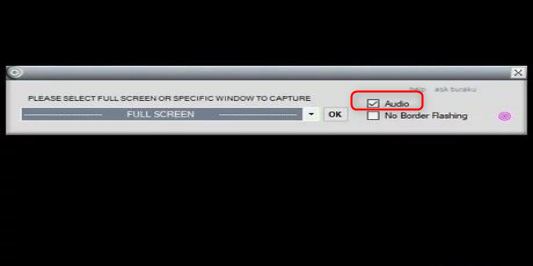
Enable Audio Recording
Step 3. Click ‘OK’. This opens the screen recorder.
Step 4. Select a name and your desired location. Choose a name for your recording and the location to save your file.
Step 5. Start the Recording. Click the Start button to begin the screen recording. You can pause the recording whenever you desire.
Step 6. Stop the Recording. After the recording is over, click on the Stop button. Your screen record is automatically saved to your desired location.
Top 17 PC Screen Recorders with Audio
Wondering what the best screen recorder with audio for your Windows 7 and 10 PC is? The following tools can help you:
OBS Studio

Screen Record on Windows 7 via OBS Studio
The Open Broadcaster Software utility is one of the greatest free pieces of software for capturing videos in terms of the number and quality of features it provides. The program is ideal for live broadcasting and recording gameplay footage of video games. In addition to that, it is ideal for the production of instructional films. The app also can post the films to your accounts on YouTube and Twitch.
You can record video and audio from various sources, such as a microphone, the system audio, and a device that captures video. The user-friendly audio mixer also allows for the addition of transitions to video clips.
Key features
- It can edit audio and video in real time.
- It provides you with an easy-to-use audio mixer so that you may alter the sound.
- You may monitor numerous scenarios at a time.
- You can record high-definition gameplay using this tool.
Drawbacks
- No customizable color schemes
Price: Free
Available for: Windows 10 and 7
User Ratings: G2: 4.6/5 (106 Reviews)
Gemoo Recorder
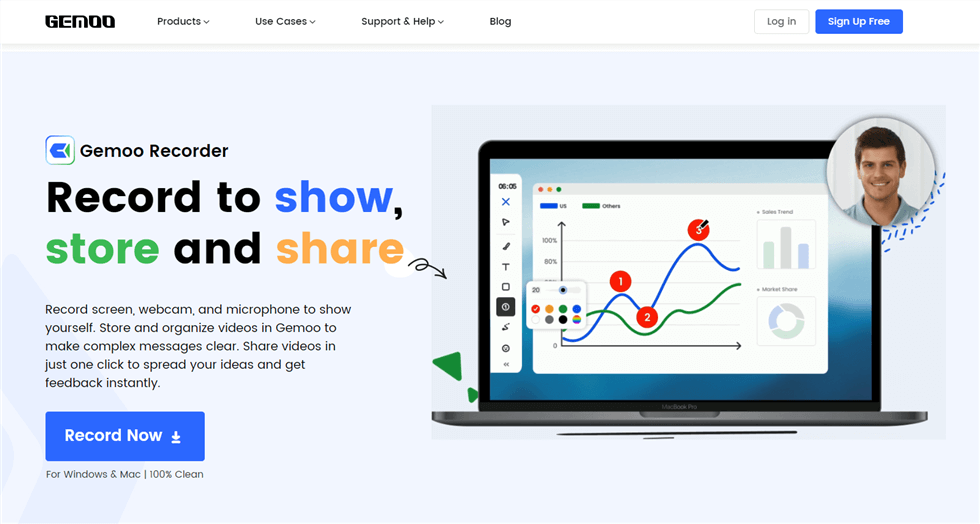
Gemoo Recorder Interface
Gemoo Recorder is one of the free and user-friendly tools for recording screen with audio. It is particularly helpful when you need to make screen recordings with audio on Windows 10 in a hurry while maintaining a high level of security.
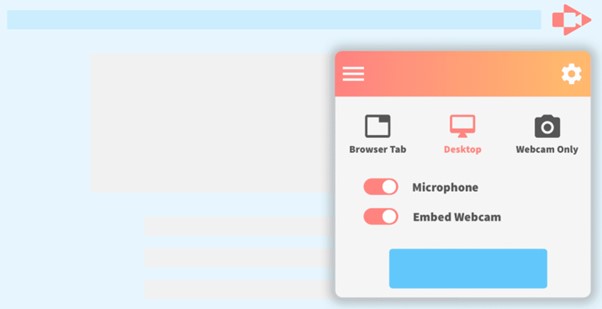
With 4 recording modes, Gemoo Recorder makes your screen recording process enjoyable and easy. You can choose to record Screen & Camera, Camera Only, Screen Only and Audio Only.
Key features
- Capture the entire screen to be more comprehensive or focus on a specific application window to show your point of view, or just a tab in your browser.
- Freely insert shapes, text, memes or other notes during recording. Express your thoughts more clearly.
- Add some humor and make your videos engaging with animated GIFs. Bring your point home with clarity and expressiveness.
- When recording with your webcam, you choose some of your favorite images as your avatar, use the camera with different filters, and add various virtual backgrounds to hide your real location.
- Supports 4K video recording.
Price: Free
Available for: Web, Windows(Windows 7 & Windows 10), and macOS.
User Ratings: N/A
Screencastify
Video Recorder for PC – Screencastify
Screencastify, a Chrome addon, may also be used as Windows 10 screen recording software. It is one of the greatest Windows 10 screen recorders. It supports offline video recording, and you may automatically upload video clips to Google Drive or download and store them on your PC. Furthermore, the toolbox has basic editing tools.
Cursor settings may also be enabled using Screencastify. It accepts MP3 and MP4 files and allows you to distribute films to others. You may also capture any speech or sound using an extra plug-in microphone when recording a video or desktop recording. It provides free video recording for up to 5 minutes, but you must pay a fee of $49 per year for limitless restriction-free recording.
Key features
- It features a mouse spotlight click highlighting capability to draw the user’s attention.
- It includes a toolkit with basic editing capabilities.
- You may also record a video or a desktop independently.
- You may set Google Drive to upload video files automatically.
Drawbacks
- Limited
Price: Free to $49 per year
Available for: Windows 10 and 7
User Ratings: G2: 4.6/4 (64 Reviews)
FlashBack Express
FlashBack screen recording software for Windows is perfect for recording games. It is regarded as one of the finest free screen recorders for PC due to its ability to capture any screen video using a camera. It also enables you to add unique yet personalized watermarks to your films.
You may export files in MP4, GIF, AVI, and Flash formats with this tool. It has several features, such as zooming and panning, to enable scanning of the whole screen, a selected window, or any carefully specified region. It also boasts a well-designed, user-friendly interface. It also includes subtitles, photos, arrows, and highlights built in. Also, this tool conceals password input while working on a PC’s screen.
Key features
- It has an excellent function that highlights the mouse.
- It aids in the concealment of perplexing and untidy desktop icons.
- The recorder may be used online.
- It also enables you to add unique yet personalized watermarks to your movies.
Drawbacks
- The free version leaves a watermark
Price: Free to $49
Available for: Windows 10 and 7
User Ratings: G2: 4.5/5 (4 Reviews)
Camtasia
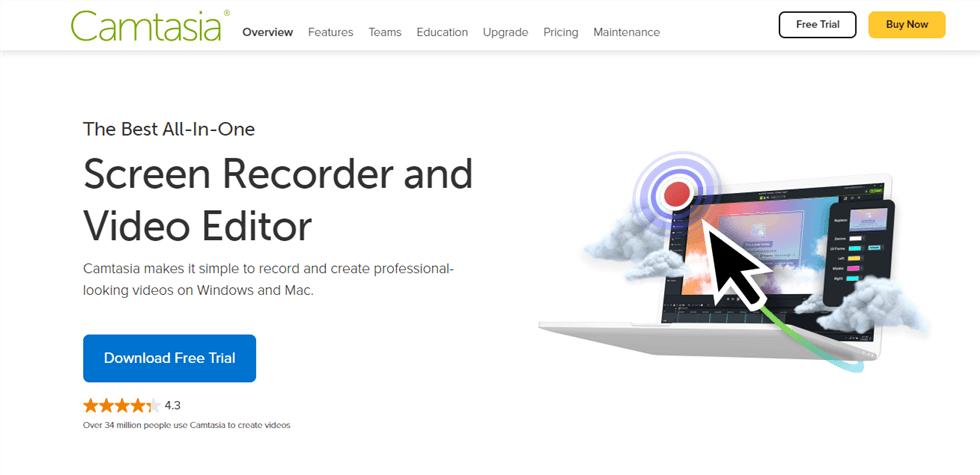
Camtasia Interface
Camtasia is the obvious choice when creating videos for presentations and instructional purposes. Videos may be edited using the pre-made themes and templates that are included.
To make the movies more interactive, you can also add questions at the end of each one. In addition, you can annotate movies, as well as add text, callouts, and shapes to them. Additionally, the program enables you to import music and sound recorded from the system or a microphone.
Key features
- You may record HD-quality videos.
- You can use the pre-built themes and templates.
- Include things like annotations, callouts, text, and shapes, among other things.
- It is compatible with 16 file formats, including AVI, MP4, and MP3.
Drawbacks
- Slightly complex for novices
Price: Free to $299.99 per user
Available for: Windows 10 and 7
User Ratings: G2: 4.6/5 (707 Reviews)
ScreenRec
Screenrec is one of the most user-friendly tools for video screen capture. It is particularly helpful when you need to take screenshots or make screen recordings with audio on Windows 10 in a hurry while maintaining a high level of security. There is just one keyboard shortcut you need to keep in mind.
ScreenRec saves movies and images of your computer’s display directly to the cloud, so you won’t have to spend time uploading them to other websites. Simply pressing the Stop button at the bottom-right corner of your screen recording window in Windows 10 will immediately provide you with a URL that only you can access. Plus, you receive a free storage space of 2 GB.
Key features
- It saves movies and images of your computer’s display directly to the cloud
- It will immediately provide you with a URL of the recording that only you can access
- It offers high-level security to keep your content safe
- It comes with a free storage space of 2 GB
Drawbacks
- No video editing
Price: Free
Available for: Windows 10
User Ratings: G2: 4.9/5 (5 Reviews)
CloudApp
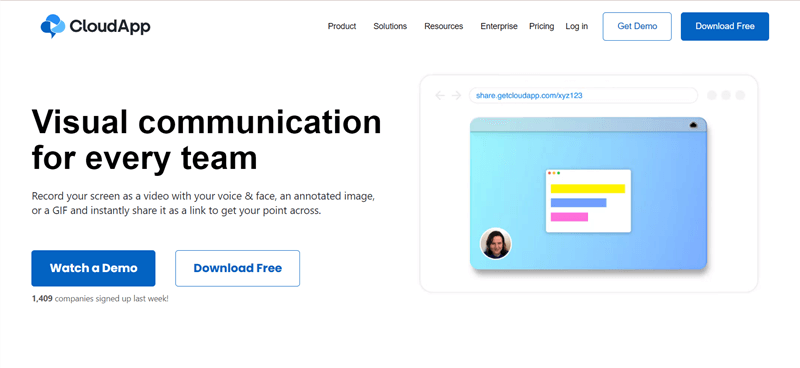
Screen Recorder – CloudApp
CloudApp is a screen recording desktop application that was developed keeping in mind the needs of busy business people. You can rapidly create videos that are brief and straightforward. It is a wonderful tool for contacting your business partners and coworkers and exchanging information without the need to schedule and allocate time for formal meetings and conferences.
Moreover, it is really simple to use, and you can make changes to your movies as you create them by adding annotations and making other straightforward alterations.
Key features
- Your stream may be captured or recorded with this feature.
- You can share films, GIFs, and still, images using user-friendly URLs.
- It enables you to make GIFs depending on your collected information.
- It allows you to edit the screen recording with a built-in editor
Drawbacks
- The Free version has a time limit
Price: Free to $9.95 per user
Available for: Windows 10
User Ratings: G2: 4.6/5 (1,139 Reviews)
ShareX
ShareX is every social media enthusiast’s best buddy. After taking screenshots or recording your screen, you may easily submit them to practically any sharing site. Speaking of which, large lists of options seem to be the main disadvantage of this screen recorder. The menu is fairly vast, which may seem positive, but some of the possibilities may be overwhelming.
The ShareX program allows you to record and capture any screen region with a single keystroke. You may also add text, photos, and other files to the saved file. The collected files may be enhanced with graphic effects and text. The recorded file may be uploaded to various internet sites such as Google Drive, Dropbox, and OneDrive. Amazon S3, among other things.
Key features
- The recorded file may be uploaded to a variety of internet sites
- It allows you to record and capture any region of the screen with a single keystroke
- The collected files may be enhanced with graphic effects and text
- It lets you record the screen with audio
Drawbacks
- Complicated menu
Price: Free
Available for: Windows 10 and 7
User Ratings: G2: 4.8/5 (70 Reviews)
CamStudio
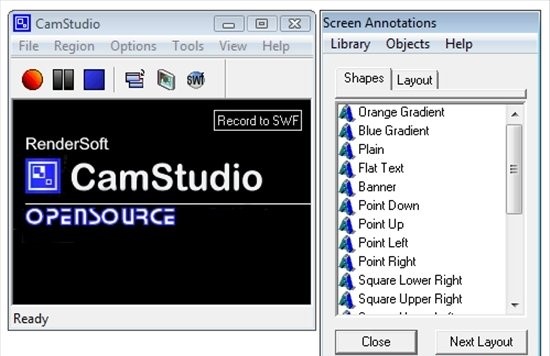
Video Recorder for PC – CamStudio
Camstudio is both open-source and free software, and it is ideally suited for streaming videos online. The program can convert movies into Flash files of a more manageable size. The built-in codec generates high-quality films that are gentle on the user’s bandwidth.
With this app, you can capture the whole screen or just a portion of it. In addition, you can add text and cursor controls to the movies taken. You will have no trouble recording and saving data because of the program’s intuitive nature, which is also simple to use and set up.
Key features
- It gives you the ability to add comments to any recordings you make.
- It is equipped with a highlighting function that allows you to highlight the route of your cursor.
- Using this utility, you may utilize the file in either the AVI format or the Flas format.
- The built-in codec generates high-quality films that are gentle on the user’s bandwidth
Drawbacks
- Size limitations
Price: Free
Available for: Windows 10 and 7
User Ratings: Not rated on G2 and Capterra
Screencast-o-Matic
Screencast-o-Matic is a screen recording program that consistently receives high ratings and is relied on and used by millions worldwide. Because it also functions as a video editor, after you have finished recording your screen and creating your clips, you can use the built-in features to add text, personalise your clips, and do much more. Additionally, it is completely interoperable with various platforms for collaboration and sharing, making it an excellent choice for corporate teams.
If you want the whole Screencast-o-Matic experience, however, you will need to pay an additional fee since most sophisticated editing capabilities and other functions are only accessible to premium customers.
Key features
- It is compatible with a variety of systems as well as file types.
- It comes with a recording space that may be customized.
- It allows you to distribute content immediately on social networking platforms and video-sharing websites.
- It has a built-in editor that allows you to add texts and annotations
Drawbacks
- The free has limited features
Price: Free to $4 per month
Available for: Windows 10
User Ratings: Capterra: 4.5/5 (33 Reviews)
Debut Video Capture
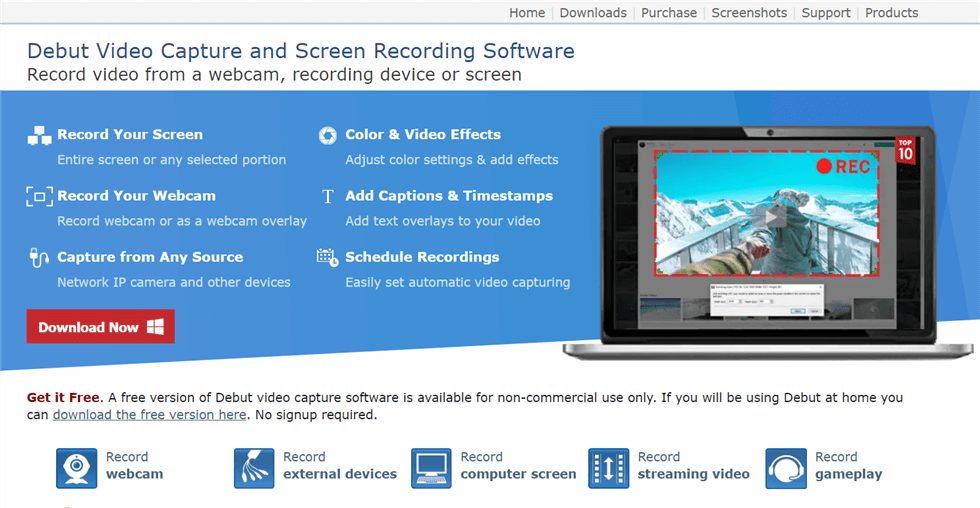
Screen Recorder – Debut Video Capture
Although it has a rather archaic interface, Debut Video Capture is one of the finest timelapse screen recorders with audio for Windows 10 and 7. Despite this, it is an exceptionally capable tool that can do much more than simply record what is occurring on your computer.
Debut Video Capture can capture video from external sources, like webcams and security cameras, and record your computer screen for free and without any time restrictions or watermarks. It can also record on a predetermined schedule, enabling it to function as the primary control center for a home security system. Not bad for an application that is completely free to use for one’s personal use.
Key features
- It can record video from devices that are connected to it.
- It can become the central processing unit of a home security system.
- You can apply filters, as well as create custom captions and watermarks.
- It gives you the ability to record the screen at predetermined intervals.
Drawbacks
- The free version has basic features
Price: Free to $3.33 per month
Available for: Windows 10
User Ratings: G2: 3.6/5 (5 Reviews)
Icecream Screen Recorder
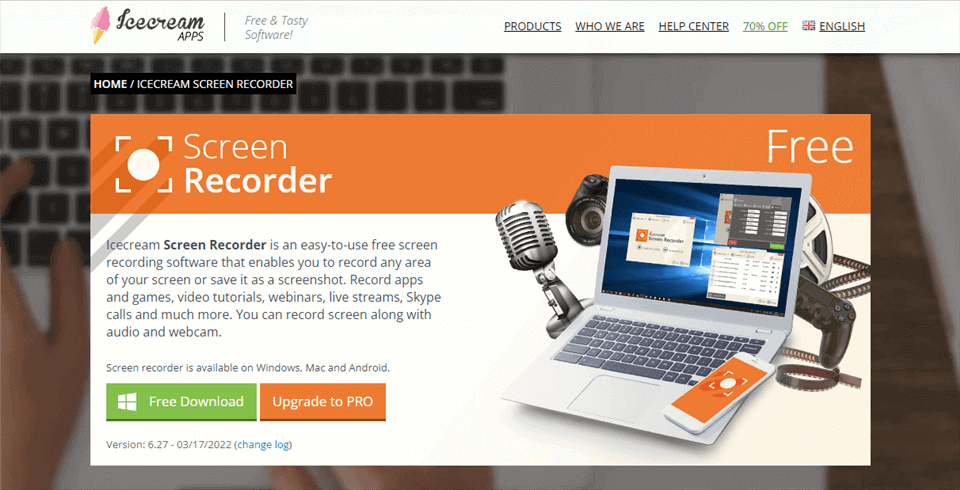
Screen Recorder for PC – Icecream Screen Recorder
Icecream Screen Recorder is a fast screen recording program for Windows. It is regarded as one of the best free screen recording software for Windows 10 since it is simple to use, open-source, sophisticated, and ad-free. It supports full-screen 3D game recording and audio clip capture. This enables the capture of screen video using a camera. It also works with YouTube, Google Drive, and Dropbox.
It allows you to copy screenshots or recordings to the clipboard, modify videos and cut or remove any section of them. You may also use this tool to slow down or increase the speed of your screen recordings. It also allows you to conceal desktop icons and cursors and even deactivate screen savers.
Key features
- It allows you to export files in a variety of formats.
- It gives you the freedom to apply any watermark of your choosing.
- It supports the usage of hotkeys and the setting of timers for various screen recordings.
- It allows you to create mouse-click animations.
Price: Free to $29 one-time
Available for: Windows 10 and 7
User Ratings: G2: 4.0/5 (24 Reviews)
Bandicam
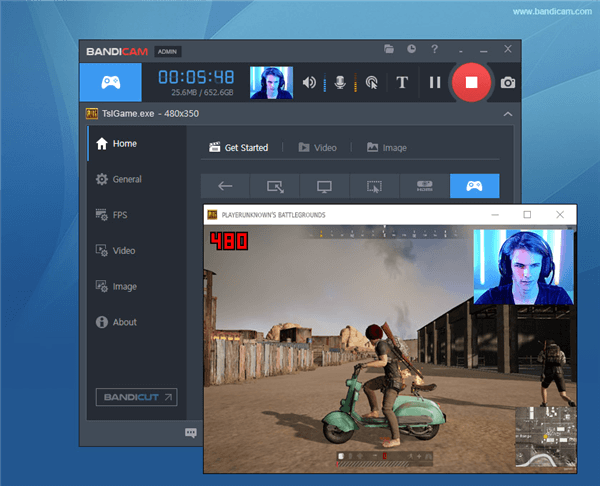
Free Video Recorder for PC – Bandicam
Bandicam is a multifunctional screen-capturing program that enables video games to capture. The 4K HD Ultra UHD game videos are the finest feature that the program has to offer. The program can record game footage at up to 144 frames per second.
The program also has a device recording function, another of its many strengths. The software allows users to record content from their Xbox or PlayStation, as well as their smartphone, IPTV, Apple TV, and HDTV. To record movies from the devices, you will, however, need to purchase a separate capture card.
Key features
- You can record sound from both the system and the microphone.
- The use of this utility enables support for hardware acceleration.
- It is capable of recording video and games in high definition.
- It is compatible with the AVI, MP4, and picture file formats.
Drawbacks
- The free version has time limits
Price: Free to $39.95
Available for: Windows 10 and 7
User Ratings: G2: 4.3 (33 Reviews)
Snagit
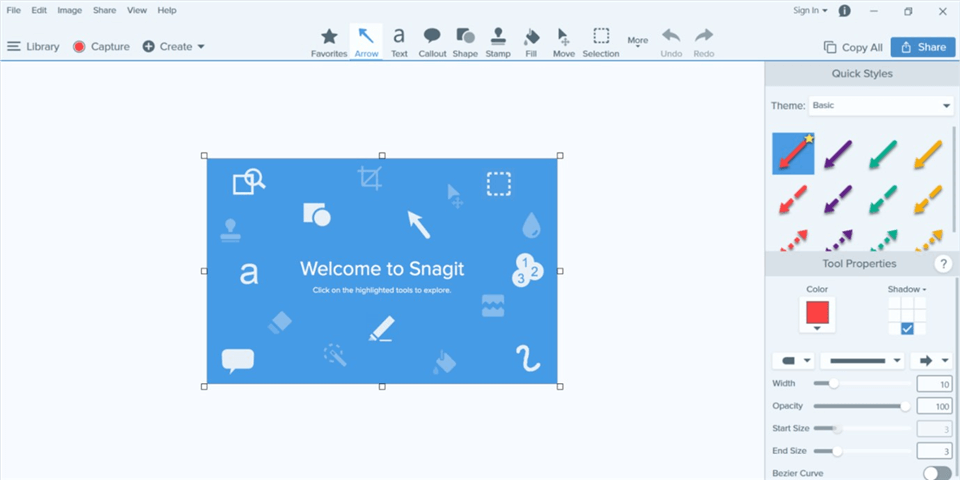
Snagit Interface
Snagit is a helpful screen capture program that can record photos or movies in real-time. You may use the program to take screenshots from several sources. You may use this utility to record sound from a microphone or your computer’s system audio. During the video, you may choose between camera and screen recording.
The program has powerful editing capabilities. You may add pictures to your documentation and easily explain procedures. You may also quickly modify and annotate screenshots with the software’s test, custom graphics, and highlights. It also allows you to convert a video into an animated GIF and upload it to your website.
Key features
- It enables you to take a video of yourself going through processes easily.
- During the video, you may choose between camera and screen recording.
- Record sounds from a microphone or the computer system.
- You may convert a video into an animated GIF and include it on your website.
Drawbacks
- Recording for extended periods can lead to problems
Price: Free to $62.99 per user
Available for: Windows 10 and 7
User Ratings: G2: 4.6/5 (3,156 Reviews)
AceThinker
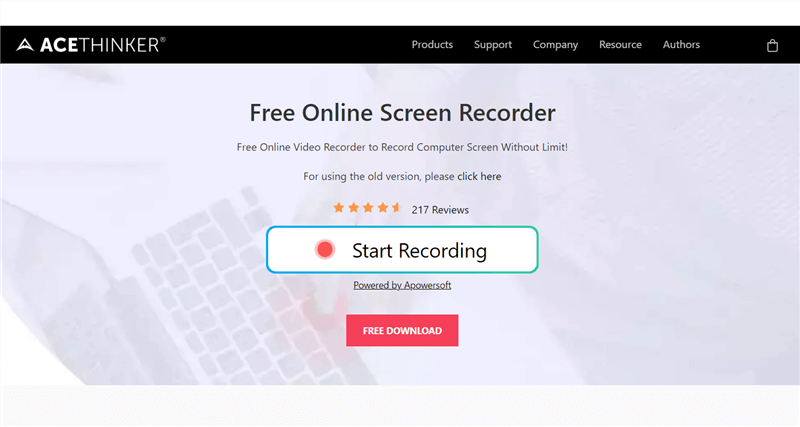
Best Screen Recorder with audio – AceThinker
AceThinker is a free screen recorder for Windows that allows you to record and preserve activities on your computer screen. It features many screen recording settings that allow you to particular screencast areas around the mouse pointer or the whole screen. This Windows screen recorder program includes a variety of video capture options.
It allows you to record a particular portion of your screen or the whole screen, make real-time changes for a fascinating movie, and simultaneously catch sounds from your microphone and computer. MP4, MOV, and API are just a few major video formats that may be converted and saved. Furthermore, AceThinker lets you quickly upload your recordings to Dropbox, Google Drive, or YouTube.
Key features
- It enables you to capture audio with video.
- You may use this tool to annotate a video.
- It is a great screen recorder for Windows that allows you to schedule a job.
- It includes a variety of video capture options.
Drawbacks
- Quite expensive
Price: Free to $39.95
Available for: Windows 10 and 7
User Ratings: G2: 5/5 (2 Reviews)
ClickUp

ClickUp Interface
ClickUp is a free screen recording program that allows you to share your screen recordings to perfectly deliver your idea without needing an email chain or a physical encounter. With a shared link, you may send your video message to everyone. You may record a video, add a summary, and assign it to your team.
Clip in ClickUp enables you to capture screencasts in addition to managing projects, assigning responsibilities, and taking notes. Annotating a taken picture or any other image form is simple by using ClickUp’s Proofing. You may also add comments to the picture where you wish to make modifications and assign it to the appropriate individual.
Key features
- It lets you capture a screenshot of your full screen, software window, or browser tab.
- With a shared link, you may send your video message to everyone.
- You may record a video, add a caption, and assign it to your team.
- Platforms supported include Windows, Mac, Android, and iOS.
Drawbacks
- No table view
Price: Free to $5 per month
Available for: Windows 10 and 7
User Ratings: Cpterra: 4.7/5 (3,084 Reviews)
Clipchamp
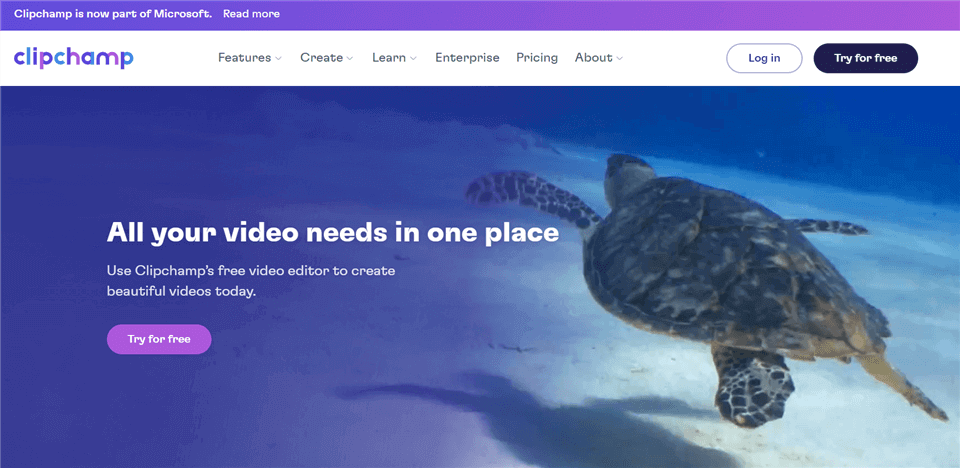
Screencast Software – Clipchamp
Clipchamp software allows you to make and edit films for business, education, and entertainment. With this screen recorder, you get professional editing capabilities like a green screen and simple editing tools like cutting and cropping. Export your films to major sharing sites in various resolutions and aspect ratios.
Unlike other comprehensive video editing software, this screen recording program does not allow you to customize video recording procedures. It provides users professional tools and capabilities ranging from basic editing and cropping to fast online screen recording and unique effects such as Green Screen.
Key features
- Its team feature allows you to collaborate on video productions.
- Provides ready-to-use templates for social video advertisements, corporate presentations, and other applications.
- It provides users with professional tools and functionality, from easy cutting and cropping to advanced image editing.
- Get access to a large video and audio stock collection.
Drawbacks
- Time limitations
Price: Free to $21 per month
Available for: Windows 10
User Ratings: G2: 4.3 (13 Reviews)
FAQ about Screen Record on Windows
1. What is Screen Record on Windows?
Screen Record on Windows is a feature that allows you to capture and record your computer screen activity.
2. How do I access Screen Record on Windows?
You can access Screen Record on Windows by using the built-in Xbox Game Bar or by downloading a third-party screen recording software.
3. Can I record audio with Screen Record on Windows?
Yes, you can record audio with Screen Record on Windows. You can choose to record system audio, microphone audio, or both.
4. What file format does Screen Record on Windows save recordings in?
Screen Record on Windows saves recordings in MP4 format by default.
5. Can I Screen Record Protect Videos on Windows?
Yes, it is possible to screen record protected videos on Windows using screen recording software. There are many screen recording software options available for Windows, such as Gemoo Recorder, Studio, Camtasia, and ScreenFlow.
The Bottom Line
Now that you have this guide at your fingertips, you can make screen recordings without hassle. With any of these methods, screen recording on Windows just got easier!