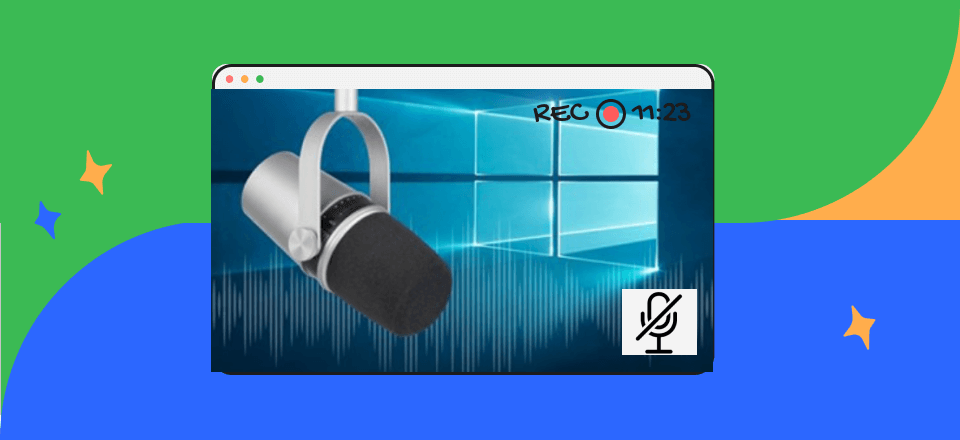
How to Record Audio on PC without Microphone?

If you don’t want to place a microphone close to your computer’s speakers to capture its sounds or record gameplay on a PC, how to record audio directly from your computer? It is possible to capture the noise from any Windows PC, even if your computer does not have a Stereo Mix option.
Record Audio on PC without Microphone
There are various methods for recording the sound from your PC, and we’ll show you the most effective one we’ve discovered. This approach does not need additional equipment such as microphones or costly software! Let’s start recording audio on PC without microphone in this article.
Also read: How to Convert Voice Memos to MP3? >
Table of Contents:
How to Record Audio on PC without Microphone?
How to Record Your Voice on PC without Microphone?
How to Record Audio on PC without Microphone?
You should use professional audio recorders to help you remove microphone voice and background noise since it is not reasonable to physically stay away from your microphone or avoid recording the surrounding unwanted sound. In this case, you should disable the microphone sound on your computer and give Gemoo Recorder a shot, so as to record audio directly only from your computer without a microphone.
As a professional screen & audio recording software, Gemoo Recorder makes it possible for non-professional users to create their own audio recording with simple clicks. You can manually disable the microphone and record audio only from your computer or online webpage. Now, free try Gemoo Recorder, and let’s take a closer look at its key features.
Gemoo Recorder’s Key Features
- Quick record and share your works with your co-workers or friends in 1 click
- Flexible to record audio in high quality, with or without microphone
- Record your expected audio online & offline – YouTube music, live stream, Zoom meeting, and others.
- Work well on both Windows and Mac computers
Steps for Recording Audio on PC without Microphone
Step 1. Launch the software and sign in to it on your PC. Choose the Audio Only mode and hit the Start Recording button when you are already.
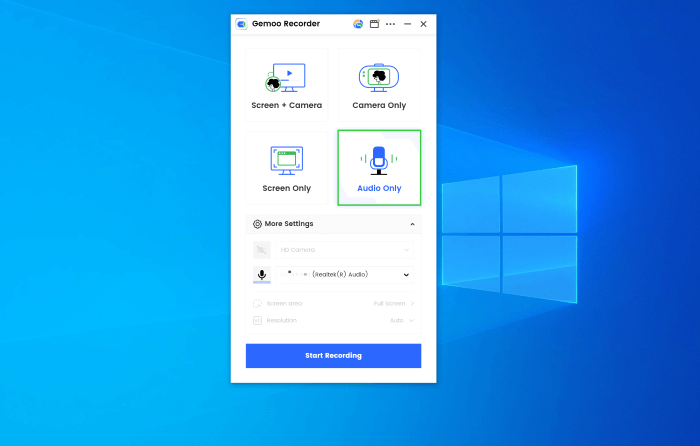
Select Audio Only Recording Mode
Step 2. After a 3-second countdown, you will see the recording interface below.
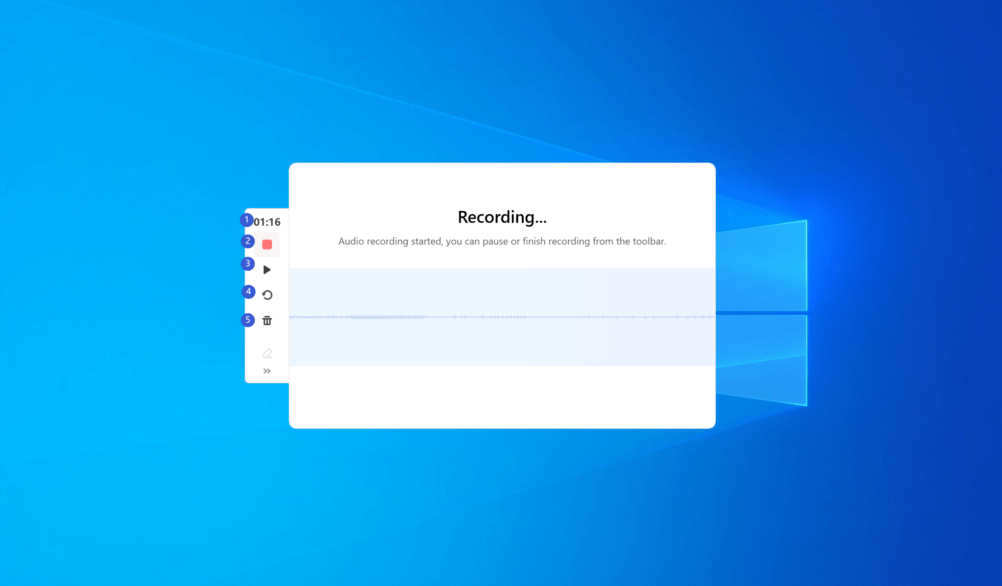
Record and Finish Recording Audio
Step 3. On the left sidebar, you can choose to screen recording time length, pause, restart, stop and delete the audio recording. When you click on the Red Stop button, your recording will be uploaded automatically to your browser.
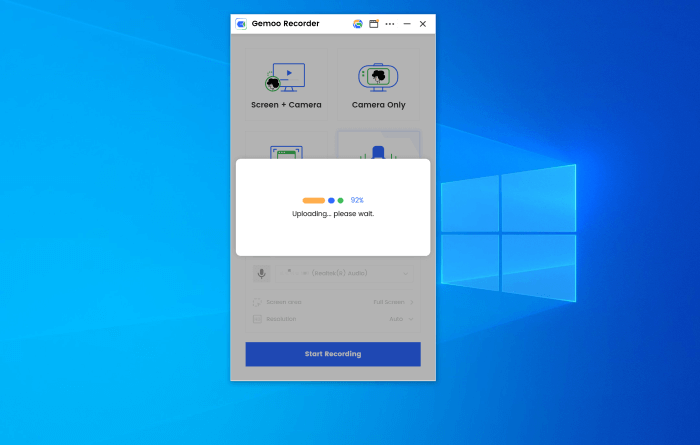
Finish Recording Audio
How to Record Your Voice on PC without Microphone?
Except for using an online voice recorder, you can record the voice using the built-in Voice Recorder app on Windows 10. Here’s how you can use it:
Step 1: Using the Start screen, search the Voice Recorder and open it.

Open Voice Recorder
Step 2: To begin recording, click the microphone button.
✍
- Whenever the recording is made, the blue circle will have an outwards motion (like waves in water) to indicate the progress.
- Pause the recording by pressing the pause button (two vertical lines). If you want to keep recording to the same file, you can pause and un-pause as many times.
Step 3: To stop recording, use the Stop button. This saves the file and adds it to the file list and any other recordings you’ve made.

Stop Recording
Step 4: It’s possible to trim the beginning or conclusion by clicking the Trim symbol (the first round icon beneath the recording). Use Rename button to keep your Sound Recorder files structured.

Trim or Rename the Voice File
Step 5: Use the sliders to save just the portions of the recording you desire. Now click the disk symbol to save the selections you made.
How to Record Audio Directly from Computer?
Audacity is a freeware music recording computer program designed to be used with Windows and Mac operating systems. First, download and install a compatible version of Audacity on your system so that you can record, edit and save audio files seamlessly.
Here’s the best part: At 192,000 Hz, this free-to-use program can record audio at the highest possible sampling rate. It’s a useful program for recording audio on a computer without a microphone.
- Tape to MP3 conversion is a simple process.
- Enable the users for audio tempo alterations.
- You should be able to use editing tools like trimming and normalizing.
Step 1: Activate the Audio Host drop-down box in the top left corner of Audacity by opening it.
Step 2: To get Audacity to record audio from movies or music playing on your computer screen, choose “Windows WASAPI” from the Audacity menu bar.

Select Windows WASAPI
Step 3: To guarantee that Audacity only records the sound coming from your device’s speakers, choose the Audio Input drop-down box to the right of the microphone symbol and then “Speakers.”

Select the Speakers Type
Step 4: Select “Record” from the “Record” drop-down menu on the Audacity toolbar. Audacity will now record your PC’s on-screen sound.
Step 5: On your computer, you can listen to the audio or listen to your downloaded music. To stop recording, click the “Stop” button in the screen’s upper-right corner.

Stop Recording Option
Step 6: Select “MME” from the Audio Host drop-down menu. This will allow you to play your recorded sound by changing the audio output and input choices.

Choose MME
Step 7: “File” in the top-left corner is where you’ll find the option to store the recording file so that you can be listening to it on your laptop’s default music player.
Step 8: Click “Export” to save the files to a place on your system in the format you want.

Export Mp3 File
Bonus Tip. How to Record External Audio on Laptop
If you frequently record audio on your laptop or computer, we recommend following these tips to ensure you record good audio.
1: Position Your Camera in Close Proximity
Including anything other than your shoulders in your photo will become more difficult if you move your camera or smartphone closer to you, but the audio you capture will be much better. Even while built-in microphones can capture good audio up close, they’re frequently used in situations when the camera is far away from the subject.
As an illustration, a clip-on LAV microphone could be better than your camera’s built-in microphone, but the LAV is right next to your lips, while the camera is a few feet away from you.
2: Don’t Let the Wind Come In-Between You and Your Camera
There are several approaches to accomplish this goal. You can partly cover the microphone on your camera or phone with your finger if you take hand-held photographs. Your audio would be muddled if you push down or cover it fully.
You’re attempting to build a barrier to keep the wind at bay. Using a built-in microphone while shooting outdoors is a bad idea since the wind can ruin your audio. Physically stopping the wind could do a lot to relieve this issue.
3: Pick a Quiet Spot
You can minimize ambient noise in your recording device by shooting in a place without any. That can sound obvious, but you’d be surprised how many individuals fail to do it.
The Bottom Line
Are you experiencing difficulty while capturing audio from your PC? When capturing system audio using a microphone, you’re likely to get poor results.
Therefore, we recommend using the methods above to ensure you record good-quality audio. Try out these methods by aligning with the mentioned tips, and let us know how it fared for your eventually!