On Reddit, there is a hot question, that is, I want to make lecture videos on my surface pro, but I see no app on Windows Store for screen recording.

How to Screen Record on Surface Pro
From this question, we can understand that this user using Surface Pro is asking how to record the screen. So, if you are also met with this problem, for example, you are a teacher and need to record lectures, or you are a YouTuber and need to record a live stream, then it’s believed that this article can answer your questions.
Meanwhile, back to the user’s question, we are happy to tell you that there is a good deal of screen recording apps on the market that supports screen recording for PC. However, since there are so many screen recording tools on the market, you can find the easiest and fastest way with our help.
Also Read:
How to Record with a Virtual Background >
How to Screen Record on Thinkpad >
How to Record Screen on Windows 10 with Audio? >
Table of Contents: hide
Way 1. Screen Record on Surface Pro via Gemoo Recorder
Way 2. Screen Record on Surface Pro via ScreenApp
Way 3. Screen Record on Surface Pro via Microsoft Stream
Methods Preview
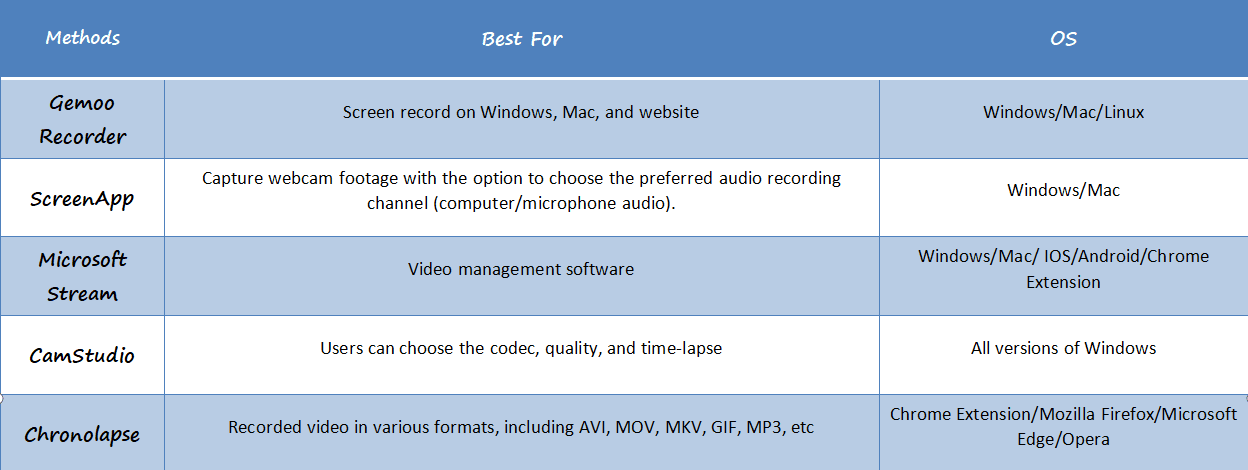
Screen Record on Surface Pro
Record on Surface Pro with FocuSee
FocuSee revolutionizes your screen recording and video editing experience, allowing you to effortlessly capture and record your computer screen for captivating tutorials, presentations, and gameplay videos. Its standout feature is the remarkable zoom in-out effects, which dynamically enhance your recordings with smooth transitions, highlighting important details and captivating your audience.
FocuSee, you can easily create professional visuals that elevate your content and leave a lasting impression. Combined with its comprehensive suite of recording and editing features, FocuSee empowers creators to produce polished and compelling screen recordings. Unlock the potential of your recordings with Screen Studio’s impressive zoom-in-out effects.
How to Screen Record on Surface Pro with FocuSee
Step 1: Download FocuSee onto your computer and set up your audio recording by connecting your microphone and camera. Choose from the three available recording modes: Full screen, Custom, or Windows.

Choose a Recording Mode
Step 2: Select your desired recording mode and get ready. FocuSee will provide a 3-second countdown to prepare, and then it will automatically begin recording your screen.
Step 3: FocuSee takes your recordings to the next level by generating zooming animations automatically. You can also enhance mouse visibility with different styles, adjust the cursor, apply highlighting, and improve the background appearance.
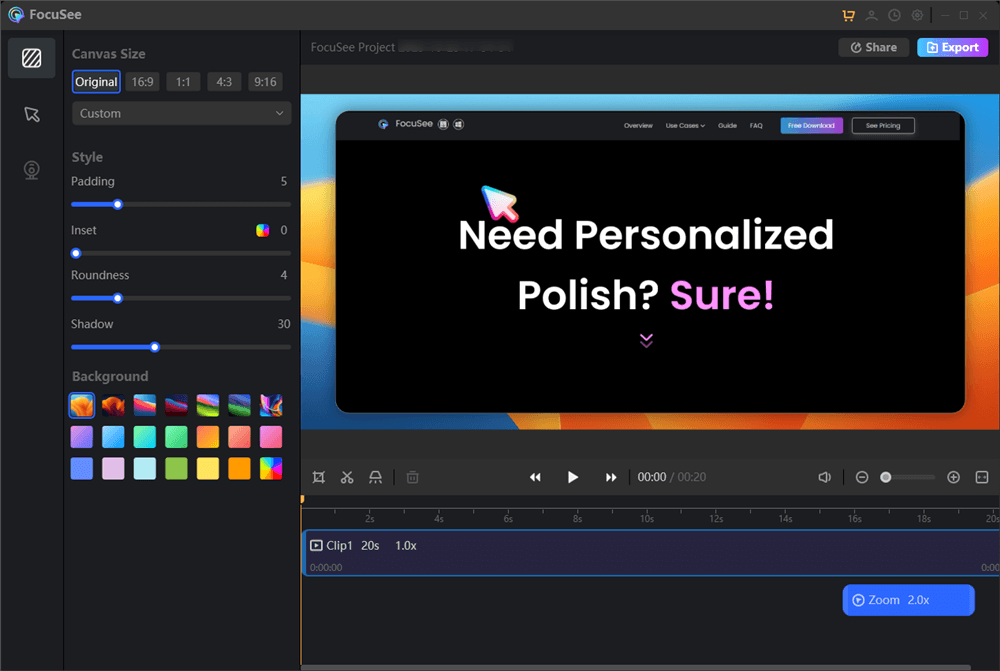
FocuSee Interface
Step 4: After finishing your recording, you have various options for exporting the video. You can save it as a GIF, download it to your device, or upload it to the cloud and share it with others using a shareable link. Enjoy the seamless experience of using FocuSee for your screen recording needs.
Screen Record on Surface Pro via Gemoo Recorder
Surface Pro that can run Microsoft Stream can use it to make a screen recording, though, you may not satisfy with its time limit of recording – up to 15 minutes. In other words, if you attempt to record a meeting, a PowerPoint presentation, a gameplay, or calls on Google Voice, you may need some screen recorders that record without a time limit or watermark. Gemoo Recorder can offer you better screen recording services than Microsoft Stream on Surface Pro. As a professional screen recording software, Gemoo Recorder makes it easy to screen record, add annotations and share the recorded video with your friends, team workers, and clients. Free try Gemoo Recorder now and check its key features concerning screen recording.
Gemoo Recorder’s Key Features
- Support users to screen record on Website, Mac, Windows 11, 10, 8, and other low-end PC.
- Record screen only or record screen and camera at the same time.
- Enable you to screen record full or part of your computer screen.
- Beautify your recorded content, adding texts, lines, stylus, and stickers to enhance the recording effects.
How to Screen Record on Surface Pro with Simple Clicks
Step 1. Free install Gemoo Recorder and open it on your Surface Pro. Take the on-screen instructions to sign in and click on the Screen Only and Start Recording buttons on the welcome page.
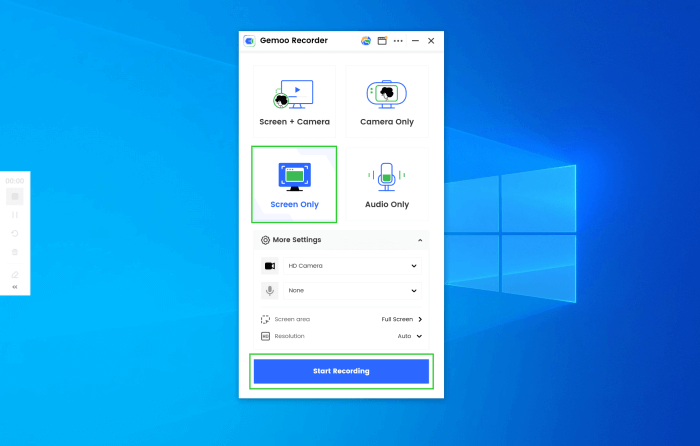
Launch Gemoo Recorder and Choose the Screen Only Mode
Step 2. Wait for 3 seconds, you will start to record your screen. During this process, you can pause and add annotations via the left toolbar to highlight your recordings.
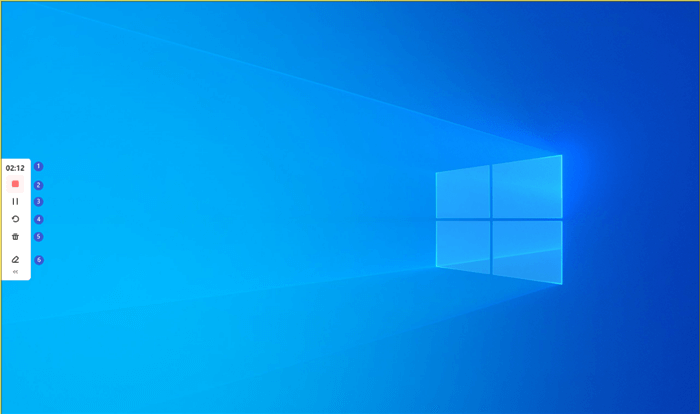
Start to Record the Screen
Step 3. When you need to stop the recording, you can click on the Red Stop or the Finish Recording button, after which, the recorded video will be uploaded to Gemoo automatically.
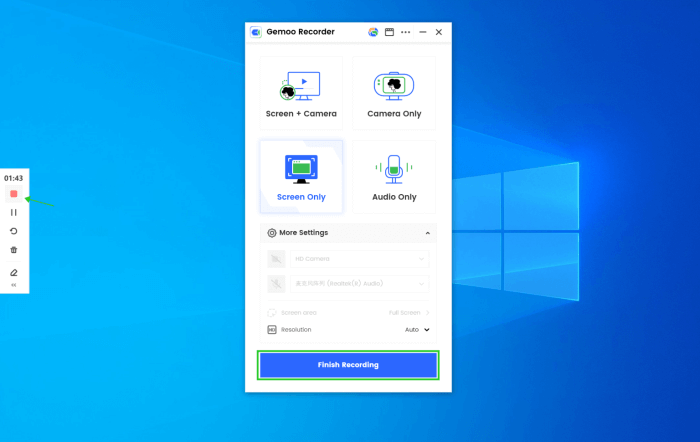
Finish Screen Recording
Screen Record on Surface Pro via ScreenApp
If you don’t want to download Screencast software to your computer and want to use a simpler way, then ScreenApp can help you. It is an online screen recorder. And it’s not only a screen recorder but also a solution that enables you to capture your webcam footage with the option to choose your preferred audio recording channel (computer/microphone audio). Since recording can be done online with the click of a button, it is guaranteed to be fast and easy. Also, since it is available for Windows/Mac/Linux, you can use it on your Surface Pro easily. Here are the steps.
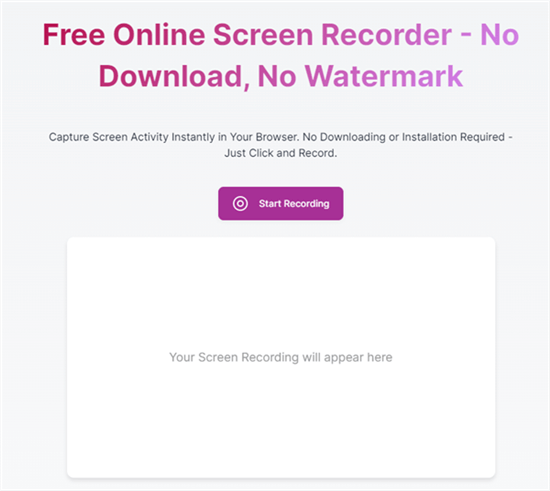
Screen Record on Surface Pro via ScreenApp
Step 1. Open Chrome or other browsers and visit Screen App.
Step 2. Click Start Recording to start recording.
Step 3. You can complete the recording and audio settings according to your needs. After that, click Share Your Screen.
Step 4. A window will pop up, please choose what to share. After picking one, click Share to go on.
Step 5. Click the Start Recording button. If you stop it, a window will pop up to save the video, and you can change the storage location to suit your needs.
Screen Record on Surface Pro via Microsoft Stream
If you’re using the latest Microsoft Edge or Google Chrome on Windows 10 or macOS, then you can try Microsoft Stream to record your screen. It is a comprehensive video management software. You can use it to watch videos, record videos/audio, etc. The steps to use are also simple.
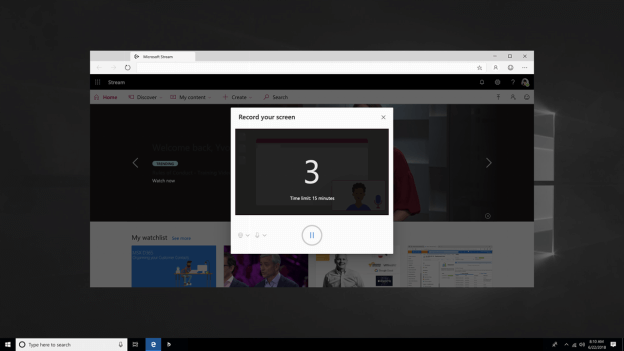
Screen Record on Surface Pro via Microsoft Stream
Step 1. After launching Microsoft Stream, please click Create > Record screen.
Step 2. When a prompt pops up, select Allow Microsoft Stream (Classic) to use your camera and microphone.
Step 3. Please set up your camera and microphone based on your needs.
Step 4. After clicking the red button, you need to choose what to share (your entire screen, an application window, or a browser tab) and click Share.
Step 5. And now you can start recording. But please note that you can only record for 15 minutes.
Screen Record on Surface Pro via Screen Capture
Screen Capture not only allows you to easily record audio etc. online, but you can also download their desktop version to use more features. You are free to choose whether to download it to your computer after you record it, and you can also watch the video back. After you download the app, you can also choose to save the recorded video in various formats, including AVI, MOV, MKV, GIF, MP3, etc.
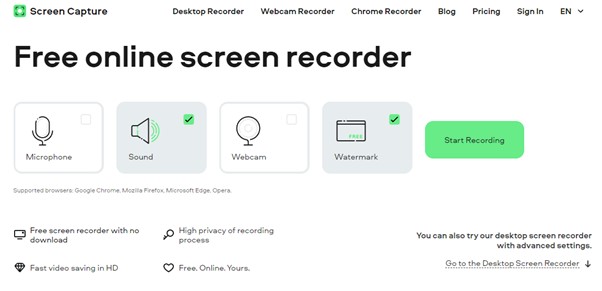
Screen Record on Surface Pro via Screen Capture
Step 1. Open Google Chrome/Mozilla Firefox/Microsoft Edge/Opera and visit the Screen Capture website.
Step 2. Choose a Microphone, Webcam, Sound, and Watermark according to your needs.
Step 3. Click Start Recording, and a window will pop up and you need to choose what to record (part or your entire screen, an application window, or a browser tab).
Step 4. After you select it, click Share and it will start recording automatically.
FAQs About Screen Recording on Surface Pro
1. How to Screen Record on Surface Pro 7
You can use the built-in feature of the Surface Pro, which is Game DVR. Please start the program you want to set up for use with Game DVR and then press Win+G on your keyboard. After that, you’ll get a prompt asking you “Do you Want To Open the Game Bar?”. Check the “Yes, This Is a Game” box.
2. How to Screen Record on Surface Pro with Sound
When you use the above method to record video, please open a microphone to record sound.
3. Can I record audio while screen recording on my Surface Pro?
Yes, you can record audio while screen recording on your Surface Pro. Make sure to turn on the “Record audio” option in the Game Bar settings.
4. Where are my screen recordings saved on my Surface Pro?
By default, your screen recordings are saved in the “Videos” folder in your user profile.
Final Words
Nowadays, as the demand for screen recording increases, more and more online screen recording tools have appeared. Of course, you can also choose to have desktop software to better manage your recorded files. If you are struggling with how to record screens on Surface Pro, we hope this article can help you!
