How to Record Multiple Screens on Windows/Mac?

Screen recording has gained immense popularity worldwide, proving a valuable tool for work and study. While capturing a single monitor or screen has become effortless, the challenge arises when dealing with dual, triple, or multiple screens. Many existing video capture software options in the market only support recording a single monitor, leaving users needing clarification about handling multiple screen capture.
Record Multiple Screens on Windows/Mac
Fortunately, professional multiple-screen recording software solutions for Windows 10 and Mac can address this limitation. Such special programs allow you to capture content from many screens at once. They are great for making tutorials, giving presentations, or recording complex activities involving multiple displays. By following the steps in this article, you can easily record multiple screens windows 10. It will help you be more productive and open up new possibilities for screen recording. So, let’s begin to learn!
Table of Contents: hide
How to Record Multiple Screens?
Record Multiple Screens with OBS
How to Record Multiple Screens?
If you want to record multiple screens on Windows/Mac, Gemoo Recorder is the best solution. This professional screen recording tool elevates your experience, surpassing basic tools like Game Bar. With its user-friendly interface, you can effortlessly capture your computer screen with just a few clicks.
Gemoo Recorder offers unparalleled flexibility by allowing you to record screen activities directly on your local desktop. But that’s not all; it goes further by providing a seamless web platform, enabling you to record your screen along with audio. This local desktop and web platform integration ensures a smooth experience, allowing your recorded videos to be effortlessly uploaded and securely stored in the Gemoo cloud. Whether you’re a professional or a casual user, this all-in-one screen recording solution will undoubtedly capture your attention and revolutionize how you record and manage your screen recordings.
Key Features of Gemoo Recorder
- Record your computer screen or camera separately or simultaneously.
- Enjoy watermark-free and unlimited screen recording capabilities.
- Capture computer screens with audio during meetings or presentations, supporting system and microphone soundtracks.
- Utilize annotation tools to draw lines, add texts, attach stickers, and make other annotations during the screen recording.
Step 1: Install Gemoo Recorder for free and launch the application on your computer. Select the “Screen Only” feature if you don’t want to include your camera feed. Select the “Start Recording” option.
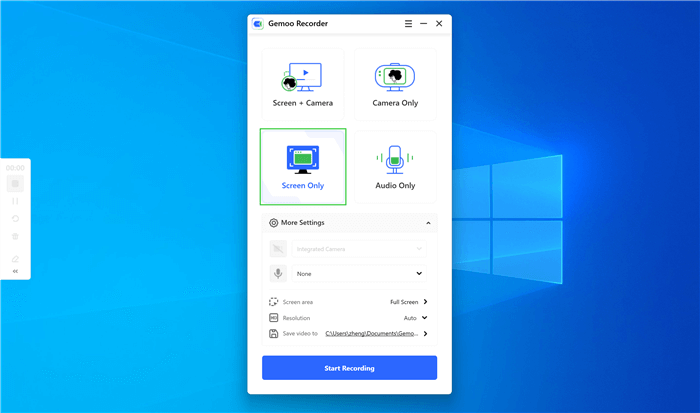
Select Screen Only Mode and Initiate Recording
Step 2: Once the countdown of 3 seconds is completed, the screen recording will commence. Utilize the annotation options from the left toolbar to add personalized touches and enhance your video.
Step 3: The left toolbar also offers additional functions, such as pausing, stopping, or restarting the screen recording. When you’re done recording, click the Red Stop or Finish Recording buttons to end the process.
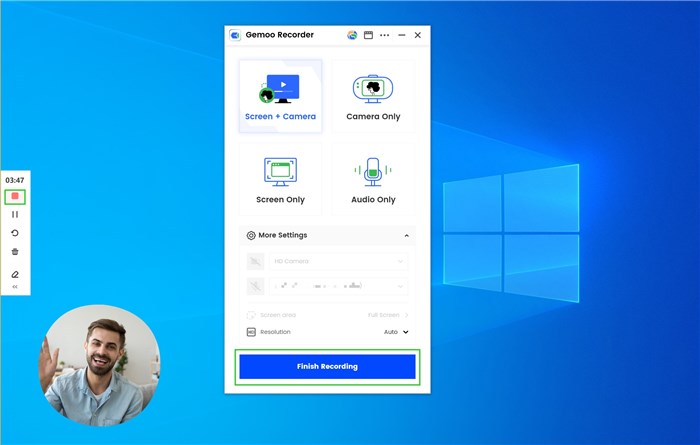
Finish Recording
Record Multiple Screens with OBS
OBS Studio is the leading open-source screen recording software catering to a global user base. This remarkable freeware facilitates seamless streaming on popular platforms and offers comprehensive screen recording capabilities. OBS Studio emerges as the ultimate choice if you need both streaming and recording functionalities.
When it comes to its recording prowess, it empowers users to effortlessly capture videos, audio, and webcam footage individually or simultaneously. Its versatility extends to multi-monitor setups, ensuring users can effortlessly record content across dual, triple, and more screens. This feature-rich software eliminates any concerns about the complexities of multi-monitor recording. Moreover, this tool is the go-to solution for recording and streaming multimedia, including audio and webcam, with ease and efficiency.
Step 1: Open OBS Studio and access Settings by clicking the button at the bottom right. Proceed to the Video tab to modify the resolution settings.
Step 2: Return to the main interface of OBS, where you’ll notice an available area on either the right or left side meant for capturing another monitor.
Step 3: Drag and drop your initial monitor source into the vacant area.
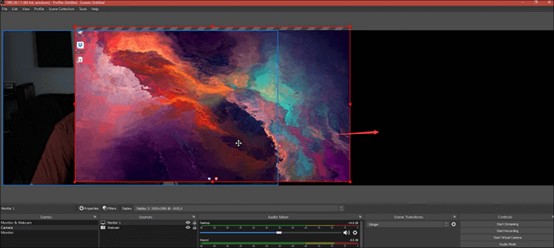
Drag To Vacant Area
Step 4: Click the Plus icon and choose “Display Capture” from the list to add a second monitor.
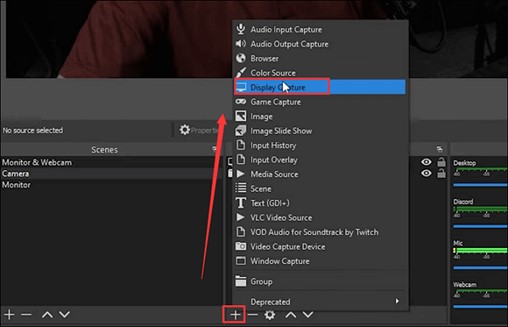
Choose Display Capture
Step 5: Adjust the settings for the second monitor and click “OK” to confirm.
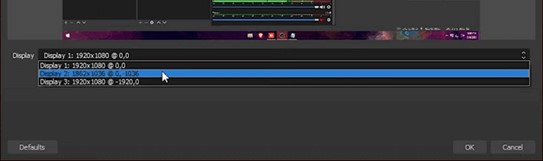
Click OK
Step 6: Finally, initiate multiple screen capture activities simultaneously by clicking the “Start Recording” button located in the bottom right corner.
Record Multiple Screens via Vmaker
Vmaker is another tool used to record multiple screens. It is top-notch multi-screen recording software renowned for its exceptional user-friendliness and versatility. Among its competitors, it stands out by providing a lifetime free plan, making it accessible to users of all backgrounds. With Vmaker, you can effortlessly switch between multiple screens, windows, and tabs during your recordings, ensuring a seamless and uninterrupted recording experience.
Moreover, Vmaker offers custom branding options, allowing you to personalize your recordings with your logo or watermark, giving your content a professional touch. Additionally, the mouse emphasis feature is a handy tool that ensures viewers can easily track cursor movements, enhancing the clarity of your tutorials or presentations. The software has a built-in video editor, eliminating the need for third-party editing tools.
Step 1: Sign up for Vmaker by visiting their official website.
Step 2: After signing up, access Vmaker’s dashboard.
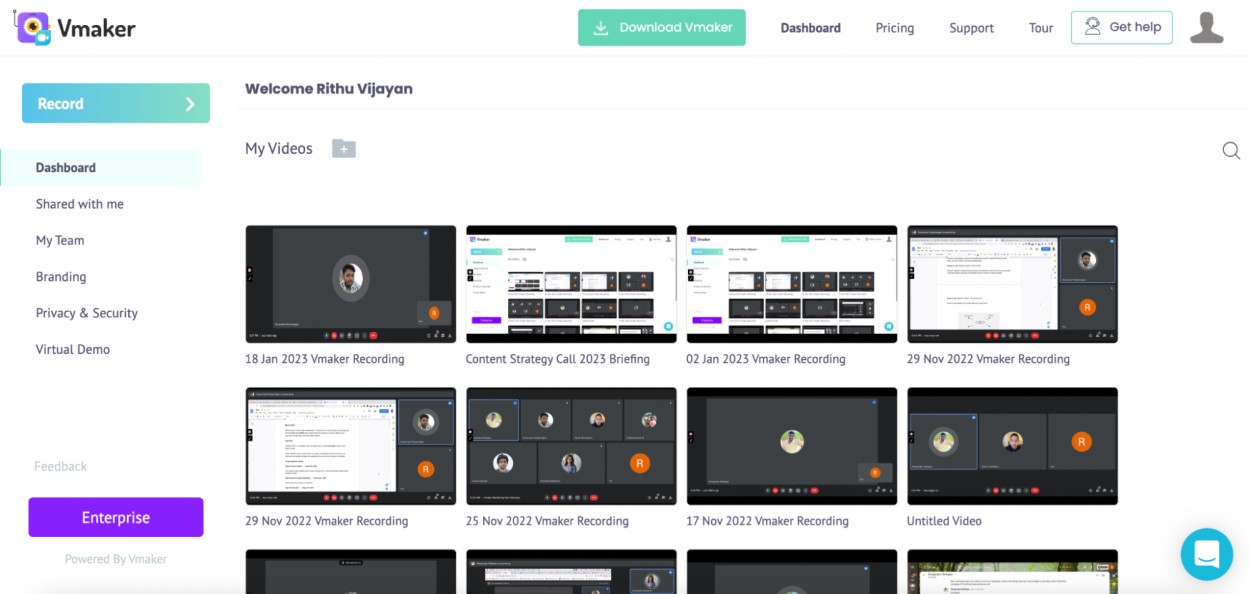
VMaker Dashboard
Step 3: Download the Vmaker application to your device by clicking the Download Vmaker button.
Step 4: Launch the Vmaker application on your device, and a pop-up box will appear. You can choose your recording mode, audio inputs, and video quality here. Click the three dots in the top right and choose Preferences.
Step 5: In Preferences, select “Select Display” to choose the screen for recording.
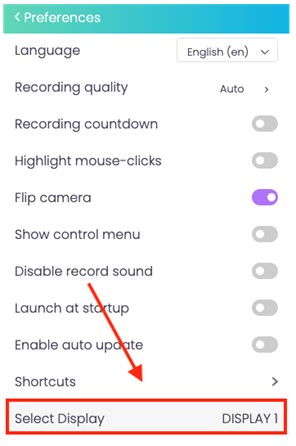
Choose Select Diaplay
Step 6: Click “Start Recording” to begin capturing your video. You can utilize various features like screen annotation tools, frames, filters, and virtual backgrounds to enhance your video’s engagement.
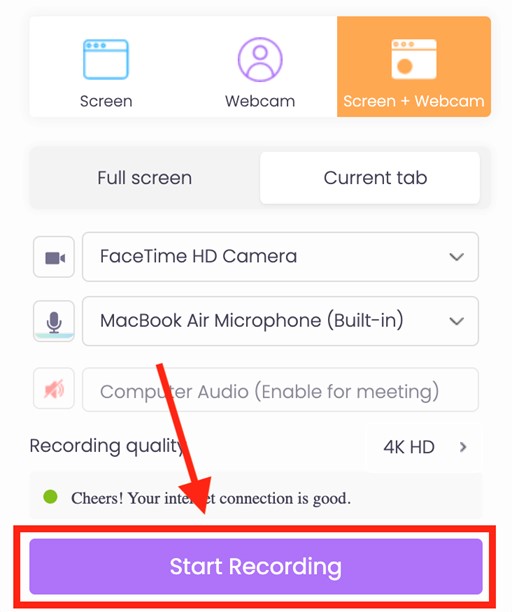
Click Start Recording
Step 7: After editing, click the “Export” option to save and export the video in 4K HD quality.
FAQs about Record Multiple Screens
1. How to record all tabs in Windows 10?
To record all tabs in Windows 10 using PowerPoint, launch the app, open your presentation, and click “Screen Recording” under the “Insert” tab. Start recording your screen to capture all the tabs you interact with during the session. It’s ideal for creating inclusive recordings for presentations or tutorials.
2. Is it possible to record multiple screens with different resolutions on Windows?
Yes, you can record multiple screens with different resolutions on Windows. Screen recording software typically allows you to customize the recording area for each screen independently. When using applications like OBS Studio, you can adjust the recording settings for each monitor individually, ensuring that both screens are captured accurately with their respective resolutions.
3. How much storage space do I need to record multiple screens?
The required storage space for recording multiple screens depends on various factors, such as the resolution, frame rate, and recording length. Recording higher resolutions and frame rates will result in larger file sizes. It is advisable to have sufficient free space on your hard drive or external storage device to accommodate the recordings comfortably.
Final Thought
In conclusion, these screen recording tools are specifically designed to assist you in capturing content from multiple screens simultaneously. Whether you possess limited technical knowledge or consider yourself a tech-savvy individual, you can confidently explore these options to find the ideal dual-screen recorder. We hope this article is a valuable resource for everyone seeking effective solution to record multiple screens windows 10. Furthermore, share your queries in the comments section below!