It’s not rare that people want to capture the content of their screen while they are working, playing games, or using a certain application. Recordings of this type can be used for many different purposes, such as posted on YouTube, sent to colleagues and friends, or archived on your own hard disc.

Screen Record on Lenovo
With a Lenovo laptop, it’s possible to make high-quality recordings using the content of your screen as the main source. There are several ways to do this, including a built-in function and some well-known applications. In most cases, you can simultaneously record system sound and/or your voice to create fully-fledged multimedia clips.
This article will show you how to screen record on a Lenovo laptop via multiple methods so that you can choose an approach that best suits the type of video you want to make and your level of technical skills.
Also read:
How to Screen Record on Surface Pro >
Table of Contents: hide
How to Screen Record on Lenovo Laptop?
Way 1. Screen Record on Lenovo Laptop via FocuSee
Way 2. Screen Record on Lenovo Laptop via Gemoo Recorder
Way 3. Screen Record on Lenovo via Nerve Center
Way 4. Screen Record on Lenovo via PowerPoint
How to Screen Record on Lenovo Laptop with Sound?
Way 1. Screen Record on Lenovo Thinkpad with Sound via Xbox Game Bar
Way 2. Screen Record on Lenovo Laptop with Sound via Screen Recorder
How to I Record on Lenovo Laptop?
To screen record on Lenovo laptop, you can use the following 3 ways.
Way 1. Screen Record on Lenovo Laptop via FocuSee
FocuSee is an intuitive and feature-rich screen recording software that enables users to create high-quality video content on their Lenovo laptops with ease. The application offers a user-friendly interface and a wide range of customization options, making it suitable for both beginners and advanced users. With FocuSee, you can record your screen, webcam, or both simultaneously, and enhance your recordings with automatic captions, zoom effects, and various editing tools. The software also provides preset sizes for popular social media platforms, ensuring that your videos are optimized for different channels.
FocuSee’s Key Features
- Auto-generate and edit captions for 100% accuracy
- Choose layouts: side-by-side, overlay, or screen only
- Trim, cut, crop, speed up, or slow down parts for conciseness
- Customize appearances with camera frames and filters.
- Add backgrounds, adjust corners, shadows, illustrations, and padding
- Preset sizes for YouTube, Twitter, TikTok, etc
- Multiple mouse styles and click effects to enhance the appeal
- Spotlight tool to highlight key points
- Customizable auto-zoom effect with adjustable zoom, duration, and position
Steps for Screen Recording on Lenovo Laptop via FocuSee
Step 1: First, download FocuSee for free, install it on your device, and then launch the application. FocuSee offers three recording modes: Full Screen/Custom/Window. You can select a recording mode to start recording.
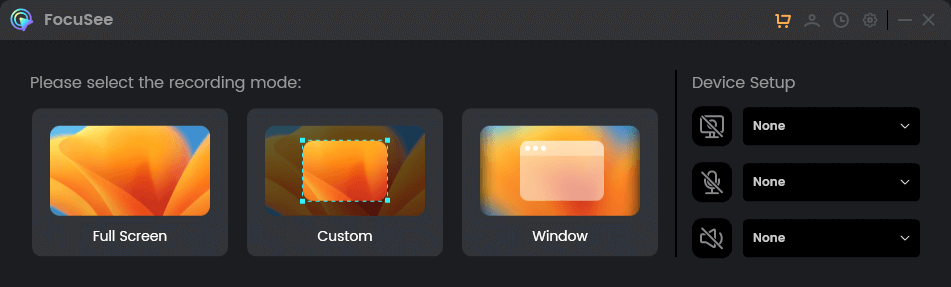
Choose a Recording Mode
Step 2: Determine the screen area you want to record by adjusting the borders, then press the “Record” button to start recording.
Step 3: After finishing capturing mouse movements and clicks, click the red stop icon on the toolbar. After recording, you can modify the mouse cursor style, size, and click effects, as well as introduce a spotlight, change zoom effects, and more.
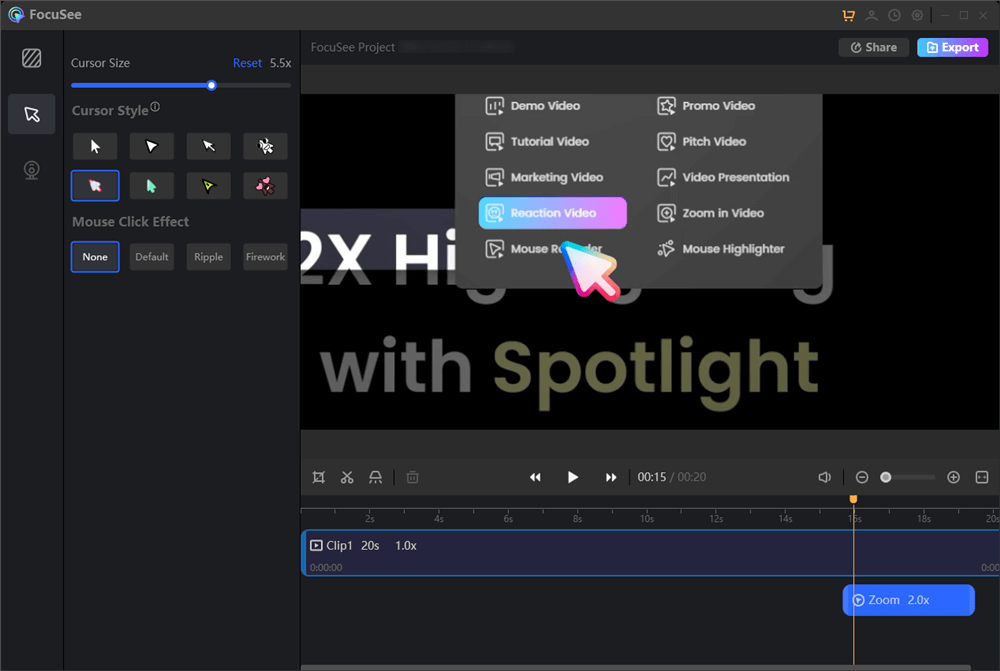
Edit Your Recording
Way 2. Screen Record on Lenovo Laptop via Gemoo Recorder
There are numerous high-quality screen recorders for Windows that work very well on a Lenovo laptop and Gemoo Recorder is one of the most popular in 2022. It brings a great combination of local recording and online management, making it easier for users to screen record and share their recordings conveniently & safely. You can record practically anything from your screen using this software, and it’s very easy to include other content from your webcam, internal audio, and external microphone. It’s even possible to add annotations during your screen recording process. Free install Gemoo Recorder now and figure out its key features.
Gemoo Recorder’s Key Features
- Make professional-level recordings with ease
- Record screen and face at the same time
- Screen record without sound or watermark
- Add annotations to your recordings such as texts, lines, stickers and other patterns.
In a word, all you need to do to start recording the screen of your Lenovo laptop with Gemoo Recorder is to hit a few buttons. Here is the exact sequence you need to execute.
Steps for Screen Record on Lenovo Laptop via Gemoo Recorder
Step 1. Download the latest version of Gemoo Recorder to your Lenovo laptop. Run the program and hit the Screen Only mode. Adjust the audio settings according to your needs.
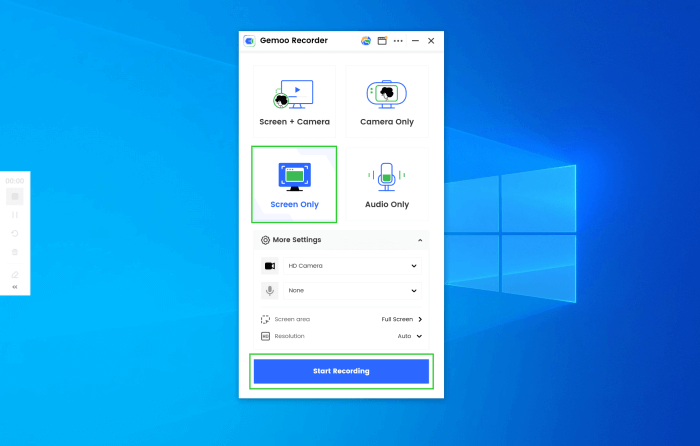
Launch Gemoo Recorder and Choose the Screen Only Mode
Step 2. Hit the Start Recording button and wait for a three-second countdown to start capturing and recording the content from your computer.
Start to Record the Screen
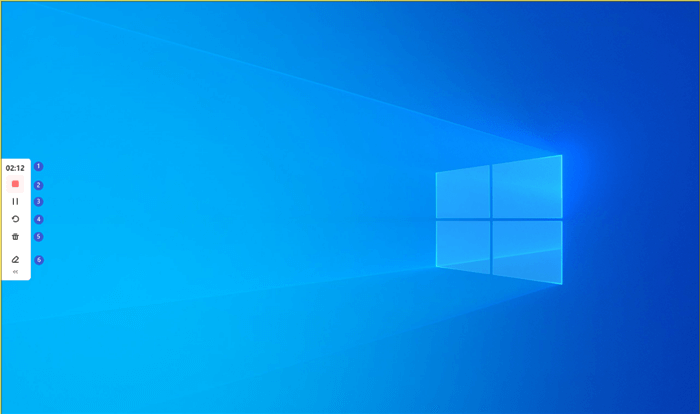
Step 3. When you are finished, click the Red Stop button or the Finish Recording button. Then your recorded video will be uploaded automatically.
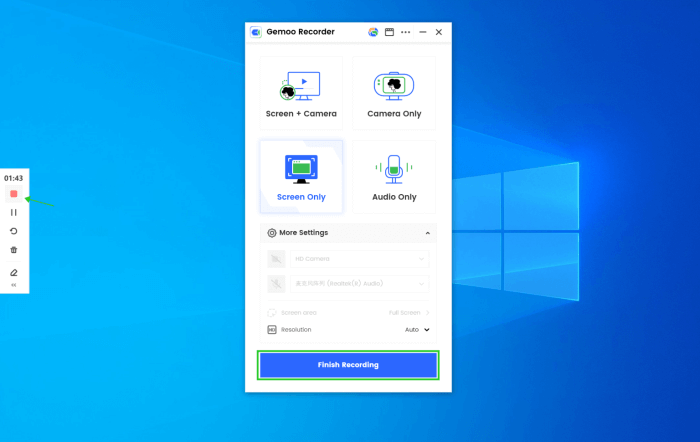
Finish Screen Recording
Way 3. Screen Record on Lenovo via Nerve Center
It’s always best to use native tools when you can, and in this case, Lenovo created its own recording software and named it Nerve Center (or Nerve Sense, depending on the model). This tool might be pre-installed on some laptops, but even if it’s not it can be downloaded from the web. If your computer is from the Legion series and runs on Windows 10, you don’t need to wonder if screen recording possible on Lenovo laptop, because Nerve Center will easily take care of this task.
If Nerve Center is present on the computer you are currently using, you can make great-looking videos at will. Just follow the recommended steps to produce amazing recordings and save them locally:
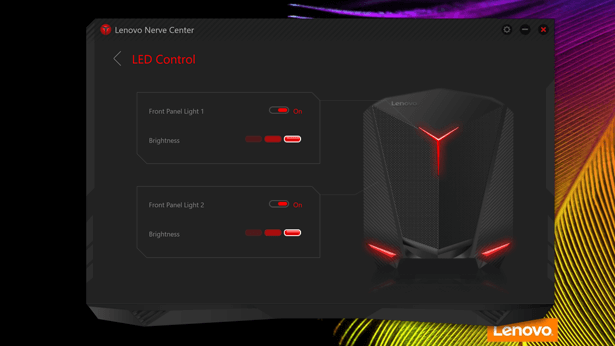
Screen Record on Lenovo via Nerve Center
Step 1. Launch Nerve Center on your laptop and open the Discover interface.
Step 2. Click on the gear-shaped icon to adjust settings such as video quality, frame rate, audio source, etc. You can also opt to include mouse cursor movements and actions.
Step 3. Define the location where the file will be saved.
Step 4. Press the Record button you the keyboard to start capturing your screen.
Way 4. Screen Record on Lenovo via PowerPoint
Microsoft PowerPoint is not primarily screen recording software, but it’s possible to use it in this way if you just need a quick recording and don’t have the time to search for better tools online. This program can be found on almost every PC and users are familiar with its interface, so it could be the right choice if your technical requirements are not too high. Its screen recording feature is not prominently displayed, so you will need to learn how to find it before you are ready to start screen grabbing at will with PowerPoint.

Screen Record on Lenovo via PowerPoint
If you know the correct procedure, you won’t have too much trouble starting a new recording. Here is what you should do:
Step 1. Start PowerPoint on your laptop.
Step 2. Create a new presentation or choose an existing one.
Step 3. Click on the Insert button, select Media, and finally find Screen recording option in the toolbar.
Step 4. Set up your video and audio preferences and press the Record button.
Step 5. Press the Stop button when you are done capturing, and Save the file locally.
How to Screen Record on Lenovo Laptop with Sound?
It’s perfectly understandable that users want to know how to screen record on a Lenovo laptop with sound, as videos without it might look amateurish or incomplete. Fortunately, there are numerous software tools that let users capture system audio or microphone feed while they are recording the content of the computer screen. If you are pondering how do I record my screen with audio and sound, consider the following options:
Way 1. Screen Record on Lenovo Thinkpad with Sound via Xbox Game Bar
If your Thinkpad has Windows 10 installed, you have a simple built-in tool for screen recording that supports system audio. Originally intended for recording gaming moments, Xbox Game Bar also allows you to capture content from some non-game applications. Here is how you can activate this feature and start recording clips with sound
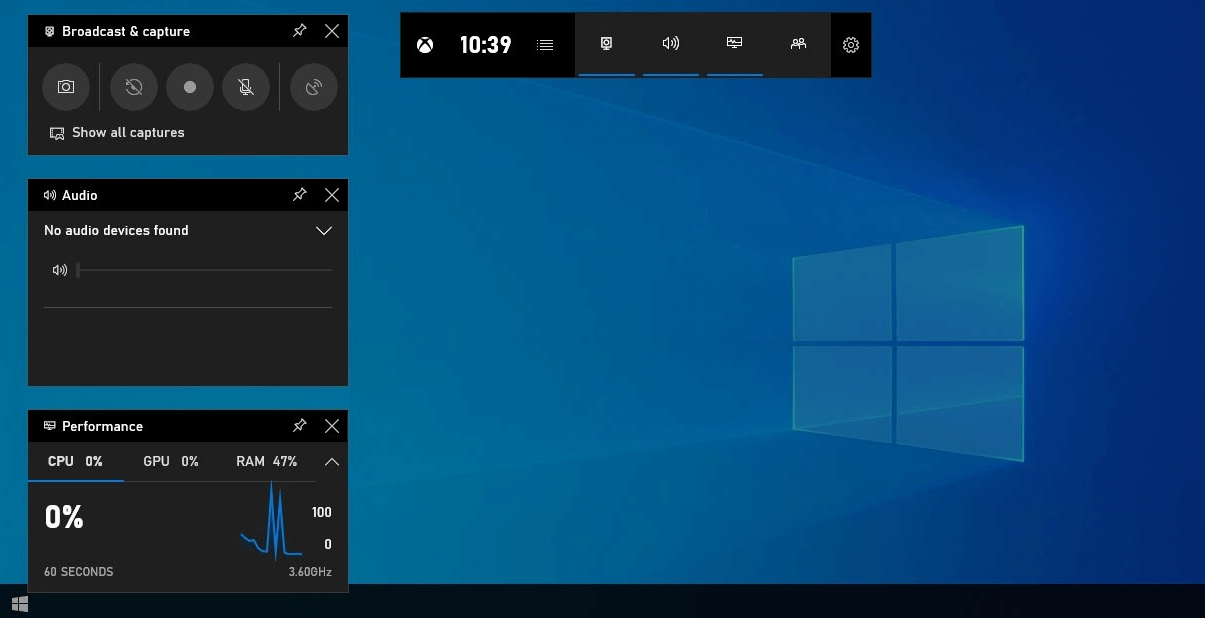
Screen Record on Lenovo Thinkpad with Sound via Xbox Game Bar
Step 1. Press the Start button on your keyboard, then select Settings/Gaming/Capture to set up from which source to record audio (in-app or from microphone).
Step 2. Open the application or game from which you want to capture.
Step 3. Press Windows key together with Alt and R keys to start recording, and use Windows + Alt + M to turn the microphone on and off while you are recording.
Way 2. Screen Record on Lenovo Laptop with Sound via Screen Recorder
You could also use the internal Screen Recorder that might be present on some series of Lenovo laptops. If your machine supports this feature, it could be the quickest way to capture the screen together with audio without downloading any external software.
Follow this procedure to quickly start recording your actions on the computer along with system sound:
Step 1. Look at the quick access panel on your desktop and search for Screen Recording icon. Click on it.
Step 2. Select the video quality level for your recording. Microphone sound will be recorded automatically.
Step 3. Provide permission to the app to access the microphone and capture screen activity.
Step 4. Wait for a three-second countdown before the recording starts.
Final Words
Everything you do on a Lenovo laptop can be captured and saved, but you need to know which screen recorder is the most suitable for the purpose you have in mind. You should consider the intended length of recording, the need to include audio or subtitles, and other requirements before choosing the best tool. If the software you already have on your computer doesn’t seem capable of meeting your expectations, just go online and find a better screen recorder.