There is a saying that one image is worth a thousand words. When you want to teach anyone how to do anything. While taking a screenshot on your iPhone or Android phone is simple, both Windows and Mac operating systems come equipped with a function that allows for recording the screen by default. Taking a screenshot of your computer screen using Ubuntu Linux does not have to be a difficult chore for users of Linux.
Consider using one of the best ten screen capture programs for Linux reviewed here, described in the following paragraphs, even if many screen capture tools for Linux are now accessible on the market. At the same time, others can also record whatever is happening on your Linux screen and capture the entire activity that is taking place on it. Let’s explore the best Snipping Tools for Linux!
Related Reading: Best Snipping Tool Extensions for Chrome >

Best Snipping Tool for Linux
What Is the Shortcut for Snipping Tool in Linux?
The basic keyboard keys are all you need to take a simple screenshot without any annotations or other advanced editing features. These are not features that are exclusive to Ubuntu and Linux computers. Most Linux distributions and desktop environments support these keyboard shortcuts.
Let’s have a look at the list of shortcuts that you have available to use on the keyboard:
- PrtSc – Into the “Pictures” directory, please save a snapshot that captures the complete screen.
- Shift + PrtSc– You may save a screenshot of a certain area to your Pictures folder.
- Alt + PrtSc– Take a screenshot of the active window and save it to the Pictures folder.
- Ctrl + PrtSc– Make a copy of the screen capture that includes the whole screen on your clipboard.
- Shift + Ctrl + PrtSc– The screenshot of a certain area will be copied to the clipboard now.
- Ctrl + Alt + PrtSc– Make a copy of the window screen capture that is now active on your clipboard.
Also Read: Best 15 Linux Screen Record Tools >
Top 11 Snipping Tools for Linux
You may use a GUI or command line-based Linux screen capture application to capture your screen. We’ve chosen the best Linux apps based on how often they’re used and popular. Ultimately, you should have a good idea of which screen-capture software to use.
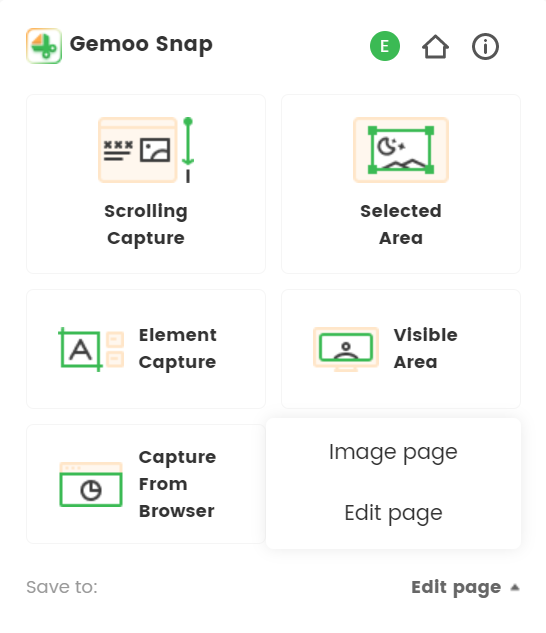
Gemoo Snap Chrome Extension
Wondering what the best screenshot app for Linux is? Let’s find out the answers here. The screenshot is necessary to show your progress on a project or a problem you’re getting rather than explaining. It helps others to get a better understanding of things. To capture high-quality screenshots, you can use the professional screenshot extension – Gemoo Snap. Simply add Gemoo Snap Chrome extension to your Chrome browser, and then you can enjoy various different screenshot features – quick screenshot, screenshot and feedback, screenshot immediately beautify the image and screenshot upload to the cloud, etc.
Get It Free
Key Features Overview
- Beautify your captures easily by adding backgrounds, rounding corners, and drawing shapes.
- Capture highlight moments instantly like a game or TV show. And upload to the cloud automatically with sharable links.
- With Gemoo Snap, you just need to take a screenshot, add your feedback and idea by context with texts, lines, or shapes, and hide sensitive information with mosaics.
- Help you extract uncopyable texts from images, videos, PDFs, websites, etc. Capture and copy. Just that easy.
- Instantly capture an entire webpage in just one click.
Pricing Plan: Free to use
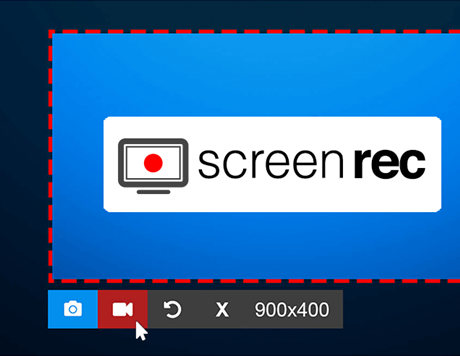
Snipping Tool for Linux -ScreenRec
ScreenRec is a piece of screen capture software that is both free and ridiculously simple to use. With it, you can quickly record what’s on your screen or snap a picture. Users can take a snapshot of the full screen or select a particular portion of the display to alter using the annotation tools. ScreenRec recorder lets you record the image on your computer’s display and the sound emanating from your computer’s speakers or microphone.
Because of this, there is no need to establish a connection to DropBox, Facebook, YouTube, or Google Drive. You won’t even have to be concerned about the amount of upload time. The URL that is produced may be copied and pasted by the creator into a private message or email, or it can be published on your website.
There is no steep learning curve associated with ScreenRec. After the download of ScreenRec is finished, you will need to install it and establish a free account. You will now be able to start recording movies or taking screenshots on your screen. The Streaming Video Provider, an all-in-one enterprise video platform, is the engine that drives the software. It has various cutting-edge capabilities and 2 GB of free storage space in a private cloud.
Key Features Overview
- Using ScreenRec, you may take screenshots of your computer screen, add audio, and even record voice-overs from your microphone.
- After choosing the portion of the screen you want to record, you’ll need to hit a button to begin the recording process.
- Using ScreenRec, you may easily capture audio from your computer’s speakers.
- With the mouse effects in ScreenRec, you may add click noises to emphasize your pointer.
- Instant sharing is possible thanks to ScreenRec’s cloud recording technology.
- This free recorder prevents unlawful downloading of screenshots and screencasts using AES encryption.
Pricing Plan: Free to use
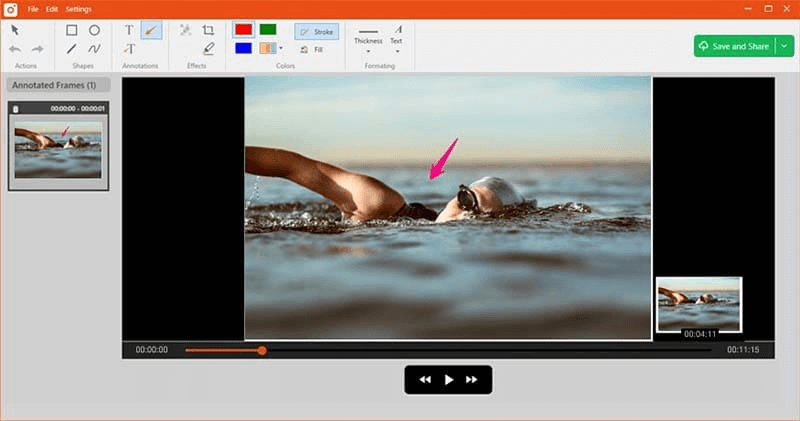
Tinytake Interface
TinyTake is a macOS and Windows screen recorder with a very simple interface. It comes with all the features you will most likely need, none of the unnecessary fluff you don’t need, and it is one of the best screen recorders for sharing movies and images with others. Once you have created an account, which is required and cannot be skipped, it only takes a few clicks to get started recording what’s on your computer screen.
TinyTake allows you to map the region you want to record, and after you’ve done so and pressed the start button, the software will handle everything else for you. It is an ideal option for use when recording on a personal computer or laptop that has limited system capabilities. TinyTake has a free version; however, if you want to record for more than five minutes or add annotations to your recordings, you will need to subscribe to the app’s premium edition.
Key Features Overview
- An existing picture may be opened, annotated, and shared.
- You may record a video of your screen for up to one hundred and twenty minutes and use your camera.
- It is excellent for capturing the screen in a basic manner and makes it simple to upload recordings to websites like YouTube.
- Cloud storage is available for storing screenshots and movies.
- Send out a link to the saved video as well as the screenshot.
Pricing Plan: Free Plan/Subscription: $29.95 per year
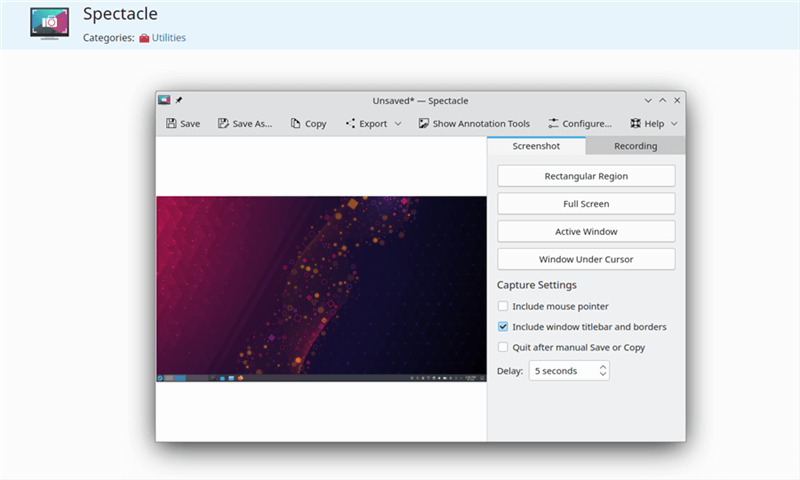
Spectacle Interface
Spectacle is a screenshot program designed with KDE in mind and is straightforward. The program is normally associated with the PrintScreen key (PrtSc) in the KDE Plasma desktop environment. In addition to this, it is compatible with any other desktop environment. Because it has all the functionality that a screenshot program might need or desire, it is an excellent option to choose as the default action that would be performed whenever the PrtSc button is pushed in any desktop environment.
When Spectacle is launched without arguments, it will immediately take a screenshot of the entire desktop. It will then present a window that can be used to take another screenshot of the entire desktop (“full screen”), the current screen (on multi-monitor setups), the active window, and the window under the mouse cursor, or a rectangular region. It is possible to establish a delay, in seconds, before capturing a screenshot using this feature.
Key Features Overview
- Images are saved as PNGs by default in Spectacle. JPEG and other lossy formats may also be saved.
- You can, of course, save screenshots by using the Save As button.
- A screenshot captured with Spectacle may be accessed in any other image-related program installed on your computer and copied to the clipboard.
- Dropbox, Flickr, Facebook, and Imgur all have built-in capabilities for posting screenshots to Spectacle.
- Spectacle’s settings allow you to change the program’s default behavior when it is first to run.
Pricing Plan: Free to use
Shutter Interface
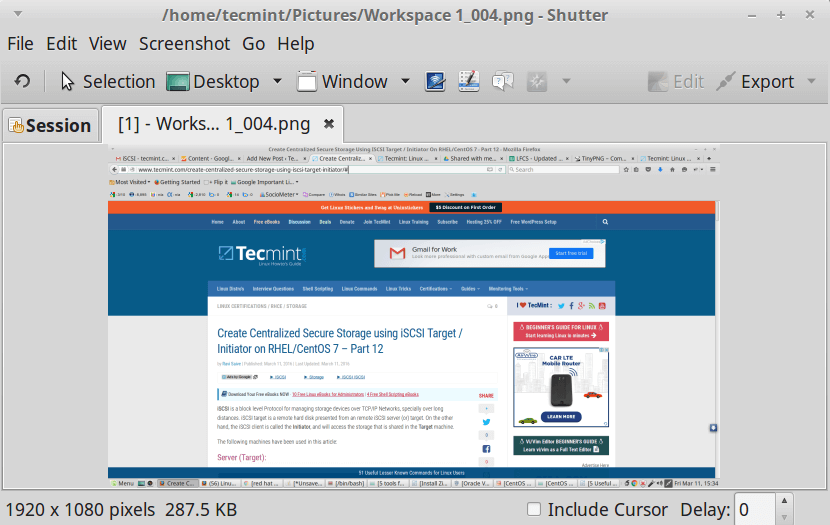
To begin, Shutter’s user interface is simple and easy to understand. You may pick what parts of your desktop you want to record by choosing one of the five primary buttons, and if you click the arrow next to those buttons, you’ll have access to even more detailed choices. When you take many screenshots, they will be neatly organized in tabs, making it simple to move between the different captures you have made.
The “Simple Selection Tool” and the “Advanced Selection Tool” options are accessible. The screen will become darker when you use the advanced mode, allowing you to distinguish what you have selected from the surrounding area. The “Preferences” menu provides access to various settings that may be modified, including picture type (PNG, JPEG, and BMP are among the possibilities), save directory, automated file naming, and capture delay.
Key Features Overview
- It is possible to capture a section of the whole screen with it.
- A screenshot of a window and a menu or tooltip may be taken using this.
- Store your credentials for each service, use the CTRL+U key combination, and click the upload button when you finish.
- Even when you are only browsing, it may still captivate you and several plugins are accessible.
- You also can configure keyboard shortcuts or have the screen capture immediately copied to the clipboard when it is taken.
Pricing Plan: Free to use
Flameshot Interface
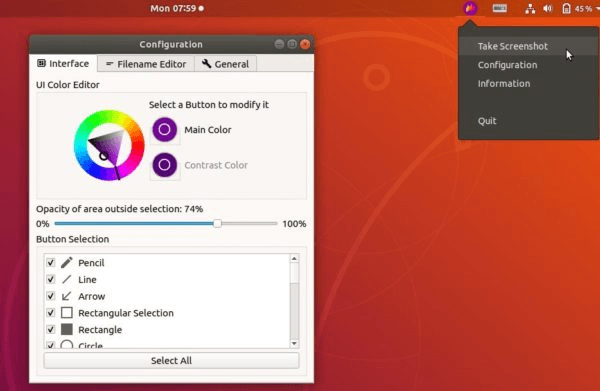
Flameshot is another excellent snipping tool that comes along with Ubuntu. It comes with a pen that can be used to draw on the picture, a line that can be used to emphasize the points and an arrow that can point to a particular spot. The application can take a snapshot of the picture in real-time and expand it at any moment while it is being edited.
Thanks to its Undo and Redo features, it allows you to reverse or revert any changes you may have made. This utility is becoming more popular as a result of the fact that it has a diverse set of capabilities and can be found on all Linux variants. The highlighter, which is available in several different colors, is used to call attention to certain parts of an image while simultaneously blurring other parts of an image.
Key Features Overview
- Contains a DBus interface as standard.
- Editing of screenshots may be done inside the app.
- Flameshot enables you to store the images you take straight to the cloud, where they may be accessed by your colleagues or family members at any time.
- It has a lovely UI that exudes quite a bit of charm and allure.
- You are granted the ability to submit screenshots to Imgur.
- Supports a system tray in addition to other features.
Pricing Plan: Free to use
Kazam Interface
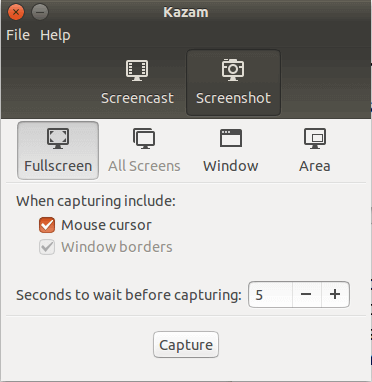
With Kazam, you may record videos and take screenshots simultaneously. It features a graphical user interface (GUI), the same as Gnome screenshot, which gives a list of choices, such as whether to conduct screencasting or capture screenshots and even within the latter, take a screenshot of the whole area or just a portion of it. It was the first secret screener to incorporate on-the-fly encoding and a snapshot function.
The flexibility offered by Kazam is one of the reasons why it is so good. You will be allowed to record a certain screen section if you do not want to capture the full screen. The fact that it is a relatively small file that won’t need much storage space is another positive aspect of the situation. There are complications associated with it.
Key Features Overview
- Record the full screen, a portion of the screen, a window of an application, or all of the displays (for multi-monitor setup)
- The VP8/WebM video file created from the screen recording may be played back on a computer.
- Additionally, a mode known as “silent” allows the program to launch without the GUI.
- Kazam will be useful whether you want to take a screenshot or record a screencast.
- Pause and resume recording of the screen with the use of keyboard shortcuts.
- Record in several file formats, including MP4, AVI, and others.
Pricing Plan: Free
Ksnip Interface
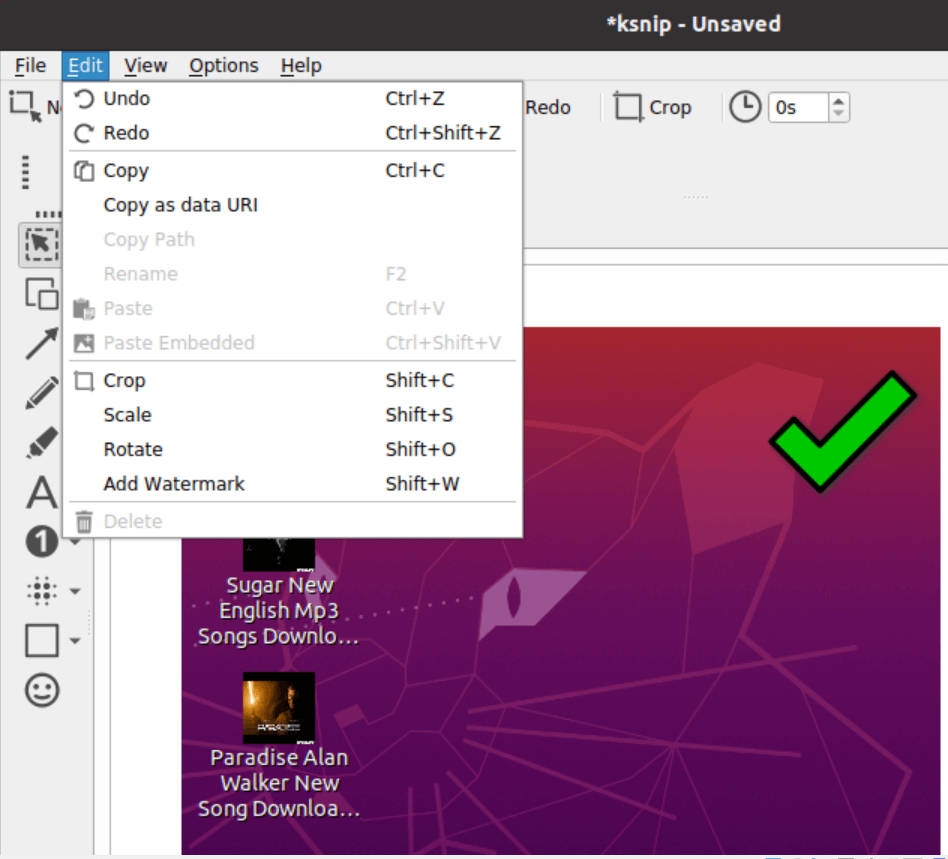
Ksnip is a fantastic snipping tool for Ubuntu, and it comes packed with many different functions that might be helpful. Taking a screenshot using the mouse is easy to perform and allows you to capture images of the full screen, windows, and other elements. The tool provides markers such as a pen, an arrow, and a rectangular box to indicate information on the screenshot
In this approach, you won’t have to worry about your work being copied while still being able to give it a personal touch. To set up Ksnip on your computer, open the Terminal and enter the instructions below. It allows you to customize screenshots, including resizing, sketching, highlighting, and other features.
Key Features Overview
- The tool enables pen, arrow, and box markers for screenshots. It can draw shapes and add text.
- The Ksnip has a variety of effects that may be applied to the picture to alter its appearance;
- The effects of drop shadow and grayscale are the most often utilized.
- The snipping tool watermarks photos with its brand or name.
- It supports command-line and time-delayed screenshots.
- The Ksnip offers several effects to modify images, including drop shadow and grayscale.
Pricing Plan: Free to use
Deepin Scrot Interface
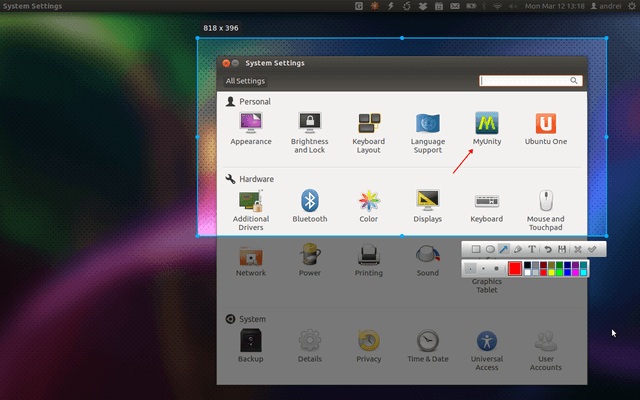
Deepin is a Linux distribution similar to Ubuntu, Linux Mint, etc. Deepin Scrot is the pre-installed screen capture application on the Deepin Linux distribution. You may also download the Deepin Scrot Debian file and use it with your preferred Linux distribution.
Deepin Scrot is a screenshot tool that, like the vast majority of its competitors, gives you the ability to take screenshots of your screen in a variety of different ways, such as by capturing the active window, the entire screen, or a specific region of the display, all without putting a strain on your operating system. Deepin OS is an operating system that enables users to annotate screenshots by adding text, arrows, lines, and drawings.
Key Features Overview
- Take a screenshot of the window that is now selected.
- Directly after the screenshot is captured, Deepin Scrot gives you the option to draw arrows and complete other activities on the image.
- Activate Deepin Scrot, and you will be able to snap a screenshot immediately after that.
- Hold off on the capture of the whole screen and snap a picture of the region you want.
- Create a screenshot by drawing a rectangle, ellipse, arrow, line, or text.
- Publish the snapshot to a file or copy it to the clipboard.
Pricing Plan: Free to use
ImageMagick Software Interface
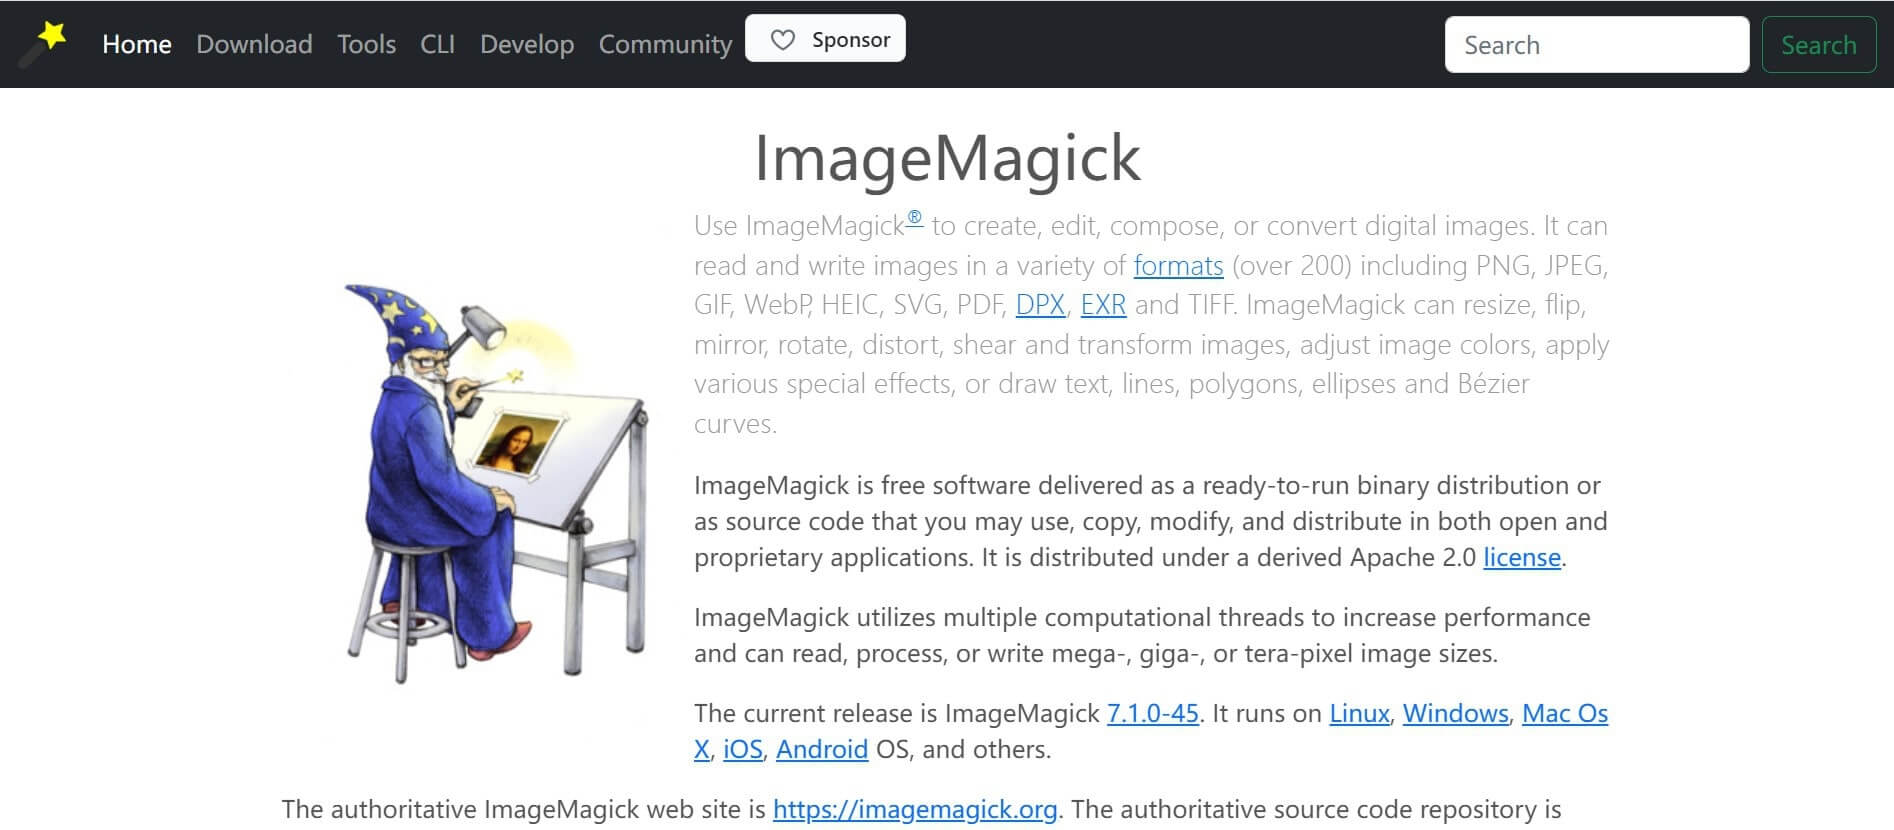
ImageMagick is a Linux snipping tool alternative that is open-source and a screenshot tool for Ubuntu. ImageMagick is also a fantastic tool for taking screenshots. This software is incredibly strong and gives users complete control over their experiences. You also won’t have to worry about waiting for pictures to render since it comes with an X-window GUI for Unix-based operating systems such as GNU Hurd and iOS. This eliminates the need for you to wait.
ImageMagick provides a wide variety of editing choices for the captured picture. These options include transforming the image, adjusting the transparency of certain parts, merging numerous photos into one, drawing shapes on the image, adding comments, and much more. This is the instrument that gives the user complete control over the situation.
Key Features Overview
- Images may be converted to over 200 formats.
- The process of creating an animated GIF from a series of photos.
- Add special effects to the picture.
- Users can alter their photographs in many different ways thanks to the availability of a large array of commands
- User even save them in over 200 different formats.
- Transparency, grain effects, and other such pixelation techniques are examples of pixelation.
Pricing Plan: Free to use
Gnome Screenshot Interface
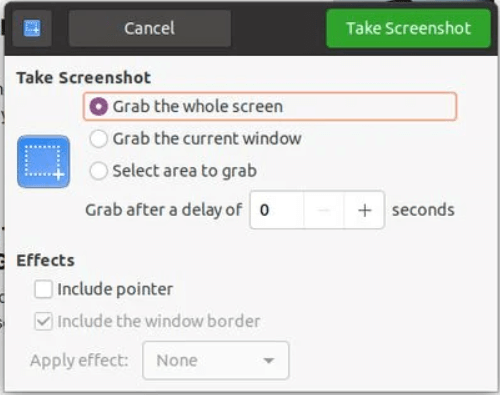
Gnome Screenshot is a built-in tool on Ubuntu’s Gnome desktop that lets you take screenshots, record a screencast of the whole window or just a part of it. You can then save the screenshot or screencast to a file. The application’s user interface makes it very easy to record screencasts and take screenshots. You may also change the settings inside the app to add a wait before the app takes the screenshot.
In addition, it gives you the option to add a border of your choosing to the screenshots you capture using the program. Compared to other screen capture tools, you will discover that its accessibility is the simplest. It is located on your system panel and can be used whenever you wish to record screen activity or take a snapshot of what’s happening on your screen.
Key Features Overview
- A built-in GNOME desktop environment utility is available.
- The utility captures the complete screen or a tab.
- Visit extensions.gnome.org and search for the “Screenshot tool” to find out how to install the extension on your computer.
- Image effects are many. It lets you take a photograph after a set amount of time.
- The picture may have a window border or not. Add the pointer to the screenshot. It easily records and shares screencasts.
Pricing Plan: Free to use
Final Thought
As a result, this article examines the most effective snipping programs available for Linux, along with the capabilities each offers. The snipping tool is helpful for providing the report and the presentation with a picture of how the task is being done. It is also possible to utilize screenshots to demonstrate how the program works while explaining its operation.
On this list, you’ll find the greatest snipping tools for Linux; nevertheless, which one takes the cake as the best overall option? ScreenRec is, in our opinion, head, and shoulders above the competition.
Nevertheless, we suggest you give the others a go so you can choose which one works best for you. It cannot get much better than that, given that it allows for private sharing, private cloud storage, simple snapshotting and recording of the screen, and basic editing.

The Gemoo Team Let everyone enjoy a simplified workflow of video creating, editing, and sharing.


