Recording videos in the loungeroom may be humiliating if the background is cluttered, while a professional and formal background may make a favorable impression on others. As a result, many people choose to record screen on the computer with a fake background. The video background does not necessarily fit the video’s topic, and recordings are routinely made against a range of backgrounds. The video background may then be modified, transitions can be added to make it more exciting, and virtual reality can be used to complete the process. There are screen recording Apps that can remove video backdrops on the market currently, but many of them have drawbacks and limits.
Record Video with Virtual Background
This article will explain how to record video with a virtual background by removing video backgrounds from your project or a course assignment. Let’s get started with the guide and learn about some excellent tools for recording videos with virtual backgrounds.
Record Video with Virtual Background on Mac & Windows
Record Video with Virtual Background via Virtual Camera App
Record Video with Virtual Background Online
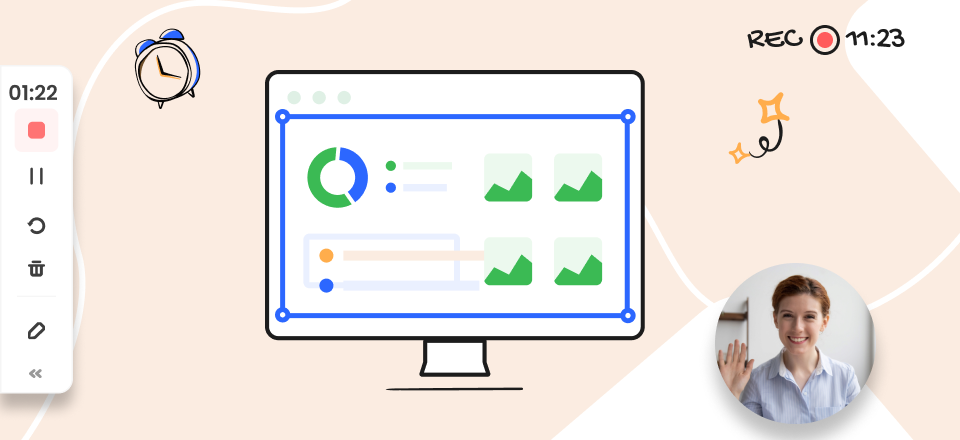
FocuSee is a popular screen recording software that allows you to record videos with stunning virtual backgrounds. Whether you’re a content creator, a product promoter, a video blogger, or simply want to enhance your video conferencing experience, FocuSee provides an easy and immersive solution to record video with virtual background. With its advanced technology, it can give your videos a professional and polished look.
Key Feature of FocuSee
How to Record Video with Virtual Background?
Here, let’s further check how to record a video with a virtual background.
Step 1. Free download and install FocuSee and launch it on your computer. Complete the device setup and choose the Custom mode to start a screen recording.
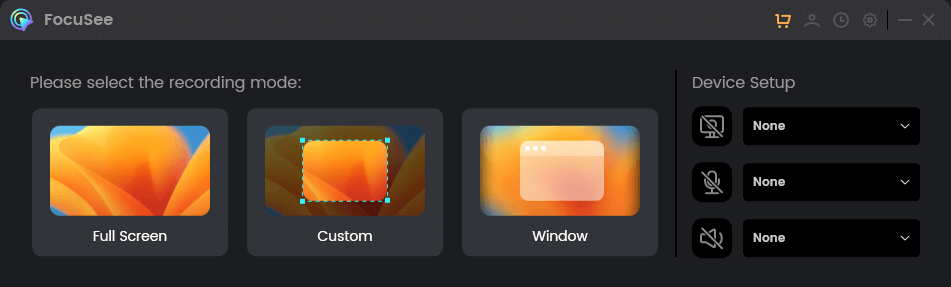
Choose a Recording Mode
Step 2. Customize an area to record on your computer. When you click on specific parts in the video, a smooth zoom-in effect can automatically be applied to bring them into focus.
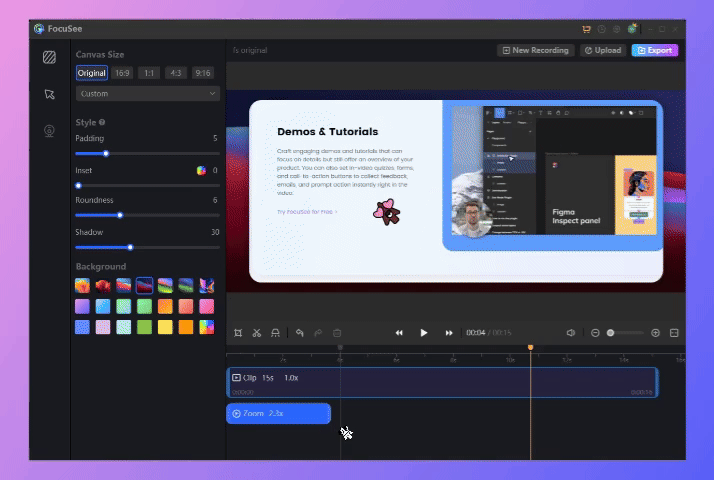
Add Zoom-in Effect Manually
Step 3. In the video editing interface, change out the virtual background of your video and adjust its padding, inset, roundness, and shadow according to your demands.
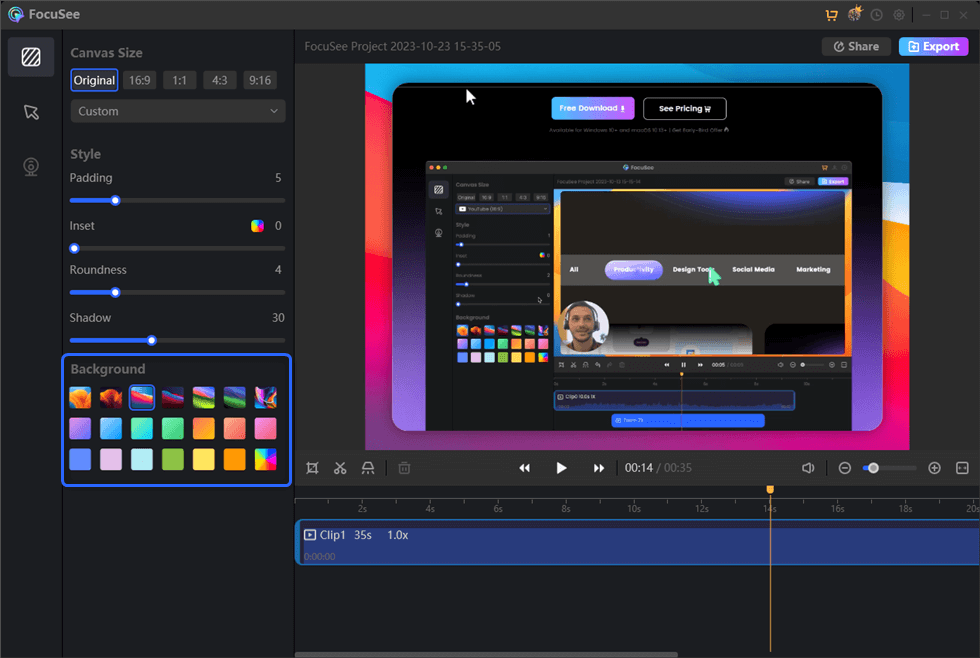
Change out a Virtual Background
Can’t Miss: 2 Ways to Record My Screen and Face Simultaneously >
Virtual background applications, often known as virtual camera apps, allow you to replace your current background with a picture, video, or GIF. ManyCam is one of the most popular live-streaming software solutions. Rather than being a virtual backdrop software, ManyCam offers the feel of a design studio. It allows you to add many layers to your virtual background and save them as presets that you may use in other conferencing apps. You may also use a tool to blur only some parts of your background while adding text to the remainder of the screen. ManyCam is significantly more thorough than what is necessary for the average employee attending online meetings.
So, here’s a step-by-step guide to getting started using Manycam:
Step 1: Create the main scene
You may build a new preset on the presets page with a number of layouts, such as picture-in-picture, split-screen, numerous layers, and so on. Additional layers can always be added in the future. Assume you want to share your screen and utilize your webcam in picture-in-picture (PIP) mode for the time being.
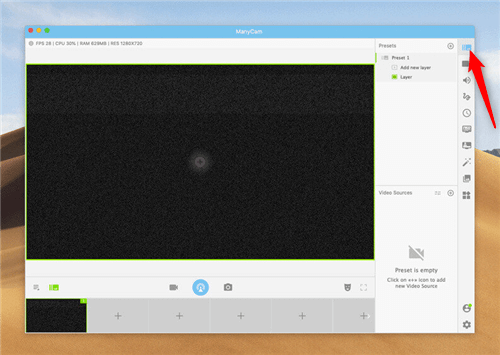
Create the Main Scene
Step 2: Change the settings
In this part of Manycam, you have entire control over your live video, which means you may change the settings to ensure the best possible quality. Users may choose the resolution and frames per second of their video, as well as make visual tweaks, via the video tab. Select Streaming Settings from the broadcast button if you wish to change the live streaming settings.
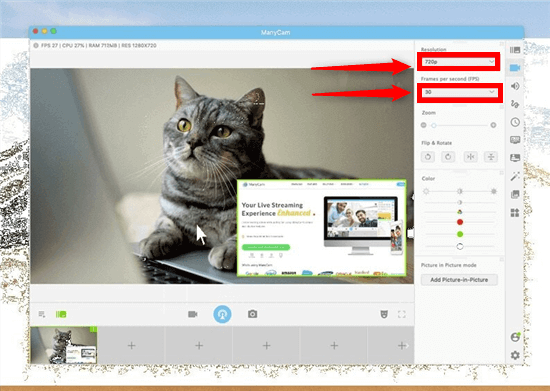
Change the Settings
Step 3: Audio configuration
The audio configuration is the third and most important phase in the setup procedure. The Audio Devices function may be found under the audio tab. Multiple audio inputs can be added. To add your microphone, click the button, then adjust the volume and sync as needed. You may need to test it to make sure it’s working. You may do a test by going live on Facebook in private mode or by recording a demo using the record button in ManyCam. Turn on the “System Sounds” button in ManyCam to listen to your microphones.
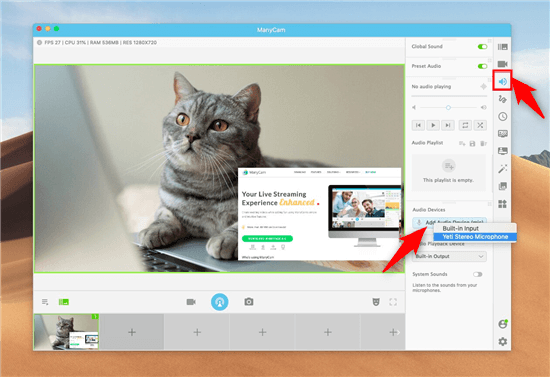
Audio Configuration
Note: ManyCam will capture noises from your computer, such as video playback, if you add your System Noises as a device.
And, after everything is configured to your liking, it’s time to go live.
Also Read: 5 Best Screen Recorder for Chrome in 2024 >
The virtual background function on Vmaker is perfectly complemented by the previously available frames feature. Users may design their own camera bubble with a background that matches the broadcast by using a range of customization choices. A gamer, for example, may utilize the frames option to create a unique webcam look by employing a square camera bubble with a transparent background to record his gameplay.
The instructions for using Vmaker’s virtual background functionality are as follows:
Step 1: Launch Vmaker
After the launching of Vmaker, choose the screen and webcam recording option, then select the virtual backdrop icon next to the camera bubble.
Launch Vmaker and Click Virtual Background
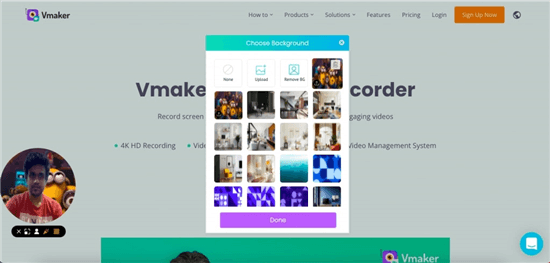
Step 2: Background Selection
As the next step, select your favorite background from the preset options.
Choose Your Favourite Background
Step 3: Remove and Apply Background
Select Remove Background to remove the backdrop from your camera bubble, and then select your preferred background to appear behind you.
Remove and Apply Background
When it comes to chromakey apps on mobile phones, there are fewer options compared to PCs. However, one notable and powerful application worth mentioning is Chromavid.
Chromavid is an intuitive and user-friendly app available for Android and iPhone, allowing you to change the background for video recording. What sets this app apart is its support for various Chroma colors beyond the standard blue and green, you can even use colors like yellow and red.
Here’s how you can use the virtual backdrop feature for video recording on your Android or iPhone:
Step 1: Open the Chromavid application and select the Chroma color, which will be replaced with the chosen background in the next steps.
Chromavid App
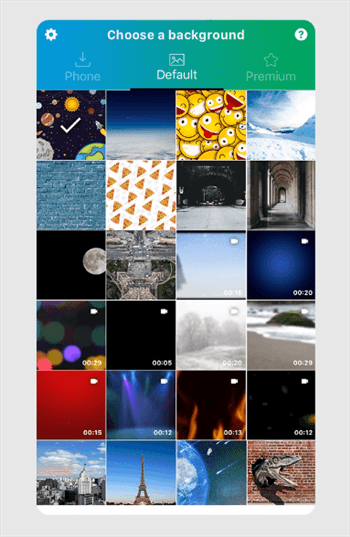
Step 2: Tap to choose an image as the virtual recording background.
Step 3: Capture your photo or video against the background in the selected Chroma color.
Step 4: Save your creative videos or share them on other platforms.
1. What is a virtual background?
A virtual background is a digital image or video that is used to replace the real background in a video call or recording.
2. How do I enable virtual backgrounds in my video recording software?
The process may vary depending on the software you are using, but generally, you can enable virtual backgrounds by going to the settings or preferences section of the software and selecting the virtual background option.
3. Can I use any image or video as my virtual background?
Yes, you can use any image or video as your virtual background as long as it is compatible with your video recording software.
4. How do I ensure that my virtual background looks good in my video recording?
To ensure that your virtual background looks good in your video recording, make sure that the lighting in your recording environment is consistent and that there are no shadows or reflections that could interfere with the virtual background.
5. Can I change my virtual background during a video recording?
Yes, you can change your virtual background during a video recording, but it may interrupt the flow of the recording.
6. Are there any limitations to using virtual backgrounds in video recordings?
Yes, there may be limitations to using virtual backgrounds in video recordings, such as compatibility issues with certain software or hardware and the need for a high-quality camera and lighting setup to ensure that the virtual background looks good.
There are a number of video editing applications that can be used to record video with a virtual background and without the need for a green screen. We’ve compiled the two best non-green screen video background removal applications for making spectacular videos. Because videos with a virtual background are so popular these days, knowing how to record videos with a virtual background is essential. This article compared and contrasted two approaches for generating videos with a virtual recording background, along with the step-by-step guide for each application. Hope this can help you solve how to record video with the virtual background.
If you want to make virtual background videos efficiently, FocuSee is the program you can never miss. Download that robust program and have a try!
Further Reading:
FocuSee
Record Video with Virtual Background on Mac & Windows
Record Video with Virtual Background via Virtual Camera App
Record Video with Virtual Background Online
Record Videos with Backgrounds on Mobile Phone
FAQs about Record Video with Virtual Background
Final Words
60 seconds, let's create a better FocuSee together ✨
Join 1K+ innovators shaping 30+features✨ & claim your Gift! 🎁

Share your thoughts & earn a coupon instantly!
Warm reminder: This survey does not involve any of your private data.
Page 1 of 10


Coupon Code:
FSUS10
Note: Copy and use the promo code FSUS10 at checkout(valid within 24 hours)