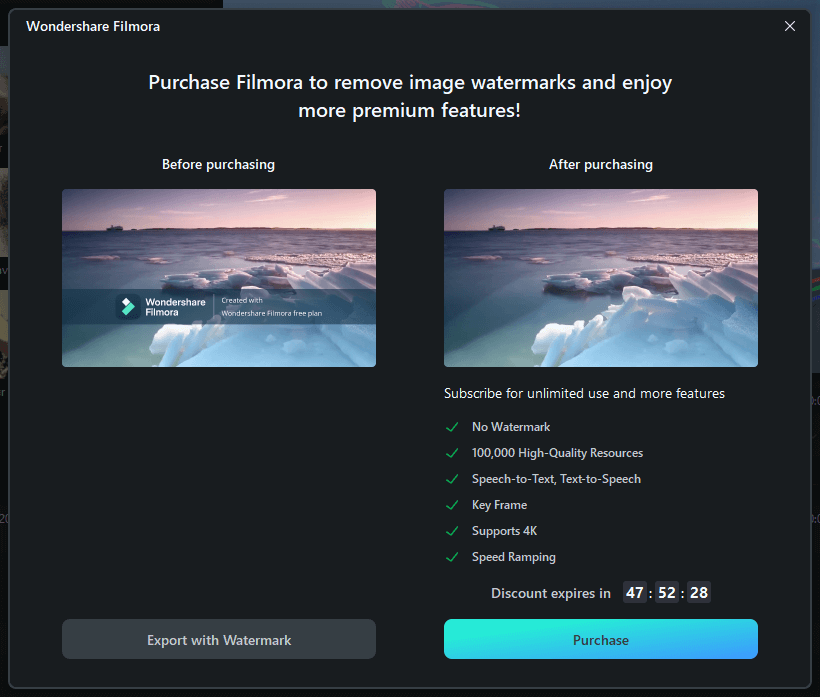
Filmora is one of a popular video editing software famous for its powerful video editing capabilities. However, when using the free trial version of Filmora, a watermark is added to exported videos, which can be undesirable for those looking to create professional-looking content. If you’re seeking a solution to remove the watermark from your Filmora videos, you’ve come to the right place.

Remove Watermark from Filmora
In this article, we’ll brief you on the functions of Filmora concerning video edits and provide you with a comprehensive step-by-step guide on how to remove the watermark from Filmora and export your videos without any intrusive branding.
Table of Contents: hide
What Is Filmora?
Filmora is a video editing software developed by Wondershare. It is a popular and user-friendly video editor that is available for both Windows and macOS platforms. Offering a range of features for creating and editing videos, it is designed to be accessible to beginners while also providing advanced editing capabilities for more experienced users.

What Is Filmora
Here are the key features that Filmora includes:
- Video Editing: Filmora provides a variety of editing tools, such as trimming, cutting, merging, and splitting video clips. It also offers features like adding text, overlays, transitions, and filters to enhance the visual appeal of the videos.
- Effects and Filters: Filmora includes a wide selection of built-in video effects, filters, animations, and overlays that users can apply to their videos. These effects can be used to add creative touches, adjust colors, apply motion graphics, and more.
- Audio Editing: Filmora allows users to edit and enhance the audio in their videos. It provides tools for adjusting volume, removing background noise, adding audio effects, and syncing audio with video clips.
- Titles and Text: Filmora offers a range of customizable title templates and text options, allowing users to add titles, generate captions, and subtitles to their videos. Users can choose from various fonts, sizes, colors, and animations to create visually appealing text elements.
- Export and Share: Once the video editing is complete, Filmora allows users to export their videos in various formats and resolutions. It supports popular video formats and offers options for sharing videos directly to social media platforms or burning them to DVD.
Proven Ways to Remove Watermark from Filmora
In this section, we’ll cover 3 effective methods to remove Filmora watermark in 2024. You can upgrade the Filmora software or rely on the Filmora Watermark Removers. All these approaches can help you achieve the desired result of watermark-free Filmora videos. Let’s explore these proven methods in detail to find the one that suits your preferences and requirements.
AI Filmora Watermark Remover
The most straightforward way to remove a watermark from Filmora is by using a Video Watermark Remover. Among these specialized watermark removal tools, Wipit is designed specifically for removing watermarks from videos. This handy tool can also remove watermarks from videos that are created and edited by CapCut, ManyCam, Kapwing, TikTok, and other video editing tools and video creating platforms.
Key Featurs of Wipit
- With its AI watermark removal technology, you can erase watermarks from video without blur.
- Erase watermarks from videos and images with AI or Smooth Filling model.
- Remove unwanted watermarks, emojis, text, logos, brand marks, and other unwanted objects from your videos and images.
- Remove Filmora watermark and replace it with your brand mark.
Steps to Remove Wipit Watermark
Step 1. Free download Wipit and open it on your computer. Upload the video with the Filmora brand mark.

Upload Filmora Video from Your Computer
Step 2. Click on the AI Select Area option and frame the Filmora watermark with a click.

Frame the Filmora Watermark
Step 3. Choose the AI Model and enter the time duration on the right panel.

Remove Filmora Watermark with AI Model
Step 4. Click on the green Preview button to check the watermark removal effect before saving the video. If you are satisfied with the effect, tap the Export button to export Filmora without watermark.

Preview Filmora without Watermark
Upgrade to Filmora Pro
Filmora Pro enjoys more advanced video editing features than the standard version of Filmora. If you want to remove watermark from Filmora, you can purchase the Pro version when exporting the video.
Also, you can upgrade it via the following solutions:

Upgrade to Filmora Pro
- Explore the Filmora Pro page and navigate to the Filmora Pro section.
- Choose a subscription plan – Filmora Pro offers different subscription plans, including monthly, annual, and lifetime options. Review the pricing details and select the plan that suits your needs and budget.
- Click on the “Buy Now” or “Upgrade Now” button to proceed with the purchase.
Online Filmora Watermark Remover
If upgrading to Filmora Pro is not something you’re interested in or if you simply don’t need its advanced features, there is an alternative option available. You can download the video with Filmora watermark and explore an online tool to remove watermark yourself.
Among these video watermark removal tools, Online Video Cutter provides a convenient ‘Remove Logo’ solution to help you remove watermark from your video without any additional software installations or upgrades. With the help of this video watermark removal tool, you can easily eliminate various types of watermarks from your Filmora videos. Whether your videos have been watermarked using Filmora or other applications like Movavi, Kapwing, Capcut, and more, it can effectively remove them.
Now, let’s learn how to remove watermark from Filmora online with simple clicks.

Remove Watermark from Filmora Online
Step 1. Navigate to the website and upload the video with Filmora logo to the platform.
Step 2. Click on the ‘Rmove Logo’ icon and select the area you want to remove.
Step 3. Adjust the timeline to apply the watermark removal effect.
Step 4. To preview the watermark removal effect, you are free to click on the ‘Preview’ button to download the video.
How to Export Filmora without Watermark?
To export a video from Filmora without a watermark, you need to ensure that you have a licensed version of the software. The watermark appears on the exported videos when using the free trial version of Filmora. Here are the steps to export a video without a watermark:
Step 1. Launch Filmora and open the project you want to export without a watermark.
Step 2. Make any necessary edits to your video, such as trimming, adding effects, text, or transitions. Ensure that you’re satisfied with the final result.

Edit with Filmora
Step 3. Purchase and activate a valid license for Filmora. You can do this by visiting the Wondershare Filmora’s landing page or in the app.
Step 4. Click on the “Export” button. In the export settings window, select the desired output format for your video. You can choose from various options, including common video formats like MP4, MOV, AVI, and more.

Export from Filmora without Watermark
Step 5. Check the export settings to ensure that the watermark option is turned off or disabled. This will prevent the software from adding a watermark to your exported video.

Filmora Export Settings
Also read: How to Completely Remove Image Watermark in GIMP >
Final Thought
In conclusion, removing watermarks from Filmora videos is a feasible and accessible process with the proven methods discussed in this guide. Whether you choose to utilize Filmora itself by upgrading to the Pro version or opt for online third-party tools, you have options to create watermark-free videos that maintain a professional appearance. By following the step-by-step instructions provided, you can confidently remove watermarks and enhance the quality of your video content.
Remember to consider the licensing agreements and copyright laws associated with the videos you edit. It’s important to respect intellectual property rights and ensure you have the necessary permissions to remove watermarks. Choose reputable online tools and exercise caution when utilizing third-party services.


