Watermarks can be a nuisance when it comes to enjoying or repurposing videos. Fortunately, there are effective ways to remove watermarks without compromising video quality. In this article, we will explore various methods to remove watermarks from videos without causing blur and provide you with some watermark removers for video, ensuring a clean and professional result.

Remove Watermark from Video without Blur
Table of Contents: hide
Remove Watermarks from Videos without Blur with AI
Remove Watermark from Videos Online without Blur
Remove Watermarks from Videos without Blur on PC
Remove Watermarks from Videos without Blur with AI
If you want to remove video watermarks but are concerned about compromising the quality, Wipit is your top choice. As an AI Watermark Remover, it can remove video watermarks while preserving the original quality of the video. With Wipit, you can also delete dates, stickers, drawings, logos, people, shadows, dates, and other unwanted objects from videos.
Key Features of Wipit:
- Supports batch import of mixed content, allowing users to conveniently add multiple videos and images simultaneously without restrictions on quantity.
- Video watermark remover can remove watermarks from videos by segmenting them into clips, enabling individual processing of selected areas for effective watermark removal.
- The desktop application is stable and highly secure.
- Offers two erasure modes: AI model (default) and Smooth filling.
To easily remove watermarks using Wipit, please follow the following steps:
Step 1: Free download Wipit for free on your computer, launch the application, and upload the desired videos you want to remove watermarks from. You can upload multiple videos at once to improve efficiency.

Remove Watermark from Images or Videos
Step 2: Select the “Select Area” option and frame the area you wish to erase.

Frame the Area You Wish to Erase
Step 3: Choose between two erasure modes: AI Model or Smooth Filling. We recommend using the AI model as it utilizes AI technology to analyze the footage, albeit at a slower speed, for better results.

Select the AI Mode
Step 4: Drag the start and end time on the video track to select the specific timeframe for applying watermark removal, or enter the desired time interval directly. Wipit will automatically remove the watermark during this chosen period.

Enter the Time to Set Removal Section
Step 5: Once the watermark removal process is complete, click on “Preview” to view the results.

Remove Watermark from Videos and Preview the Effect
Wipit only removes watermarks and elements from user-owned or authorized content. Users must avoid infringing on others’ intellectual property rights. Unauthorized use of copyrighted material is illegal, and Wipit and Gemoo strictly condemn such software usage.
Remove Watermark from Videos Online Free without Blur
Removing watermarks from videos can be a common need, especially when you want to use the video for personal or professional purposes. With media.io’s Watermark Remover, you can easily remove watermarks from your videos online for free without causing any blurring or distortion. Here are the steps to remove watermarks from videos using Media.io Watermark Remover:
Steps to Remove Watermarks from Video Online with Media.io Watermark Remover:
Step 1: Go to the media.io website and navigate to the “Video Tools” section, on the homepage.
Step 2: Select “Watermark Remover”: Within the “Video Tools” section, locate and click on the “Watermark Remover” tool.
Step 3: Click on the “Upload Video” button to select and upload the video file from which you want to remove the watermark. Make sure you have the necessary rights and permissions to edit the video.
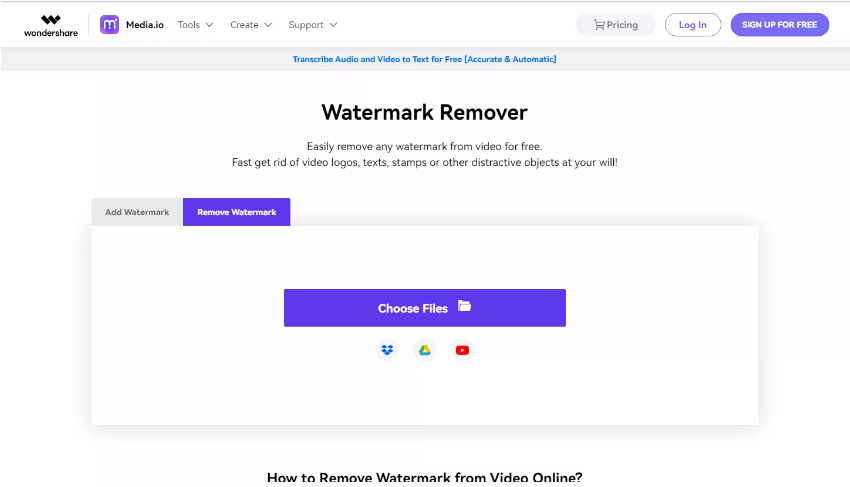
Upload the Video
Step 4: After the video is uploaded, the media.io Watermark Remover will automatically detect and analyze the watermark in the video. It will then proceed to remove the watermark without introducing any blurring or distortion to the original video.
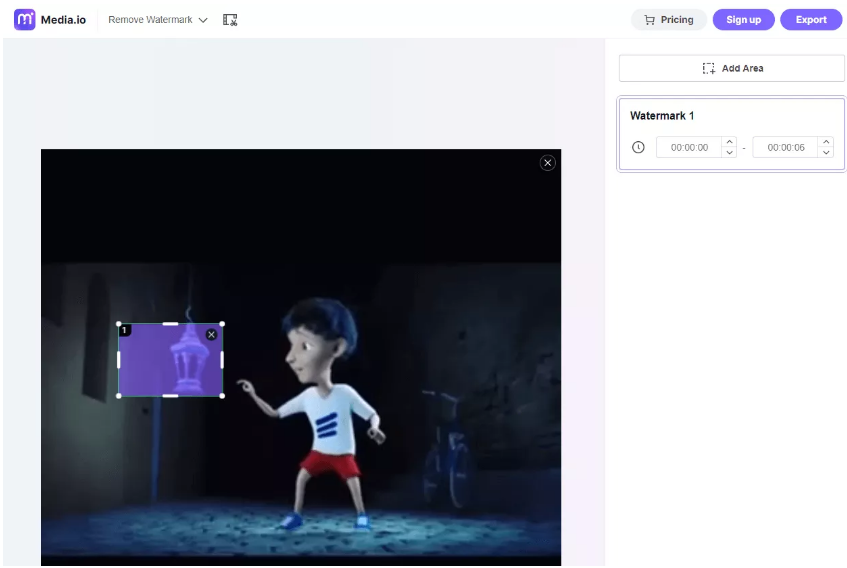
Remove the Watermark
Step 5: Once the watermark removal process is complete, you will be provided with a preview of the video without the watermark. To download the watermark-free video, click on the “Download” button.
Step 6: Choose a location on your device where you want to save the watermark-free video and click “Save” or “OK” to start the download process.
Remove Watermarks from Videos without Blur on PC
When it comes to removing moving watermarks from videos on desktop platforms, HitPaw Watermark Remover proves to be a reliable software solution. This intuitive tool offers advanced features and a user-friendly interface.
To remove watermarks using HitPaw Watermark Remover, follow these steps:
Step 1: Download and install HitPaw Watermark Remover on your computer.
Step 2: Launch the software and import the video file containing the watermark.

Open HitPaw Watermark Remover
Step 3: Use the software’s AI-powered tools to automatically detect and remove the watermark without causing blur.

Remove the Watermark
Step 4: Preview the video and make necessary adjustments if needed.
Step 5: Export the video without the watermark and save it to your preferred location.
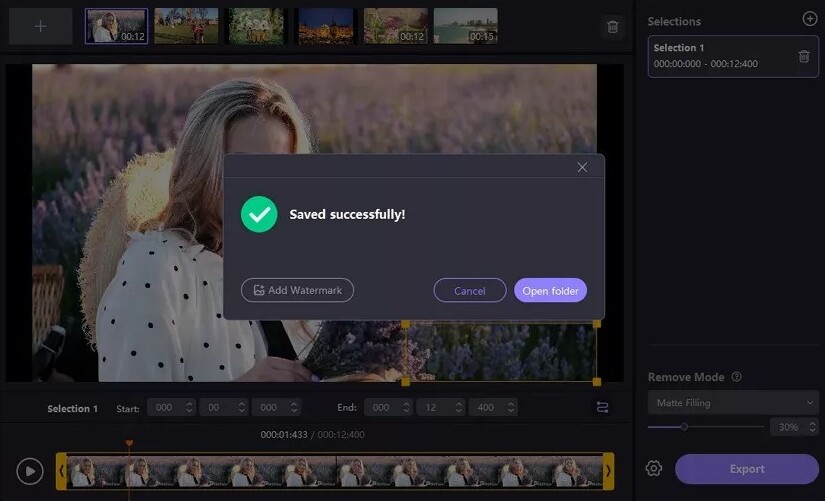
Saved The Image Successfully
Remove the Watermark from the Video by Cropping the Video
Cropping the video is another effective method to remove watermarks, although it may result in the loss of some content adjacent to the watermark. This method can be executed using software like iMovie for Mac or Windows Video Editor for Windows.
Remove Watermark from Video on Mac with iMovie
Cropping is a commonly used technique to remove watermarks from videos using iMovie on a Mac. By adjusting the frame size and position, you can effectively eliminate unwanted watermarks from your videos. To remove watermarks by cropping the video using iMovie, follow these steps:
Step 1: Open your video in iMovie and click on the “Cropping” button to reveal the cropping controls.
Step 2: Click on the “Crop” button, which will display an adjustable frame on top of the video in the viewer.
Step 3: Move and drag the frame until the watermark is completely covered and removed from the video.
Step 4: Once you’re satisfied with the positioning, click the “Apply” button to confirm the changes.
Step 5: Finally, click on the “File” menu and choose the option to save your video with the watermark removed.
Remove Watermark from Video Windows with Windows Video Editor
If you’re using a Windows operating system, you can utilize the built-in Windows Video Editor to remove watermarks from your videos. Here are the steps to remove watermarks from a video using Windows Video Editor:
Step 1: Open the Photos app on your Windows computer and navigate to the “Video Editor” section.
Step 2: Drag and drop the video file containing the watermark onto the first storyboard at the bottom of the interface. Alternatively, click on the “Import” button and select the video file from your computer.
Step 3: If you want to remove the black bars from the video, click on the frame-shaped icon located on the right side of the speed icon. This will open the cropping tool.
Remove Watermark on Android and iPhone
Removing watermarks on the go is possible with dedicated mobile apps such as Video Erase for iPhone and Remove Logo from Video for Android. These apps provide simple and efficient methods to remove watermarks directly from your mobile device.
Remove Watermark on iPhone – Video Erase
If you have watermarked videos on your iPhone and want to remove the watermarks, you can use the Video Erase app. With Video Erase, you can easily remove watermarks from your videos directly on your iPhone.
Steps to Remove a Watermark on an iPhone – Video Erase:
Step 1: Download and install the Video Erase app from the App Store on your iPhone.

Install the Video Erase App
Step 2: Open Video Erase and import the video file that contains the watermark. You can do this by tapping on the “Import” or “Add” button within the app and selecting the desired video from your iPhone’s photo library.
Step 3: Use your finger to select the area of the video that contains the watermark. Video Erase will automatically analyze the selected area for accurate removal.
Step 4: Once you have selected the watermark area, tap on the “Erase” or “Remove” button in Video Erase. The app will process the video and remove the watermark from the selected area.
Step 5: After the watermark removal process is complete, tap on the “Save” or “Export” button to save the edited video without the watermark. Choose the desired video format and location to save the watermark-free video on your iPhone.
Remove Watermark on Android – Remove Logo
If you have watermarked videos on your Android device and want to remove the watermarks, you can use the Remove Logo app.
Steps to Remove Watermark on Android – Remove Logo:
Step 1: Download and install the Remove Logo app from the Google Play Store on your Android device.
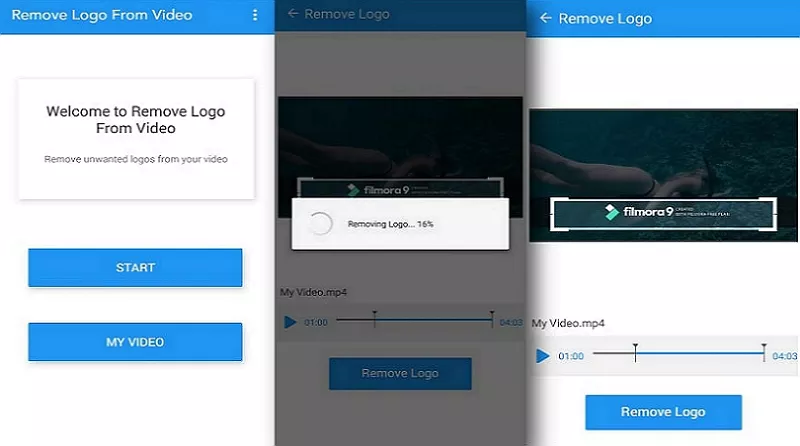
Install the Remove Logo App
Step 2: Open Remove Logo and import the video file that contains the watermark. You can do this by tapping on the “Import” or “Add” buttons within the app and selecting the desired video from your device’s gallery.
Step 3: Use your finger to draw a rectangle or select the area of the video that contains the watermark. Remove Logo will automatically analyze the selected area for precise removal.
Step 4: Once you have selected the watermark area, tap on the “Remove” or “Erase” button in the Remove Logo. The app will process the video and remove the watermark from the selected area.
Step 5: After the watermark removal process is complete, tap on the “Save” or “Export” button to save the edited video without the watermark. Choose the desired video format and location to save the watermark-free video on your Android device.
Final Thought
Removing watermarks from videos without blur is a common need for content creators and individuals alike. With the advancements in video editing technology, it is now possible to remove watermarks effectively while preserving the video’s original clarity and quality. The process can be straightforward and efficient by using Wipit, just free download and have a try!
By following the step-by-step instructions provided, you can remove watermarks from your videos seamlessly, allowing you to create professional-looking content or preserve cherished memories without the distraction of unwanted watermarks. Embrace the power of these tools and enjoy watermark-free videos that truly shine.


