
Record Computer Screen with Audio
If you want to record and share your latest gaming exploits with the world or would just like to instruct someone how to use a software tool, creating a video that shows your computer screen can be the right solution. Of course, you also need voice recorders to record an audio stream to follow the video is preferable in most cases.
Recording your computer monitor is not very hard to do on a PC or Mac computer, but you need to know which tools are the most optimal for this simple task on each platform. There also might be some requirements and limitations that you should know about before you select the method you will use.
This article will teach you how to screen record computer screen with sound and create great-looking clips that you can save locally on your hard drive or share over the internet.
Also read: Screen Record on TikTok >
| Product | Best For | OS | Get it |
| FucuSee | Automatic zoom effect and mouse tracking. Ideal for creating demo and tutorial videos | Windows, macOS | Download it free |
| QuickTime Player | Record your screen on Mac quickly | macOS only | Read more |
| OBS Studio | Video recording and live streaming | Windows, macOS | visit |
| Xbox Game Bar | Capturing game highlight moments | Windows only | Read more |
| Free Cam | Screencasts and edit recorded videos | Windows only | visit |
| Windows 11 Snipping Tool | Screen capturing | Windows 11 build number 22621.1344 or higher | Read more |
Record Screen and Audio on Windows and Mac via FocuSee
How to Screen Record on Windows with Audio
How to Record Screen and Audio on Mac
If you want to create video tutorials and online courses, make your product a demo video, market your business to online customers, or record new moves in your favorite game, then use FocuSee, which lets you record your computer screen with an auto zoom effect. In addition to allowing you to record screen and audio at the same time, FocuSee can also record the camera and screen at the same time. After recording, you can also edit your recording directly in FocuSee.
Key features of FocuSee:
Please free download FocuSee to start the wonderful experience of recording screen and microphone.
Step 1. Launch FocuSee on the computer and enter your account and password to log in to FocuSee.
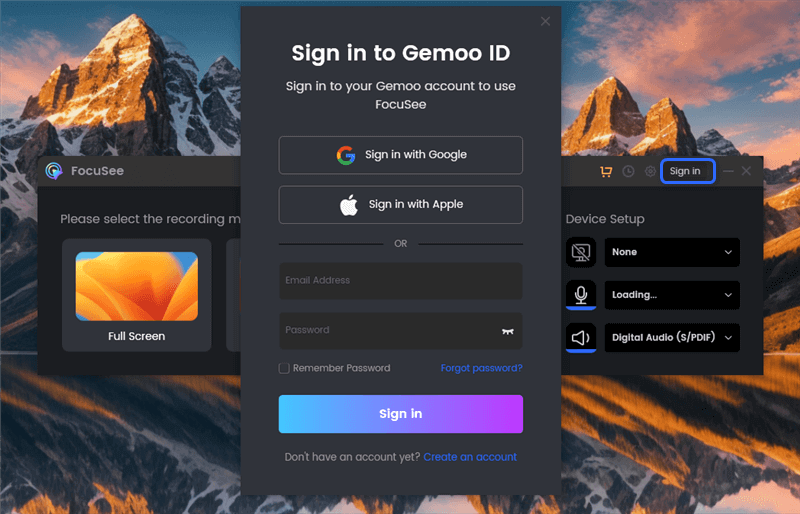
Create an Account and Activate FocuSee
Step 2. FocuSee supports 3 recording modes: record the full screen, custom the recording area, or record the window. You can choose the one you want to record.
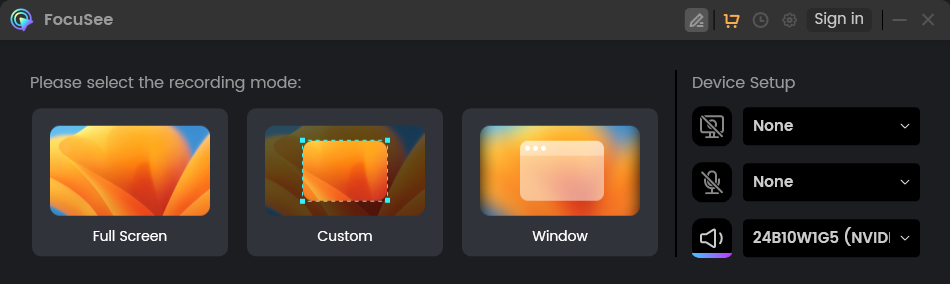
Three recording Modes of FocuSee
Step 3. After choosing the recording mode, please just focus on your screen recordings. Let FocuSee handle the post-production automatically. You can get a visually appealing video as soon as you finish recording. After recording, you can change the background, adjust the cursor style, add captions and more.
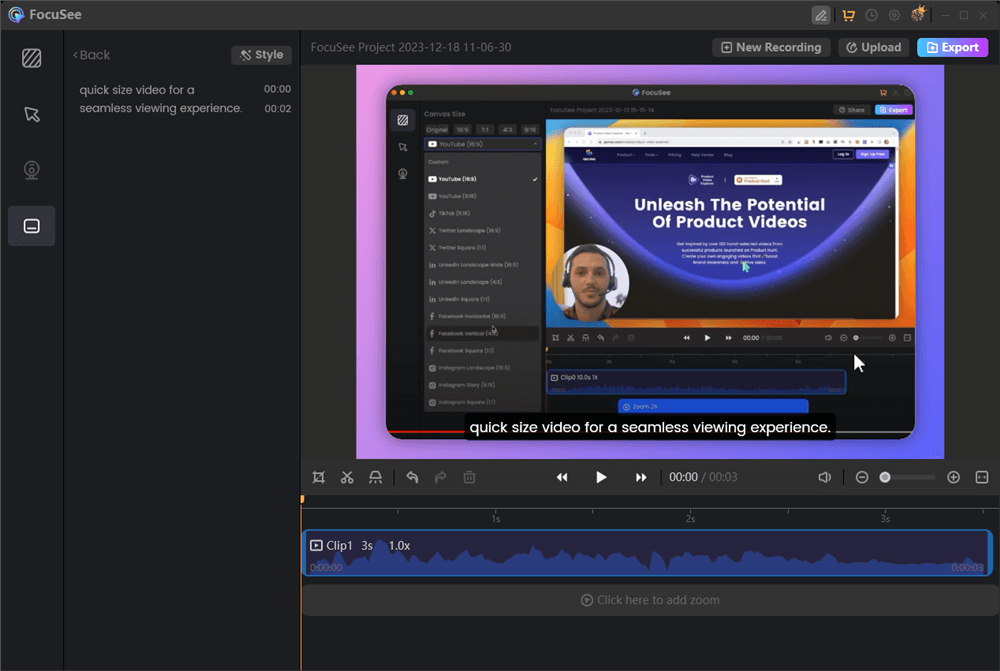
Automatically Generate Captions
Step 4. Then, export your recordings as an MP4 or GIF file or share it with a link easily.
How to Export the Video
Also Read: 15 Best and Free Guitar Recording Software >
PC users have just as broad a palette of options for screen recording and can choose between excellent built-in tools and specialized third-party products. With proper guidance, anyone curious about how to screen record on Windows with audio will be able to discover a way that suits his skill level. Here are some suggestions worth exploring:
The latest version of Windows has a built-in tool that lets you record your screen while you are playing a game or using another app. The feature is named Xbox Game Bar and can be activated simply by hitting a shortcut on the keyboard, so it’s ideal for high-paced action. However, there are limitations to what you can record in this way so this option might not work for everyone.
To record your screen on a PC with Xbox Game Bar, just do the following.
Step 1. Open the Xbox Game Bar
The fastest way to open the Xbox Game Bar is to press the Windows + G keyboard shortcut. Alternatively, you can search for “Xbox Game Bar” in the menu and select it.
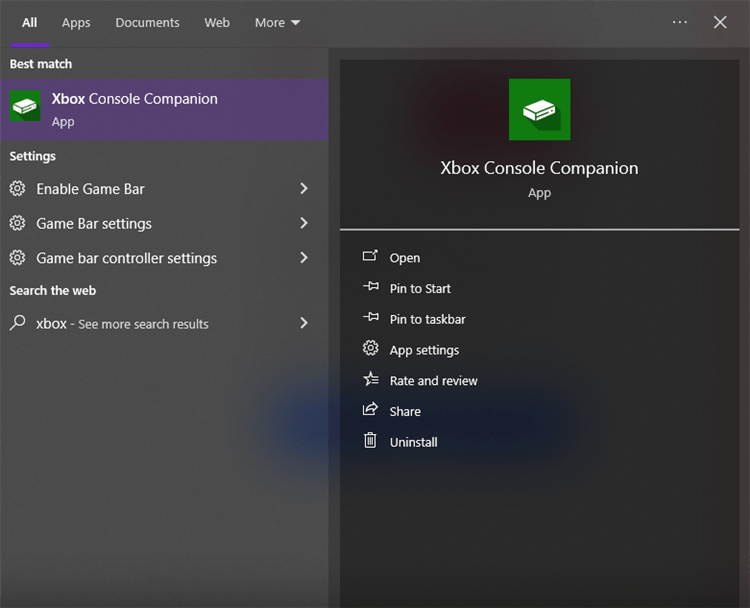
Open the Xbox Game Bar
Step 2. Configure Video and Audio Settings
Use widgets that open across the screen to choose details about video and audio.
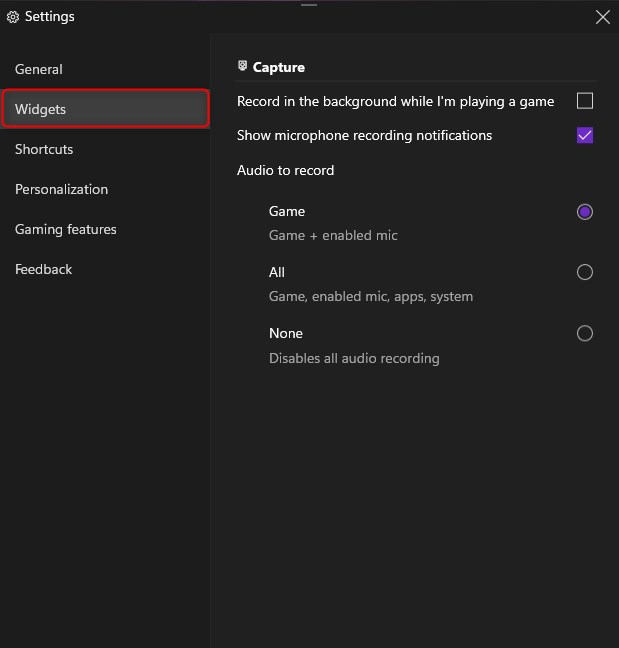
Configure Video and Audio Settings
Step 3. Start the Screen Recording
Press Windows, Alt, and R buttons on the keyboard at the same time to start recording. Or click on the Record button in the Capture floating window.
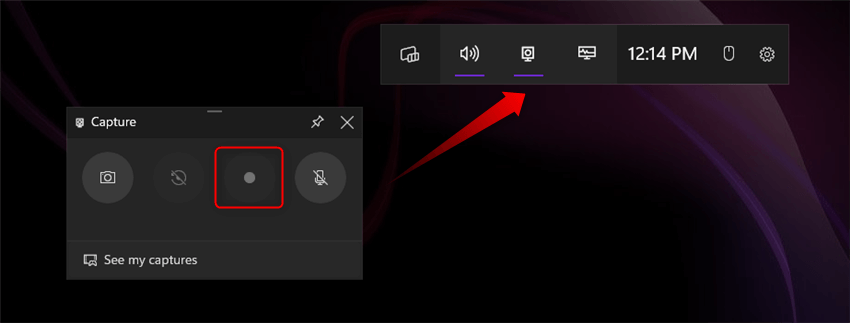
Start the Screen Recording
Step 4. Access Your Recordings
To view your recorded videos, click on the “See my captures” option in the Capture floating window.
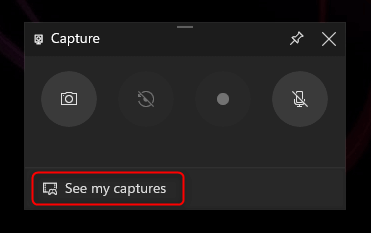
View Rour Recorded Videos
Further Reading: How to Fix Xbox Game Bar Screen Recording Not Working >
Free Cam is another simple but effective software that allows you to record your activity on a PC computer. Not only you can make videos of unlimited length with integrated sound with this tool, but you can also edit them in the same program. You can download this software to your Windows-based machine for free and use it whenever you want to record the content on your screen. Here is what you need to do to create a new video with Free Cam:
Step 1. Download Free Cam to your computer and run it.
Step 2. Select Screen Recording and define the area to be captured and other settings.
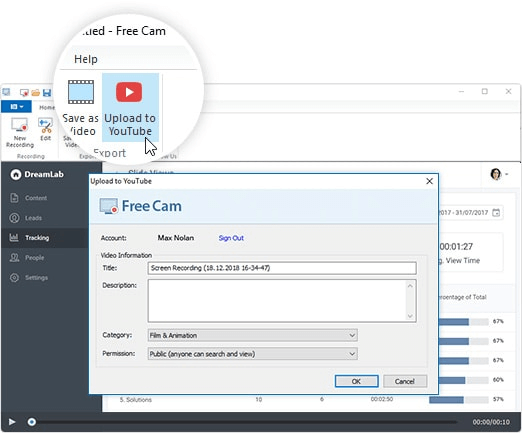
Record Windows Screen with Audio by Free Cam
Step 3. Enable audio capturing and start recording.
If you are a Windows 11 user, Snipping Tool is not only a screenshot software for you now, it can also record your computer screen. To record videos using Snipping Tool, you need to use the in-app controls as there is no predefined shortcut or option to map a shortcut for screen recording in the app settings.
Follow these steps to screen record in Snipping Tool:
Step 1. Open Snipping Tool on Windows 11
Press the Windows key + S simultaneously to open the Windows Search bar > Type “Snipping Tool” and select the “Open” option to launch the application.
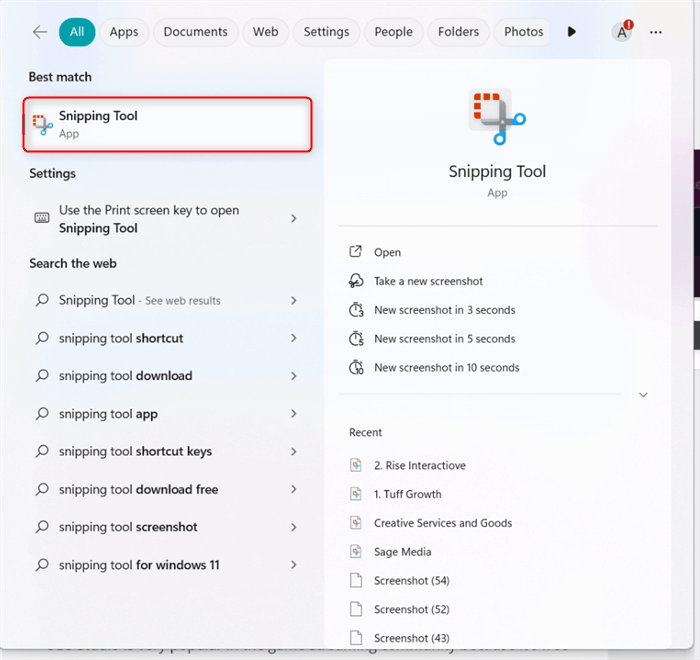
Open the Snipping Tool
A window will appear that looks like this:
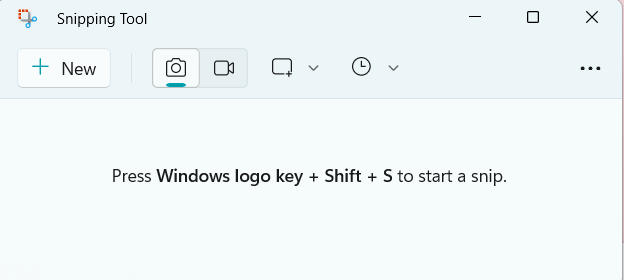
Snipping Tool Interface
Step 2. Choose the Record Mode
Once opened, click on the Record icon located on the top bar to activate the screen recording feature.
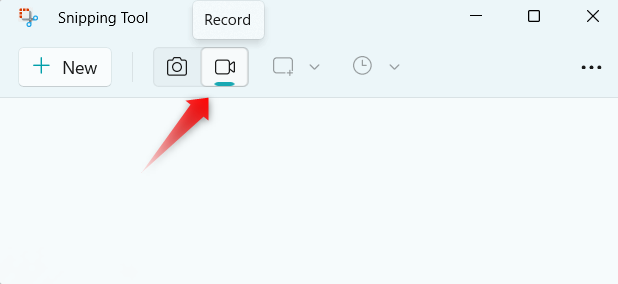
Activate the Screen Recording Feature
Click on the New button or use the shortcut Ctrl + N after selecting the screen recording feature. This will open the screen recording overlay.

Open the Screen Recording Overlay
Step 3. Select the Recording Area
Next, use the slider to choose the specific area of the screen you wish to record. You can opt for a small section or capture the entire screen.
Once you have selected the area, click on the Start button to commence the recording. The duration of the recording will be displayed on a timer.
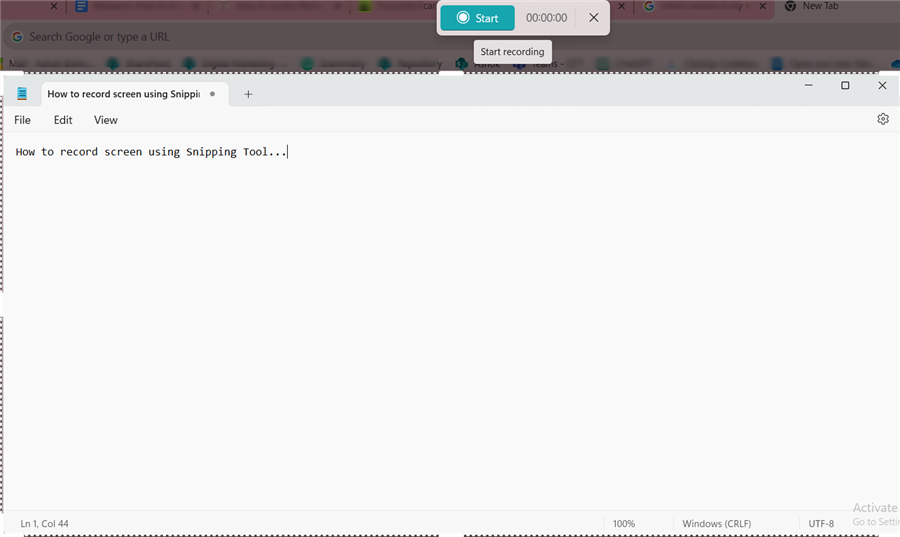
Crop the Area You Want to Record
Step 4. Save Your Recordings
After finishing the recording, save it by selecting the “Save as” option or use the shortcut Ctrl + S in the top right corner of the Snipping Tool window.
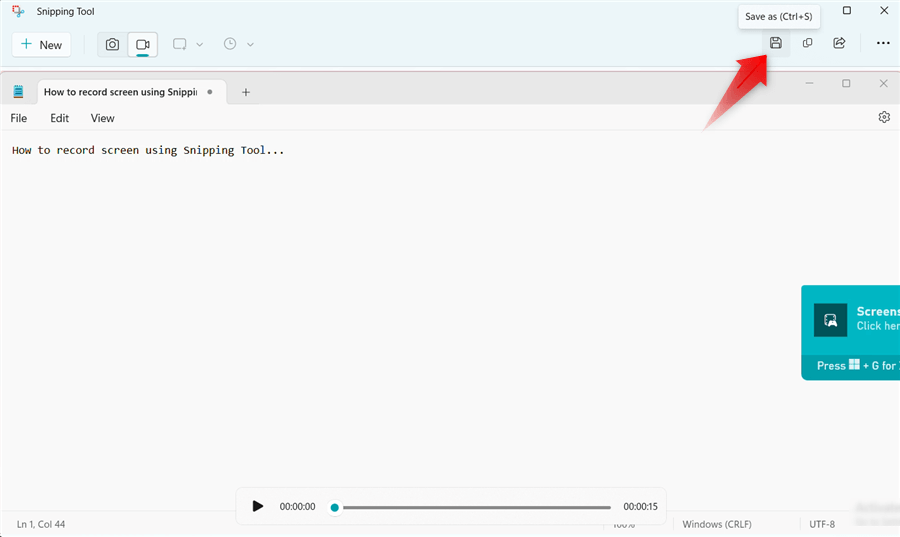
Save Your Recording
If you own a Mac computer, you won’t have a shortage of options for screen recording. In fact, there is a standard screencast software that comes as a part of macOS that can complete this task easily, as well as specialized software suites you can install on your computer. Here are the possibilities at your disposal if you want to record screen on Mac with audio:
The simplest method for recording the content of your computer screen is based on the built-in screenshot tool you can find on every Mac computer running Mojave or later versions of macOS. The screenshot tool allows you to quickly capture the action with just a few commands, which may be essential to catching the right moment. Here is what to do to start recording your screen instantly:
Step 1. Press Shift + Command + 5 to open the built-in screenshot tool.
Step 2. Use the toolbar to select video recording and define the part of the screen to be covered.
Step 3. Turn on your microphone and hit the countdown button to start capturing.
QuickTime Player is the most popular media tool for Mac users, and it is one of the best options for recording your screen. If you already gave the software permissions to use your microphone and record the screen, activating this feature and making a new recording takes only a few clicks. Here is how to initiate a new recording from QuickTime Player:
Step 1. Launch QuickTime on your Mac.
Step 2. Open the File menu, and choose New screen recording.
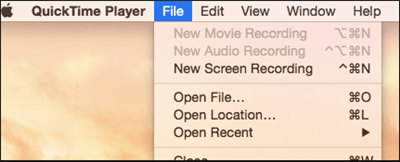
Choose New Screen Recording
Step 3. Click on the red dot icon to start recording the screen.
Unlike many other screen recording tools, OBS Studio is universally valuable and works great on a PC or Mac. You can use this practical app to capture everything you are doing on your computer and add system audio or your own voice on top of the visuals. You can record audio only or record screen and audio at the same time. Besides, it also has excellent editing tools that can help you make better and more visually attractive videos. To create a new recording, follow those steps:
Step 1. Open OBS Studio on your Mac desktop or laptop.
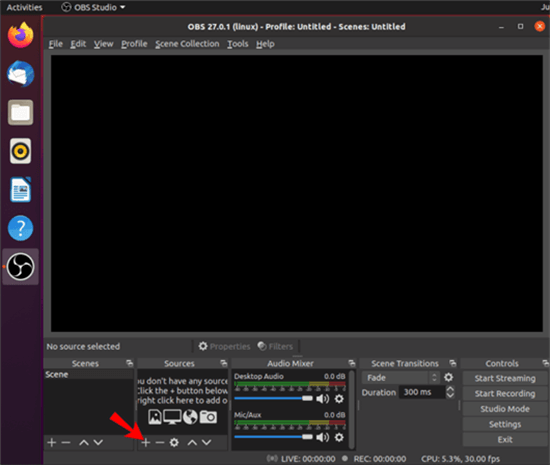
How to Record Mac Screen with Audio by OBS Studio
Step 2. Choose the type of recording, audio source, and other settings in the control panel.
Step 3. Click on Start recording when you are ready.
Google Chrome is one of the most popular web browsers, and it can be enhanced with extensions that allow simple screen capturing. With Chrome extensions for screen recording and Chrome video recorders, you can document everything you are doing on the internet with just a few clicks. We present you with some of the most popular extensions that are commonly used for this purpose.
Screen recorder gives the user a simple way to select the sources for video and audio feed, allowing the content from the screen and webcam to be combined with system audio and/or microphone. This simple software is hence suitable for making a wide range of videos directly from your computer without the need for more complex video-making and editing tools.
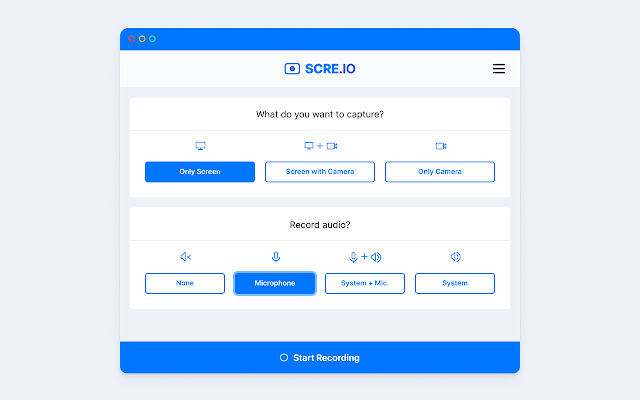
Record Screen and Audio on Chrome by Screen Recorder
With Screencastify you can have a lot of control over what you are capturing. The extension can record the content of the browser tab, the desktop, or input from the webcam, and it’s very easy to add sound to your recording. Finally, Screencastify makes it extremely simple to share recordings online, which is one of the main reasons why it’s among the most popular Google Chrome extensions.
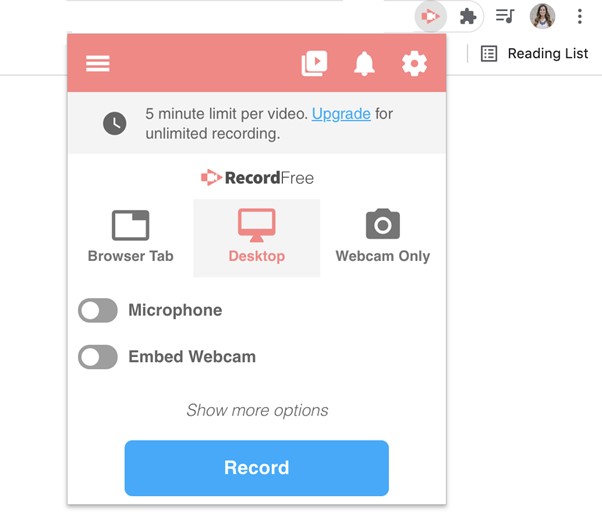
Screencastify Interface
Q1. Why would I want to record my screen and audio?
Screen and audio recording can be useful for creating tutorials, presentations, demonstrations, or capturing important information for later reference.
Q2. What file format will my screen recording be saved in?
Most screen recording software saves recordings in a common video file format, such as MP4 or MOV.
Q3. How do I record audio along with my screen recording?
You will need a microphone to record audio. Most screen recording software allows you to select the audio source, such as your computer’s built-in microphone or an external microphone.
As you can see, there is a wide variety of screen-capturing tools at your disposal regardless of which computer you own. While some of them come with certain limitations, you should still be able to find at least one that can do what you need it to. Once you learn how to record a computer screen with audio using any of them, you will be able to create multimedia clips without anyone’s help.
FocuSee
Record Screen and Audio on Windows & Mac [via FocuSee]
How to Screen Record on Windows 10 & 11 with Audio
How to Record Screen and Audio on Mac
How to Record Screen and Audio on Chrome
FAQs on How to Record Screen and Audio
The Bottom Line
60 seconds, let's create a better FocuSee together ✨
Join 1K+ innovators shaping 30+features✨ & claim your Gift! 🎁

Share your thoughts & earn a coupon instantly!
Warm reminder: This survey does not involve any of your private data.
Page 1 of 10


Coupon Code:
FSUS10
Note: Copy and use the promo code FSUS10 at checkout(valid within 24 hours)