Experiencing issues with your Xbox Game Bar screen recording can be frustrating, especially when you want to capture and share your gaming moments. But don’t worry, there are 10 potential fixes you can try to get your screen recording running smoothly again. There are 10 effective ways to troubleshoot and resolve common problems with Xbox Game Bar screen recording.
Xbox Game Bar Screen Recording Not Working
The Xbox Game Bar not recording can be due to several reasons, and there are various solutions to troubleshoot and fix the issue. Here are some common reasons:
If you’re experiencing issues with Xbox Game Bar screen recording not working, you can try the following steps to troubleshoot and resolve the problem:
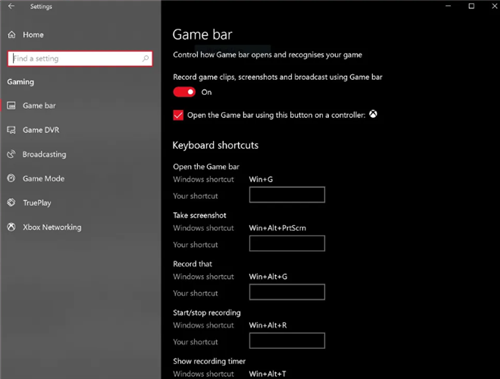
To ensure that you’re able to use the Xbox Game Bar for recording gameplay or other screen activities on your Windows 10 or Windows 11 PC, it’s essential to verify that the Game Bar is not only enabled but also properly configured to your preferences. Here’s a detailed guide on how to access and adjust the Xbox Game Bar settings:
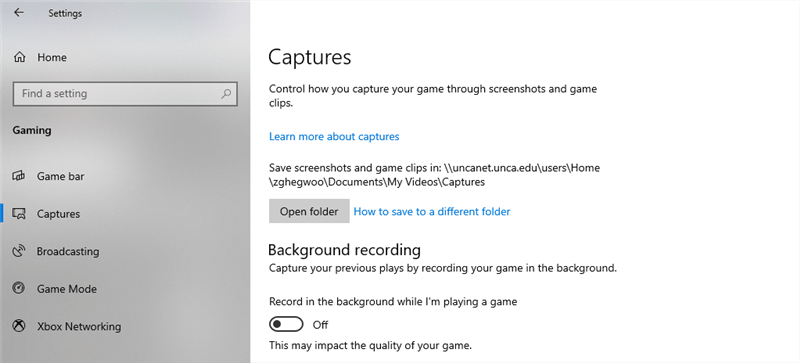
Check Xbox Game Bar Settings
1. Click on the Start button and then select the Settings icon (the gear symbol) to open the Windows Settings menu.
2. In the Settings menu, click on the “Gaming” tab, which will present various options related to gaming and game performance.
3. Within the Gaming settings, look for the “Xbox Game Bar” or a similar section that may be labeled under “Game Mode” or “Captures & broadcasts.”
4. Ensure that the toggle for “Xbox Game Bar” is switched on (it should be highlighted or show a checkmark).
Updating the Xbox Game Bar is an important step to ensure you have the latest features, performance improvements, and bug fixes. The Game Bar receives updates through the Windows Update system, which means that keeping your Windows operating system up to date will also update the Game Bar. Here’s how you can check for and install updates for the Xbox Game Bar:
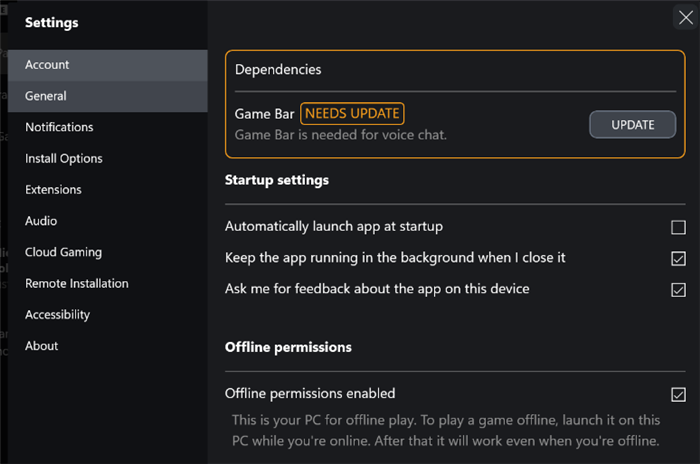
Update Xbox Game Bar
1. Click on the Start button and select the Settings icon。
2. In the Settings menu, click on “Update & Security.”
3. Under the “Windows Update” tab, click on “Check for updates.” Windows will then search for the latest updates available for your system.
If you’re still having trouble, you can record screen without Xbox. You can try using third-party screen recording software as an alternative to Xbox Game Bar. Several options available such as FocuSee can offer high-quality recording without time restrictions or watermark sometimes found with Xbox Game Bar.
FocuSee is a screen recording tool that not only captures your screen activity but also automatically applies a series of enhancements to create polished videos. Compared with Xbox Game Bar, it is designed to save you time and effort that would otherwise be spent on manual video editing.
Step 1. Free install FocuSee and launch it on your computer. Choose a screen recording mode and click the REC button to initiate the recording process.
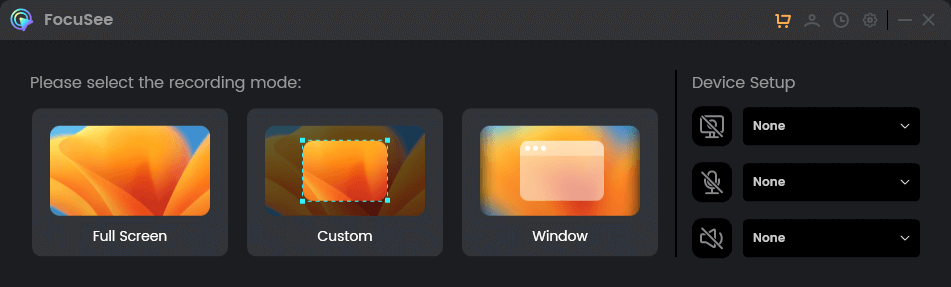
Choose a Recording Mode
Step 2. Record your activities on the screen and automatically apply zoom-in effects.

Frame an Area to Record
Step 3. Stop the recording process and go to the video editing interface to enhance your video with ease.
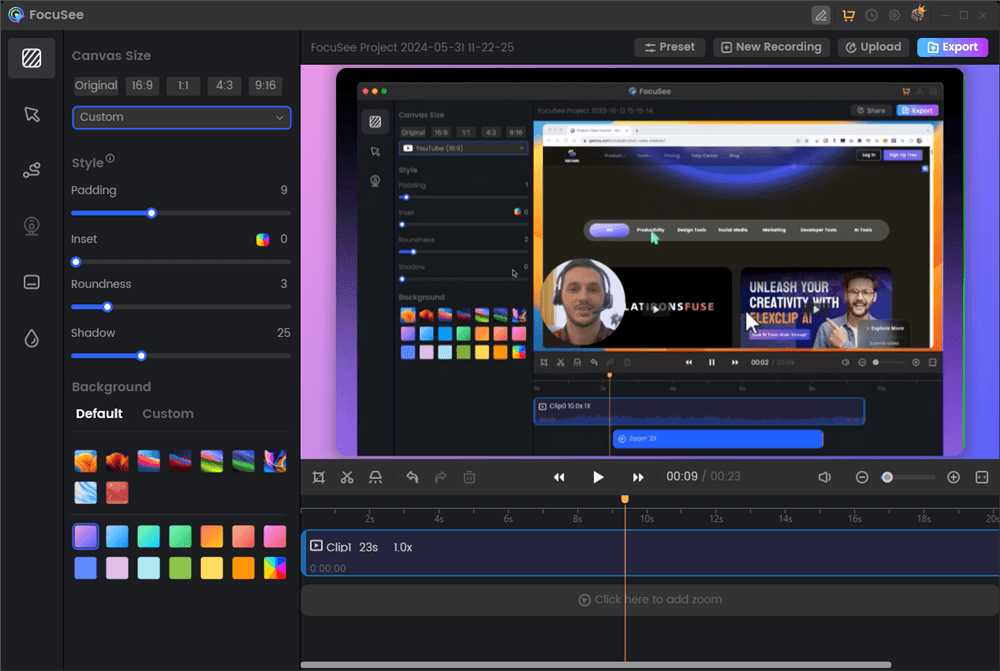
Video Editing Interface
Instead of using the Xbox Game Bar interface, try using the keyboard shortcut Windows logo key + Alt + R to start and stop recording. Here’s how you can use this shortcut:
1. Before you can use the shortcut, make sure that the Xbox Game Bar is enabled on your Windows 10 or later system. You can check this in the Settings app under Gaming > Xbox Game Bar.
2. While you’re in a game or any application you want to record, press the Windows logo key + Alt + R. This will start a new recording.
3. To stop the recording, simply press the same key combination (Windows logo key + Alt + R) again. The recording will be saved to your designated video folder.
If you’re experiencing issues with the Xbox Game Bar on your Windows 10 or later system and it’s not functioning as expected, you can indeed try resetting or repairing it. Here’s a step-by-step guide on how to do that:

Reset or Repair Xbox Game Bar
1. Click on the Start button and then select the Settings icon.
2. In the Settings window, click on “Apps” to access the list of installed applications.
3. Within the Apps section, click on “Apps & features” from the left-hand menu. Scroll through the list of applications to find “Xbox Game Bar”.
4. Click on “Xbox Game Bar” to highlight it. In the Advanced options, you may see several choices: the Repair option will attempt to fix any issues with the app without affecting your settings or data, while the Reset option will remove all the data, including settings and any game-related data, and reinstall the app to its original state.
If you’ve tried various troubleshooting steps and your Xbox Game Bar screen recording is still not working, uninstalling and reinstalling the feature from the Microsoft Store could be the next solution to try. Here’s how you can do it:

Reinstall Xbox Game Bar
1. Navigate to the Microsoft Store app on your Windows PC.
2. Use the search function to locate the Xbox Game Bar or navigate to the gaming section where it might be listed.
3. Once you’ve found the Xbox Game Bar, click on it to open its page. Look for an “Uninstall” button and confirm the action when prompted.
Some games may have built-in restrictions that prevent screen recording, either due to copyright or anti-cheat measures. When you attempt to use the Xbox Game Bar’s recording feature while playing these games, you may find that the recording does not start, or if it does, it may not capture the gameplay correctly.
Here are a few things you can try if you encounter this issue:
If the Xbox Game Bar is not recording due to insufficient space on your C drive, you can change the default save location for your recordings to another drive with more available space. Here’s how you can do it:
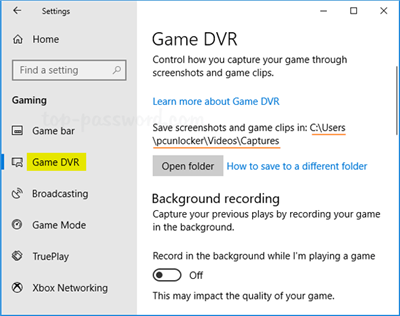
Change Video Capture Location
1. Click on the Start button and then select the Settings icon. In the Settings window, click on “Gaming”.
2. Within the Gaming option, click on “Game DVR”.
3. Look for a section that allows you to change where new content is saved.
4. Look for and tap on the “Open folder” button and ensure that the save location is set to the new drive you’ve chosen. Save any changes you’ve made.
Encountering an error code like 0x8007007B (or any other specific error code) while trying to record with the Xbox Game Bar indicates that there’s a particular issue that needs to be addressed. The error code 0x8007007B is commonly associated with issues during the Windows activation process.
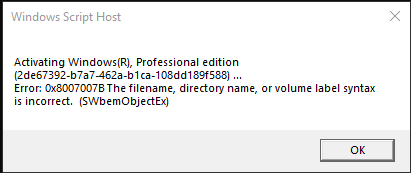
Check for Errors and Codes
Here are several methods to fix this error based on the information provided from various sources:
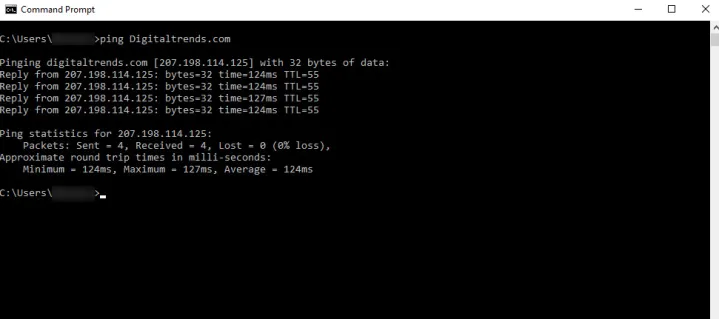
Command Prompt
Ensure that the gaming capture feature is enabled in Windows can also fix Xbox Game Bar screen recording not working. Follow these steps to verify and enable the gaming capture feature within Windows:
Enable Gaming Captures
After confirming that the capture feature is enabled and making any desired adjustments, close the Settings application to apply your changes.
Remember to follow these steps in order and check if the issue is resolved after each step before proceeding to the next one. If none of these solutions work, you may need to contact Microsoft Support for further assistance.
FocuSee
Why Is the Xbox Game Bar Not Recording?
How to Fix Xbox Game Bar Not Recording?
Final Thought