In recent years, recording clips on your PC has become an essential skill for various purposes, such as making video tutorials, sharing gameplay experiences, making video presentations, or capturing important moments during video calls. Whether you’re a content creator, educator, or professional, knowing how to record high-quality clips on your computer can greatly enhance your ability to communicate and share information effectively.
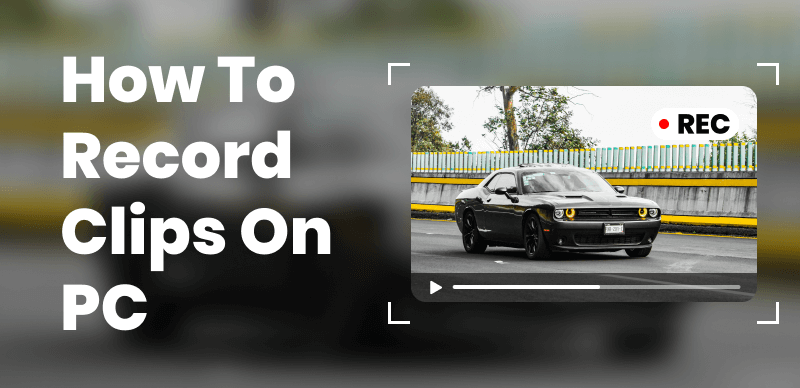
How to Record Clips on PC
In this article, we will explore the various methods and tools available for recording clips on your PC. Whether you’re a beginner looking to start creating video content or an experienced user seeking to enhance your recording skills, this guide will provide you with the knowledge and techniques necessary to record professional-quality clips on your computer.
Table of Contents: hide
Can Windows Snipping Tool Record Video?
Can Windows Snipping Tool Record Video?
No, the Windows Snipping Tool cannot record video. The Snipping Tool is a built-in utility in Windows that allows users to capture screenshots or “snips” of their screen. It offers various snipping modes, such as free-form, rectangular, window, and full-screen snips, but it cannot record video.
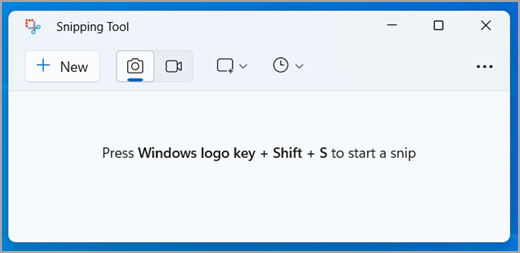
Can Windows Snipping Tool Record Video
The Snipping Tool is designed specifically to capture still images of the screen, which can be useful for quickly sharing or saving visual information. However, if you need to record video on your Windows computer, you’ll need to use other screen recording tools.
Proven Ways to Record Video Clips on PC
Recording video clips on your PC has become an increasingly important skill in today’s digital landscape. Whether you’re creating tutorials, showcasing your gaming skills, or capturing important moments during online meetings, having the ability to record high-quality video clips is essential. In this article, we will explore several proven ways to record video clips on your PC, providing you with detailed steps to help you get started.
Record Video Clips on PC with a Professional Screen Recorder
FocuSee is a powerful screen recording tool that offers a wide range of features and customization options, making it suitable for both beginners and advanced users. With FocuSee, you can easily record your entire screen, a specific window, or a selected area, giving you the flexibility to record video clips in the way you need.
Without requiring extensive technical knowledge, you can apply the auto zoom-in feature during the recording and automatically generate subtitles after your recordings. To enhance the quality and functionality of your recorded video clips, you can trim video clips, crop the video clips to focus on specific areas, apply mouse cursor effects to highlight your interactions, and add watermarks to protect your content or brand your videos.
Step 1. Free download and install FocuSee on your computer. Select the area you want to record or choose to record the entire screen.
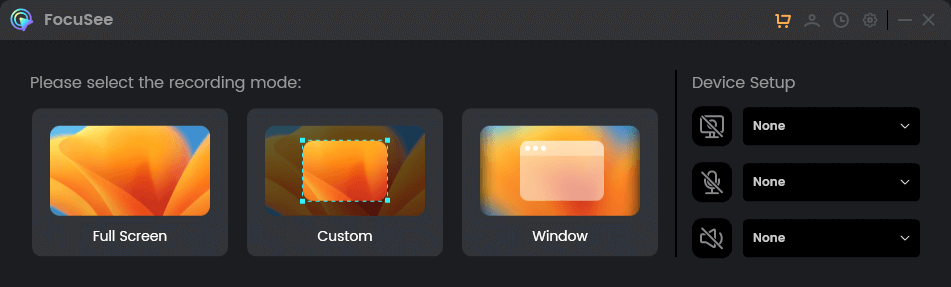
Choose a Recording Mode
Step 2. Start to record and the auto zoom-in feature will work during your screen recording.

Frame an Area to Record
Step 3. To stop recording, click the red “Stop” icon or press the hotkey. After recording, you can trim, crop, or perform other edits to your recorded clips
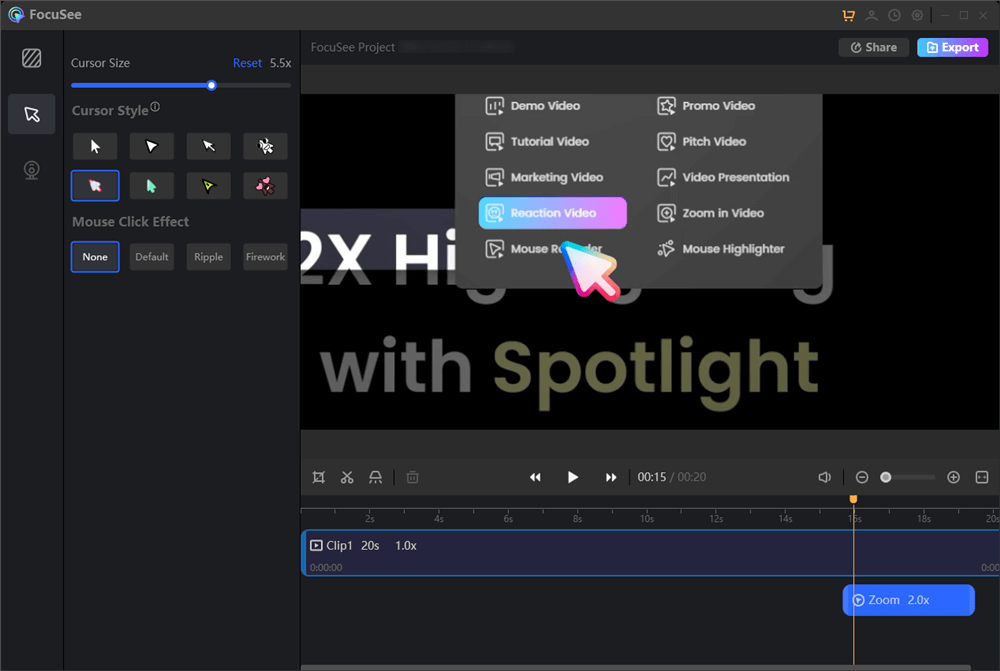
Edit Your Recording
Record Video Clips on PC with Built-in Windows Tool
The Xbox Game Bar is a built-in feature of Windows 10 that provides a convenient way to record video clips on your PC. Originally designed for capturing gaming moments, the Xbox Game Bar has evolved into a versatile tool that allows you to record not only gameplay but also any application or screen activity on your computer.
One of the main advantages of using the Xbox Game Bar for recording video clips is its seamless integration with the Windows operating system. As a native feature, the Xbox Game Bar is readily available on your PC without additional software installation. This means you can quickly access the recording functionality with just a few keystrokes, making it a convenient option for capturing video clips on the fly.
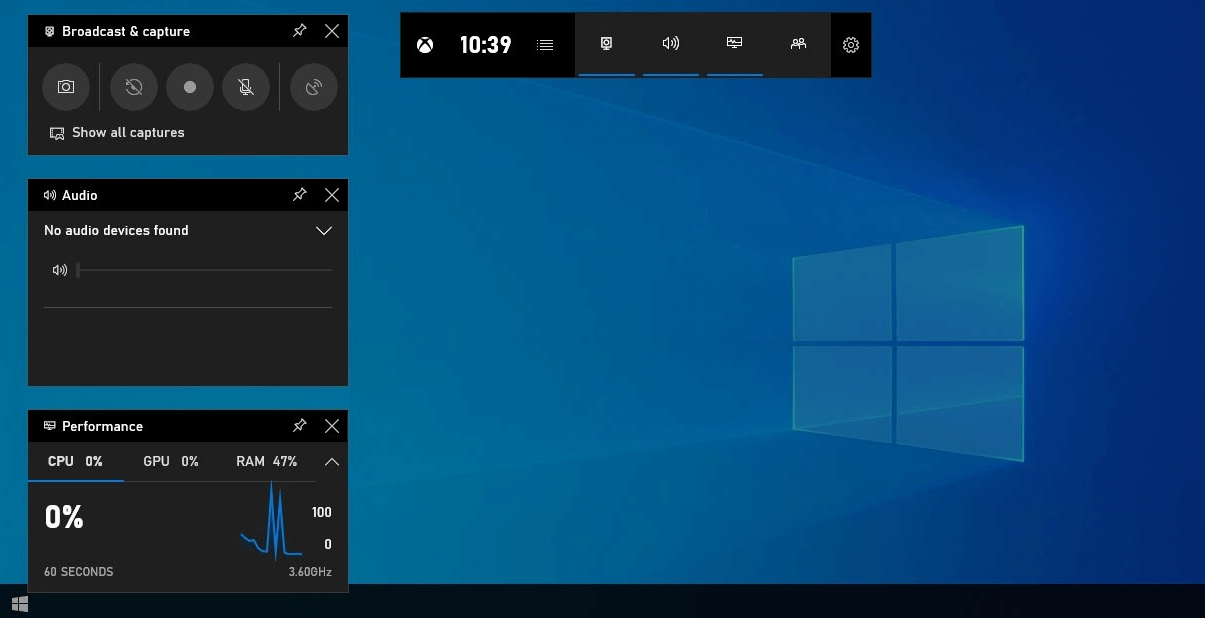
Record Video Clips on PC with Xbox Game Bar
Here is how to use Xbox Game Bar to record video clips on your PC.
Step 1. Press the Windows key + G to open the overlay.
Step 2. Click on the “Capture” button or use the keyboard shortcut Windows key + Alt + R to begin recording.The Xbox Game Bar will capture your screen activity, including audio from your microphone or system sounds, depending on your settings.
Step 3. Once you’re done recording, you can stop the capture by clicking the “Stop” button or using the same keyboard shortcut.
Where Are Clips Saved on PC?
The location where clips are saved on your PC depends on the application or method you used to create the clips. However, here are some common default locations where you might find your saved clips.
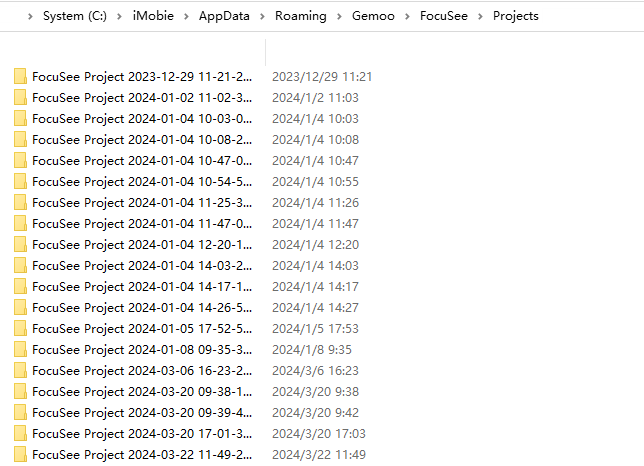
Where Are Clips Saved on PC
Windows default “Videos” folder
Many applications save video clips to the user’s “Videos” folder by default. The path is typically: C:\Users[YourUsername]\Videos.
Application-specific folders
Some applications create their folders within the “Videos” directory or in the “Documents” folder. For example, Camtasia might save projects to: C:\Users[YourUsername]\Documents\Camtasia.
Xbox Game Bar clips
If you use the Xbox Game Bar to record clips, they are saved in a dedicated folder. The default path is: C:\Users[YourUsername]\Videos\Captures.
Custom save locations
Many screen recording applications allow you to choose a custom save location for your clips. If you have specified a custom location, you’ll find your clips in the folder you selected.
Downloads folder
If you have downloaded a clip from the internet, it will likely be saved in your “Downloads” folder. The path is: C:\Users[YourUsername]\Downloads.
If you’re unsure where a specific application has saved your clips, you can try searching for the file using the Windows Search feature. Press the Windows key, type the name of your clip or the application you used to create it, and Windows will search for matching files on your computer.
Additionally, most video recording applications have a “Save As” or “Export” option that allows you to choose the location where you want to save your clips. By default, the application will usually open the last location where you saved a file, which can help you find your previously saved clips.
Final Thought
Throughout the article, we provided step-by-step instructions and detailed explanations to help you understand how to use each tool effectively. By following these guidelines, you can quickly master the art of recording video clips on your PC, regardless of your experience level or technical expertise.
As you continue to explore and refine your video recording skills, remember to keep your audience and purpose in mind. Consider factors such as video quality, audio clarity, and overall presentation to ensure that your recorded clips effectively convey your message and engage your viewers. With practice and persistence, you’ll be able to create professional-quality video clips that captivate your audience and leave a lasting impact.