Podcasting, voice acting, music creation, live music, and live streaming are a few operations that need audio recording. Content creators often look for software options that have both variety and capacity to fulfill these various objectives. One such well-liked software program that is excellent at collecting and recording audiovisual output is Open Broadcaster Software (OBS). In this in-depth tutorial, we will examine the technique of using OBS to record audio on both Windows and Mac platforms.
OBS Record Audio Only
For those who wish to record audio in high-quality, OBS is a fantastic choice since it has several capabilities and flexible settings. OBS, renowned for its ability to record and broadcast video, also has the option to record audio independently, enabling users to focus only on capturing high-quality sound. You can use the OBS recording audio-only feature to quickly and easily record any given audio! Let’s find out more:
Table of Contents: hide
Can OBS Record Audio Separately?
Does OBS Record Mic and Desktop Audio Separately?
How to Record Audio Only on OBS Windows?
How to Record Audio Only on OBS Mac?
Can OBS Record Audio Separately?
Certainly! OBS allows individual video and audio recording to provide users autonomous control over these two elements. This capability is very helpful for content producers who need to handle their productions’ audio and video components precisely.
OBS Recording Audio Only
Users may choose independent sources for video and audio inputs to accomplish separate video and audio recordings in OBS. They have a variety of video sources to pick from, including a linked camera, a connected window or a screen capture. Similarly, distinct audio sources, such as microphone input, system audio, or particular application audio, may be chosen.
Users have more post-production options using OBS to record video and audio independently. They may manually edit each component, modifying the audio and video tracks separately to get the desired effects.
Does OBS Record Mic and Desktop Audio Separately?
Yes, OBS provides the option to independently record desktop and microphone audio, giving users independent control over these two audio sources throughout the recording process. This function is very helpful for multimedia producers who need to split the microphone and desktop audio tracks for post-production editing, volume adjustments, or other effects.

OBS Record Mic and Desktop Audio Separately
Users may set up various audio sources for the desktop and microphone to be recorded independently in OBS. Users of OBS may choose their microphone as one audio source and the desktop audio (system audio) as another source. In this manner, the desktop audio will record the audio playing from the computer, such as system noises, music, or game audio. In contrast, the microphone audio would record their speech or any other external audio input.
How to Record Audio Only on OBS Windows?
Content creators may easily record high-quality audio using OBS on Windows without utilizing video, and the method is straightforward. You may set up OBS on your Windows machine to record audio-only content by following these steps.
Step 1: Visit the official OBS website to get OBS for Windows. Open the installer, then follow the on-screen instructions to complete the installation process.
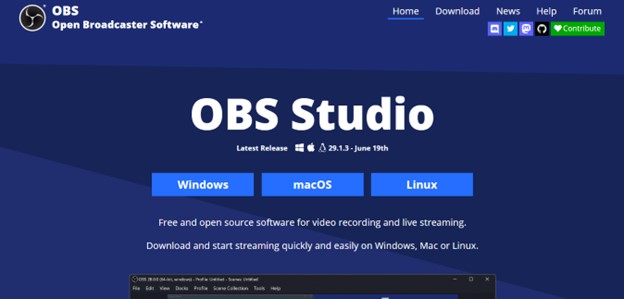
Download and Install OBS Studio
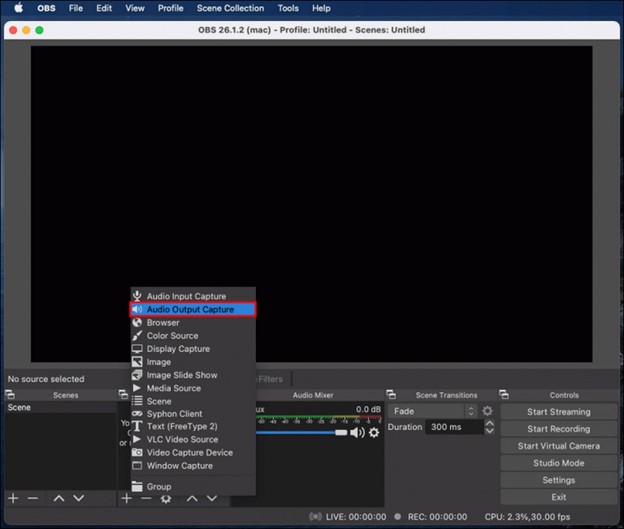
Step 2: Navigate to the “Sources” section of OBS. By pressing the “+” button, choose “Audio Input Capture” from the drop-down menu.
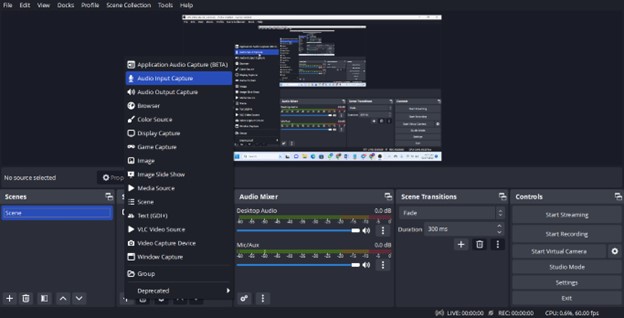
Setup OBS
Step 3: Choose “Microphone” as the audio source and press “OK.” Choose your microphone from the drop-down menu in the properties window, then click “OK.”
Step 4: Opt for the “Audio” option under “Settings” in OBS. You should have “Monitor Only” selected for your microphone input in the “Audio Monitoring Device” section. Ensure the desktop audio option is off or muted to capture audio exclusively.

Configure Audio Settings In OBS Studio
Step 5: From the “Settings” menu, choose the “Output” tab. Choose the audio format you like. To save the adjustments, click OK.
Step 6: Click the “Start Recording” button to begin recording audio in OBS. Select “Stop Recording” in OBS to stop recording.
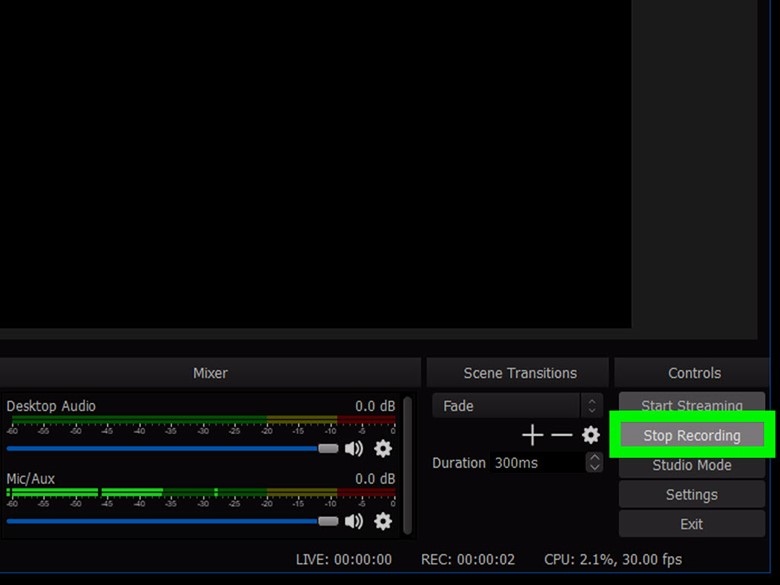
Stop Recording In OBS Studio
These instructions will help you properly use OBS on Windows to record audio-only material. To assist you in producing professional-caliber audio recordings for different content production objectives, OBS offers a variety of customizable options and settings. With OBS, enjoy recording pristine sound and unleash your creativity!
How to Record Audio Only on OBS Mac?
Using OBS on a Mac to record audio alone is a quick and easy way for content creators to capture high-quality audio without video. There are two basic scenarios to consider while capturing audio on a Mac device.
Step 1. Mac’s built-in operating system restrictions block direct audio recording from any source until permission is granted by the user.
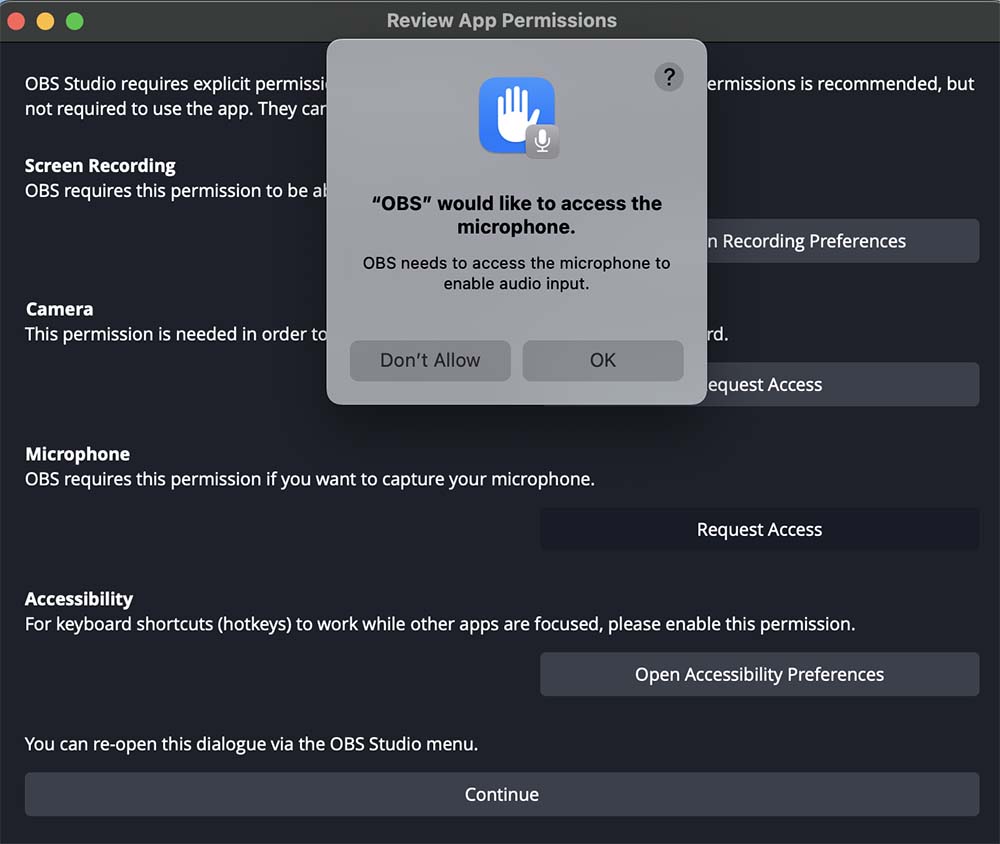
Review App Permissions
Step 2. Installing Soundflower software, which enables audio recording on a Mac running an OS version older than 13, is an efficient workaround. However, users may get around this difficulty and get complete audio recording capability on their Mac machines by using the features of Soundflower.
While on MacOS Ventura, you may set up OBS to record audio-only content using the instructions below.
Step 1: Download OBS for Mac from the official OBS website.
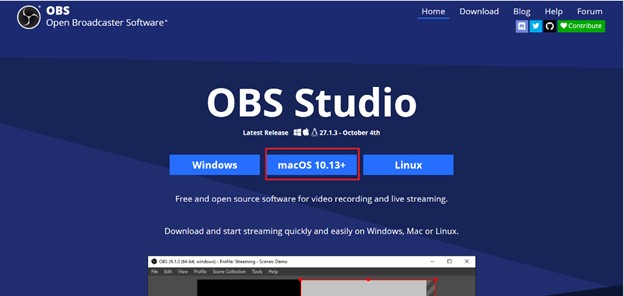
Download OBS Studio on Mac
Step 2: Open OBS and go to the “Sources” area.
Step 3: By pressing the “+” button, choose “Audio Input Capture” from the drop-down menu. After choosing “Microphone” as the audio source, click “OK.”
Selecting Audio Input Capture Source
Step 4: Select the “Audio” tab under “Preferences” in OBS. Choose the desired microphone from the dropdown menu under “Mic/Auxiliary Audio” under the section. Make sure the desktop audio option is off or muted for audio-only recording.
Step 5: Select the “Output” tab under “Preferences” in OBS. Select the audio format of your choice, then click OK.
Step 6: Click the “Start Recording” button to record audio in OBS. Click on “Stop Recording”.
By following these steps, you can effortlessly and quickly record audio-only material for various professional tasks. In addition, using the various customization features, you can further enhance your recordings.
Alternative Way to Record Audio Only – Gemoo Recorder
By the end of the post, we’ll introduce another 2 ways to record audio only on your Win and Mac computer.
If you want to find an OBS alternative, a flexible and user-friendly audio recording tool – Gemoo Recorder is worth your trying. As a professional screen and audio recording software, it is simple for anybody to record high-quality audio. Gemoo Recorder provides a variety of capabilities and configurable settings to satisfy the requirements of different recording situations. As it offers an ‘Audio Only‘ recording mode, you don’t need to make extra settings to record audio only on your computer. Besides, whether you’re a podcast fans, writer, student, or audio/video content producer, this robust program offers a flawless recording experience.
Users may easily record audio from any source, including a microphone, the system sound, and other devices, using Gemoo Recorder. Both novice and expert users may utilize it because of the user-friendly interface, rapid access to key recording settings, and ease of navigation. The program’s support for several audio formats makes it compatible with various hardware and software. Additionally, users may modify recording options like sampling rate, bit rate, and audio quality to get the best results depending on their unique needs.
Features of Gemoo Recorder
Geemo Recorder comes with some features, which are described below:
- Capture sound from external devices, microphones, and system speakers..
- Noise reduction, EQ tweaks, and volume normalization are just a few of the audio effects and filters that may be applied in real time.
- The software’s editing features let you cut and trim unwanted audio parts.
- Record screen, audio, and webcam simultaneously or separately.
Steps to Record Audio Only via Gemoo Recorder
Step 1: Install Gemoo Recorder on your computer, and launch it. Then log in to your Gemoo account using the sign-in window’s prompts.
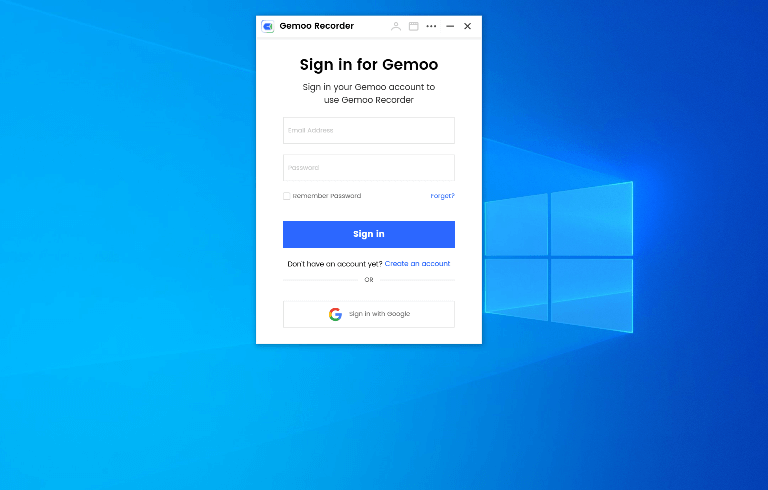
Sign in for Gemoo
Step 2: To record audio during the recording process, choose the “Audio Only” recording option from the Gemoo Recorder interface.
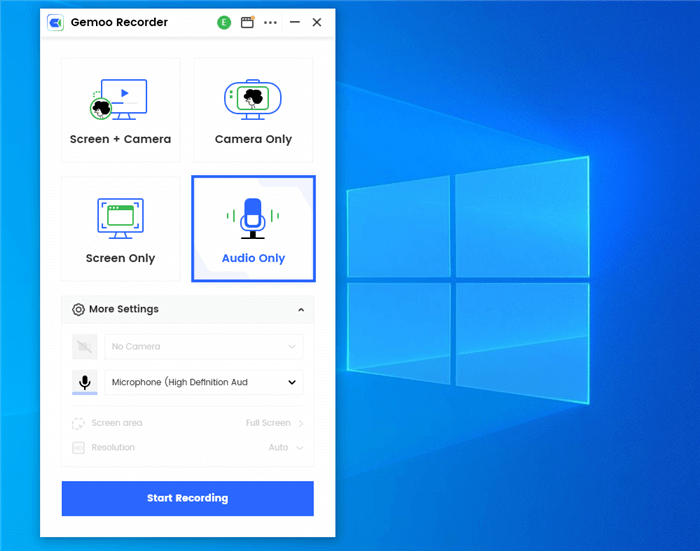
Select Audio Only Recording Mode
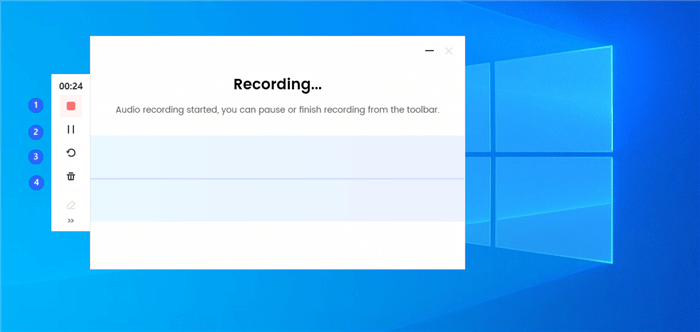
Step 3: Press the “Start Recording” button, and then use the countdown to be ready before the recording starts. When the countdown hits zero, start the recording by choosing the preferred audio source, such as music, video sound, or voice.
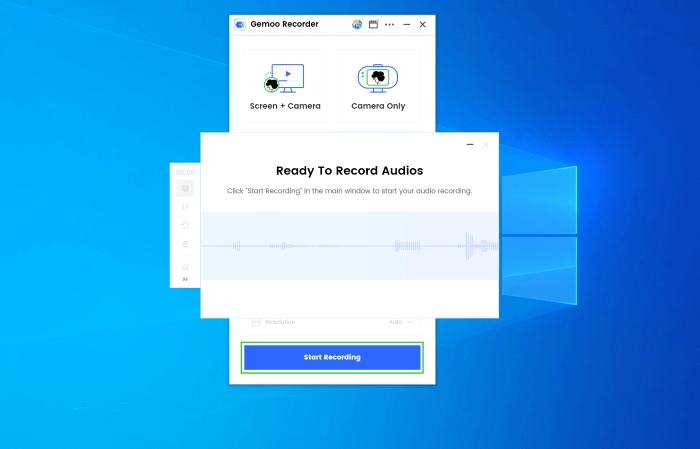
Initiate Audio Recording Process
Step 4: To complete the specified audio recording and have it immediately posted to Gemoo, click the red stop button. A strong network connection is required for a successful upload.
Begin to Record Audio
Bonus Tip. How to Record Screen with Audio?
As FocuSee is well known for its advanced screen recording capabilities with effective video editing features, it can record your screen with internal video and external microphone. These features allow you to capture voiceovers, interviews, presentations, and any other video and audio content, ensuring that the video and audio are recorded in high quality.
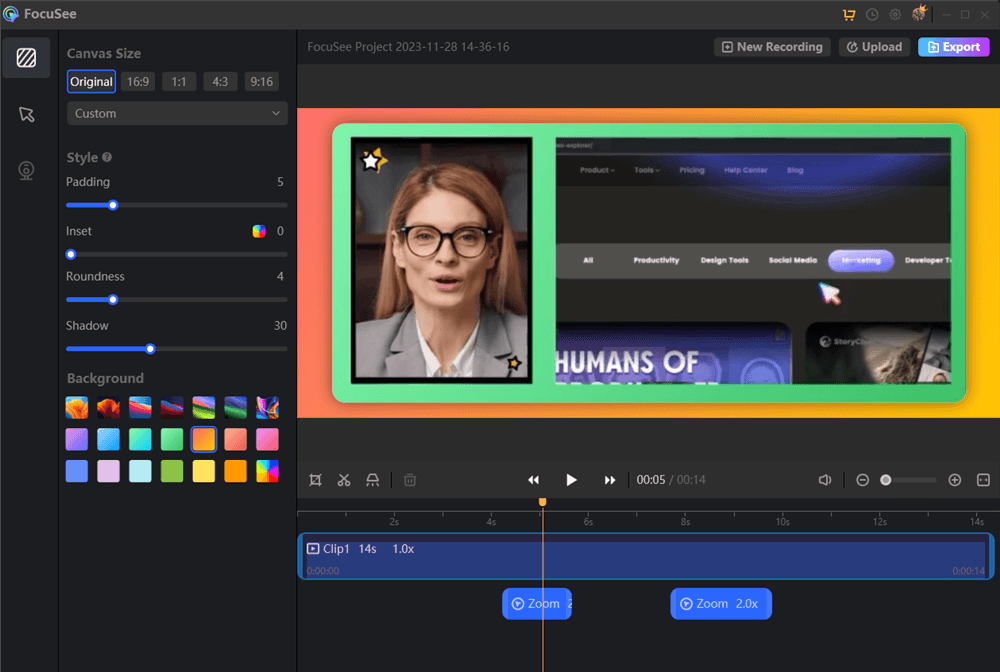
Edit the Recording
Final Thoughts
For content creators, OBS’s ability to record audio-only material on both Windows and Mac platforms opens up a world of possibilities. OBS offers a strong and adaptable choice whether you’re a podcaster, voice actor, musician, or someone who wishes to record crystal-clear audio. OBS provides users with a wide range of tools and customization possibilities that enable them to produce audio recordings of the highest standard.
We highly suggest you look into how to use OBS to record audio-only for yourself. Find out how OBS interacts with your operating system without a hitch, how to choose the audio sources you wish to utilize, and how to customize the recording settings to your needs. Share your expertise, sage advice, and the amazing audio content you create using OBS.