How to Record TeamViewer Session with Audio?

TeamViewer is a widely used software and a convenient tool for collaboration, troubleshooting, and remote support. There may be situations where you need to record a TeamViewer session with audio for documentation or future reference, such as when a manager needs to train a new employee on how to use a specific software program and wants to record the session with audio to ensure the employee can refer back to it as needed.

Record TeamViewer Session with Audio
However, people need clarification on how to do it. There are multiple ways to perform TeamViewer Screen recording with audio. From using the tool’s native screen recording feature manually or automatically to using a third-party tool like Bandicam and OBS Studio, this article will help you briefly understand every method, along with the perks of each and the easy-to-follow steps. So, sit back and let us dive into the procedure now!
Table of Contents: hide
The Built-in Feature to Record TeamViewer Session
How to Record TeamViewer Sessions with Audio via Powerful Screen Recorder
The Built-in Feature to Record TeamViewer Session
TeamViewer is a popular software for remote access and support, and it comes equipped with several built-in features that make it a versatile tool for collaboration and communication. Some of the built-in features of TeamViewer include file transfer, remote control, chat, and online meetings.
One of the built-in features of TeamViewer is screen recording. Screen recording can be valuable for training, troubleshooting, and documentation purposes. This feature allows users to record their TeamViewer sessions manually or automatically with audio. The details of both these methods are mentioned below:
Record TeamViewer Sessions Manually
In this type of TeamViewer screen recording, the user has to start the screen recording by manually clicking on the relevant option from the navbar. If you want to screen-record your TeamViewer session manually, follow the steps given below:
Step 1: First, connect with another device.
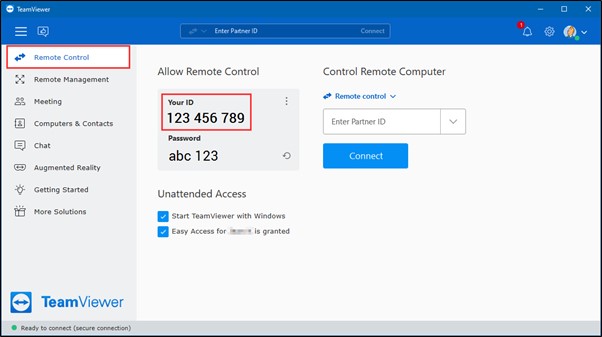
Connect With Another Device
Step 2: Click “Start session recording” under “File & Extras” in the top toolbar to initiate the session recording by clicking.
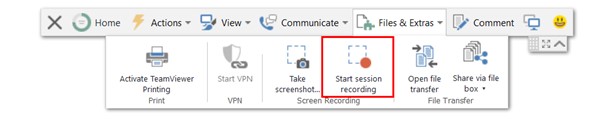
Click On Start Session Recording
Step 3: After recording the session, click the “Stop” button to conclude the recording.
Record TeamViewer Meetings Automatically
Automatic screen recording is a feature of TeamViewer that allows users to record their meetings and remote-control sessions without manual intervention. Once the user has configured the necessary settings, the screen recording will begin automatically when a remote control session or meeting starts. To automate the process, you can follow the steps mentioned below:
Step 1: Launch TeamViewer on your computer and access the recording settings by clicking the “Extras” button in the main interface and selecting “Options.”
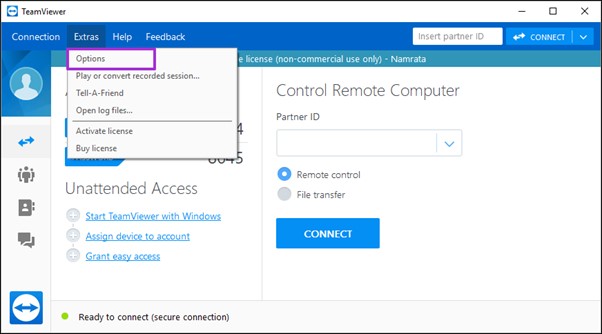
Click On Options Under Extra
Step 2: From the left menu, click on “Meeting.”
Step 3: Enable automatic recording by checking the “Auto record meeting” box.
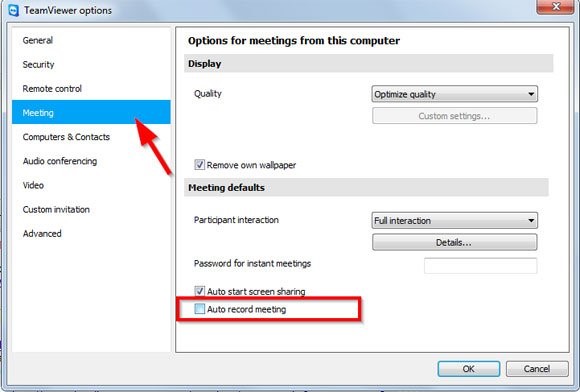
Enable Auto Record Meeting
Record TeamViewer Sessions with Audio via Powerful Screen Recorder
Third-party screen recorders are software programs developed by companies other than the device manufacturer. They are used to capture and record computer screens and activities and offer additional features and capabilities beyond those provided by built-in screen recorders, such as more customization options, video editing, hotkeys for recording, and much more.
Additionally, third-party screen recorders may be used over built-in screen recorders as they are often more secure and can better protect data. This is especially important for individuals and companies that handle sensitive information or comply with strict data privacy regulations. This section will guide you about two such third-party screen recorders with quick and simple steps:
Gemoo Recorder
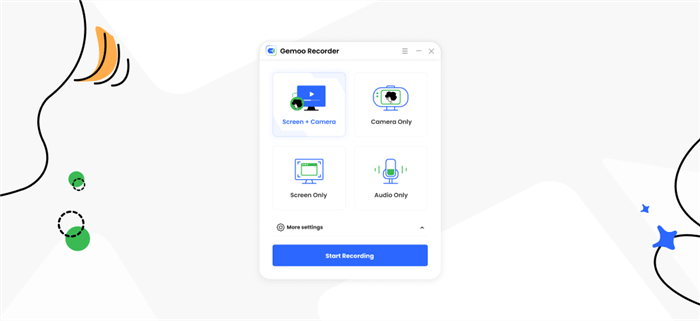
The Interface of Gemoo Recorder
Gemoo recorder is a valuable tool that is readily available on both Mac and Windows operating systems. It offers advanced features that many users may not be aware of, making it an excellent option for recording TeamViewer sessions and incorporating sound. For those seeking the optimal method for recording a computer screen with system audio, the Gemoo recorder is worth exploring. This software allows users to select whether they want to record the screen, audio, or both simultaneously.
Main Steps:
If you want to use Gemoo Recorder to capture your TeamViewer Sessions, just follow these straightforward steps:
Step 1: Launch both TeamViewer and Gemoo Recorder on your computer. Log in to Gemoo Recorder.
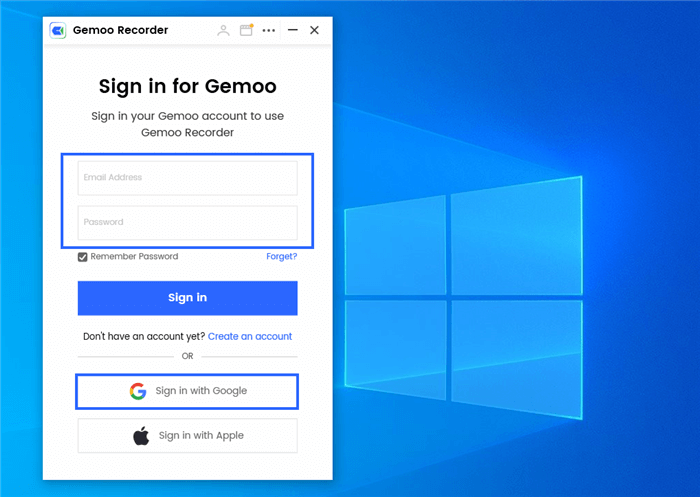
Sign in Gemoo
Step 2: There are four modes for screen recording. Choose “Audio only”, this tool will just capture the audio.
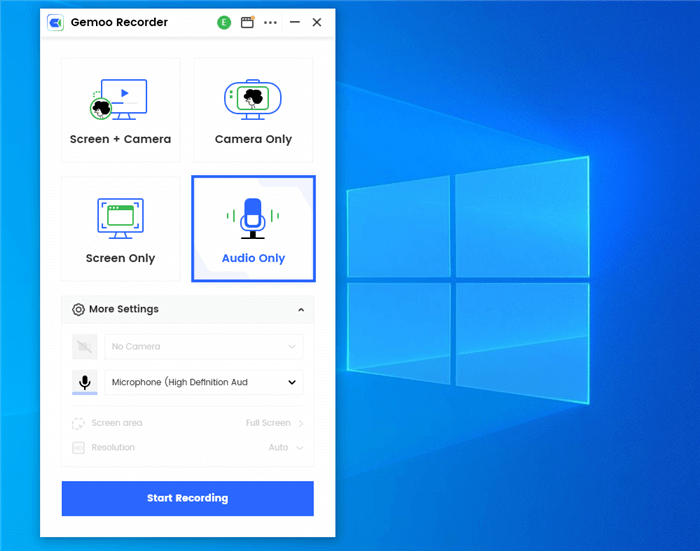
Select Audio Only Recording Mode
Step 3: To begin recording, press the “Start Recording” button after selecting the recording mode.
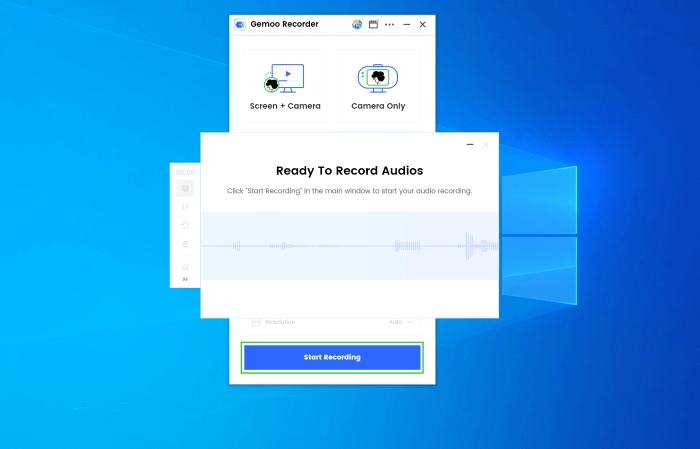
Initiate Audio Recording Process
Step 4: After completing the recording, simply press the red stop button to end it. The recording will then be automatically uploaded to Gemoo. However, it is important to ensure that you have a stable network connection as this step requires it. Please double-check that your network connection is strong and reliable.
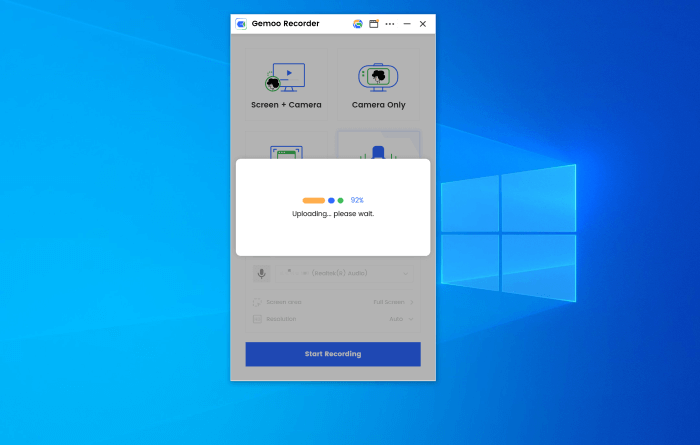
Finish Recording Audio
Bandicam
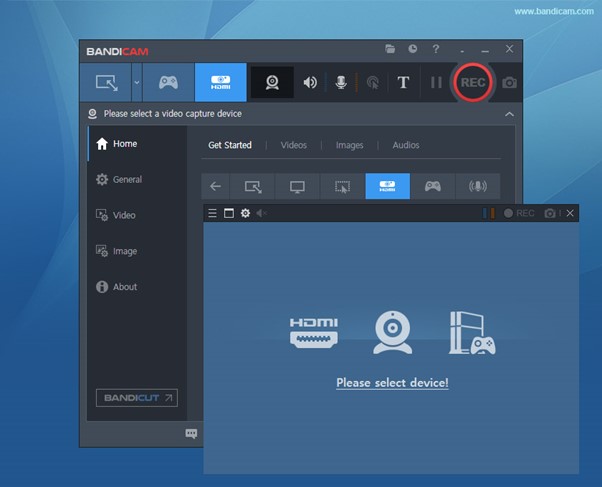
Bandicam’s Interface
Bandicam is a highly customizable and efficient screen recording software that allows users to capture high-quality videos with minimal impact on system performance. It offers features optimized for gaming, including hardware acceleration, a dedicated ‘Game Recording Mode,’ and a built-in video editor for easy post-processing. In short, Bandicam is a versatile tool that can be used for various applications, from content creation to business presentations.
Main Steps:
To record your TeamViewer Sessions using Bandicam, follow these simple and easy steps:
Step 1: Launch both TeamViewer and Bandicam on your computer.
Step 2: Connect to the remote device via TeamViewer for the session.
Step 3: Set up the recording area, configure the settings in Bandicam, and start using the “Rec” key or “F12.”
Click On-Screen Icon
Step 4: When the session ends, stop the recording using the “F12” or “Stop icon” in Bandicam and save the recorded video to your preferred location.
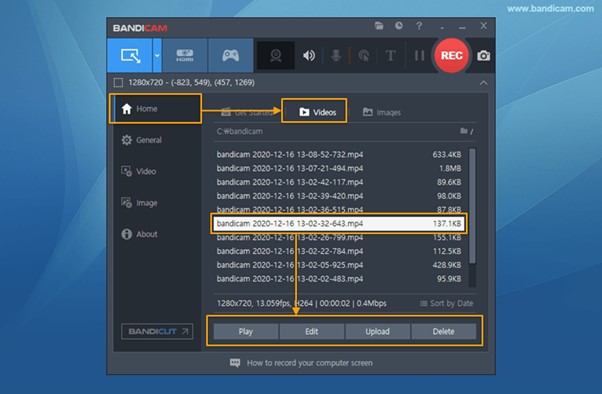
Save The Recorded Session
OBS Studio
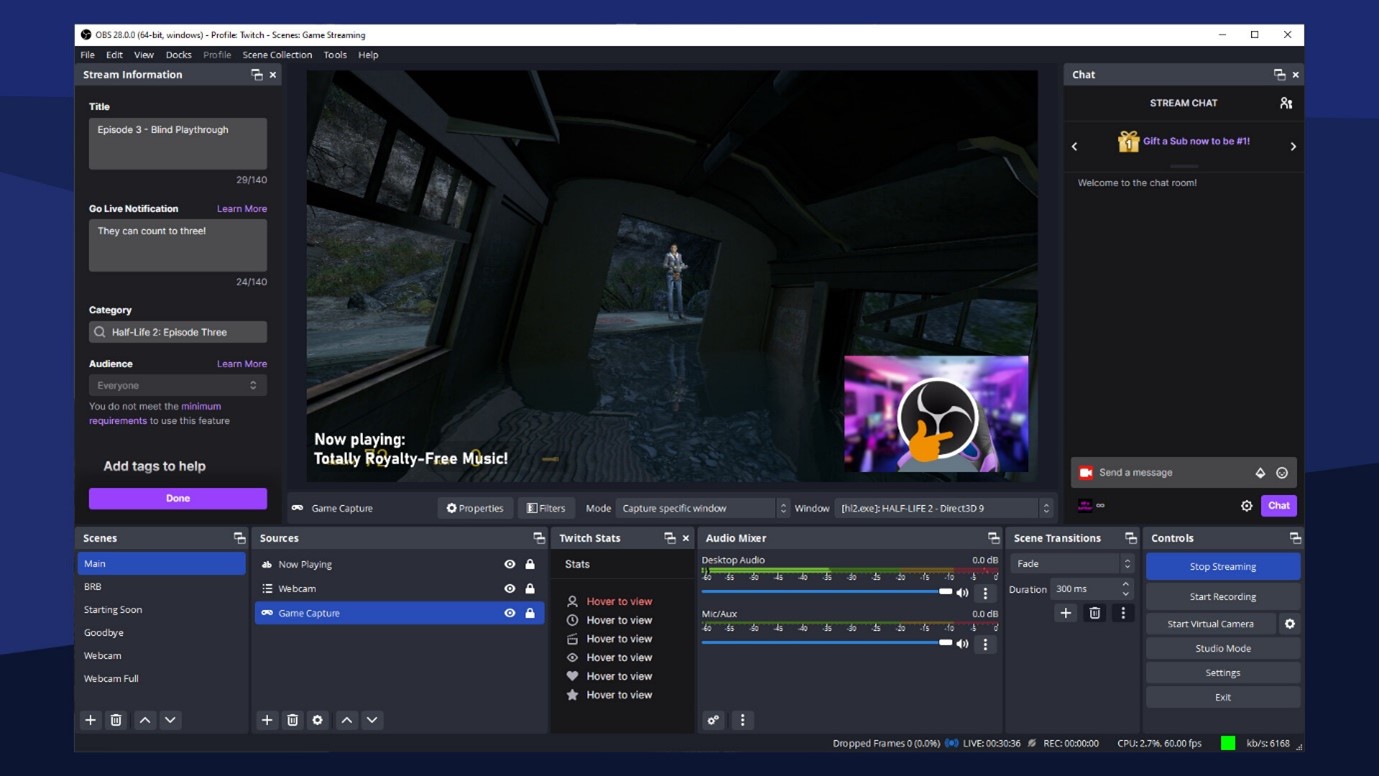
OBS Studio’s Interface
OBS Studio is a free and open-source screen recording and live streaming software with robust features for customization and flexibility. It supports multiple sources, filters, and scenes to create professional-looking videos, including game recording, live streaming, and video production. Its intuitive interface and user-friendly design make it easy for beginners, while advanced users can take advantage of its extensive settings and configurations. OBS Studio is an excellent tool for content creators, educators, and businesses looking to create high-quality video content.
Main Steps:
Below mentioned are the quick and easy steps to record your session on TeamViewer with audio using ODS Studio:
Step 1: Open TeamViewer and connect with a remote user for the session.
Step 2: Launch the ODS studio in the background and add “Application Audio Capture (BETA)” in the sources.
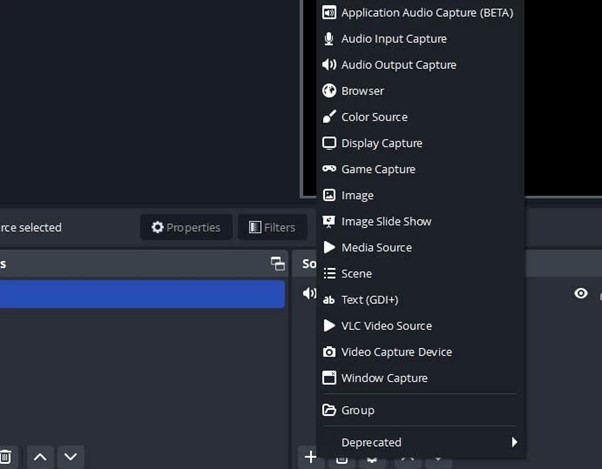
Select Application Audio Capture (Beta)
Step 3: After setting up sound settings, “Start Recording” from the Controls menu.
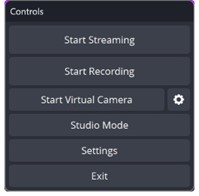
Click On Start Recording
Step 4: Click “Stop Recording” after the TeamViewer session ends.
FAQ about Record TeamViewer Session
Do you still need clarification regarding the TeamViewer session screen recording? This section is for you as we understand that new knowledge can initially create confusion. By addressing ambiguities and seeking clarification, one can overcome this confusion and gain a deeper understanding of the concept. We have answered some commonly asked questions to remove any misunderstanding left. Let us dive into that:
1. How to View TeamViewer recorded file?
If you have utilized TeamViewer’s internal recording functionality to capture your sessions, the recordings can be located in the default folder:
C:/Users/username/AppData/Local/Temp/TeamViewer/Version.
However, if you have previously changed the save location, you will find them in your designated path.
2. How do I access TeamViewer recordings?
To access the TeamViewer screen recordings, you can follow the simple and easy steps mentioned below:
Step 1: Launch TeamViewer and go to the “Extras” menu.
Step 2: Select “Open log files” and navigate to the “TeamViewerXX” folder, where XX is the version number of the TeamViewer installed on your computer.
Step 3: Look for files with the “.tvs” extension and double-click on the file to open it. The recording will start playing in a new window where you can use the playback controls to navigate through the recording.
3. How can I record my TeamViewer call?
To record your TeamViewer call session, follow the quick and easy steps mentioned below:
Step 1: Start a call on the TeamViewer with the person you want to record the session with.
Step 2: Click on the “Extras” menu and select “Record.”
Step 3: Choose your recording options in the “Record” dialog box and click “Start” to begin recording, then “Stop” when the session is over.
It is important to note that the ability to record a TeamViewer call may depend on the version of TeamViewer you are using, and the permissions set by the remote user. Obtaining the remote user’s permission before recording a session is a good practice.
Conclusion:
In conclusion, TeamViewer screen recording can be useful for reviewing and analyzing remote support sessions, online meetings, or webinars. This article has thoroughly explained the built-in screen recorder and third-party screen recording methods for TeamViewer. Whether you use Bandicam, OBS Studio, or the built-in tool depends on your preferences, security constraints, and device supportability. If this article has been helpful to you, please remember to share it with your family and friends. Also, feel free to leave your comments in the comment box below.