Set Up
Welcome to the Gemoo Snap settings page, this guide will show you how to set Gemoo Snap shortcut keys, save paths, screenshot management, etc. so that you can use Gemoo Snap more efficiently!
![]() 2 min
2 min
Shortcut Settings
Please right-click the Gemoo Snap icon when running it and choose Shortcut Settings option.
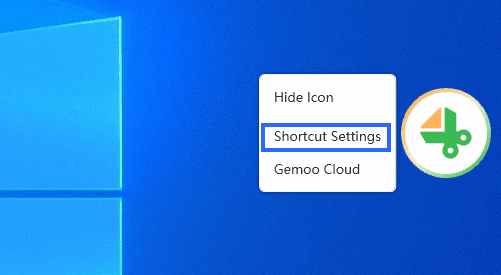
Choose Shortcut Settings Option
Then you will see the interface below to complete some shortcut settings for Gemoo Snap, including Screenshot Feedback, Screenshot & Beautify, Recognize Text (OCR), Quick Screenshot, Clipboard Screenshot, Scrolling Screenshot, and Pin Screenshot.
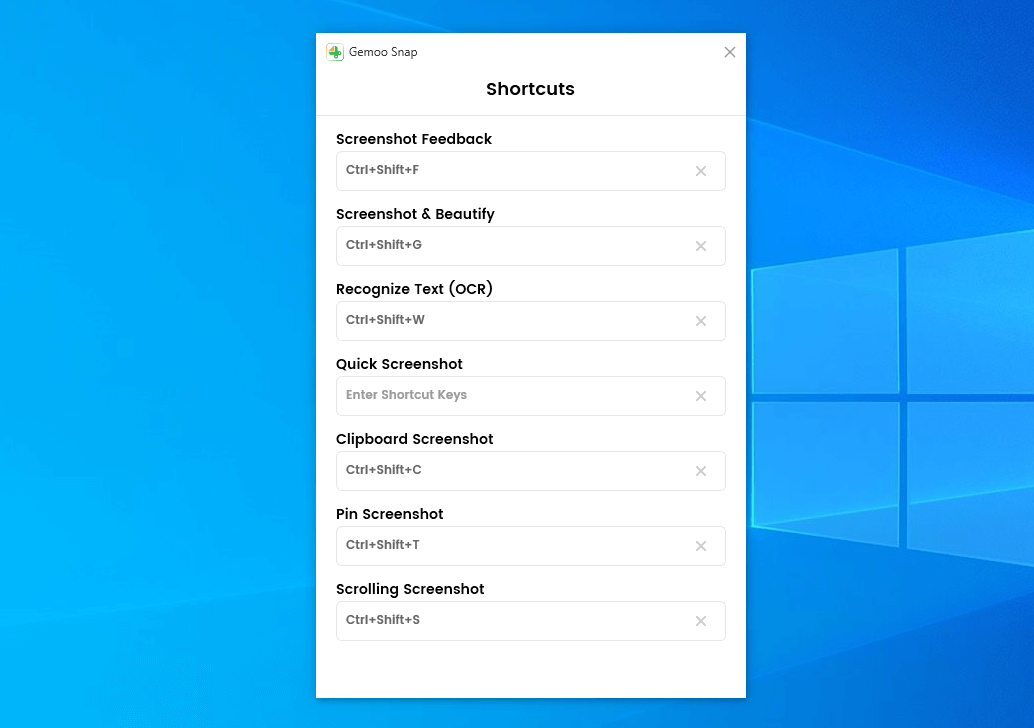
Shortcut Setting
It is recommended to use the following hotkey combinations to set shortcut keys:
Windows: Ctrl/Shift/Win/Alt+any other key
Mac: Command/Alt+any other key; Shift+any 2 or more other keys
Screenshot Options
When running Gemoo Snap on the Windows computer, the Gemoo Snap icon will be in the lower right corner of the screen. Please right-click the icon and you will see the interface below. Then you can go to Screenshot Feedback function, Beautify Image function, Recognize Text (OCR) function, Quick Screenshot function, Clipboard Screenshot function, Pin Screenshot function, Scrolling Screenshot function, and the webpage of Create Images function.
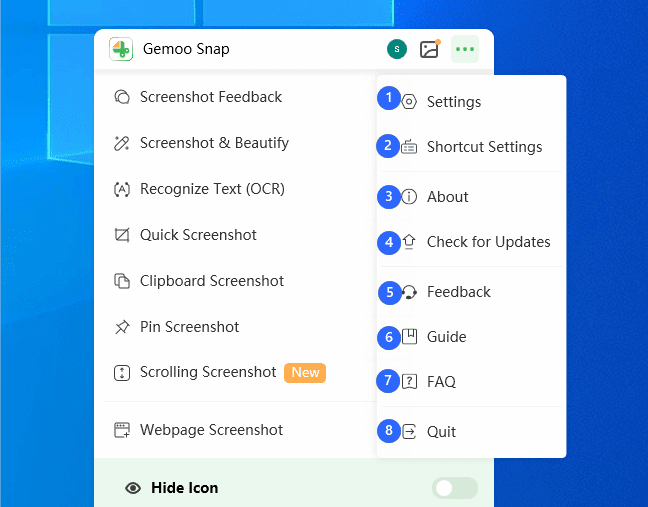
Screenshot Options of Gemoo Snap
Support & Settings
Please right-click the Gemoo Snap icon in the lower right corner of the screen and click the Option button. Then you will see the interface below:
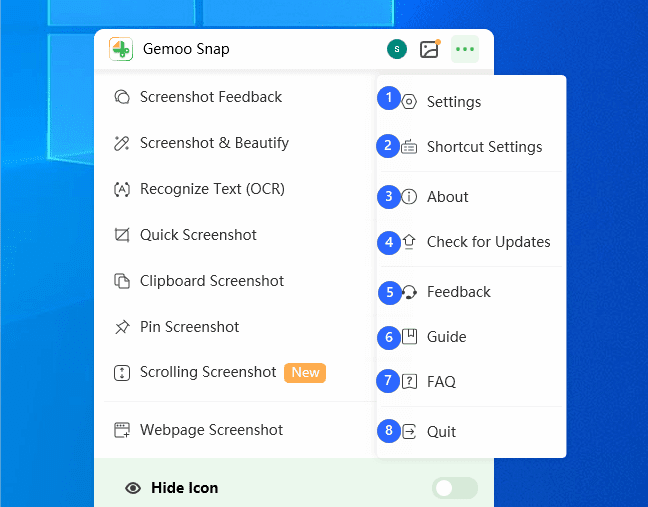
Support and Settings of Gemoo Snap
In this setting menu, you can:
1
Go to Settings of Gemoo Snap.
2
Go to Shortcut Settings of Gemoo Snap.
3
Check the info about Gemoo Snap.
4
Check for updates of Gemoo Snap.
5
Get support from Gemoo Team.
6
Check the Guides of Gemoo Snap.
7
Check the FAQs of Gemoo Snap.
8
Quit Gemoo Snap.
Account Setting
When you click the Account button, you can view the available space of your account or you can sign out of the account.
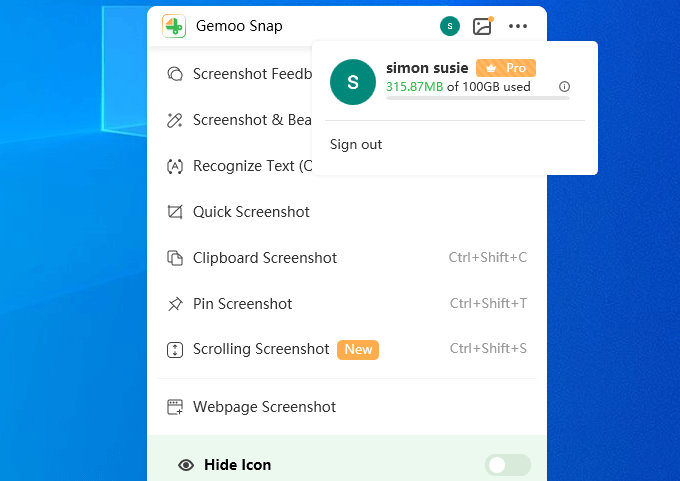
Account Setting of Gemoo Snap
Settings
When you click the Settings button, then you will see the interface below:
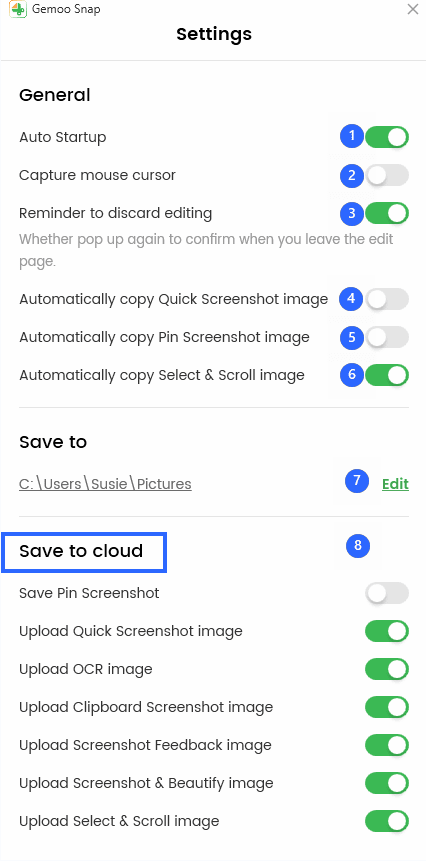
Gemoo Snap Settings
In this setting menu, you can:
1Enable/disable auto startup.
2
Enable/disable capture of the mouse cursor.
3
Enable/disable the edit save prompt.
4
Choose whether copy Quick Screenshot image automatically.
5
Choose whether copy Pin Screenshot image automatically.
6
Choose whether copy select&scroll image automatically.
7
Select the save path of the exported pictures.
8
Enable/disable saving screenshots to Cloud automatically.
The 8 options for Save to Cloud can be set separately. The images of each functional block are supported to be stored locally or uploaded to Gemoo Cloud according to your needs. If you choose to enable these options, the screenshots you created will be automatically uploaded and saved to Gemoo Cloud.
Library
All your screenshots can be found in the library on Gemoo Snap. When the Save to Cloud option is disabled, all screenshots you created will be saved in Gemoo Local library.
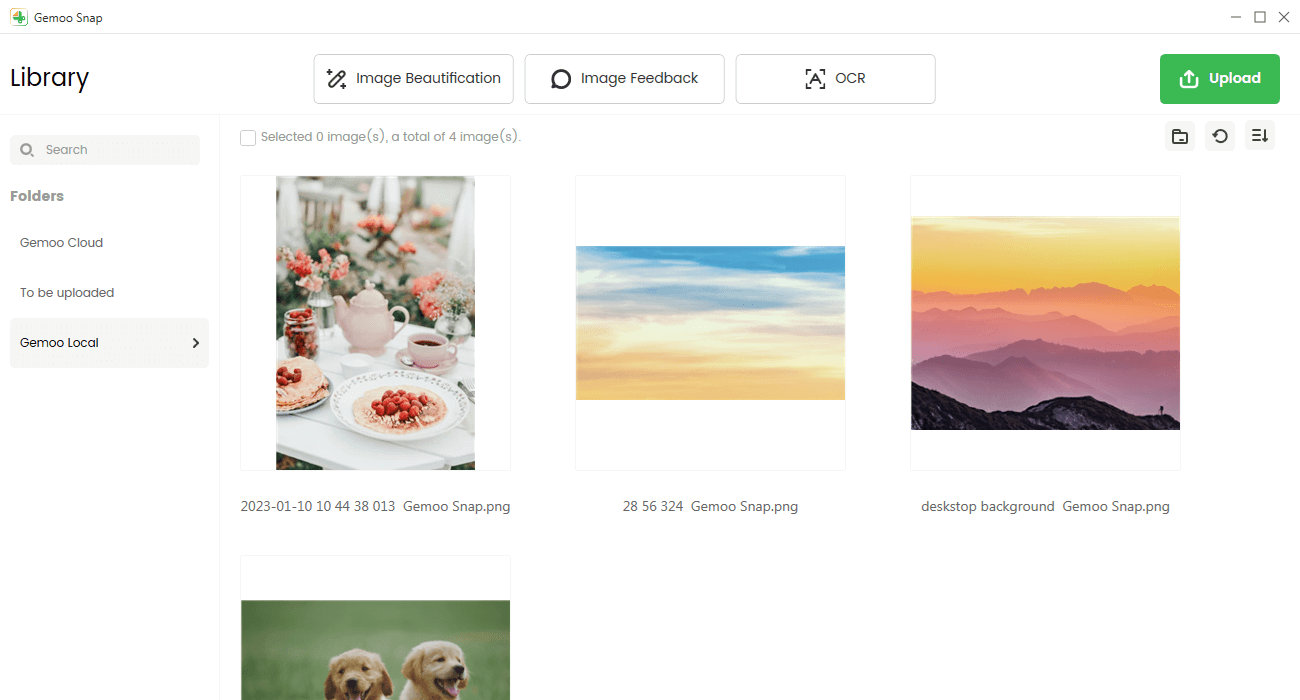
Gemoo Snap Local Library
If one of the Save to Cloud options is enabled, such as the Upload Quick Screenshot image feature, all screenshots you create using this feature will be saved in Gemoo Cloud automatically.
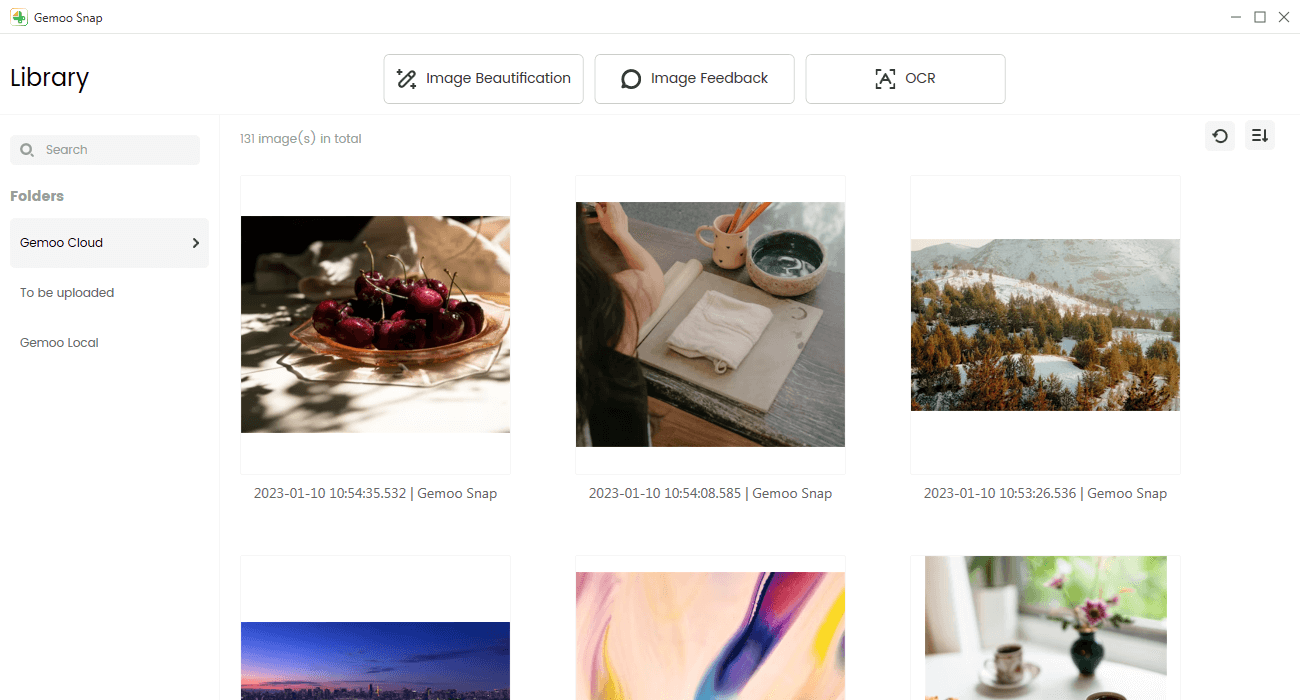
The Library of Gemoo Snap
Then, you can organize screenshots in Gemoo Snap Library.
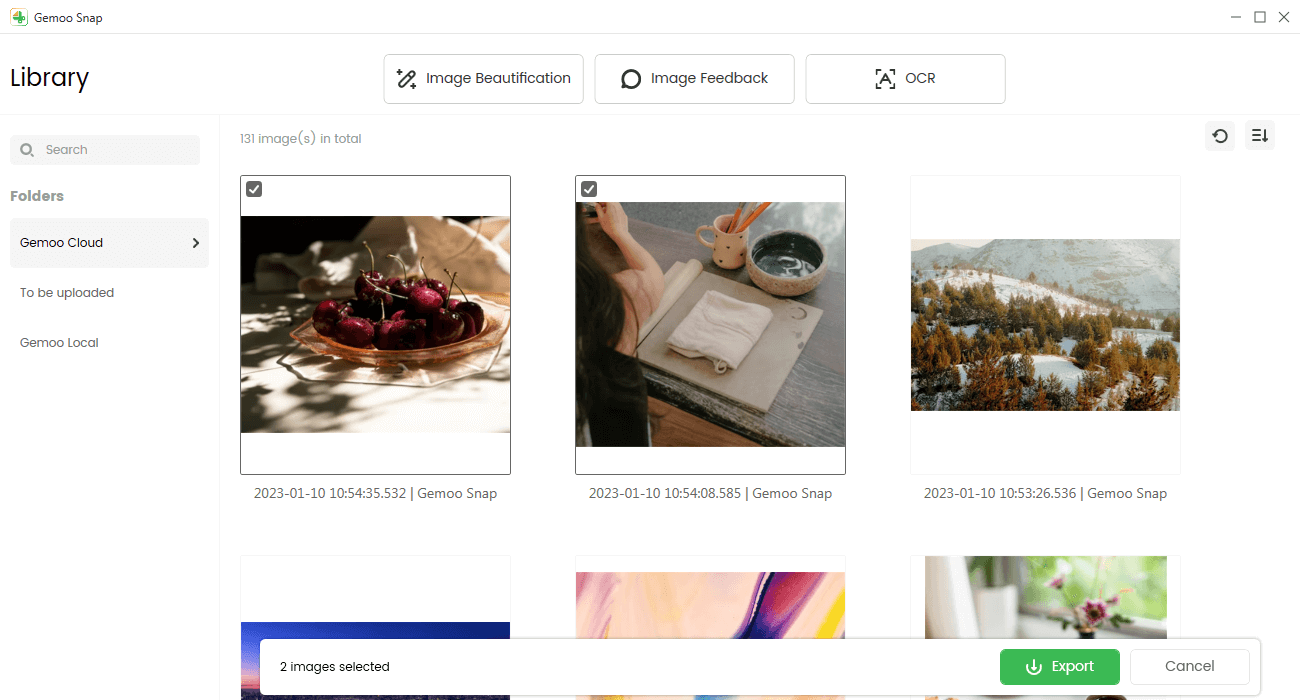
Organize Screenshots in the Library
Questions, comments, concerns? Contact us here.
Happy recording! 
