How to Record a Video
FocuSee offers three screen recording modes. You can choose to record the full screen, a custom portion, or a specific window. You can also configure it to record audio and webcam simultaneously. Here, we will provide you with a detailed introduction to each of these modes.
Hardware Setup
This section will introduce you to the 3 parts of the Camera, Microphone and System Audio.
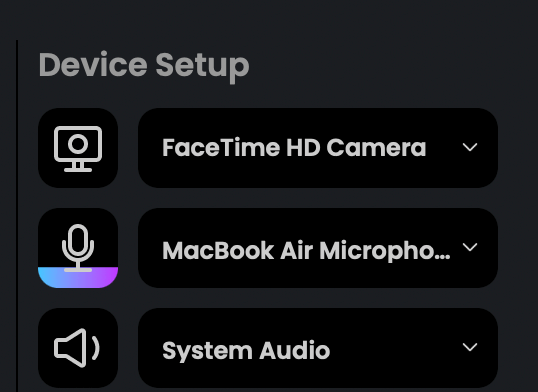
Hardware Setup of FocuSee
1. Camera Setting: Click on the Camera icon to enable or disable the webcam. By clicking on the dropdown option, you can see the list of supported webcams on your computer and select the one you wish to use.
2. Microphone Setting: Click on the Microphone icon to enable or disable the microphone. By clicking on the dropdown option, you can see the list of supported microphones on your computer and select the one you wish to use.
3. System Audio: Click on the System Audio icon to enable or disable system audio. By clicking on the dropdown option, you can view the list of supported system audio devices on your computer hardware.
Select the Recording Mode
FocuSee offers 3 screen recording modes. You can choose to record the full screen, a customized section, or a specific window.

Three Recording Modes
Start Recording
In this section, we will guide you through the process of using FocuSee to record the entire screen, a custom portion, or a specific window.
Step 1: Click on the Full Screen / Custom / Windows icon, and it will automatically display a hardware setting interface.
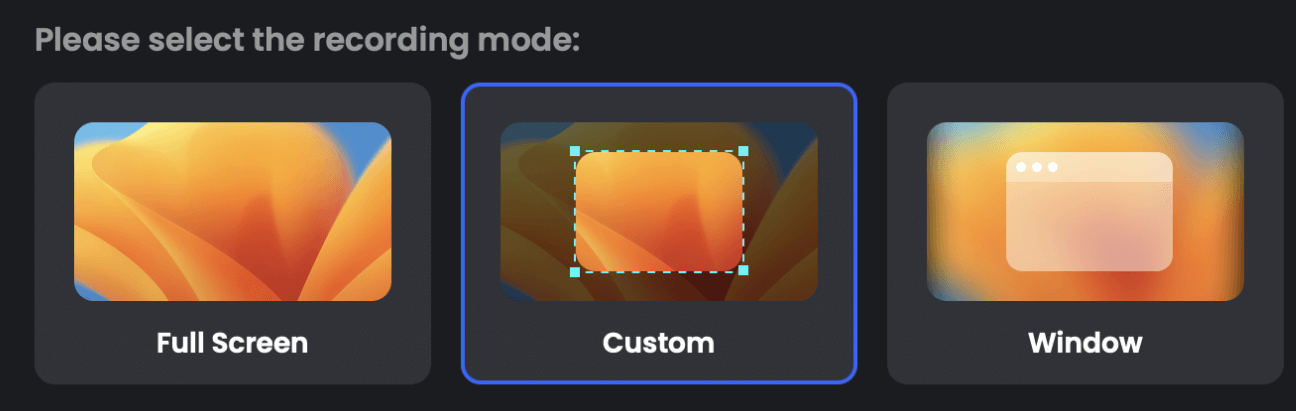
Select the Recording Mode
If you choose to record a custom portion or a specific window, after clicking on the Custom or Window icon, you will first need to select the desired area or specific window to record before adjusting the camera, microphone, and system audio settings.
Step 2: Adjust the camera, microphone, and system audio settings according to your needs, and then click the red REC button to start recording.
Adjust Settings
Step 3: Before the recording starts, there will be a 3-second countdown to prepare. Once the countdown reaches zero, FocuSee will begin recording. You can simply start your presentation at your own pace.
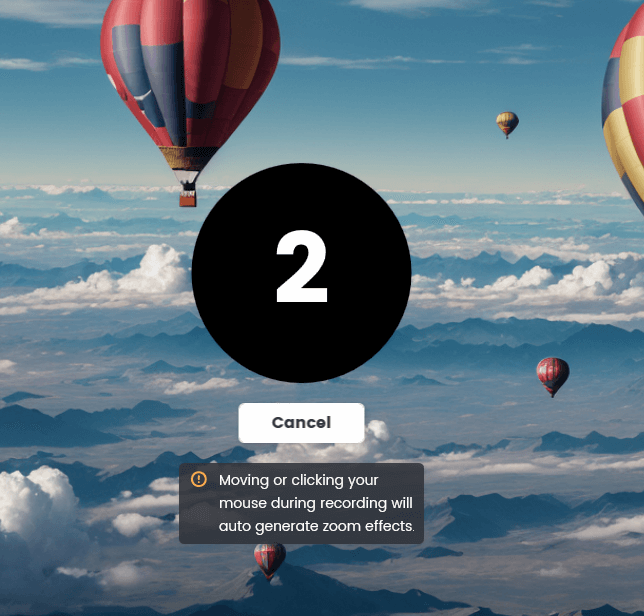
Three Second Countdown
The recording time is not limited as long as your computer can support the desired duration of recording.
Step 4: After recording, the video will automatically have zooming in effects applied. Additionally, you can perform simple video editing tasks such as trimming, adjusting playback speed, and highlighting specific areas using the track feature.
Step 5: After completing the editing, you can export the video as a GIF or MP4 format, or upload it to the cloud and share it with others through a unique link.