Edit the Recording
After recording your screen, you will automatically jump to the recording editing interface. Now you can use FocuSee’s built-in video editing tools to enhance the visual appeal and engagement of your video.
Background Canvas Settings
The Canvas tab enables you to change the video canvas size and style according to your preferences. Additionally, you can customize the background behind the video. This will help you to personalize the appearance of your video and allow you to create a visually appealing look for your video.
By default, FocuSee sets your video canvas size to auto-size. If you wish to resize the canvas, FocuSee provides another four commonly-used video sizes: 1:1, 4:3, 16:9, and 9:16. This allows you to adjust the dimensions of your video to suit your specific requirements.
Furthermore, FocuSee offers the option to customize the canvas size for sharing on various social media platforms, including YouTube, TikTok, Twitter, LinkedIn, Facebook, and Instagram. This ensures that your video is optimized for each platform and maintains its visual appeal when shared across different social media channels.
In addition to adjusting the video canvas, FocuSee allows you to fine-tune other visual aspects such as padding, inset, roundness, and shadow. Here’s a breakdown of what each parameter signifies:
Furthermore, we provide a collection of video background templates for you to easily add and replace the background of your video.
Mouse Cursor Settings
The Mouse tab allows you to adjust the mouse size, choose from different mouse styles, add mouse click sounds, and apply various mouse cursor effects. Customizing the mouse cursor empowers you to personalize your mouse experience according to your preferences and enhance mouse click effects.
Webcam Display Settings
The Webcam tab allows you to present your webcam during screen recording when both your screen and webcam are simultaneously captured. You can determine how your camera is displayed – you can choose whether to show the webcam feed, customize the camera layout, resize the camera window, alter the camera’s shape, apply a portrait mirror image effect, and adjust the webcam size when zooming is in effect.
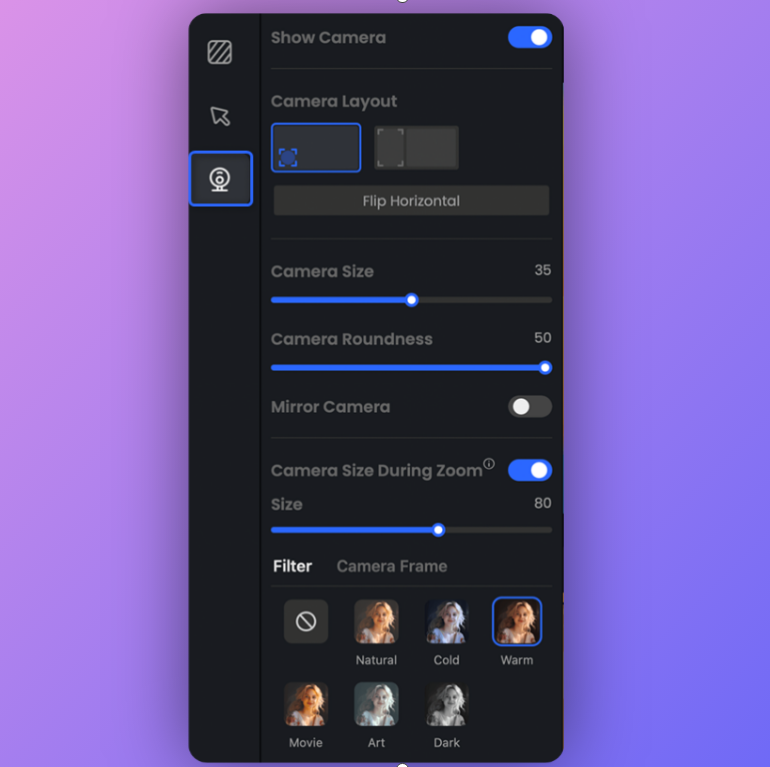
Webcam Settings
Additionally, you can enhance your webcam’s visual appeal by applying filters and selecting a webcam frame to complement your video presentation.
Crop the Video
Click the Crop icon to crop the video. Within this feature, we offer four predetermined aspect ratios for your convenience: 16:9, 4:3, 1:1, and 9:16. Moreover, FocuSee grants you the freedom to customize the video size, giving you complete control over the visual presentation of your video.
Clip Settings
Tap the Scissor icon to divide your video into separate clips. Click on each clip to adjust its speed to your preference. The settings can also apply to all video clips. Besides, by clicking on the Trash icon, you can trim unwanted clips, removing unnecessary parts from your video effortlessly.
Zoom Settings
FocuSee incorporates an automatic zoom-in effect during screen recording. However, if you find that the zoom-in effect is unnecessary for your recording, you have the option to disable it. Additionally, FocuSee allows you to further enhance your recording by adding alternative zoom-in effects or adjusting the existing zoom-in effect to better suit your preferences. This level of customization ensures that you can create recordings that precisely meet your requirements and desired visual impact.
Spotlight Settings
To apply a spotlight effect, simply select the Spotlight icon. You have the flexibility to add spotlights to various parts of your video, such as the title, important features, images, and other elements. As you add the spotlight, you can customize its size and shape by adjusting the spotlight round. This enhancement will elevate the visual impact of your video.
After learning how to edit the video with the mentioned tools, figure out how to export, share, and embed the video in the following sections.