Set Webcam Layout
When you start a screen recording, you may like to include a camera, alongside the captured screen recording content. The camera layout determines how the camera is displayed and integrated into the screen recording.
What Is Camera Layout?
Camera layout refers to positioning, arranging, and resizing the camera within your screen recording. You can decide where to place the camera within the screen recording frame, such as in a corner, by the side, behind, or overlaid on the screen content.
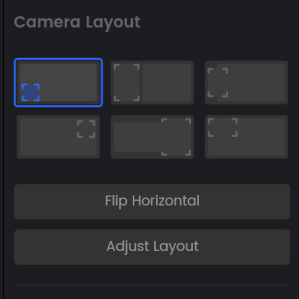
FocuSee offers flexible camera layout options for screen recordings. You can choose from 6 pre-defined default camera layouts, each with a different positioning and sizing of the camera feed within the video frame. Alternatively, you can drag and drop the camera feed to freely reposition it and resize it to your preferred size and location. If you don’t need to show your face during the screen recording, you can also click to disable the camera display.
How to Apply Default Camera Layout?
FocuSee provides a set of default camera layouts that are optimized based on the size and orientation of your screen recording canvas. Depending on whether your canvas has a horizontal or vertical layout, FocuSee will offer you 6 pre-defined camera layout options to choose from. To apply the default camera layout in FocuSee, locate the Camera icon on the left panel and select the layout option that best suits your needs.
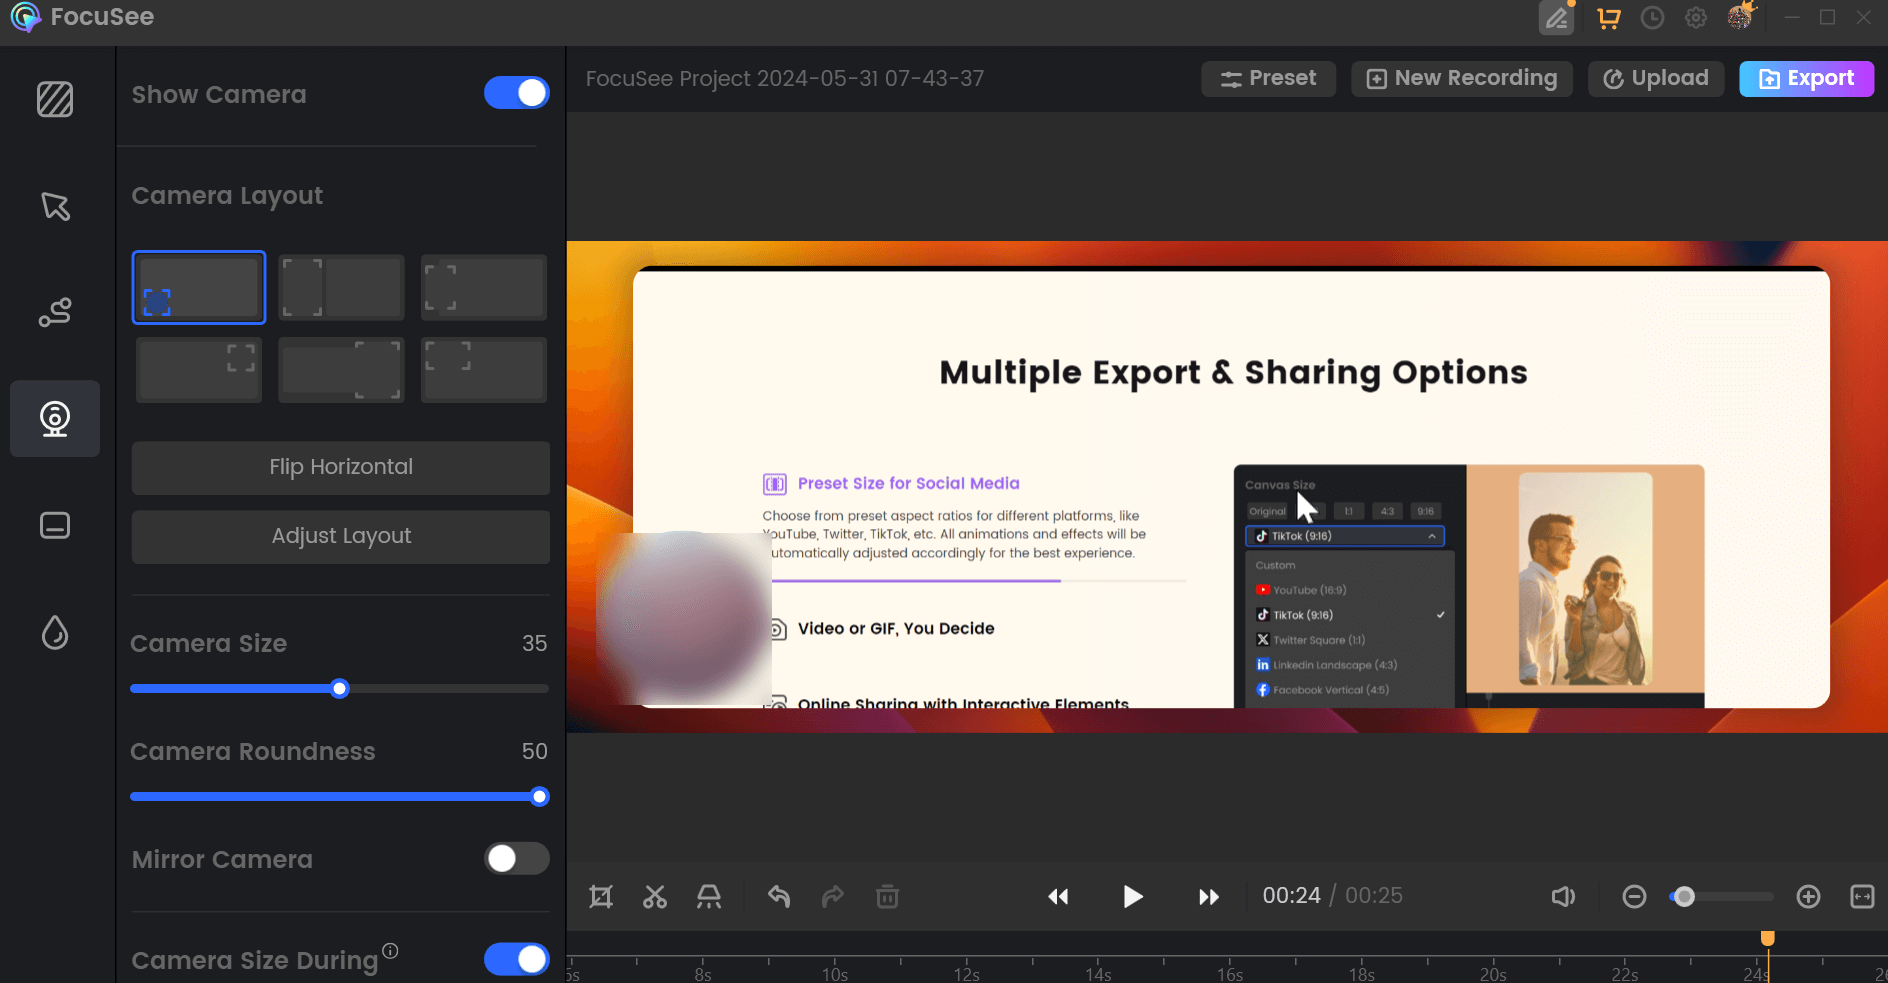
Apply Default Camera Layout
For horizontally oriented canvases, the default camera layouts allow you to position your camera feed over or behind the screen recording. Alternatively, you can place the camera and screen recording side-by-side.
For vertical canvases, the default camera layouts will position the camera feed in the middle of the screen recording area, arranging the camera and screen capture in a vertical sequence.
How to Customize Camera Layout?
Despite using the default camera layout, you can also customize the camera layout. Here are the steps to customize the camera layout:
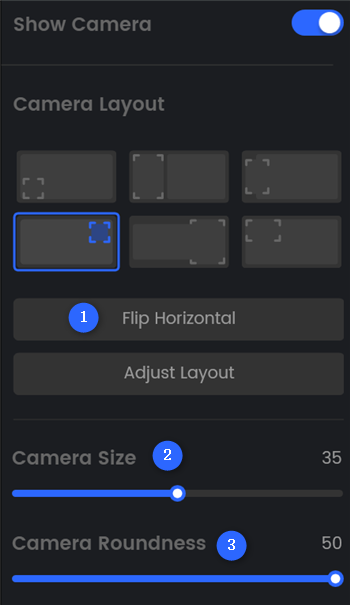
1. Select one of the preset default layout options and click the Adjust layout button to access the custom layout page.
Choose Adjust Layout
2. Based on the selected default layout, you can customize the position and size of the camera feed and screen recording by dragging them to new locations and adjusting their dimensions.
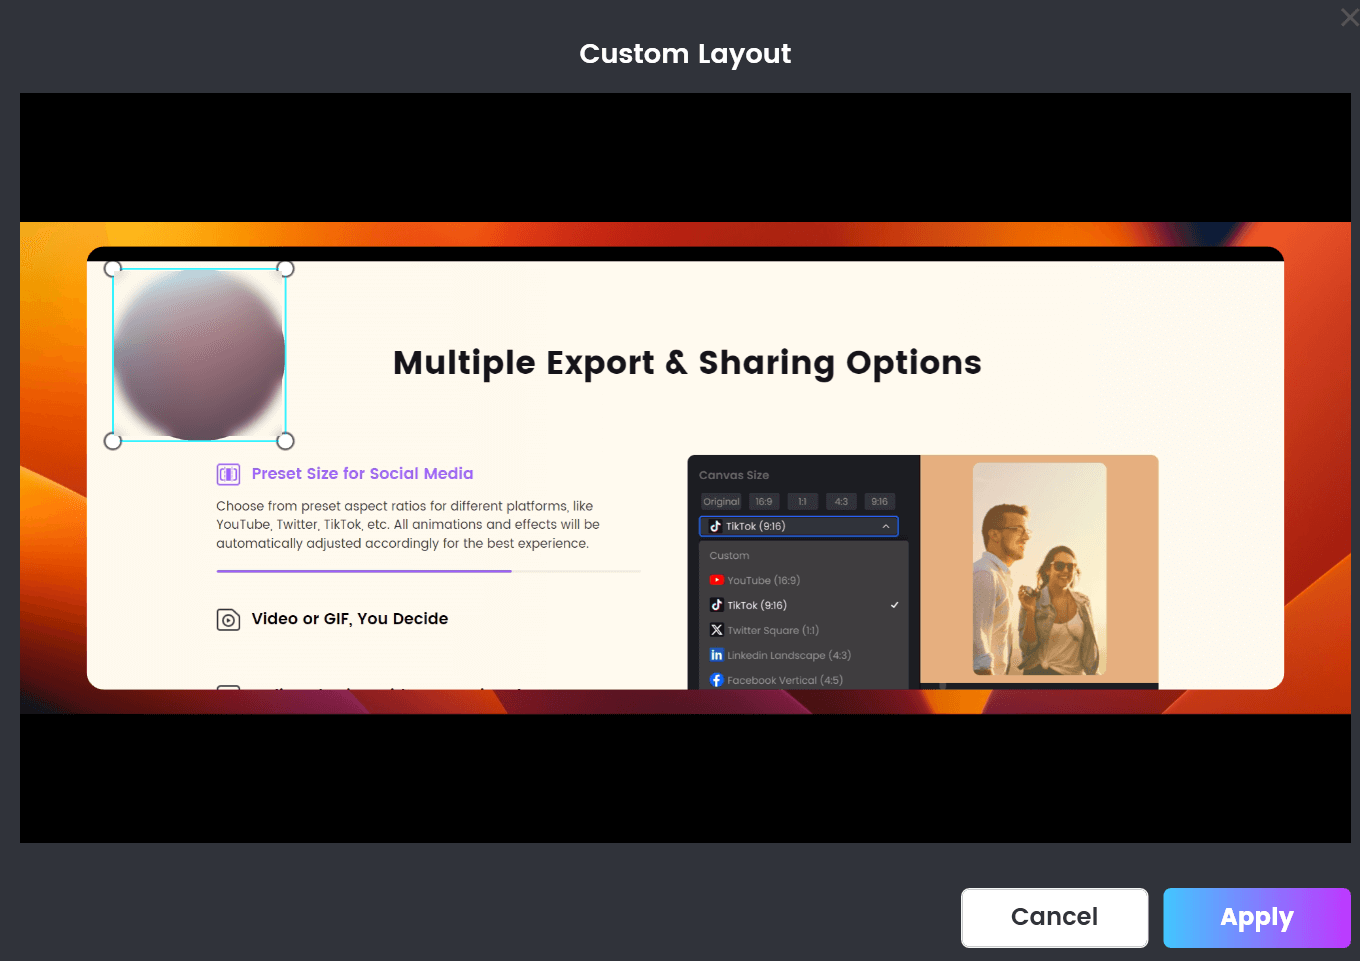
Apply Custom Camera Layout
3. When finish customizing the camera, click Apply to return to the previous interface, where you will see a reminder – Currently using a custom layout. If you want to apply the default camera layout, click on the default layout above again.
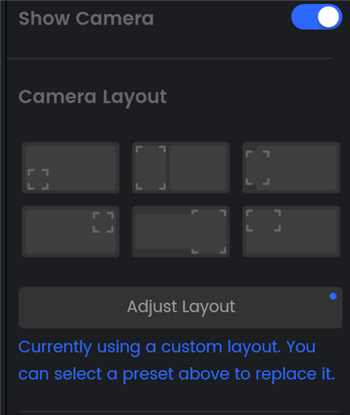
You are Using a Custom Layout
After customizing the camera layout, you cannot crop the video, horizontally flip the lens layout, or set the padding or inset of the video.
Other Camera Settings
Despite setting camera layout, you can also work on other camera settings. These camera settings will provide additional flexibility and creative control when capturing webcam recordings.
Other Webcam Settings
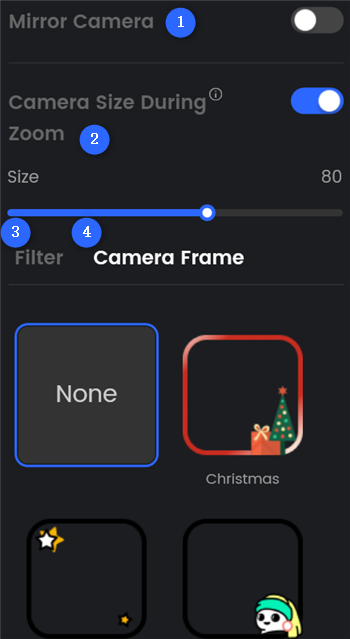
Other Webcam Settings