Modern computers and smartphones can support crystal-clear graphics and impressive HD visuals, but if you try to record such content with inadequate tools you might ruin its beauty. This is why it’s important to have a high-end screen recorder that can capture video in resolutions up to 1080p or better and ensure a high frame rate of at least 60 FPS. Anything less would result in a recording that’s not faithful to what you are seeing on your screen.
Fortunately, there are numerous screen recorders that work on a computer or even a smartphone capable of meeting those requirements. In fact, you won’t even have to pay for the privilege since most of those tools have at least free trial version you can download right away. We tried to present the most significant characteristics of 60 FPS screen recorders for Android, Mac, or Windows that are available in the online market at the moment.
Hopefully, some of the described apps will be sufficient to meet your needs and help you fulfill your objectives.
Table of Contents: hide
Why Users Prefer 60 FPS Screen Recording Apps?
Top 12 60 FPS Screen Recorders for PC and Mac
Mirillis Action! Screen Recorder
Why Users Prefer 60 FPS Screen Recording Apps?
Framerate is an important parameter that affects the quality of recorded videos, and higher values ensure that it will flow perfectly without any sudden jumps or lag. Basically, framerate refers to the number of still images captures during one seconds of recording, and is expressed in frames per second or FPS. Screen recording apps currently in the market vary regarding the maximum FPS they allow, and some limit it in order to save computing resources.
Apps with 24, 30, or even 48 FPS can be used to create videos, but a careful eye might be able to catch the imperfections. With a 60 FPS screen recorder with no watermark that supports recording in 1080p resolution, you can make smooth-running clips that leave a professional impression on the viewer. Since modern computers are powerful enough to handle this task, there is no reason to sacrifice quality by using a lower framerate.
12 60 FPS Screen Recorders for PC and Mac
FocuSee
When it comes to capturing screen recordings with a smooth and visually appealing playback experience, FocuSee stands out as one of the best 60 FPS screen recorders available. FocuSee is a powerful and user-friendly software designed for Mac and Windows users, offering a range of features that ensure high-quality recordings.
One of the key advantages of FocuSee is its ability to capture screen recordings at 60 frames per second. This higher frame rate provides a fluid and seamless viewing experience, particularly for fast-paced or action-oriented content. Whether you’re recording gameplay, creating tutorials, or capturing software demonstrations, FocuSee’s support for 60 FPS ensures that your recordings are crisp, detailed, and visually impressive.
In addition to its frame rate capabilities, FocuSee offers a customizable recording experience. You can fine-tune settings such as resolution and capture specific areas of the screen, whether it’s the entire screen, a single window, or a custom-selected region. FocuSee also provides real-time editing tools, allowing you to trim, cut, and add annotations to your recordings on the fly.
FocuSee Key Features
- Support for 60 frames per second (FPS) screen recording, ensuring smooth and visually appealing playback.
- Customizable recording settings, including the ability to adjust resolution and capture specific areas of the screen (full screen, window, or custom region).
- Real-time editing tools that allow you to trim, cut, and add annotations to your recordings during the recording process.
- Simultaneous recording of audio, webcam, and screen, providing flexibility in capturing multiple sources of content.
- Dynamic tracking of the mouse cursor with an automatic zoom-in effect, enhancing focus and making it easier to follow along with the recorded content.
- Export options that allow you to fine-tune resolution and frame rate settings before saving your recordings, ensuring optimal quality and compatibility with your desired output.
Step 1: Download and Install
Start by downloading FocuSee for free and installing it on your device. Once installed, launch the application to begin. FocuSee offers three recording modes: Full Screen, Custom, and Windows. Choose the recording mode that suits your needs.
Step 2: Define the Recording Region
In FocuSee, you can define the specific region of your screen that you want to record. Adjust the frame to encompass the desired area, and then click the REC button to start the recording process.

Three recording Modes of FocuSee
Step 3: Capture Mouse Movements
During the recording, FocuSee captures mouse movements and clicks automatically. Once you have finished recording, click the red Stop icon on the toolbar to end the recording session.
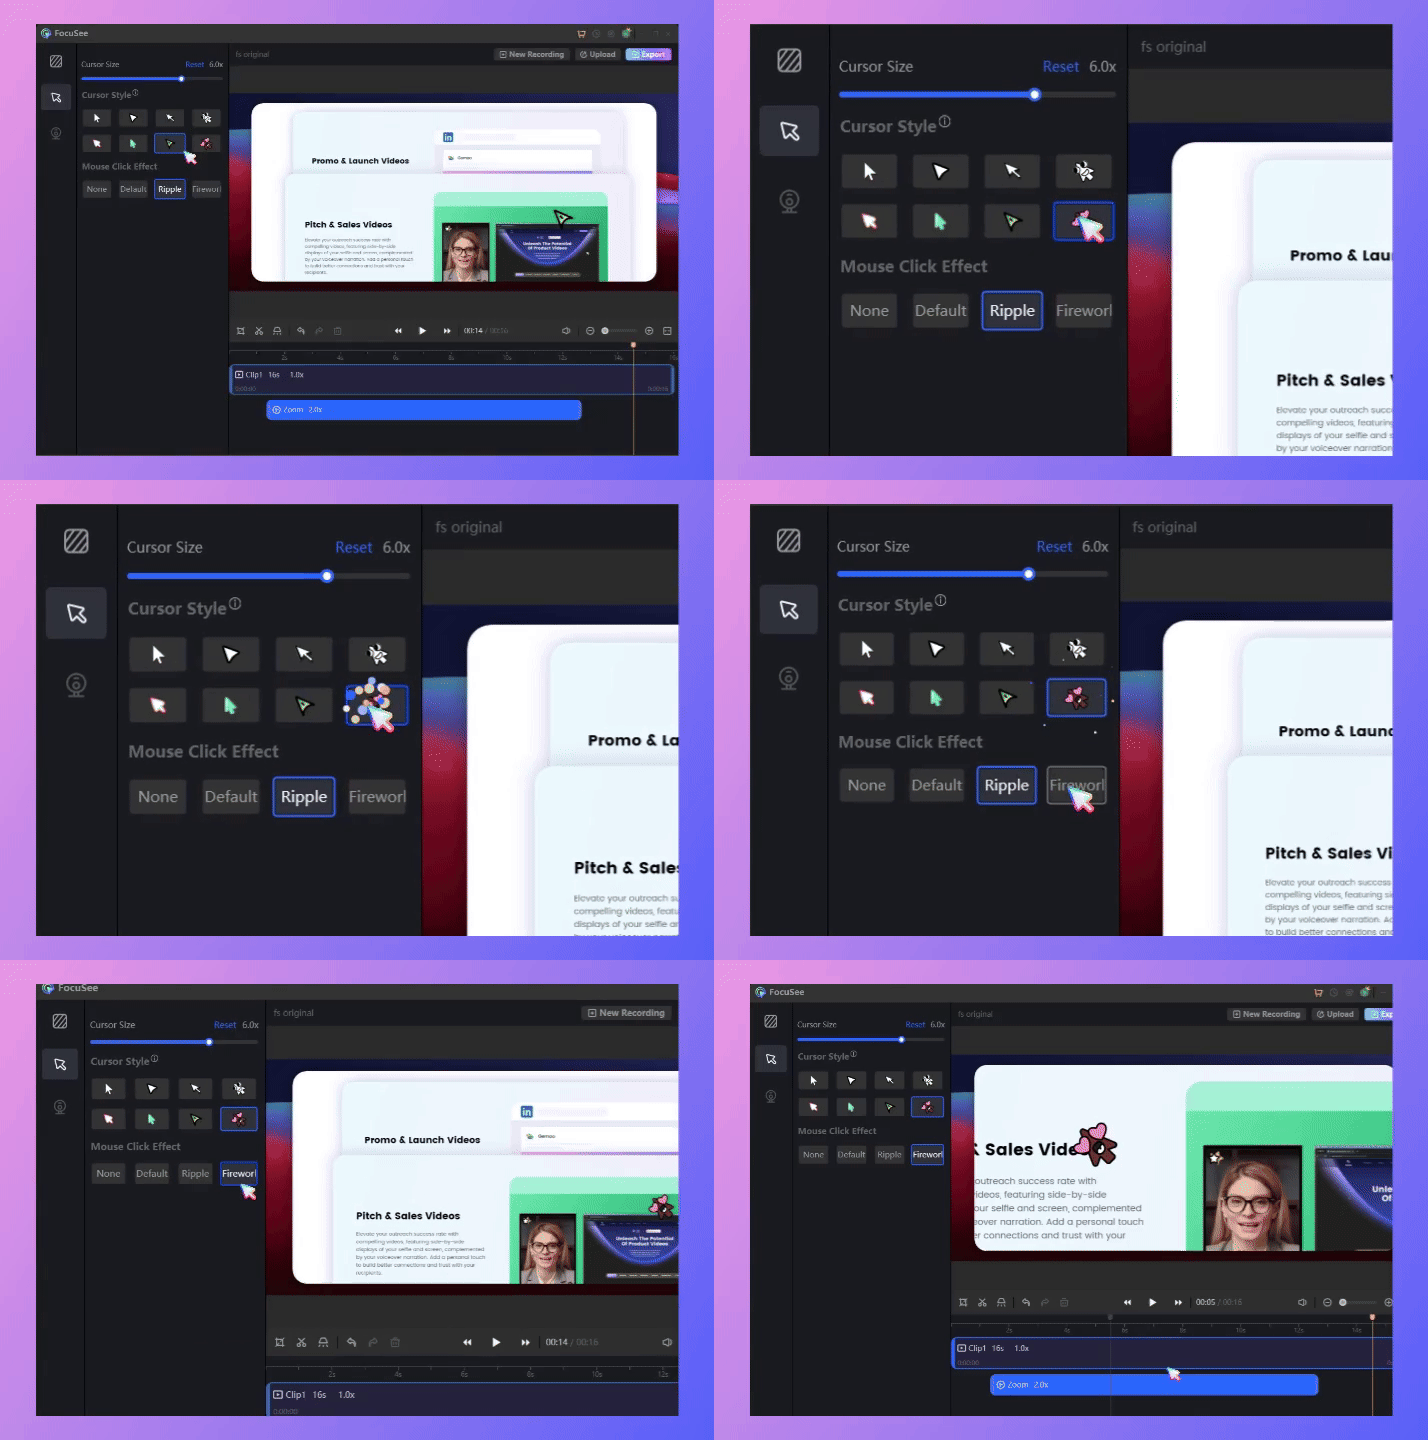
Mouse Cursor Settings
Step 4: Post-Recording Options
After completing the recording, FocuSee offers various post-recording options. You can modify the style, size, and click effects of the mouse cursor. Additionally, you can introduce a spotlight effect, adjust the zoom effect, and make other edits to enhance the recording as desired.
Gemoo Recorder
The first popular 60 FPS screen recorder comes from Gemoo Recorder. It is available for Windows and Mac users, and its neat interface makes the whole recording process easy to operate. Before initiating the recording, you can choose to record your screen or webpage window. You can record important content, such as your work presentation, gameplay show, and your favorite live stream After the recording, you can save them to the cloud and demonstrate it to others with a link.
Gemoo Recorder Key Features
- Screen record wholly or partly on your computer screen.
- Annotate and add texts during the recordings.
- Record your screen without a watermark or time limit.
- Record screen anywhere and anytime through plugins
How to record 60 FPS video?
Step 1. Free install Gemoo Recorder and launch it on your computer. Choose the Screen Only mode and hit the Start Recording button.
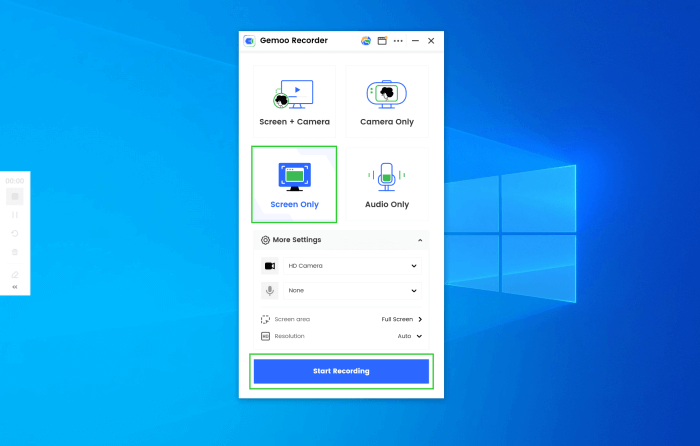
Launch Gemoo Recorder and Choose the Screen Only Mode
Step 2. After a 3-second countdown, you will see the following interface. Turn to the left sidebar if you need to add annotations, pause or stop your recordings.
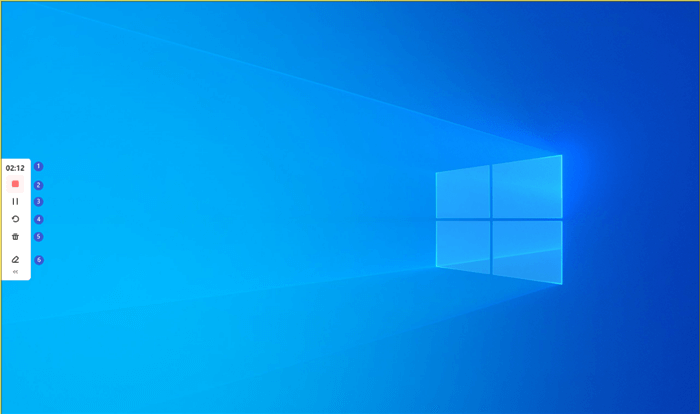
Start to Record the Screen
Step 3. When you finish recording, you can click on the Finish Recording button.
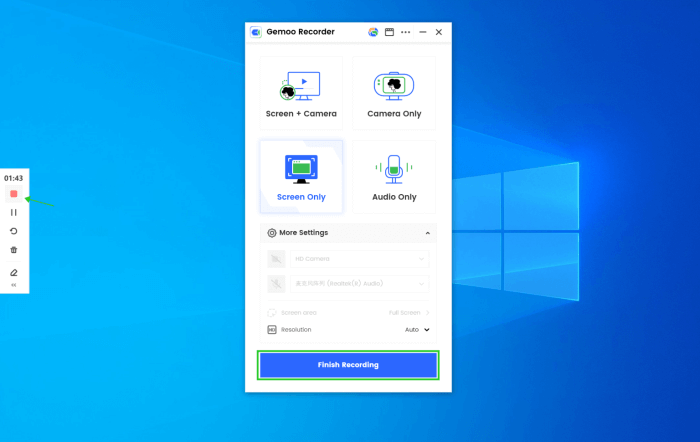
Finish Screen Recording
Xbox Game Bar
If you own a PC with Windows 10, you already have a screen recorder that’s made with gaming in mind. Using the built-in feature named Xbox Game Bar is probably the most straightforward option, and you will be able to get decent clips that include high-quality audio. Once this feature is activated on the device, you can record the screen with keyboard commands without calling its interface to the front.
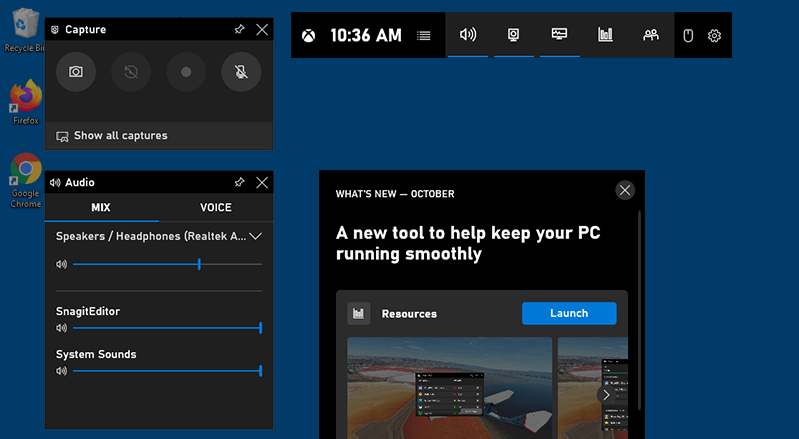
Game Recorder for PC – Xbox Game Bar
Xbox Game Bar Key features
- Pre-installed as part of Windows
- Keyboard shortcuts make it very simple to use
- Record content from the active window (i.e. game)
- Framerate and other settings can be manually adjusted
How to record 60 FPS video?
Step 1. Open Settings on your computer and choose Gaming, and then GameDVR.
Step 2. Adjust the Video quality to high and set Recorded video to 60 FPS.
Step 3. If you intend to record with audio, set Audio quality to 192 kbps.
Step 4. Go back to the game or app that you wanted to record from.
Step 5. Press Windows key + G to open the Game Bar, or Windows + R to start recording immediately.
OBS Studio
Widely regarded as one of the best open-source screen recorders and praised for its rich functionalities, OBS Studio is a solid choice regardless of which OS your computer is running. This software can capture content from any part of the screen, a selected window, or webcam, and it lets the user change lots of different settings for audio and video recording.
Open Source Screen Recorder – OBS Studio
OBS Studio Key features
- Reliable screen recorder 60 FPS with no watermark
- Supports video streaming to online platforms in real-time
- Users can set up custom video resolution and a wide array of other settings
- Audio mixer is included in the software package
How to record 60 FPS video?
Step 1. In OBS Studio, open File menu and select Settings item.
Step 2. Choose Video tab from the left-side toolbar.
Step 3. Change the field Common FPS values to 60 and click on the Apply button.
Step 4. Record the scene you wanted with new settings active.
Bandicam
Users looking for premium screen recording software should give some consideration to Bandicam, especially if they are professional content creators or avid gamers. Audio and video quality can be directly controlled through settings, so this app can deliver optimal performance regardless of the CPU power. Free version of Bandicam is available, but is limited to 10 minutes clips.

Video Capture Software – Bandicam
Bandicam Key features
- High-performance screen recorder with robust editing capabilities
- Clean and professional-looking user interface facilitates a quick learning curve
- Relatively small CPU and memory requirements compared to performance
- Ability to record audio and video separately or together
- Customizable keyboard hotkeys enable faster work
How to record 60 FPS video?
Step 1. Open Bandicam on your computer and go to Format settings menu.
Step 2. Find the FPS field in the Video section of the pop-up window.
Step 3. Change the value of this parameter to 60, and optionally change the values for audio quality.
Step 4. Run the app from which you want to capture content and press the Record button.
With this screen recorder you can create videos in very high resolutions up to 7680 x 4800, and boost the framerate all the way up to 120 FPS. It’s not a surprise that Fraps is extremely popular among online streamers, passionate gamers, and other prolific video creators. Free version may not contain all the best tools, but could allow users to become familiar with the incredible power of this app.
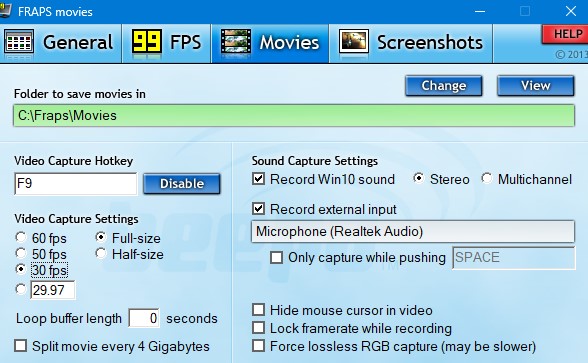
Video Capture Software – Fraps
Fraps Key features
- Suitable for recording high-quality content from a multitude of sources
- Excellent benchmarking tools are very valuable for gamers
- The possibility to minimize the app to system tray
- Sound and video settings can be manually controlled
- Mouse movements can be shown or hidden
How to record 60 FPS video?
Step 1. Run Fraps on the same computer from which you intend to record.
Step 2. Click on the Movies tab on the main taskbar.
Step 3. Choose the framerate you want to record with, i.e. 60 FPS from the drop-down menu.
Step 4. Check the box next to Lock framerate while recording option.
Step 5. Press F9 while your game is running to start recording, and FPS will be displayed on the screen.
Debut Video Capture
Debut is another well-known recorder that has been proven very useful and practical. It has the capacity to support high-quality screen recording, and makes it easy to combine audio with video in the same file. This software is free for personal use and compatible with Windows and MacOS, so it represents a viable solution for a wide range of users with different technical requirements.
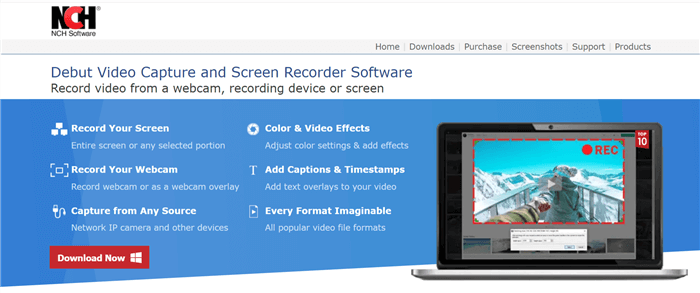
Video Capture Software – Debut
Debut Video Capture Key features
- Can record from any source, including attached security cameras
- Very easy to use and customize
- Multiple output formats are supported for both images and video
- It’s possible to schedule automatic screen recording
How to record 60 FPS video?
Step 1. After you start Debut, open the Options menu.
Step 2. Select the Devices tab, and find the Screen capture section.
Step 3. Move the slider next to Limit Frame Rate to maximum (60 FPS) and click OK.
Step 4. Start recording your content immediately or schedule a time to do it automatically.
Mirillis Action! Screen Recorder
Designed specifically for capturing dynamic content from a PC screen, Mirillis has been well-received by the users and industry commentators. Despite its simplicity, this app allows users to create stunning videos in high resolution that include sound from the app or the microphone. Frequently used by gamers, Action! is a good choice for anyone who needs a reliable screen recorder 60 FPS with no watermark.

Video Capture Software – Mirillis Action! Screen Recorder
Mirillis Key features
- Simple tool capable of capturing videos in resolutions up to 8K
- Recording the screen and webcam feed at the same time
- Excellent integration with online streaming platforms (YouTube, Twitch…) for easy screencasting
- TimeShift feature allows for capturing gaming moves with 10 minutes delay
- It’s possible to add effects and annotations to high-res videos
How to record 60 FPS videos?
Step 1. Run Mirilis Action app on your device and select the Screen mode.
Step 2. Find the Video framerate field in the interface and click on the arrow next to it, then set the value to 60.
Step 3. Click on the Video capture tab and select the portion of the screen to be recorded.
Step 4. Press F9 to start recording the screen, or click on the Live button to start streaming.
RecMaster
Working with this screen recorder is quite easy even if you are not a multimedia expert, since its main functions are easily accessible. RecMaster supports recording in HD resolution on both Mac and PC, and has a wide range of tools that allow for professional-level capturing and editing. Overall, this is a solid recording option but it might be necessary to get a paid version to derive the most value from it.
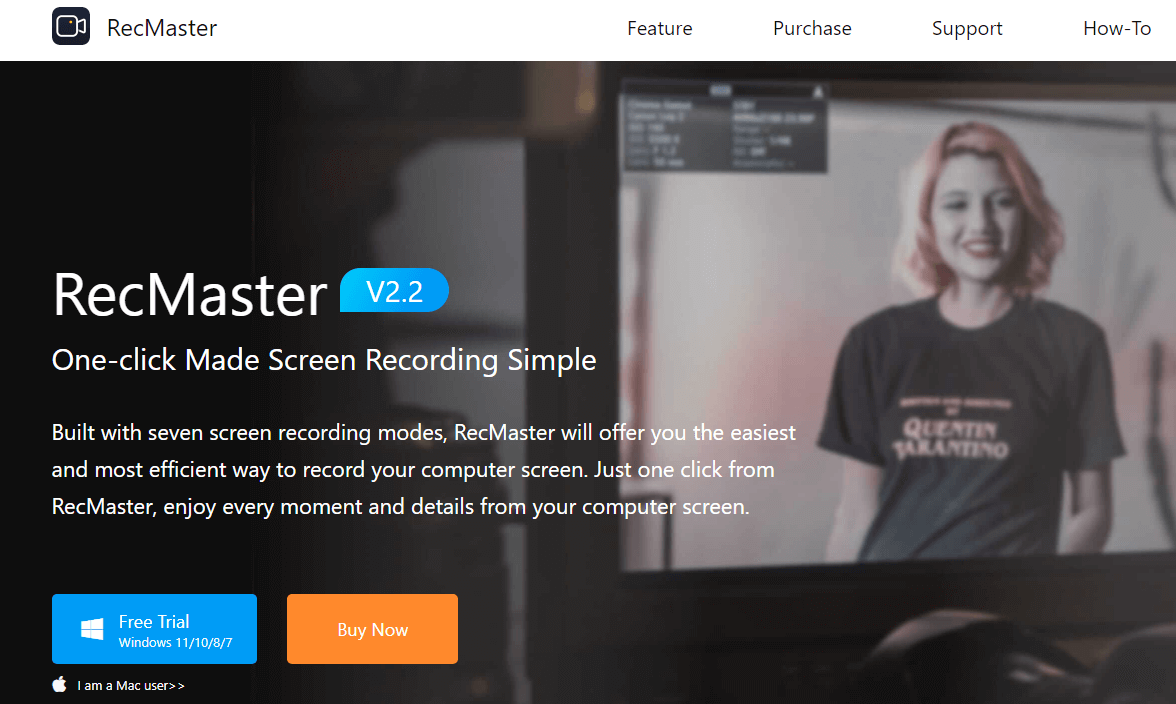
Video Capture Software – RecMaster
RecMaster Key features
- HD recording in resolutions up to 4K
- Users have a choice between 7 different recording modes
- Capturing and highlighting mouse movements and clicks is possible
- The app can recognize when a game is started and automatically record from that window
- Simple but effective editing tools found within the package
How to record 60 FPS video?
Step 1. Start RecMaster and select your preferred mode (Game).
Step 2. Click on the Settings tab to set the parameters for your recording.
Step 3. Find Frame rate icon, and choose 60 from the drop down menu.
Step 4. From the same screen, you can also turn on microphone and/or webcam.
Step 5. When you are done tinkering with the settings, click on the Rec button and start capturing.
Dr.Capture Screen Recorder
Creating various types of media content with Dr. Capture requires minimal technical knowledge, yet the results can be quite impressive. Dr.Capture Screen Recorder has all the features you would expect from such a product, and lets you easily capture audio and video from any part of the screen. It’s ideal for casual gamers or entry-level creative professionals who want a quick and effective solution.
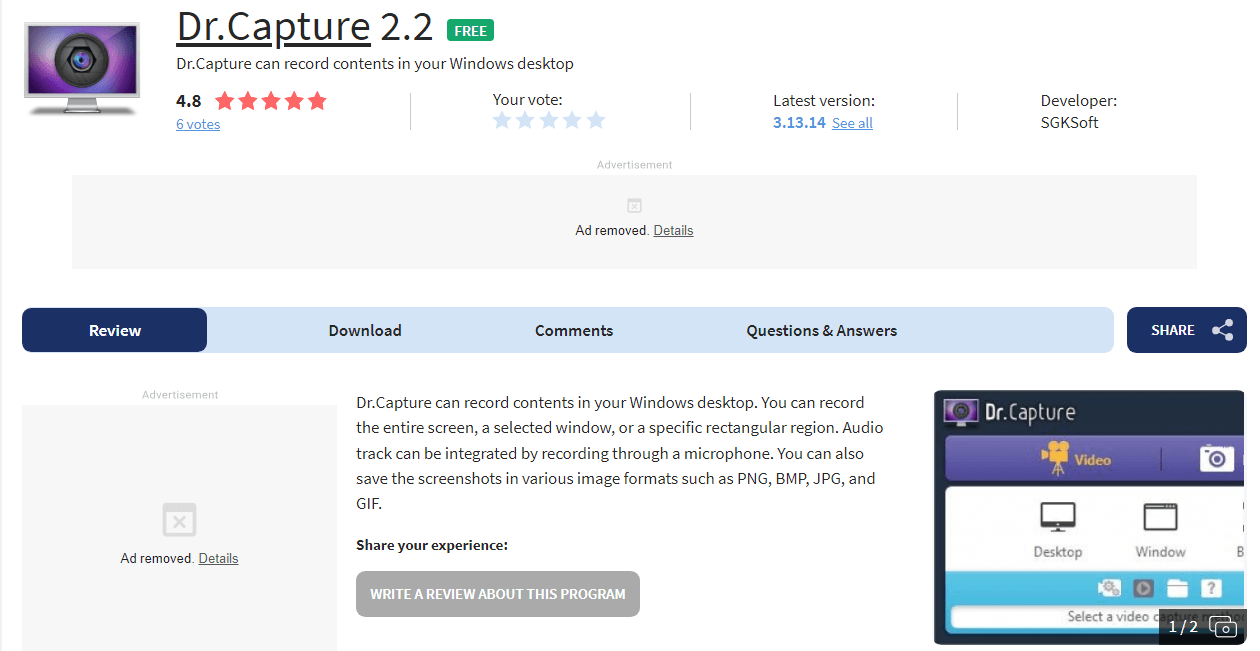
Video Capture Software – Dr.Capture Screen Recorder
Dr.Capture Key features
- Versatile screen recorder capable of performing multiple tasks at once
- Supports several image and video formats, including GIF
- Suitable for recording gaming session with audio and running comentary
- Can be installed on 32-bit or 64-bit Windows machines
How to record 60 FPS videos?
Step 1. Run DrCapture software and click on the Video tab.
Step 2. Select the recording mode you want (Window).
Step 3. Open Settings and set Video quality to Best.
Step 4. Enable audio recording and set a recording limit before you start a new video.
AnyRec
AnyRec is a powerful screen recording product that can also perform video conversion and editing duties. It’s capable of recording with no lag, which is why gamers love it so much. Numerous recording options and the ability to manually change settings make this app great for creating video tutorials, YouTube clips, vlogs, and many other types of multimedia materials.
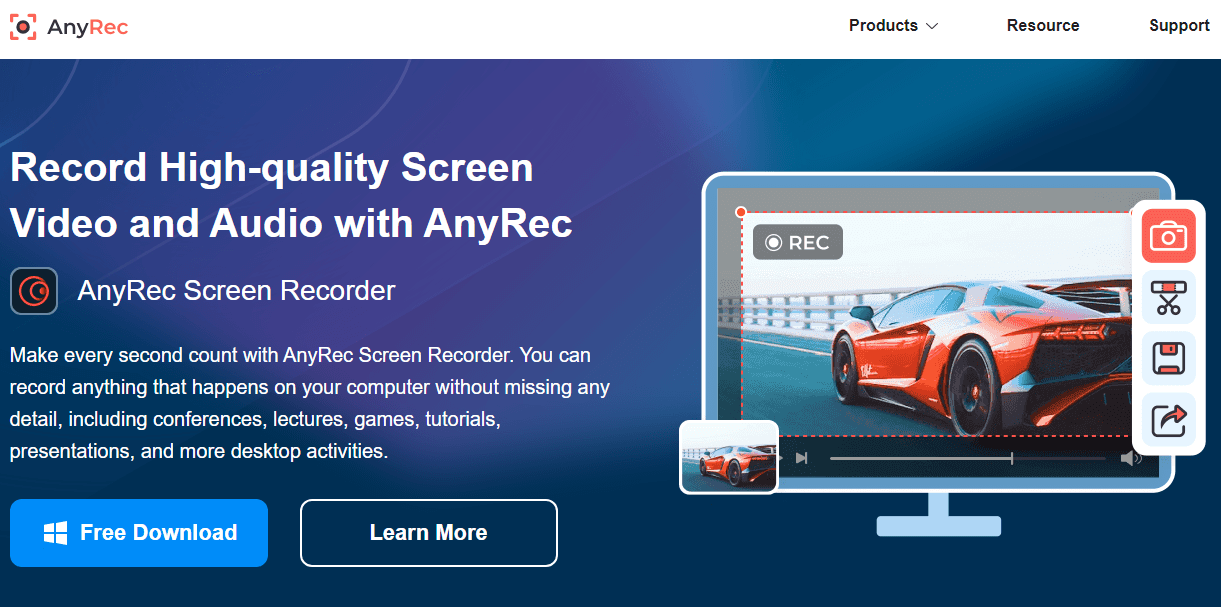
Video Capture Software – AnyRec
AnyRec Key features
- Low CPU requirements, even when recording at a high framerate
- Recordings and screenshots can be saved in a wide variety of formats
- Volume of system audio and microphone sound can be directly controlled
- It’s very easy to trim the videos to a desired length
- Sharing finished video to YouTube requires just one click
How to record 60 FPS videos?
Step 1. Start the app and choose the recording mode (Game recorder or Video recorder).
Step 2. Click on the gear-shaped icon, then select Preferences output.
Step 3. Change the framerate to 60 FPS and confirm by clicking OK.
Step 4. Click on the REC button to start capturing content with the selected framerate.
QuickTime
For many years, QuickTime has been the most used screen recorder and media player on Mac and it comes built into MacOS these days. Its performance is quite impressive and it can easily support recording in high resolution and with a fast framerate. While it has limited functionalities and supports only MOV format, this app can still get the job done if your expectations are moderate.
Video Capture Software – QuickTime
QuickTime Key features
- Records the screen on any Apple device (MacOS or iOS)
- Streamlined interface and simple commands
- It’s possible to make simple edits (trimming, rotating…)
- Lots of different keyboard shortcuts and gestures for all core tasks
- Files can be optimized and downsized before sharing
How to record 60 FPS videos?
Step 1. Run QuickTime on your Mac computer and click on the Apple icon.
Step 2. Go to System preferences, click on Displays, and select Display tab.
Step 3. From here, activate Scaled option and choose Larger text, then click OK.
Step 4. The previous action will increase the framerate to 60 FPS, now go to File and click on New Screen recording.
Step 5 – Select the screen area and audio source, and click OK to start recording.
5 Best 60 FPS Screen Recorders for Android
XRecorder
If you own a fast Android phone and need a good screen recorder to capture its high-resolution graphics, XRecorder should one of the apps to look at. This is a screen recorder with no watermark or time limit, and it can be installed for free from Google App Store (in-app purchases are enabled). At the very least, it’s worth trying out this app to see what the videos made with it look like.
Video Capture Software – XRecorder
XRecorder Key features
- Captures HD videos and screenshots from an Android phone
- It’s possible to crop the videos without external tools
- The app uses data encryption and doesn’t share data with third parties
- The app is frequently updated to ensure smooth user experience
How to record 60 FPS videos?
Step 1. Install XRecorder on your Android phone and run it.
Step 2. Click on the Settings icon from the home screen, then choose Video from the menu.
Step 3. Set the resolution to 1080p and framerate and 60 frames per second.
Step 4. Go back to the home screen and tap the Record icon.
ADV Screen Recorder
ADV Screen Recorder is another popular gaming screen recorder for Android especially for Motorola’s screen recording that’s truly shining when it needs to capture fast-moving scenes from the screen. This app is not very computationally demanding, but it will surprise you with high-quality of recordings and lots of settings you can play with. ADV Screen recorder is definitely good to have on your phone if you enjoy recording your activities.

Video Capture Software – ADV Screen Recorder
ADV Screen Recorder Key features
- Records the phone screen while taking input from front and back camera
- Contains two different engines that can alternatively be used for recording
- Rooting the device is not necessary when installing this app
- The magic wand tool lets you draw on top of your recording
- Users can easily add textual comments to their videos
How to record videos in 60 FPS quality?
Step 1. Run ADV Screen Recorder and tap on the three-dot icon in the corner to open Recorder settings.
Step 2. Find the Video settings section on the screen.
Step 3. Adjust the framerate and bitrate to your preferences.
Step 4. Use one-click commands to record anything from the screen.
MNML Screen Recorder
With this lightweight and user-friendly app, you can capture pretty much everything that you are doing on the phone. The main advantages of MNML screen recorder are simplicity and practicality, but it’s still capable of delivering amazing looking recordings. It can be installed on an Android phone for free, while additional functionalities are available with the premium version.
Video Capture Software – MNML Screen Recorder
MNML Screen Recorder Key features
- Clean interface that contains to advertisements
- Start and stop recording at a press of a button or a single gesture
- Built-in editor allows for simple cuts and improvements
- Doesn’t take up too much resources on your phone
- It’s possible to adjust various settings before recording
How to record 60 FPS videos in high resolution?
Step 1. Start MNLM Screen Recording and choose Settings from the main menu.
Step 2. Pick the Quality tab from the Settings menu.
Step 3. Increase the framerate to 60 and set the desired level of video and audio recording quality.
Step 4. Go back to the home screen and hit the Record button.
Mobizen Screen Recorder
Anyone can create beautiful videos while using this Android app to record screen content. Mobizen is a screen recorder that can be trusted to make clear screenshots and recordings, no matter how dynamic the scene might be. It’s fair to describe Mobizen as one of the better 60 FPS screen recorders with no watermark, and it can even be used for professional purposes.
Video Capture Software – Mobizen Screen Recorder
Mobizen Key features
- Supports HD video and high-quality audio recording
- All commands are easily accessible from a pop-up toolbar
- Length of recordings is not limited and the watermark can be removed
- Solid drawing and markup tools are included
- It’s possible to trim or split the video without leaving the app
How to record 60 FPS videos?
Step 1. Download Mobizen from Google Play Store and start it.
Step 2. Open the Video Settings Menu and click on the FPS field.
Step 3. Change the status from Auto to 60 FPS.
Step 4. Record anything from your screen or webcam with the chosen video quality.
AZ Screen Recorder
Most users who tried AZ Screen Recorder describe it as a reliable recording app that has some interesting options you can play with. It’s great for taking snapshots while gaming or surfing social media, even better for creating GIFs, and can be used for crafting impressive video clips in high resolution with excellent system audio.
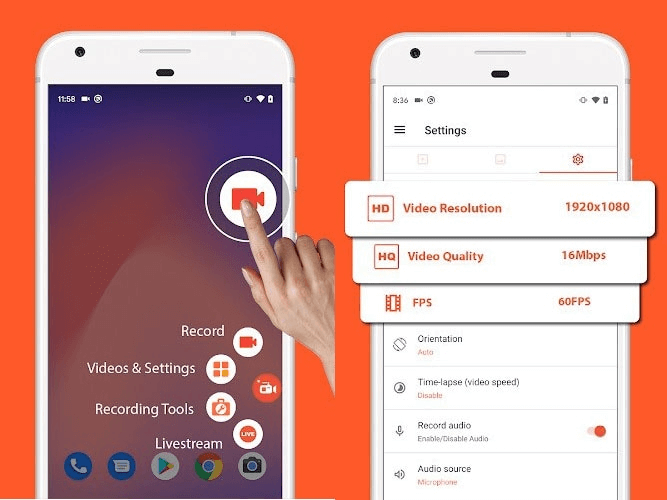
Video Capture Software – AZ Screen Recorder
AZ Screen Recorder Key features
- Free app that can be used with no watermark
- Can record the screen together with the front camera feed
- Rooting the device is not necessary for this app to be installed
- Floating toolbar can stay on the screen as you navigate other apps
- It’s possible to annotate and add graphics while recording
How to record 60 FPS videos:
Step 1. After you start the AZ Screen Recorder on your phone, a window with 4 icons will appear.
Step 2. Click on the gear-shaped icon, and then select Video configuration.
Step 3. Set the framerate to 60 FPS and select the appropriate resolution.
Step 4. Click on the camera-shaped icon and wait for 3 seconds for the recording to start.
Frequently Asked Questions
How do I record 1080p/60 FPS gameplay?
First, you need to check whether your screen recorder of choice supports this resolution and framerate, and you also make sure to choose them in the Settings. Once you’ve done that, you can simply play the game and activate the screen recording function whenever you want to save the action.
What is the maximum framerate supported by high-end screen recorders?
While all of the recommended screen recorders on this list are capable of capturing videos with 60 frames per second, some of the state-of-the-art tools can go as high as 120 FPS. However, such high speeds may be unnecessary if you are recording your PC screen.
How do I record 60 FPSvideo on Android?
With the right screen recording app installed on your phone, you can easily create clips in 60 FPS on your Android phone. In most cases, this is not a default frame rate and you might have to set it manually before you can create smooth-flowing recordings with no lag.
Can I edit high-resolution videos on my phone?
Depending on which screen recorder you are using, some editing tools might be included in the package. If you intend to make serious changes, it might be better to use a mobile editor or transfer the file to a computer where you have a more advanced editing software package.
Let us know what you think!
Even the most demanding content creators are sure to find a few interesting options on our list of best 1080p 60 FPS screen recorders for PC and mobile. Depending on the type of videos you want to make, like recording games, lectures, tutorials, etc, you might want to try some of the apps that you aren’t yet familiar with. We also invite you to let us know about your experiences with any of the recommended apps in the comments section, or to share the article with your friends who might be looking to learn more about recording high-quality videos on computer.


