Massive computers served as the foundation of the modern technology industry. It wasn’t long before these computers were reborn as stylish and convenient laptops. As a result, an array of Operating Systems flooded the market.
Windows and macOS are the most popular operating systems in the world, but they’re not the only ones out there. It’s called Chrome OS. With the Chromebook, you can do more in less time and with fewer hassles.
Record Audio on Chromebook
The one caveat for a lot of users is that they don’t how about the ways they can record screen with audio. Stay with us until the end to find out everything about how to record audio on Chromebook.
Also read: How to Screen Record on Google Pixel >
Table of Contents: hide
How to Record Audio on Chromebook?
How to Record Audio on Chromebook with Online Voice Recorder?
How to Record Audio on Chromebook?
In this part, we collect 3 solutions for Chromebook audio recorders to help you record audio on your Chromebook. Check it step by step.
Way 1. Using MicNote
MicNote is an application that, in contrast to the others described, is more than simply a standard voice recorder for the Chromebook. In addition to being able to record audio continually, this device also functions as a notepad.
It can record high-quality audio for an extended period and will continue to do so even if the screen on your Chromebook goes dark. In addition, there are editing features, such as removing files, pruning, extracting, adding, and other similar operations.
The following is a straightforward instruction manual for recording audio:
Step 1: You can get Mic Note up and running on your Chromebook by first installing the program.
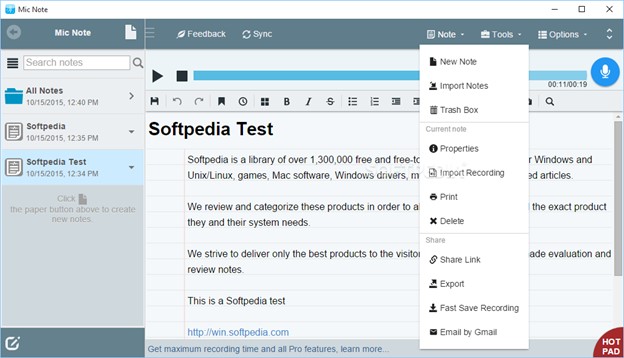
MicNote Recording Audio
Step 2: Launch the software and get the audio that has to be captured in the appropriate format ready.
Step 3: When you are ready, you may start recording by clicking the “Record” button on the right side of the UI. You have the option of making some notes on the notepad while the recording is in progress.
Step 4: You may stop the process by clicking it once again and then modifying or saving the file according to your preferences.
Way 2. Using Cloud Audio Recorder
Cloud Audio Recorder is a speech and audio recorder that is simple, straightforward, and a joy to use. This free audio recorder can record any computer sound, including your voice and the Microphone produces that on your computer.
This audio and speech recorder is not only entertaining but also straightforward to use. You can immediately save the audio file to your computer or Google Drive. You can save the audio in mp3 or wav format once it has been recorded.
Flash recorder and HTML5 are both supported. You can also save the audio file straight to your computer or to Google Drive.
Step 1: Install the extension file on your Chromebook.
Step 2: Next, launch the tool on your device.
Step 3: Click on the Start option, to begin the recording process.
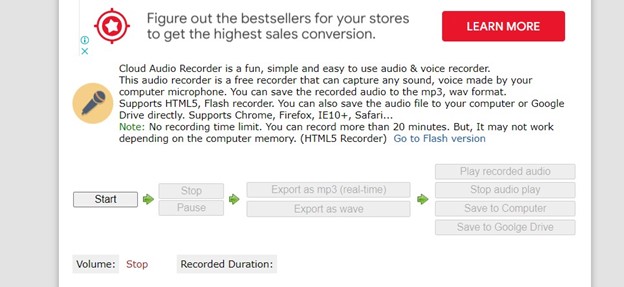
Click on the Start Button
Step 4: Record the audio for the duration you want and then hit the Stop button.
Step 5: You should opt for the Export as an MP3 option to ensure you can save the audio recorded on your desktop.
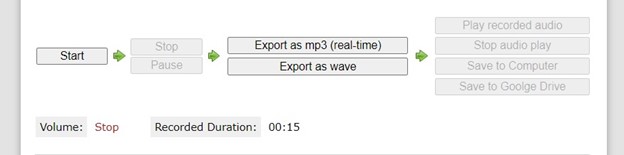
Stop the Recording
Step 6: Now, click the Save to Computer option to save the recorded file.
Way 3. Using Screencastify
Last, there is an alternative that isn’t only a recording device. Screencastify may also be used to capture the desktop of a Chromebook. To create short Chromebook films with audio overlays, Screencastify is ideal.
Drawing tools are already built-in, and you may record just a single tab or your whole desktop. You can even record with a microphone or camera. A superb Chromebook audio and video recording app, in a nutshell!
Step 1: Activate it once again by clicking on its symbol.
Step 2: Turn on the Microphone by turning it on.
Step 3: To record your session, choose the audio device. You can’t tell whether the sound bar is functioning until you can see it.
Step 4: The audio from the browser tab (such as a YouTube video sound) may be included by following these simple steps.
Step 5: Select “Show more choices“.
Step 6: Turn on the “Tab audio” feature.
Step 7: Then go to the “Recording Tab“. Your audio recording session will begin with a countdown.
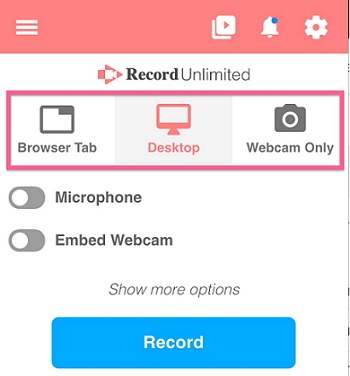
Recording Audio on Screencastify
How to Record Audio on Chromebook with Online Voice Recorder?
Apart from the in-built softwares, you can also record audio on Chromebook using different online tools. Read about these three online softwares to help you record audio on Chromebook.
Way 1. Apoersoft Free Online Recorder
You may use Apowersoft Free Online Audio Recorder to record high-quality audio you play on your PC and your voice through the Microphone.
Aside from being able to record high-quality audio, it can also add ID3 tags, and the built-in audio library makes it easier to manage your recordings. This Chromebook audio recording tool is a breeze since no other plug-ins are needed.
Step 1: Activate the “Start Recording” button on your browser’s audio recorder.
Step 2: Make sure you’ve got the right audio source. You must download and install the launcher on your Chromebook if you are a new user. This will no longer be necessary in the future.
Step 3: You may either open the audio you want to record or speak into the Microphone, to begin recording.
Step 4: When you’re ready to begin recording, click the red “Start” button.
Step 5: The file is saved to the library and may be accessed by selecting the “Menu” button in the bottom right corner of the screen when you press “Stop“.
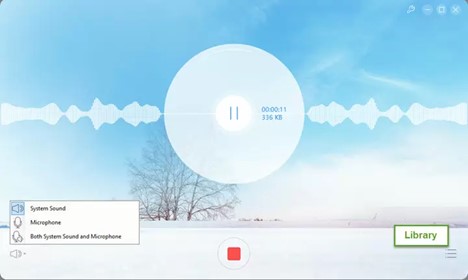
Apowersoft Online Screen Recorder
Way 2. Online Voice Recorder
Another audio recorder for Chromebooks is the Online Voice Recorder. To use this, you’ll need an Internet connection and the Google app, which you can add straight to your Chrome browser.
You may capture audio from your Microphone with this simple and free program. The audio file may be trimmed and saved straight as an MP3 after recording.
Step 1: You may download this app from the Google App Store or directly use the application via the website.
Step 2: When prompted, click “Allow” to allow the flash reminder to appear.
Step 3: Recording begins when you speak into your Microphone and press the silver circular button. Press the same button twice to complete the operation.
Step 4: Listen to the recorded audio and remove any extraneous bits if necessary.
Step 5: Save the document to your Chromebook by clicking “Save” after you’re finished.
Further Reading: How to Record Live Streaming >

Online Voice Recorder
Way 3. Vocaroo
Using Vocaroo on a Chromebook allows you to record your voice. Because it works in the cloud, you may free up a lot of space on your computer’s hard disk.
It’s free and doesn’t need you to have an account or a subscription to use it. It’s worth noting, though, that this program can only record audio via the Microphone.
Vocaroo makes it simple to capture audio on a Chromebook. Here’s how it’s done:
Step 1: Go to vocaroo.com on your Chrome web browser.
Step 2: The “Click to Record” button on the website may be clicked to record.
Step 3: A pop-up message will request permission to access Microphone. Here, you should choose “Allow.”
Step 4: Recording has begun, and you may stop it by using the “Stop” button.
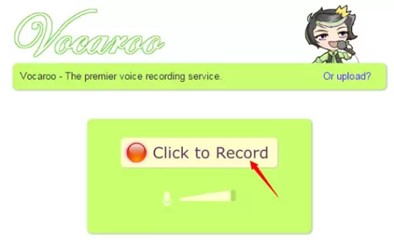
Vocaroo Screen Recorder
Note: Emailing or embedding the file will then appear as choices. You may also save the recorded file to your laptop and access it anytime.
How to Record Audio on Chromebook on PowerPoint?
A tool in Microsoft PowerPoint allows you to generate narration for any slides in whatever way you see suitable. You’ll be able to record and re-record voiceovers for your presentations in a manner that won’t make you feel self-conscious or embarrassed.
The procedure is almost the same for Chromebook, Mac, and PC users, and you may use either the Microphone that is integrated into your Chromebook or a headset instead. You may quickly record narration over a PowerPoint presentation by following a few simple steps, regardless of the operating system that you want to use.
Step 1: Launch PowerPoint and open a new or an existing presentation.
Step 2: Choose “Insert” from the toolbar at the screen’s top.
Step 3: To listen to the track, choose “Audio” from the menu on the far right. Select “Record Audio…” from the menu.
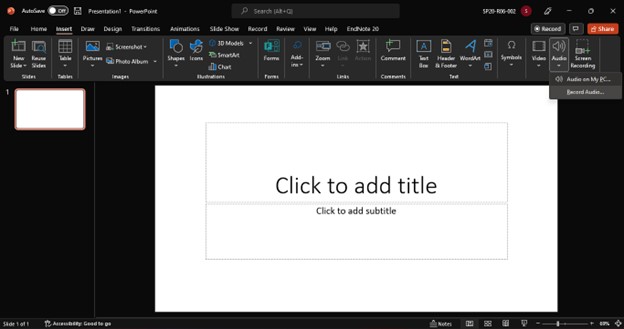
Click on the Audio Option
Step 4: Name your audio file.
Step 5: When you are ready to begin recording, you may click the symbol that looks like a circle.
Step 6: When you are finished recording, be sure you choose “OK.”
Step 7: When the narration has been put to the slide, a microphone symbol will appear on the slide.
Tip. How to Record Screen and Audio on Windows/Mac Computer?
If you are using a Windows or Mac computer, you may use another alternative way to record screen and audio on your computer. FocuSee can offer you a good experience when you seek to record a tutorial video, product demo video, promo video, YouTube music, gameplay, etc. In addition, you can record selfies and voiceovers easily if you need to.
FocuSee Key Features:
- Customize your recording by choosing to capture either a specific area or the entire screen.
- Effortlessly emphasize your click actions on the screen while recording with automatic zoom-in functionality. Highlight specific details and effortlessly capture attention.
- Enhance your recordings with a variety of mouse cursor styles and click effects.
- Easily resize your video to a preset size optimized for social media platforms.
- Export your final creation as stunning 4K videos or high-quality GIFs.
- No professional skills required. Save you precious hours and extra effort on video editing.
Free install FocuSee now and take the on-screen instructions to record audio on Window/Mac in 1 click.
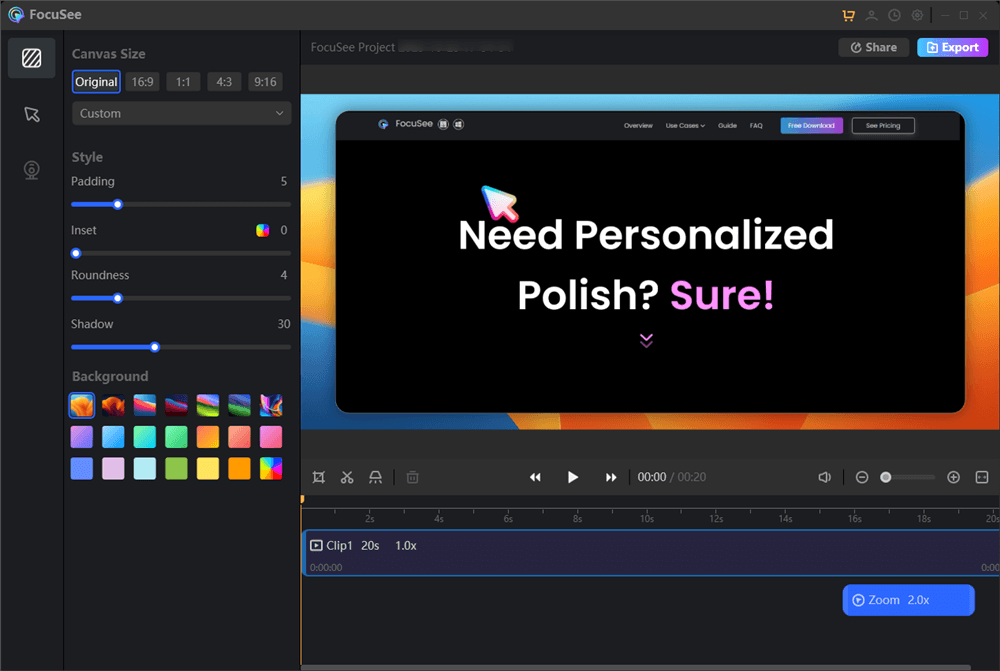
FocuSee Interface
Also Read: Best Meeting Recording Software You Need >
FAQs on How to Record Audio on Chromebook
Q1. Can I record audio on a Chromebook without any additional software?
Yes, you can use the built-in audio recorder app on your Chromebook to record audio without any additional software.
Q2. How do I access the audio recorder app on my Chromebook?
You can access the audio recorder app by clicking on the launcher icon on the bottom left corner of your screen and typing “audio recorder” in the search bar.
Q3. Can I record audio from external sources like a microphone or an instrument?
Yes, you can connect an external microphone or instrument to your Chromebook and record audio using an audio recorder app such as Gemoo Recorder.
Final Words
If you are concerned about an audio recorder in Chrome, you should read this post since it will assist you. Including a variety of pointers for recording audio on a Chromebook.
All of the suggestions and techniques that were shown are highly potent and effective in the area of recording. The tools and software, along with their appealing characteristics, are also addressed to further your understanding.
If you want to make screen recordings on Windows and Mac computers efficiently, FocuSee is the program you can never miss. Download that robust program and have a try.
