Technology has revolutionized our lives and work in today’s fast-paced world, with laptops playing a vital role. These portable and versatile devices have become essential tools for professionals and individuals. Nowadays, whether teachers deliver online lectures or colleagues collaborate remotely, laptops have enabled seamless communication and interaction through video conferencing platforms, transcending physical barriers. However, it can be incredibly frustrating for users when they discover that their webcams cannot zoom in or out while recording or reviewing videos.
Zoom in & out Webcam on Windows
This limitation hampers their ability to adjust the framing or focus per their preferences, ultimately impacting their recordings’ overall quality and effectiveness. This article will delve into various solutions to tackle this issue head-on. We will provide practical methods to zoom in or out on a webcam, ensuring you can enhance your video experience with just a few simple steps. So, without further delay, let us dive into the article and uncover the secrets to achieving the perfect zoom on your webcam.
Table of Contents: hide
How to Zoom My Webcam on Windows 10/11
Zoom in/out Camera using Gemoo Recorder for Windows
How to Zoom in/out of Webcam?
Are you still uncertain about zooming in and out while using Windows Live Messenger? No worries at all! Microsoft’s Windows Live Messenger, or MSN Messenger, is a highly popular instant communication tool known for its user-friendly interface and extensive collaboration features. This section has prepared a comprehensive and easy-to-follow guide on adjusting the zoom level during video calls on MSN Messenger. Let us dive right in and explore this feature together!
Step 1. First, start Windows Live Messenger on your computer or laptop.
Step 2. Select “Tools” from the top menu, then click “Set up audio and video devices.”
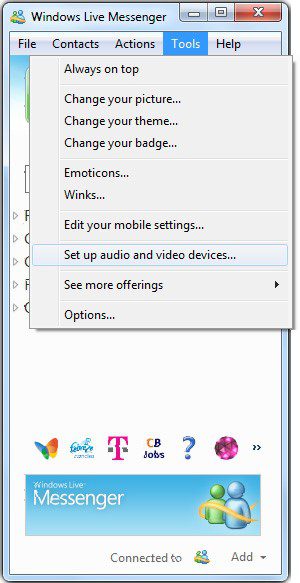
Click On Set Up Audio And Video Devices
Step 3. Set the desired volume and click “Next.”
Step 4. Adjust zoom by selecting “Camera Control,” sliding to the desired level, and clicking “OK” to confirm.
How to Zoom My Webcam on Windows 10/11
Are you still wondering how to zoom in and out on your default webcam on Windows? Look no further! Windows has a webcam feature that makes it simple for users to take pictures and record videos. But many users discover that they frequently need to adjust the framing, focus, or capture precise details by zooming in or out on their webcam. Zooming in can improve clarity, and zooming out can give a broader view. This article will walk you through zooming in and out on your Windows default webcam.
Step 1. Click “Start” to open the menu.
Step 2. Within the Start Menu, locate and access the “Camera App” using the search bar.
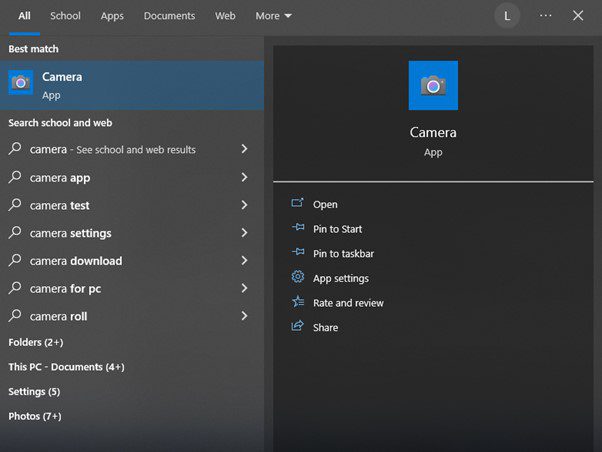
Locate And Open The Camera App
Step 3. Ensure the Camera app has the necessary permissions to access your webcam, microphone, and location by granting the appropriate permissions and verifying that your device’s location setting is turned on.
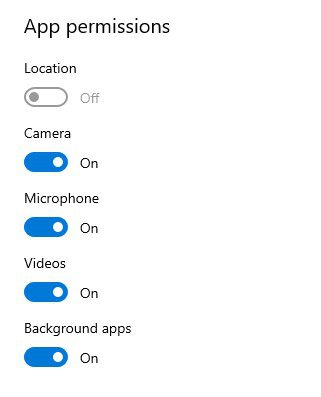
Ensure All The Required Permissions Are Enabled
Step 4. Zoom using the left slider in the Camera app.
Zoom in/out Camera using Gemoo Recorder for Windows
To adjust the size of your webcam, you can utilize third-party software that allows you to zoom in or out. Gemoo Recorder is a great option for resizing your webcam video for various purposes, such as recording, online meetings, or live streaming. This software is fully compatible with both Windows 10 and Windows 11. Follow these steps to zoom in or out on your camera using Gemoo Recorder on your PC.
Step 1: Download and install Gemoo Recorder on your PC, and log in to it.
Step 2: Choose “Camera Only” first, then click the ”More Setting” to zoom in or zoom out your webcam.
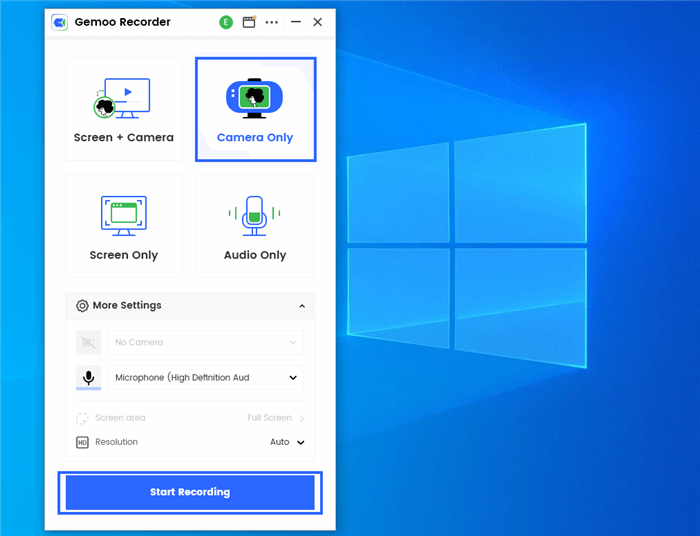
Select Camera Only Mode and Initiate Recording
Using Gemoo Reorder to zoom your camera just so easily and fast, let’s install Gemoo Rcorder and try it for free!
Pro Tip. How to Zoom in and out Your Screen While Recording
FocuSee, a user-friendly and professional video zoom editor compatible with both Windows and Mac, empowers you to enhance your videos with captivating zoom effects. Whether you prefer automatic application or manual adjustment, FocuSee offers the flexibility to create stunning zooming-in effects effortlessly. When it comes to recording tutorial videos, product demos, promo videos, and more, FocuSee ensures a seamless experience. Free to try FocuSee and figure out its features.
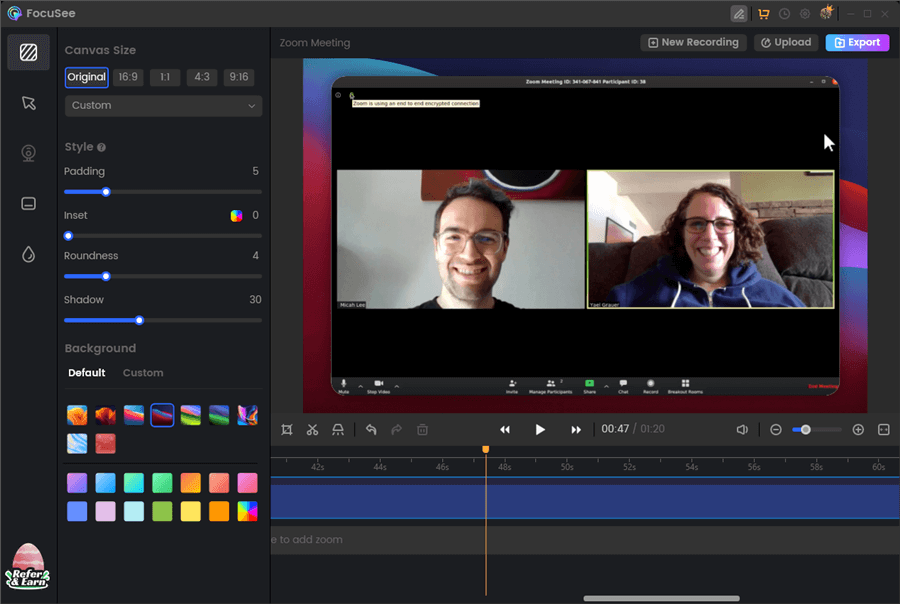
FocuSee Overview
Key Features:
- FocuSee automatically follows the cursor movement and applies dynamic zoom-in effects to enhance the video.
- Manually adjust the Zoom level or locate and add other zoom-in effects.
- Customize the screen recording area and record the screen according to your needs.
- Offer easy video editing tools, allowing you to personalize video canvas, mouse cursor effects, webcam appearance, and zoom-in effects.
- Enable you to record screen and webcam simultaneously or separately.
- Apply in various situations including making demo videos, product video tutorials, and marketing videos.
Why Is My Webcam Zoomed In and How to Fix it?
Have you ever been annoyed to discover that your webcam was zoomed in, giving you a close-up or restricted view? It is a frequent problem that many users run into, and it can make recording and using video less convenient. Your webcam could be zoomed in without your knowledge for various reasons, some of which are:
- Alteredsetting: The zoom level of your webcam can be greatly influenced by the software settings you choose. Numerous webcam programs and applications allow users to finely tune their zoom settings, catering to individual preferences and needs. If the software settings are configured to emphasize zooming in, it implies that the default zoom level is adjusted for a closer and more intimate perspective. To rectify or customize the zoom level according to your liking, the software usually furnishes controls that facilitate such adjustments.
- Hardware Specification and Limitations: The zoomed-in appearance of your webcam can be influenced by the hardware itself. Certain webcams have fixed focal lengths or limited zoom capabilities integrated into their physical design. Unlike cameras with adjustable lenses or optical zoom features, these webcams cannot be easily modified to change the zoom level. The focal length and zoom capabilities are predetermined during manufacturing, so you have limited control over adjusting the zoom functionality of such webcams.
- Drives not updated: Another factor that can cause problems with webcam zooming is related to the drivers. Outdated or incompatible webcam drivers can lead to unexpected behavior, including issues with zooming functionality. They serve as the crucial link between the hardware of the webcam and your OS. They facilitate smooth communication and ensure the proper functioning of the device. It is important to regularly update your drivers to address any known bugs or compatibility issues to avoid consequences.
Additionally, we have gathered a compilation of common solutions to assist you in resolving this issue.
Setting the webcam to default
When your webcam is zoomed in, resetting the camera app settings can be an effective solution. Misconfigured settings or accidental adjustments may result in the camera app displaying a zoomed-in view over time. You can reset the camera app settings by following a few simple steps. To begin, launch the camera app on your Windows device. Then, go to the app settings, usually accessible via an icon or menu. Look for a setting to reset or restore the defaults. By choosing this, the camera app will return to its default settings, which can assist in resolving any zoom-related issues.
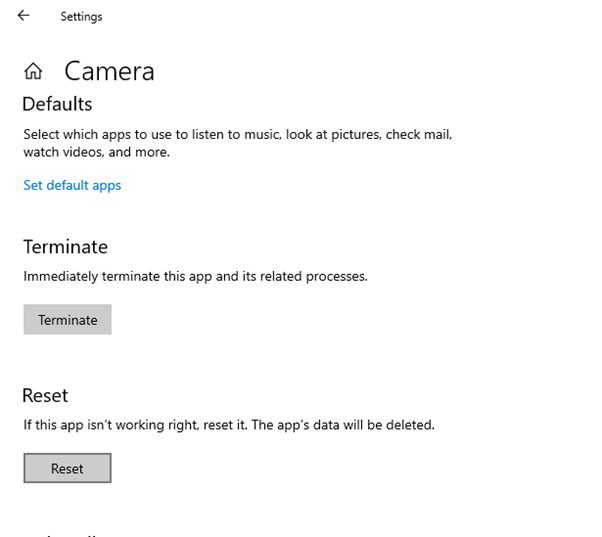
Click On The Reset Button To Set Camera Zoom Setting To Default
By deleting any third-party camera software
If you encounter issues with your webcam, such as unexpected zooming, it is worth considering uninstalling any third-party camera software installed on your computer. Sometimes, conflicts can arise between the default camera app, drivers, and third-party software, leading to peculiar behavior or problems with zooming functionality. You can resolve the situation by turning off the third-party camera software to tackle this. You can achieve this by uninstalling it through the Control Panel or temporarily deactivating it via the software’s settings.
Step 1. Launch Control Panel
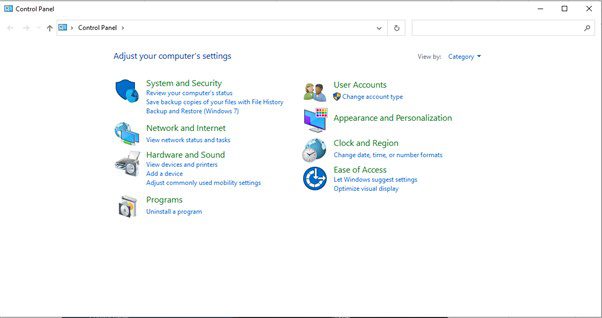
Launch The Control Panel
Step 2. Then, click on “Programs and Features.”
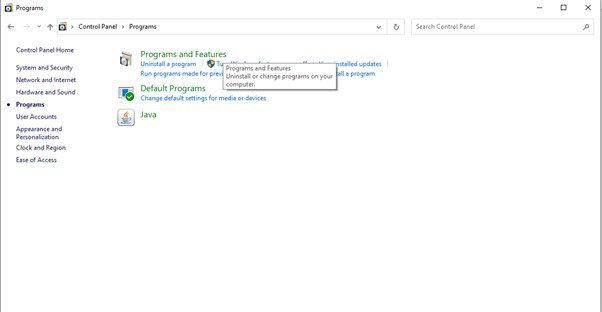
Click On Programs And Features
Step 3. Look for the third-party camera software in the list of installed programs.
Step 4. Select the software > “Uninstall” option.
Changing zoom settings
Adjusting the zoom settings is necessary when attempting to repair a zoomed-in webcam. Most camera apps and webcam software allow you to control the zoom level. You can fine-tune the zoom to your desired level by accessing these settings. Look for the zoom controls within the camera app or software interface, typically represented by icons or sliders. Depending on the software, you may be able to zoom in or out incrementally or manually adjust the zoom level. Experiment with various zoom settings until you get the desired framing and perspective.
Webcam drivers
Keeping your webcam drivers up to date is crucial in troubleshooting and resolving camera performance problems, including zoom-related issues. To ensure optimal performance, updating your webcam drivers regularly is essential. Outdated or incompatible drivers can create compatibility conflicts, hindering the proper functioning of your webcam. You can use the Device Manager feature on your Windows computer to ensure drivers are updated. This handy tool allows you to check for any available driver updates easily.
Step 1. Search “Device Manager” in the Windows search bar, and click on it.
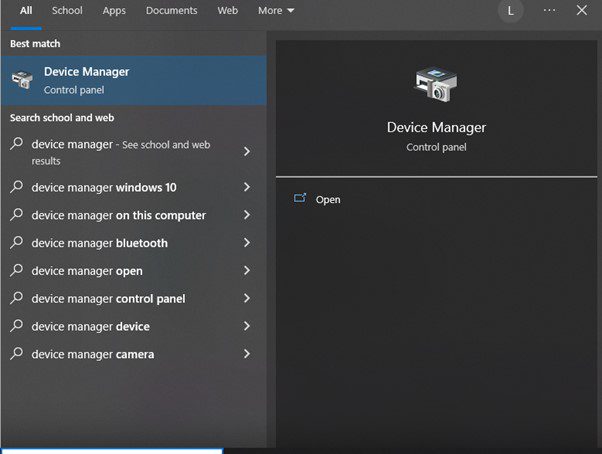
Open Device Manager
Step 2. Once inside, look for the “Camera” in the list and click on it.
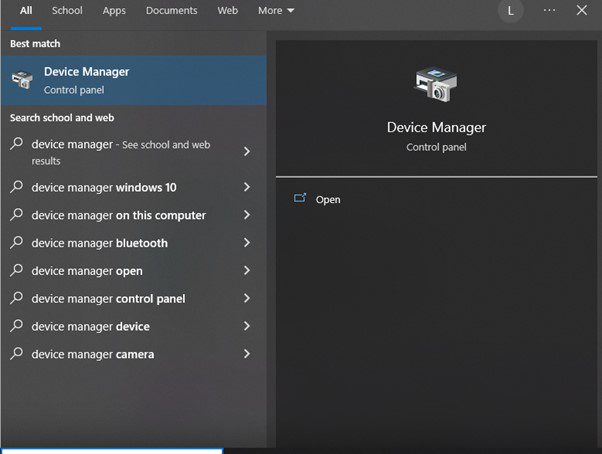
Click On Cameras
Step 3. From the dropdown lists, choose Camerasand right-click on it.
Step 4. Then, from the drop-down menu, choose the “Update driver” and wait until the process is completed.
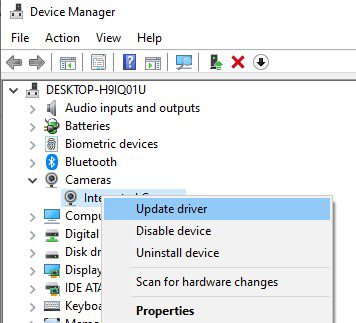
Click On Update Drivers
Final Thought
In conclusion, zooming in and out on your webcam offers numerous benefits, allowing you to fine-tune the framing, focus, and perspective of your videos or images. This article provides detailed instructions on achieving this zoom functionality on your built-in camera and MSN. If you found this article useful, we kindly encourage you to share it with your friends and family, who may also find the information valuable. Additionally, we truly value your feedback, so please do not hesitate to leave your comments in the comment section below.


