We all enjoy watching videos, but sometimes, more than the default view is needed. Videos usually play in their original size and orientation, which is generally acceptable. However, sometimes, you want to zoom in on the action or pay attention to particular things. When that happens, the ability to zoom in on a video can be helpful.

How to Zoom in on a Video
In this article, we’ll walk you through how to zoom video with some tools. You’ll discover various software solutions and methods for novice and expert users. With these techniques, you can make your videos more exciting. Let’s get started and make your videos awesome!
Table of Contents: hide
What Video Editor Can You Zoom In?
How to Zoom in on a video While Playing?
What Video Editor Can You Zoom In?
The capabilities of modern software are vast, and video editing has advanced significantly. One such feature essential for video editors is the ability to zoom in on your content. The following video editors can be used to zoom in on a video:
- Final Cut Pro: For professional video editing on a Mac, Final Cut Pro is the program of choice since it has easy-to-use zooming features.
- FocuSee: You can automatically zoom in on your video clips during the screen recording process. After completing the recording, you can also manually adjust the zoom level and add new zooming effects in the video editing interface. This is available for Mac and Windows.
- iMovie: Another Mac-friendly option provides a user-friendly interface with zooming capabilities.
- HitFilm Express: This free video editing software has zooming features and is suitable for beginners and more experienced editors.
These video zoom editors make it easy to zoom in on your videos. This feature can focus on something specific in your video or add exciting effects. Moreover, you can check out these options to see which one works best for you, depending on what you want to do and how comfortable you are with them.
Further Reading: How to Record a Demo Video >
How to Zoom in on a video While Playing?
Zooming in can be helpful when you want a closer look at a particular video area while it plays. Using the Zoom option, you may narrow in on details or enlarge the video on your screen. The good news is that this feature is frequently easy to use and is present in many video players and video editing programs.
One of them is the FocuSee. In this tool, you can zoom in on specific parts of your video while playing. FocuSee’s automatic zoom-in feature keeps the same zoom level throughout the recording and allows you to adjust the zoom-in effect after recording as well.
Step 1: Free install FocuSee and open the program on your computer. Here, we choose the Custom mode to get started.

Choose a Recording Mode
Step 2: Choose an area to record a video.

Frame an Area to Record
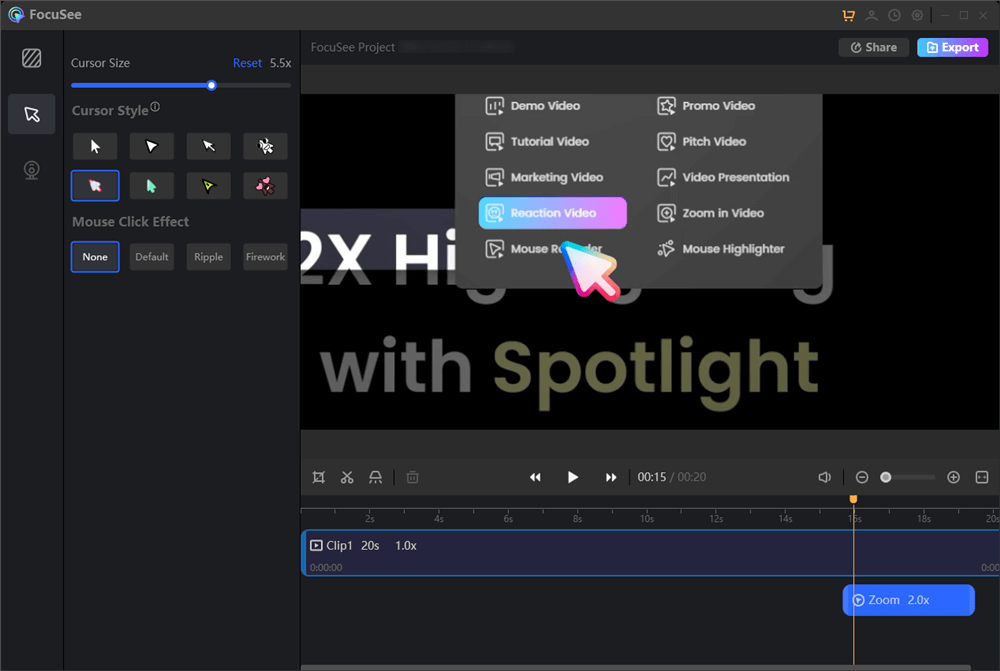
Step 3: Access the video editing page and customize the zoom-in effect.

Preview and Customize the Zoom-in Effect
Once finish editing the video, click on the Export button to download your video.
How to Zoom in on a video After Saving?
Zooming in on a video after saving it might sound tricky, but it’s pretty doable with the right video editing software. Whether you’ve captured a special moment and want to emphasize a detail or correct a framing issue, post-saving zooming can help you enhance your videos. Let’s discover how you can do it!
iMovie
iMovie has many excellent features for your videos, like cutting, making things look closer or farther away, removing backgrounds, adding cool effects, making smooth transitions, and changing how fast or slow parts of your video play. If you want to zoom in on something in your video using iMovie, here’s how you can do it:
Step 1: Launch iMovie and import your video. Place the video clip onto the timeline.
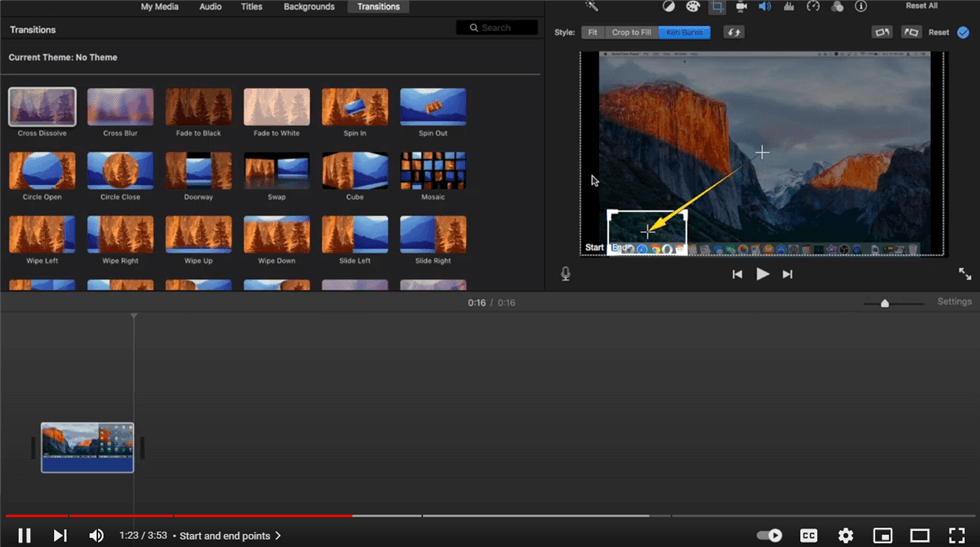
Step 2: Access the Cropping feature by clicking the designated button. Within this menu, you’ll find three video cropping styles. Opt for the Ken Burns style to add a zoom-in/out effect.

Zoom in on a video After Saving on iMovie
Step 3: In the viewer, you’ll notice two frames marked as Start and End present over your video clip. Utilize these frames to set the desired crop at the beginning and end of your clip.
Step 4: Click the “Apply” button to save your changes.
Movavi
Movavi Video Editor is your ultimate video editing companion. You may enhance your videos with this simple application by seamlessly zooming in for an engaging close-up look. In addition to the zoom feature, you can turn, trim, and apply incredible effects, filters, and transitions to your videos to make them even more impressive. Let’s have a look at its zooming-in on a video feature:
Step 1: Import your video clip using the Add Media Files button. It appears in the timeline automatically.
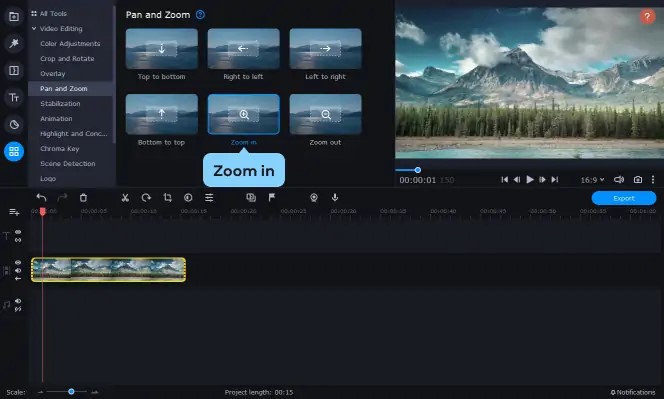
Step 2: Add a zoom-in effect from the More tab and Pan and Zoom section. You can fine-tune the frame in the Preview Window.

Add a Zoom-in Effect
Step 3: Export your edited video, select settings, and click Start from Export button.
Can I Zoom My Video in Zoom?
Certainly! You can adjust the camera view size within the Zoom app, allowing you to control what others see during a video conference. This feature is handy for emphasizing a particular element or showing more of your own video during the call. To do this:
Step 1: Initiate or enter a meeting.
Step 2: Click on the Camera Control icon.
Step 3: Utilize the icons within the Camera Control popup to adjust the zoom and camera position as necessary. Finally, select “Done” to go back to the meeting controls.
Final Thought
In conclusion, you can zoom in on a video to improve its visual appeal for your audience. It can be done using different editing programs or online tools. It helps you highlight specific things in your video. Avoid over-zooming, as it can degrade the quality of the video. A last check should be made before editing is complete. Furthermore, share your concerns in the comments below!


