Screenshots can be useful for various purposes, such as documenting a problem you are experiencing with your computer, creating visual instructions for someone else to follow, or capturing a moment in a game or video. Regardless of the reason, taking a screenshot on a Dell computer is a simple process that anyone can do.

How to Screenshot on Dell Computer
There are several different ways to take a screenshot on a Dell computer. We will cover four main methods: using the Print Screen (PrtSc) button, Windows Snipping Tool, Windows Game Bar, and using keyboard shortcuts. We will provide step-by-step instructions for each method and tips and tricks to help you get the best results.
By the end of this article, you will have a solid understanding of how to take a screenshot on a Dell computer and save it to your hard drive or share it with others. So, let’s get started! If you have any questions or need further assistance, please don’t hesitate to ask.
Table of Contents: hide
Part 1. How to Screenshot on Dell Computer?
Part 2. 10 Best Tools to Screenshot on Dell Computer
Part 3. FAQ About Taking Screenshots on Dell Computer
How to Screenshot on Dell Computer?
Taking a screenshot on a Dell computer is a simple process that allows you to capture an image of your computer’s screen and save it to your hard drive or share it with others. There are several different ways to take a screenshot on a Dell computer, including the Print Screen (PrtSc) button, the Windows Snipping Tool, the Windows Game Bar, and keyboard shortcuts.
Screenshot on Dell Windows 11/10 via Snipping Tool
Here’s how to use the Snipping Tool to capture a screenshot on a Dell PC running Windows 11 or 10:
Step 1: To access the Run dialog, use the Windows key plus R.
Step 2: Enter the “snipping tool” into the Run box and hit Enter to launch the program.
Step 3: Just hit the “New” button to take a brand-new screenshot.
Step 4: Choose the region of the screen you wish to record by clicking and dragging the mouse. Selecting an area will cause it to be highlighted in blue.
Step 5: When you’re ready to take the screenshot, just let go of the mouse button once you’ve selected it.
Step 6: In this case, the Snipping Tool window will be where the snapshot is stored. After making any necessary changes, you may save the snapshot.
Note: You may also use the Snipping Tool to take a screenshot by pressing the Windows key plus Shift plus S.
Screenshot on Dell Windows 10/8/7 via Print Screen
Here’s how to use the Print Screen (PrtSc) button to capture a screenshot on a Dell computer running Windows 10, 8, or 7:
Step 1: To copy and paste, please use the PrtSc key. If you press here, a snapshot of your full screen will be taken and copied to the clipboard.
Step 2: Initiate an image editor, such as Microsoft Paint.
Step 3: To insert the screenshot into the editor, use Ctrl+V.
Step 4: Edit the screenshot as you see fit using the available image editing tools.
Step 5: To save the screenshot to your computer, go to File > Save As.
Screenshot on Dell Windows 10/7 via Windows keys
This part will show you how to use keyboard shortcuts to capture a screenshot on a Dell computer running Windows 10 or Windows 7:
Step 1: To take a full-screen screenshot and save it to your computer’s Pictures folder, press the Windows key plus PrtSc.
Step 2: To copy the contents of the currently selected window to the clipboard, use the Alt key in combination with the PrtSc key.
Step 3: Initiate an image editor, such as Microsoft Paint.
Step 4: To insert the screenshot into the editor, use Ctrl+V.
Step 5: Edit the screenshot as you see fit using the available image editing tools.
Step 6: To save the screenshot to your computer, go to File > Save As.
Screenshot on Dell Windows 10 via Windows Key and G Key
The following steps need to be taken to capture a screenshot using the Windows key and the G key on a Dell computer running Windows 10:
Step 1: Press the Windows key with the letter G to access the Game Bar.
Step 2: You may take a snapshot of your screen by clicking the “Screenshot” button on your keyboard.
Step 3: Alternately, you may take a snapshot of the current window by pressing the Windows key in combination with the Alt key and the Print Screen key.
Step 4: Your “Videos” library will get the screenshot, which will be stored in the “Pictures” folder.
11 Best Tools to Screenshot on Dell Computer
Gemoo Snap
Gemoo Snap is a reliable and cost-free app for quick screenshots. Gemoo Snap is compatible with Windows and Mac. No matter whether you want to screenshot on Gateway, Dell, or Lenovo Laptop, it will meet your various needs. Gemoo Snap can meet a range of your screenshot requirements, including feedback, screenshot beautification, quick screenshots, clipboard screenshots, text recognition (OCR), scrolling capture, and full-page capture. etc.

Gemoo Snap Interface
Features Introduction
- Upload screenshots in the Gemoo cloud or save them locally, it’s up to you.
- You can screenshot any element on a website, including the visible area of the screen, a chosen area, or the entire page. Or, click once to instantly capture an entire webpage.
- You can use mosaics to cover up sensitive information after taking a screenshot and adding context with texts, lines, or shapes.
- You can easily improve your captures by adding backgrounds, rounded corners, and shapes.
- It’s workable for many scenarios – screenshot video, create screenshots for making how-to tutorials, capture your gameplay and etc.
Follow the steps below to capture high-quality Screenshots on a Dell computer with Gemoo Snap:
Step 1: Free download and install Gemoo Snap on your computer first.
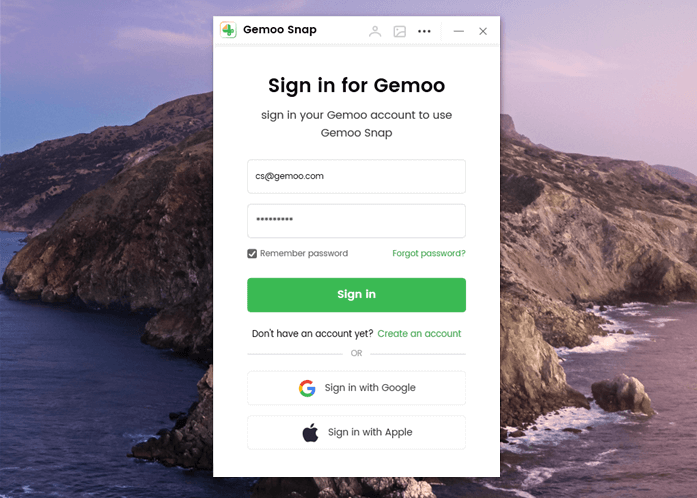
Sign in Account
Step 2: Please select a function by tapping on it. You can also activate the Quick Screenshot function by tapping the shortcut key PrintScreen. Next, please drag your mouse over the desired area to customize it and then let go.
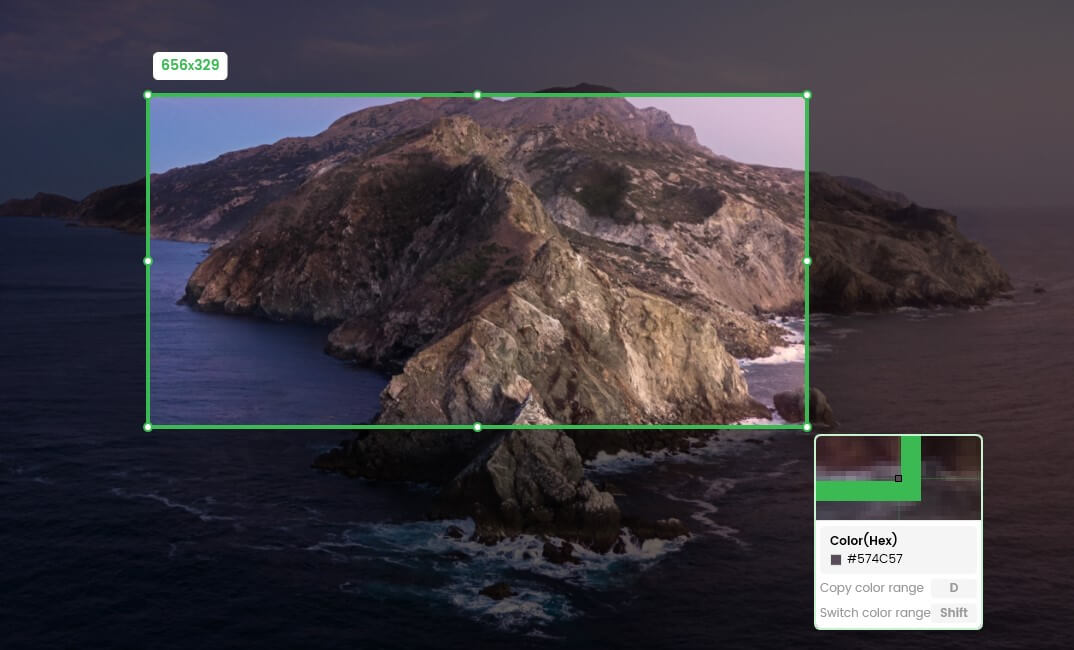
Frame the Screen
Step 3: After you complete the screenshot, Gemoo Snap will upload it to Gemoo Cloud automatically.

Jing
Jing Interface
Jing, created by TechSmith Corporation, is a screen capture program. Screenshots and video recordings of the desktop, individual windows, and other screen regions are all possible using Jing. Saved to the user’s hard disk or uploaded to the internet, the collected photos and videos may be annotated with text, arrows, and other visual aids. You can get Jing free from the TechSmith website, which supports both Windows and Mac computers.
Features Introduction
- Screen capture, including particular windows or areas.
- Annotate your screenshots using arrows, highlights, and text.
- You may access cloud-stored captures from any internet-connected device.
- Compatibility with other TechSmith products
Follow the steps below to record Screen with Jing:
Step 1: Install the scrnli utility. You may install it using pip install scrnli or PyPI.
Step 2: Launch the command prompt and go to the folder.
Step 3: To save a snapshot of a specific web page, enter scrnli -u URL> where URL> is the address of the page you want to save.
Scrnli
Step 4: The snapshot is saved as screenshot.png.
TinyTake
TinyTake Interface
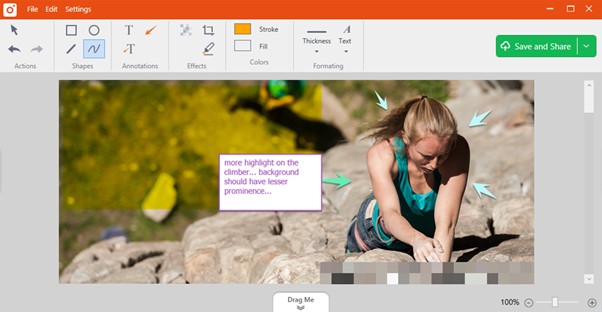
TinyTake, created by MangoApps, is a program that records video and screenshots of a computer screen. It lets users snap screenshots, record video, and audio, and distribute the materials through email, social media, and cloud storage. TinyTake lets users take and annotate photographs, record their screen or a window, and save their files in different formats. The program allows altering and annotating photographs and videos and sharing them through a secure link or cloud storage.
Features Introduction
- MangoApps integration allows you to share captures and collaborate on projects.
- Scheduling and auto-capture.
- Annotate screenshots using lines, colors, and captions.
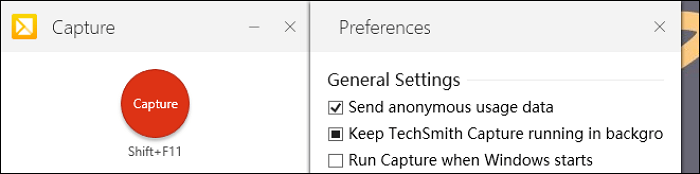
Follow the steps below to record Screen with TinyTake:
Step 1: Select TinyTake in the settings menu and choose an area, window, or full screen.
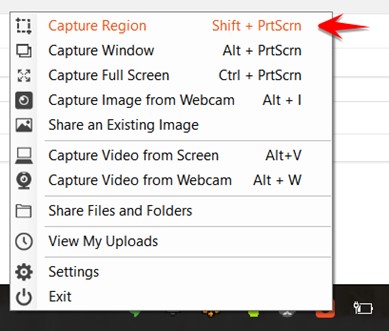
Select Region
Step 2: You may take screenshots using TinyTake’s shortcut keys.
Step 3: Launch TinyTake, then click Capture to capture.
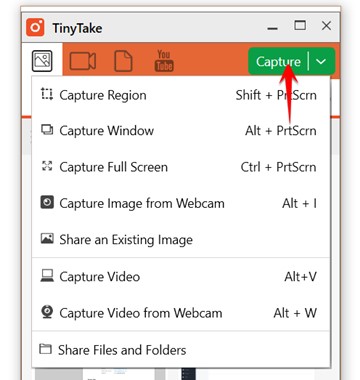
Capture a Screenshot
Greenshot
Greenshot Interface
Greenshot is a Windows screen capture program. It lets users take and modify screenshots of their computer screen and save them in several formats. Greenshot can capture an entire screen, a window, or a custom screen section. It also has tools for annotating and highlighting photos with text, shapes, and arrows. The program contains a built-in picture editor for cropping and resizing photographs and sharing screenshots through email or social media.
Features Introduction
- Built-in picture editor for cropping and scaling.
- Jpg, Png, and Image file support.
- Custom hotkeys for capturing and editing.
Follow the steps below to record Screen with Greenshot:
Step 1: Select a capture option from Greenshot.
Alt: Capture a Screenshot via Greenshot
Step 2: Drag or position the mouse to grab the screen, then release it.
Screenpresso
Screenpresso captures and records Windows screens. It captures photographs and movies from the computer screen and saves them in PNG, JPG, and MP4 formats. Screenpresso can capture an entire screen, a window, or a custom portion of the screen. It also has tools for annotating and highlighting photos with text, shapes, and arrows. The program contains a built-in picture editor for cropping and resizing photographs and sharing screenshots through email or social media.
Features Introduction
- Click to capture your screen.
- Workspace-based capture history.
- Create attractive papers and photos.
- Screenpresso Cloud doesn’t need registration.
Follow the steps below to record Screen with Screenpresso:
Step 1: Open the Screenpresso app and press the Print Screen button.
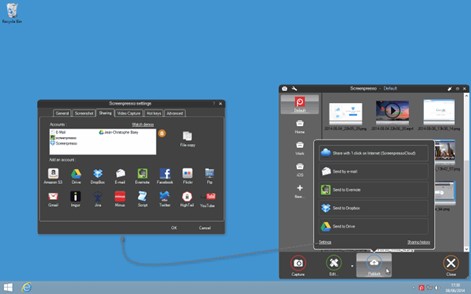
Prnt Scrn To Capture Screenshot
Step 2: When you click and drag the mouse to move the crosshair, the capture zone will light up red on the screen.
Step 3: Click and Save the Screenshot to any Folder.
Lightshot
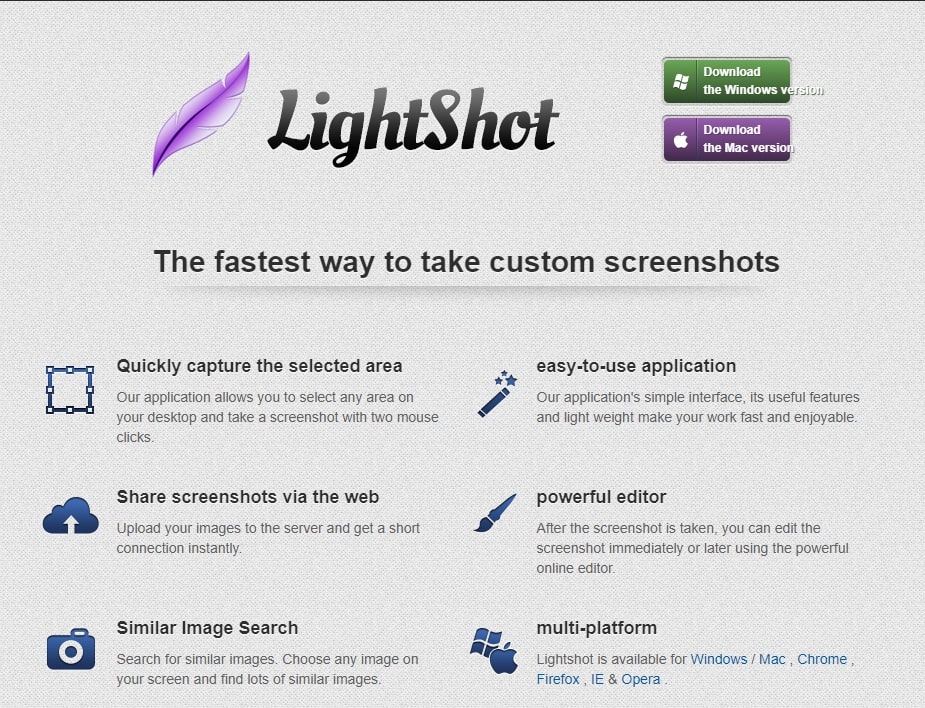
Lightshot Interface
Screenshots may be easily taken and edited using Lightshot, a program designed specifically for this purpose. The program supports Chrome and Firefox web browsers and Windows and Mac computers. Lightshot allows users to take screenshots of their whole display, a selected window, or a defined screen area and then save the output in several different picture formats. In addition to basic picture viewing and manipulation features, the program provides various tools for altering and annotating photographs.
Features Introduction
- The screenshot may be copied to the clipboard and pasted into any program.
- com lets you track your screenshots.
- Pixlr Editor can edit screenshots online.
- Preserve your screenshot offline without uploading it.
Follow the steps below to record Screen with Lightshot:
Step 1: In Windows, open the lightshot software and press Function + PrntScr/PrtSC or Command + 9 to launch the software.
Step 2: Select and highlight the area you want to screenshot with your mouse.
Step 3: The area you pick will brighten, so you can see what you’re capturing. Your possible snapshot will also include bottom and side choices.
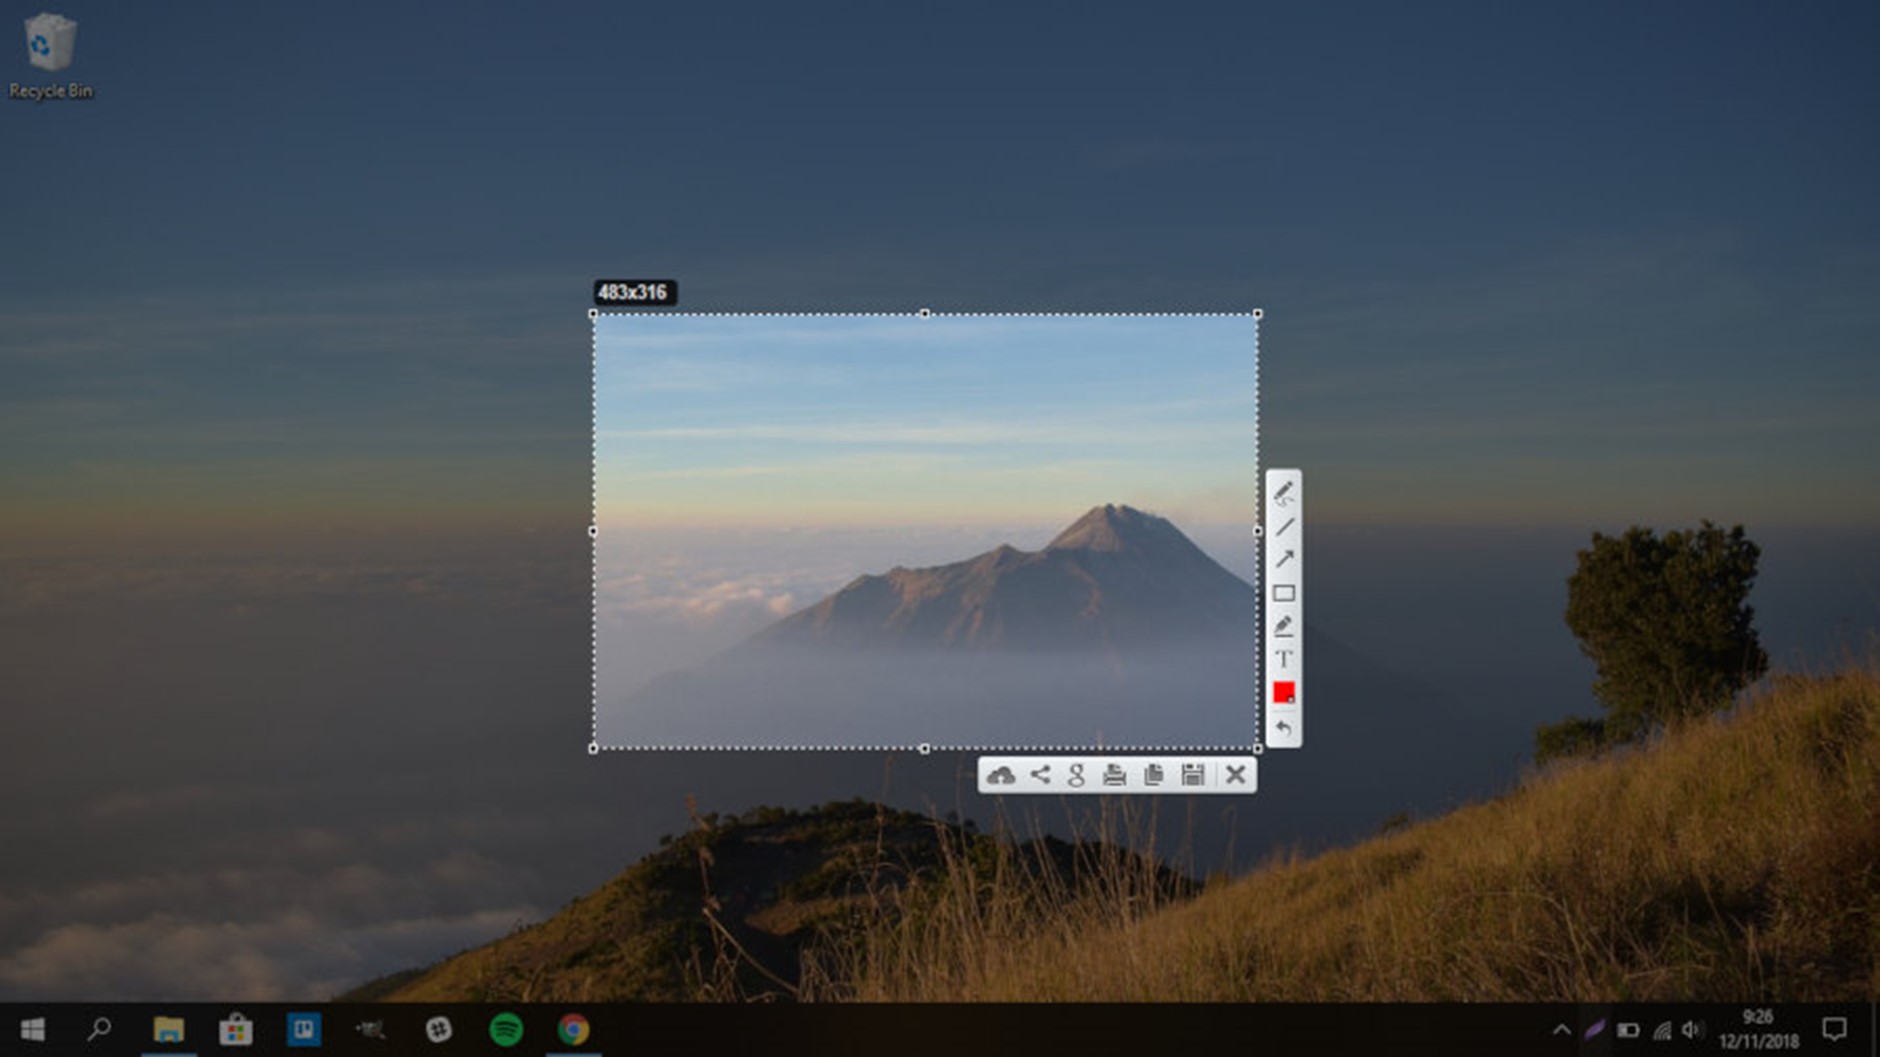
Capture a Screenshot Via Lightshot
Step 4: You may save, edit, share, print, search, and upload photographs.
FastStone
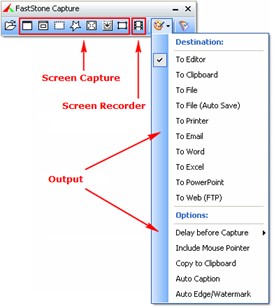
FastStone Interface
FastStone Capture is a software from FastStone Soft designed to record screen activity and modify captured images. Images captured with the program may be edited and saved in common image formats, making it ideal for sharing screenshots online. All or part of the screen may be captured using FastStone Capture, and the program also includes editing capabilities that let you add text, shapes, and arrows to captured photos for emphasis.
Features Introduction
- FastStone Image Viewer is an image reader, decoder, and editor.
- It can view, manage, compare, remove red-eye, email, resize, trim, and modify colors.
- A high-quality zoom.
- 150+ transitions in a musical animation.
Follow the steps below to record Screen with Faststone:
Step 1: Start FastStone Capture.
Step 2: Use Ctrl+Alt+PrtScn to open a scrolling window and capture a screenshot.
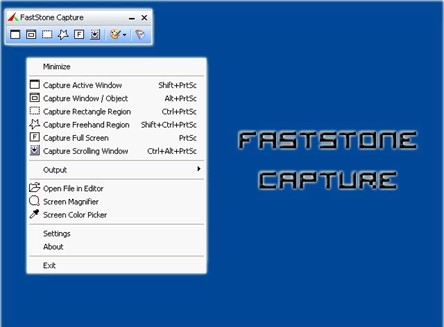
Use Ctrl+Alt+PrtScn to Capture Screenshot
Step 3: This opens FastStone Editor with the current window captured.
Droplr
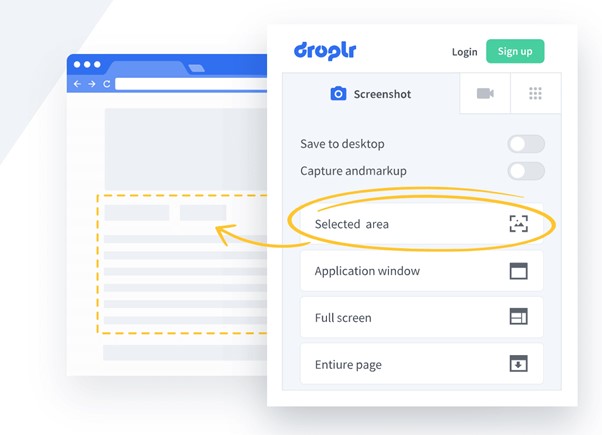
Droplr InterfaceDroplr is a cloud-based sharing and collaboration tool that uses secure links. The platform is accessible for all available OS and allows users to share and collaborate on files of any size, monitor file views, and specify expiry dates for shared links. Droplr features capabilities for managing and organizing shared files, such as creating tags and folders. Droplr offers a screen capture feature that lets users snap screenshots and share them through a secure connection.
Features Introduction
- Annotating tools
- Moving file Data.
- URL shortening service.
- Online data backup.
Follow the steps below to record Screen with Droplr:
Step 1: To access Droplr, choose it from the main menu.
Step 2: Then, choose the Screenshot menu option.
Step 3: You can take a screenshot of a custom region by clicking and dragging the area you wish to capture.
Ksnip
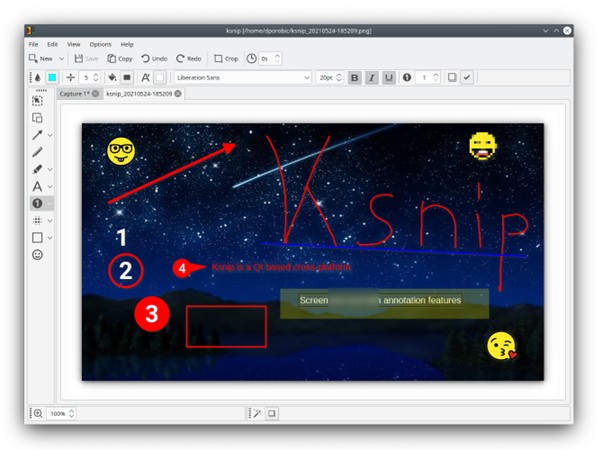
Ksnip Interface
KSnip is a free and open-source program that can capture the screen of a Windows computer. It lets users take and modify screenshots of their computer screen and save them in different formats. KSnip includes tools for annotation and marking photos with text, figures, and lines. It may capture a complete screen, a single window, or a custom portion of the screen. The program contains a built-in picture editor for editing and resizing photographs and sending screenshots through social media or email.
Features Introduction
- Supports all OS devices
- Taking a screenshot of a mouse-drawn rectangle.
- Taking a snapshot of the present display.
- Taking a full-screen, multi-monitor snapshot.
Follow the steps below to record Screen with KSnip:
Step 1: Startup Ksnip and hit the minus sign next to “New.”
Step 2: Choose a screenshot option to begin.
Step 3: When you click “New,” the active option will be highlighted and saved for the next time the program is started.
MonoSnap
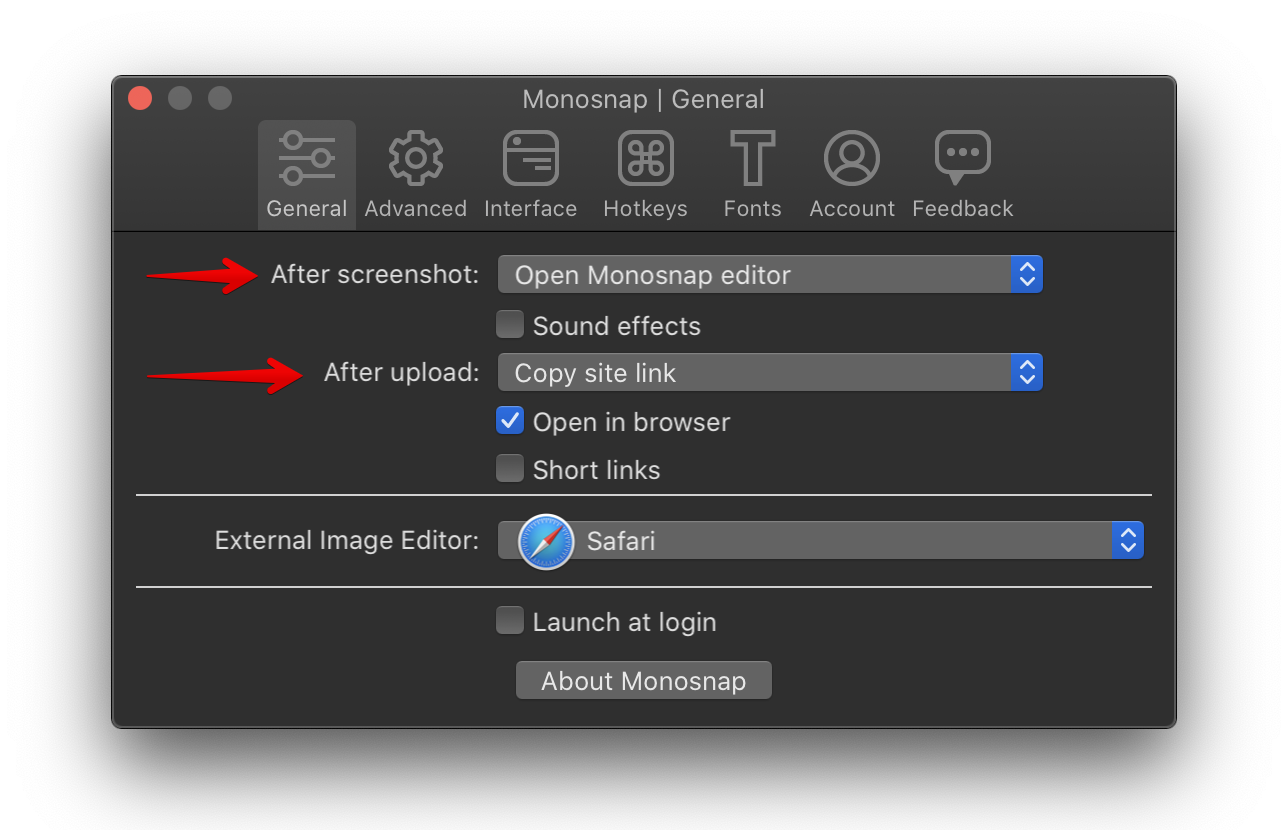
Monosnap Interface
MonoSnap is Windows-specific screen capture and picture editing software. It facilitates the capturing and editing of screenshots with little effort. You may capture the whole screen, a single window, or a defined area using MonoSnap, and then modify and annotate the picture in many ways, such as by adding text, shapes, and arrows.
Features Introduction
- Annotation features
- Editing capabilities
- Customize screenshot area
Follow the steps below to record Screen with MonoSnap:
Step 1: Click-capture window.
Step 2: Select the square area by holding Shift.
Step 3: Ctrl-click to record the video.
Step 4: Copy the color using Ctrl+C. Hold Alt to start a 5-second timer.
Scrnli
Scrnli Interface
Scrnli is a screen capture tool that allows for recording screen video. Capture the screen using a snapshot or screencast, then modify it, download it, and share it. It is one of the most sophisticated screen recorders, with extra capabilities that allow users to highlight and annotate content on the screen even as the program is recording it. Scrnli is a screen capture program that has been enhanced in its functionality and contains many functions connected to the production of content. Scrnli provides its users with a screen capture tool, a screen recorder, and the capability to convert video files into several other formats.
Features Introduction
- During recording, there are very few options for highlighting.
- It’s simple to use.
- Supports non-online use as well.
- The File may be exported to several formats.
Follow the steps below to record Screen with Scrnli:
Step 1: Click “Add to Chrome” in the Chrome Web Store to add scrnli.
Step 2: Click the extension logo, then pick a screenshot type.
FAQ About Taking Screenshots on Dell Computer
1. How to take a Screenshot on a Dell Computer/Laptop for Windows 10?
The screen must be captured by hitting the Windows key and the PrntScrn key. For tablets, you must simultaneously hit the Windows logo button and the volume down button.
2. Where are screenshots saved on Windows 10?
Just press the Windows key plus the Print Screen key to take a snapshot of the full screen, and it will be saved to your computer immediately. Taking a screenshot will cause the screen to go dark for a second, and the image will be stored in the Pictures > Screenshots folder.
3. What to do if Win Print Screen not working?
The Function (Fn) key is often situated next to the Windows key. Pressing Fn and Print Screen together may capture a screenshot. Fn+Windows+Print Screen may also work.