How to Find Screenshots on Mac [Quickly & Easily]?

Taking screenshots can be incredibly useful if you are a designer, a developer, or just need to capture something on your screen. However, finding those screenshots can be challenging, especially if you take many of them. Fortunately, there are several ways to find screenshots quickly and easily on your Mac.

How to Find Screenshots on Mac
Nonetheless, you must know wow to find screenshots tools on Mac. In this article, we will explore some of the best methods for locating your screenshots, so you can spend less time searching for your screenshots and more time taking them for your tasks. Without further ado, let’s get started.
Recommendation tools:
Where Do Screenshots Go on Mac?
When you press Shift+Command+3, Shift+Command+4, or Shift+Command+5 to capture a snapshot, your Mac will automatically save the image to the Desktop in PNG format. For example, screen Shot (2023-03-01) 09:58:13 AM will be the name given to each screenshot. You can have difficulty locating the snapshot when your desktop is cluttered with other files and icons.
The “View” tab at the top of the window will provide you with choices for customizing your desktop layout. To have macOS immediately organize your files into stacks that extend whenever you open them, choose View > Use Stacks, for instance. Double-clicking a screenshot’s symbol should display it in Preview or your default picture viewer. It’s conceivable that macOS has been set up to save pictures in a location other than the desktop.
How to Find Screenshots on Mac?
Screenshots are an essential part of a Mac user’s life. From capturing important work-related information to keeping memories alive, screenshots are an excellent way to capture and store important information. This section will delve into three ways to find your screenshots quickly and easily. Without further ado, let’s look at them in detail.
Find Screenshots on Mac via Finder
One of the first ways to find your screenshots is by using Finder. The Finder is an excellent tool for finding files on your Mac, and it can also be used to recover all your screenshots. To discover all your screenshots, use the search option to look for the screenshot tag. Here’s how to do so:
Find Screenshots on Mac via Finder
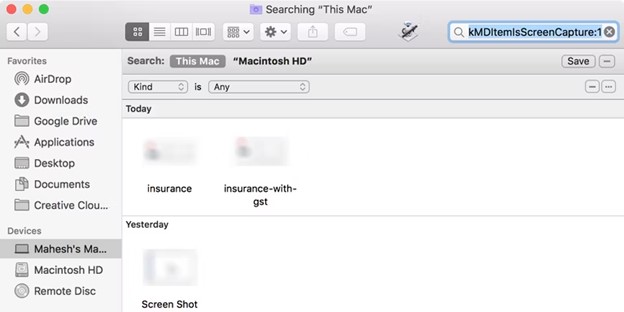
Step 1: It’s time to launch a Finder window. Choose Find from the File menu in the top navigation. The Cmd + F keyboard combination is another option. Ensure This Mac is the setting option on the Search bar.
Step 2: Search for “kMDItemIsScreenCapture:1” and press the Enter key. The search terms will include your images.
Step 3: You can see previews of your screenshots by right-clicking the window and choosing View > as Icons.
Step 4: You can save this search for later use by clicking the Save button in the window’s upper right corner.
Step 5: Give your new search a name, check the box to have it appear in the sidebar, and click Save.
After taking a screenshot, you can easily locate it by using the specialized search option in the sidebar.
Find Screenshots on Mac via Terminal
Using the Terminal to find screenshots on Mac can be a powerful tool in your arsenal, especially if you are comfortable working with command-line interfaces. The Terminal allows you to use complex search queries and operators not available in other search tools, such as Spotlight.
This means you can refine your search to specific parameters, such as file type or date range, to find the exact screenshot you are looking for. Using Terminal to find screenshots on Mac can be much faster than other search tools, especially when dealing with large files.
Here’s how to find a screenshot on Mac using Terminal:
Find Screenshots on Mac via Terminal
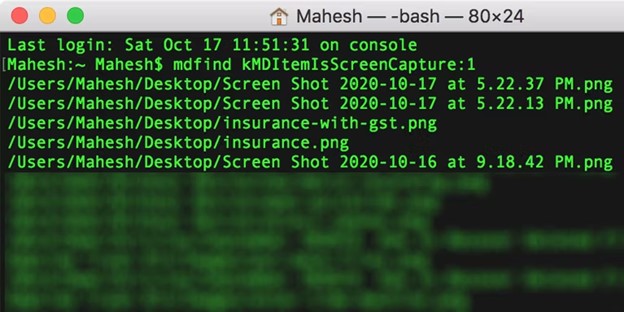
Step 1: Launch the Mac’s Terminal application.
Step 2: To capture a screenshot, go to the Terminal, and enter mdfind kMDItemIsScreenCapture:1. Please note that your screenshot history can be seen in the Terminal.
Step 3: Take note of the folder location of the screenshots you would like to download, and then open that folder in the Finder.
Find Screenshots on Mac via Spotlight
Spotlight is a powerful search tool on Mac that can be used to find a wide range of files, including photos. Several reasons why using Spotlight to find your photos on Mac is a good idea.
Using Spotlight to find your photos on Mac is a quick, efficient, versatile, and secure way to search for your files, making it an excellent tool for anyone looking to stay organized and efficient on their Mac. Here’s how to use Spotlight to find a screenshot:
Find Screenshots on Mac via Spotlight
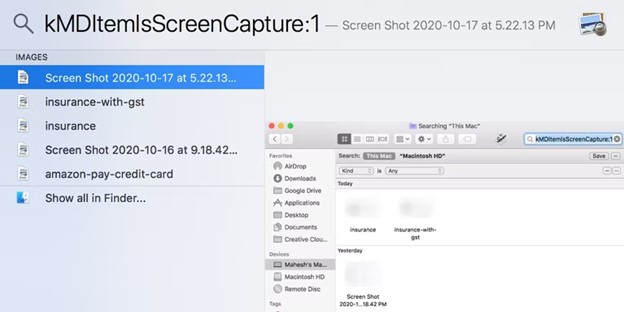
Step 1: Start Spotlight using the keyboard combination Cmd + Space.
Step 2: To find items captured on screen, enter kMDItemIsScreenCapture:1 and enter. All your screenshots are going to appear along the left side.
Step 3: As you use the arrow keys to choose one of these options, a preview of it will show on the right side of the screen.
Step 4: Choose the screenshot you want to open the folder for, then hit the Cmd + Enter keys. Clicking this button will launch the directory housing your screenshots.
How to Screenshots on Mac?
Using Gemoo Snap
As a professional and lightweight screenshot software for macOS and Windows computers, Gemoo Snap is the first choice to quickly take screenshot on Mac. You can use the PrntScr key to quickly capture the screen you want with one click, whether it is a part of the screen or the full screen, it can meet your needs.
What’s more, with the help of Gemoo Snap, you can take and annotate the screenshots immediately,you can also beatify your screenshots with the built-in tools, such as brush, text, numbers, shape,mosaic, and etc. Pin screenshots, share screenshot with a sharable link is possible. It also allows you to extract text from screenshots, which helps you communicate more efficiently.
Now, get Gemoo Snap on your Mac computer and start the experience of taking screenshot:
Step 1. Free downlaod ad install Gemoo Snap on your computer > Launch it and enter your account and password to log in Gemoo Snap, or you can just sign in with your Google account.
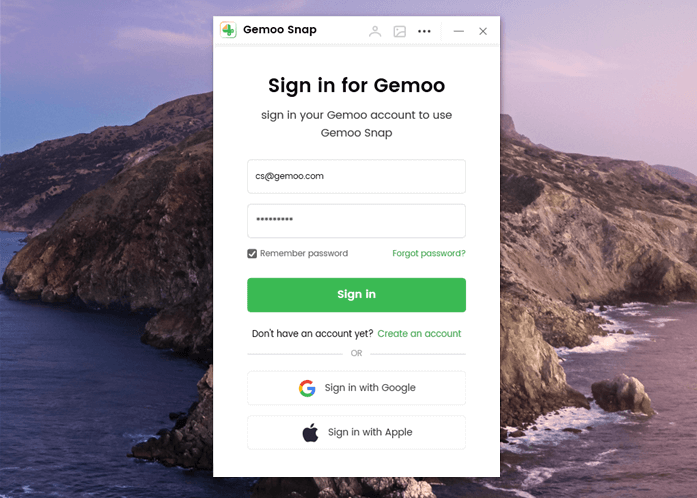
Sign in Account
Step 2. Please click the button Quick Screenshot on the main interface. And you can also tap the shortcut key PrintScreen to launch the function.
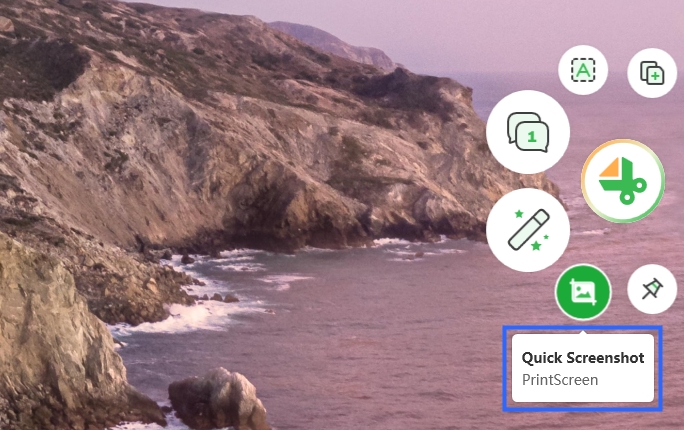
Quick Screenshot on Your Computer
Step 3. Please drag your mouse over the desired area to customize it and then let go.
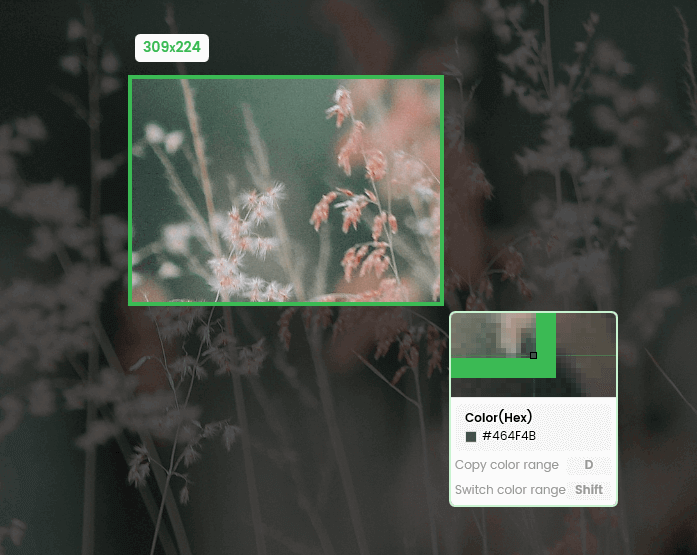
Frame The Screen
Using Built-in Tools
Except for using some professional screenshot apps, Mac has built-in ways that allow you to take a screenshot easily and quickly. There are three main types of screenshots that you can make using this tool: full-screen, window, and selection. Here’s how you can launch the screenshot on a tool on Mac before using it:
Step 1: Go to Launchpad to use the Screenshot utility.
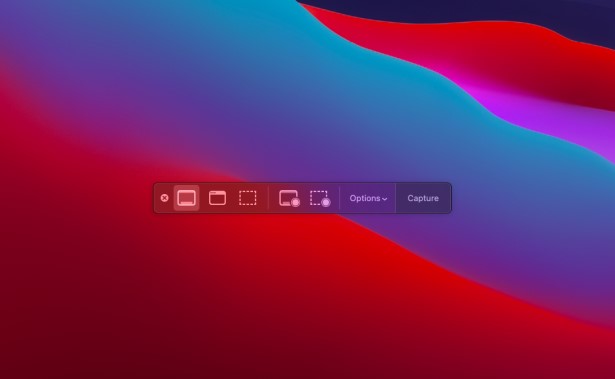
Step 2: To access the Screenshot, choose the Other menu item (or press Shift + Command + 5) from the main menu.
The floating toolbar can capture the screen, a specific window, or a user-defined display region. A video recording of the current window or a user-defined screen region is also possible.
Screenshot of the Entire Screen
Screenshot of the Entire Screen
Step 1: Select the Capture Entire Screen option in the screenshot menu.
Step 2: The next step is to hit the Capture button.
Step 3: To snap a screenshot immediately, use the keyboard combination Shift + Command + 3.
Screenshot of a Window or Menu
Screenshot of a Window or Menu
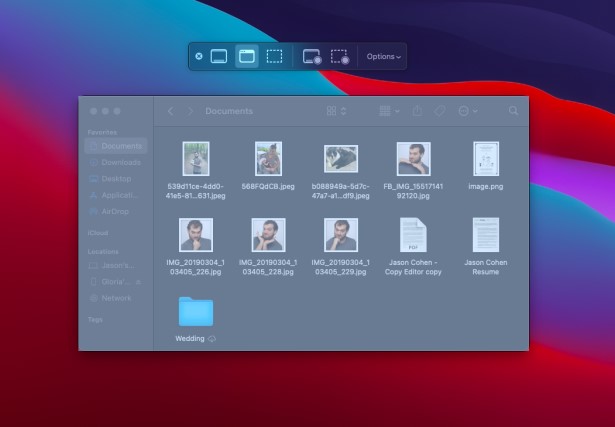
Step 1: Choose the Capture Selected Window button in the taskbar and hit Shift + Command + 5 to obtain a snapshot of the current window or menu.
Step 2: An image of a camera would replace the pointer. Just hover the camera over the desired window, and a photo can be saved with a single click.
Step 3: To toggle between selecting an item from a menu and making a custom choice, press the space bar.
Custom Screenshot

Custom Screenshot
Step 1: To take a screenshot of a particular window, you can either click the Capture Selected Window button in the menu or hit Shift + Command + 4 to make your mouse cursor become a crosshair.
Step 2: To choose a region, use the mouse to select it and drag the crosshair to the desired location.
Step 3: Put your finger off the mouse button to grasp the highlighted region or release it to undo the selection.
Before taking a picture, you can modify the selected area’s dimensions, location, and form by using Shift, Option, or the Space Bar.
FAQs About Finding Screenshots on Mac
Where are my screenshots on Mac, not the desktop?
If you hit the keys for taking screenshots, but nothing occurs, you can check in Finder or Spotlight to see whether the images have been saved elsewhere. You can sort your files by creation date by opening Finder, selecting “All My Files,” and then clicking the “File Sort” drop-down menu. The newest screenshots must always be shown first.
How to change where screenshots are saved on Mac?
Here’s how you can change the location of the screenshot while saving:
Step 1: Choose the Utilities folder and then the Screenshot program.
Step 2: Choose “Options” to see where you can store the picture (Desktop, Documents, Clipboard, etc.).
Step 3: Click the “Save to” menu and choose a location to save your snapshots.
Step 4: When you choose a location, Mac will always save your screenshots there.
Final Thought
We hope that now you know how to find screenshots on Mac. Locating screenshots on a Mac is a simple process that can be done using different methods such as Spotlight, Terminal, and Finder. These methods allow you to locate and access your saved screenshots easily. Additionally, taking a screenshot on your Mac is also a straightforward process. Press Command + Shift + 3 to take a full-screen screenshot or Command + Shift + 4 to select a specific screen area.