How to Blurred Video Background
In video production, blurring the background of a video is a commonly used technique to add depth and focus to the subject of the video. It can be used in many scenarios for example, in interviews, the blurred video background helps to keep the viewer’s focus on the subject, while in music videos, it adds a cinematic quality to the footage. There are different ways to achieve this effect, depending on the software and techniques used.
This article will explore the methods for blurring a video’s background, including 5 popular software options alongside their easy-to-follow steps and key features ranging from Gemoo Recorder, Adobe premier pro, and much more. Whether you are a beginner or an experienced video editor, this guide will provide you with the knowledge and tools needed to achieve a blurred background effect in your videos.
Also read:
How to Replace Audio in Video?
How to Blur Background in Photoshop? >
Why you Need to Blur Video Background
Blurring the video background can be useful in various situations, such as during video conferencing or creating professional-looking videos. It helps to keep the focus on the subject in the foreground, reducing distractions and creating a more polished and visually appealing video. Additionally, blurring the background can help maintain privacy and prevent others from seeing sensitive or confidential information in the video’s background.
5 Best Video Background Blur Apps
There are various apps and software available that can be used to blur the background in videos. The choice of app or software may depend on the user’s specific requirements, such as the platform they are using, the level of customization they need, and the quality of the desired output. It is important to explore and compare the options available before selecting the most appropriate one for your needs.
Gemoo Recorder
Geemo Recorder is a screen recording tool that allows users to capture their screen activities and add voiceovers. It is used for various purposes, such as creating instructional videos, recording gameplays, and making product demos. It provides a variety of features to its users that make it an ideal option for people looking to edit videos. Additionally, the tool provides an option to blur the background of the recorded video, which can be useful for maintaining privacy and keeping the focus on the subject.
Key features of Gemoo Recorder
- Allows the ability to customize video quality.
- You can blur, delete, and replace your backdrop using photos or video sources.
- When recording with your webcam, you choose some of your favorite images as your avatar to show off your style. Put yourself in front of the webcam and let others know your facial expressions.
- You can navigate to the area of the screen you want to record, capture the entire screen to be more comprehensive, or focus on a specific application window to show your point of view or just a tab in your browser.
- Built-in video editor.
Simple steps of the background blurring process
Step 1. Download Gemoo Recorder and Log in by launching the app on your computer, entering your account and password, or signing in with your Google account.
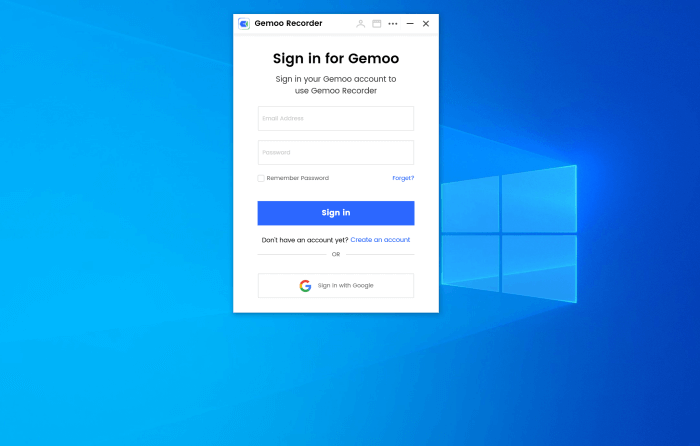
Sign in for Gemoo
Step 2. Click the “Camera Only” > “Start Recording” button to begin recording with webcam turned on. In the Camera Effects settings, you can make filter settings, background image settings and avatar shape settings.
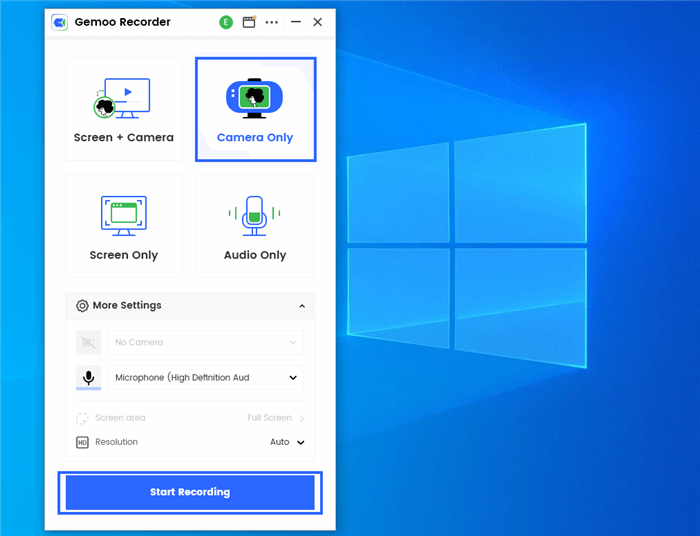
Select Camera Only Mode and Initiate Recording
Step 3. During the recording process, you can manage the recording by accessing the control panel in the left sidebar and can view the recording time, pause, resume, or delete the recording, and add annotations and blur the background as well.
Kapwing
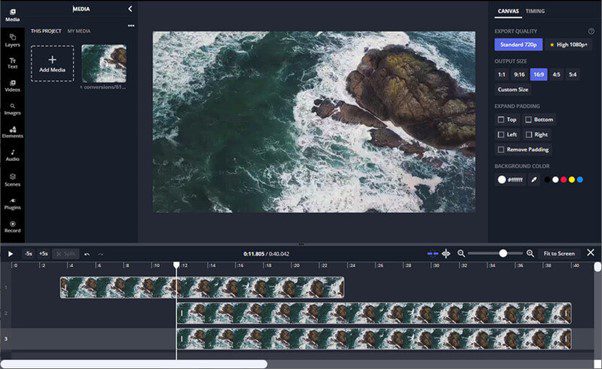
Kapwing Interface
Kapwing is a web-based video editing platform that allows users to create and edit videos quickly and easily. The company was founded in 2017 and was created to democratize access to video editing tools and make them more accessible for everyone, regardless of their skill level or experience. The platform offers editing features such as trimming, adding annotations, and much more, making it an ideal tool for users.
Key features of Kapwing:
- Wide range of editing tools and features.
- Allows simultaneous working of multiple users.
- Multi sources media importing.
- Option to create and customize video templates.
Simple steps of the background blurring process:
Step 1. Access the Kapwing website and click the “Get Started” button.
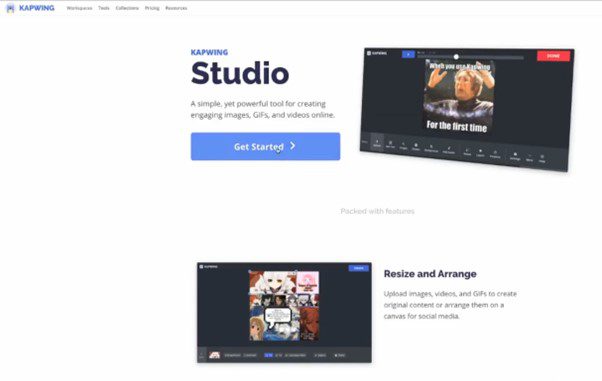
Click On Get Started on Kapwing
Step 2. Upload the video you want to edit by clicking the “Click to Upload” button or dragging the file into the editor.
Step 3. Select the “Filters” tab from the top menu bar and choose the “Background Blur” option.
Step 4. Adjust the blur intensity using the slider, and preview the video to ensure the background is blurred. Click the “Export” button, choose the desired video resolution and format, and click the “Create” button. Wait for the video to process, then download the final product to your device.
Filmora
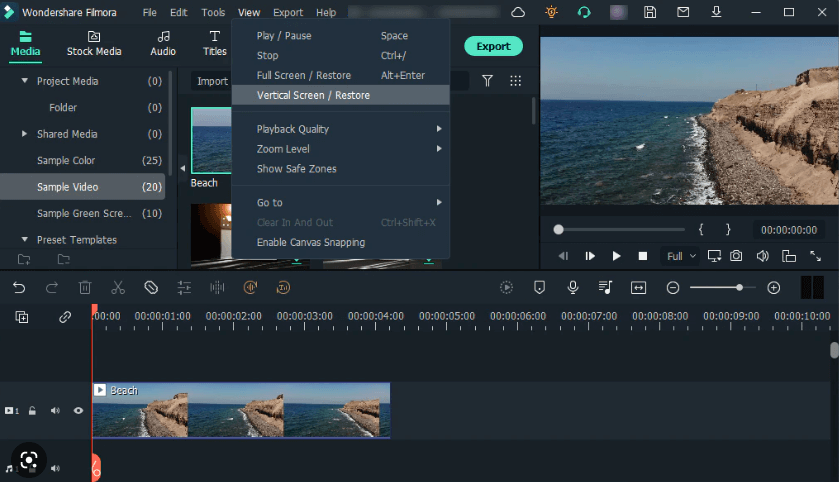
Wondershare Filmora Interface
Wondershare Filmora is a video editing software allowing users to quickly and easily create professional-quality videos. It is a popular tool for content creators, marketers, and social media managers who must produce high-quality video content regularly. One of the key benefits of Filmora is its intuitive user interface, which makes it easy for beginners to start editing videos with little prior experience.
Key Features of Wondershare Filmora:
- Advanced features like motion graphics.
- Built-in video stabilization and noise removal.
- Option to export videos in a variety of formats and resolutions.
- Green screen and keyframe animation capabilities.
Simple steps of the background blurring process:
Step 1. Open Filmora and create a new project, then import your media files.
Step 2. Drag and drop the video clip onto the timeline and select the “Background Blur” category in the Effects panel.
Step 3. Choose your preferred blur effect and apply it to the video clip.
Step 4. Adjust the blur level by double-clicking on the effect in the timeline and modifying the background color, source width, luminance, scale level, and Alpha blurry background.
Adobe Premiere Pro
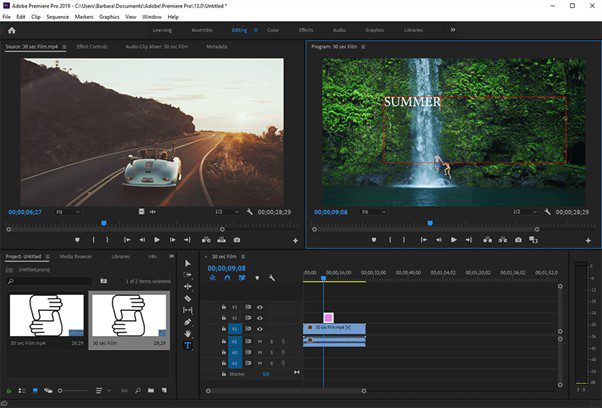
Adobe Premier Pro Interface
Adobe Premiere Pro is a video editing software developed by Adobe Systems Incorporated, and is used by professionals in the film, television, and online video industries for editing, color correction, audio mixing, and other post-production tasks. Premiere Pro offers many features and tools, including multiple video and audio tracks, advanced color grading, and special effects.
Key Features of Adobe Premier Pro:
- Cross-platform compatibility.
- Multiple video and audio tracks.
- Advanced color grading tools.
- Collaboration and sharing.
Simple steps of the background blurring process:
Step 1. Import the video you want to edit into Adobe Premiere Pro.
Step 2. Drag and drop the video clip onto the timeline, and then duplicate the clip by pressing “Ctrl + C” and “Ctrl + V” or by right-clicking on the clip and selecting “Duplicate.”
Step 3. Select the duplicated clip, and then go to the “Effects Control” panel. Click on the “Mask” option, and then draw a circle around the subject in the video by clicking and dragging the cursor.
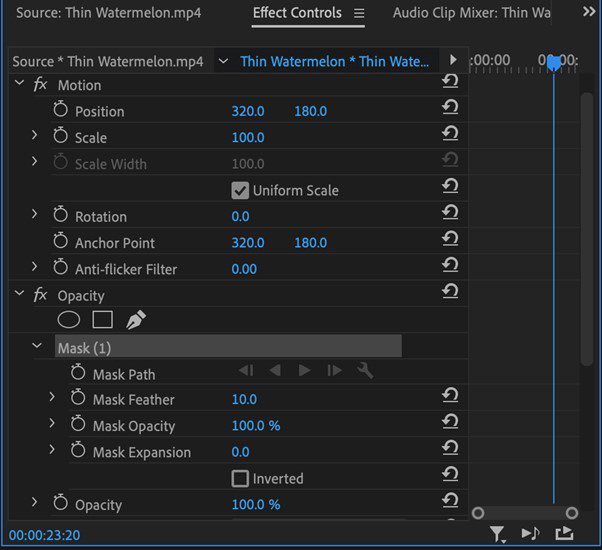
Click The Mask Option
Step 4. In the “Effects Control” panel, scroll down to the “Blur and Sharpen” section and adjust the “Gaussian Blur” effect until the background is sufficiently blurred. You can also adjust the “Mask Feather” setting to create a smoother transition between the subject and the blurred background.
FlexClip

FlexClip Interface
FlexClip is a web-based video editing and creation tool that allows users to make professional-looking videos without needing advanced technical skills or expensive equipment. It was founded by a team of developers from PearlMountain Limited, providing uncanny features to its users.
Key Features of FlexClip:
- Custom watermark.
- Collaboration features.
- Direct sharing options.
- Export in multiple aspect ratios.
Simple steps of the background blurring process:
Step 1. Upload your video assets from your device, cloud storage, or social media platforms to FlexClip.
Step 2. Add your video to the timeline by clicking on the plus icon.
Step 3. Search for “mosaic” in the Video tab, select a mosaic style, add it to the video, and move the mosaic to the subject.
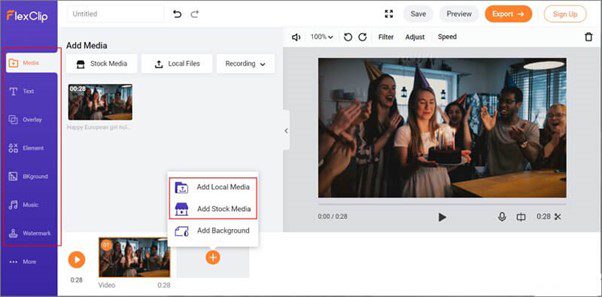
Search For Mosaic
Step 4. Align the mosaic overlay with the video length and save or export your video.
Further reading: How to Remove Black Background in Premiere Pro 2024 >
Pro Tip. How to Record Your Screen with Zoom Effect
Discover the power of FocuSee, a top-recommended software that’s expertly designed to cater to your screen recording needs. Whether you’re looking to capture the full screen, a selected area, or a specific window, FocuSee offers unparalleled flexibility and control.
Effortless Recording Experience: FocuSee’s intelligent auto-zoom and mouse highlight features transform the recording process into a streamlined, efficient, and precise activity. This makes it an ideal tool for creating tutorial videos, product demonstrations, promotional content, and more.
Personalized Recording Options:
- Experience the convenience of automatic zoom-ins that follow your cursor, providing a clear focus on the actions you’re highlighting.
- Express your creativity with a variety of cursor styles and layouts. Enhance your video with camera frames, filters, and additional visual elements such as backgrounds, rounded corners, shadows, and padding for a polished look.
- Choose from a range of preset sizes optimized for social media or export your videos in stunning 4K resolution or as high-quality GIFs.
- Effortlessly share your creations through direct links or embed them on websites, complete with engaging interactive features like quizzes and call-to-action buttons to captivate your audience.
Step 1. Launch FocuSee on the computer and enter your account and password to log in to FocuSee.
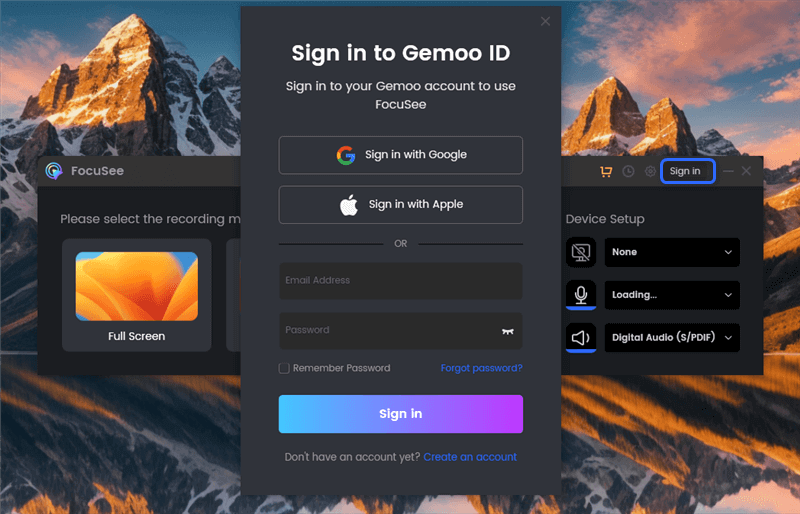
Create an Account and Activate FocuSee
Step 2. FocuSee supports 3 recording modes: record the full screen, custom the recording area, or record the window. You can choose the one you want to record.

Three Recording Modes for FocuSee
Step 3. After choosing the recording mode, please just focus on your screen recordings. Let FocuSee handle the post-production automatically. You can get a visually appealing video as soon as you finish recording. After recording, you can change the background, adjust the cursor style, add captions and more.
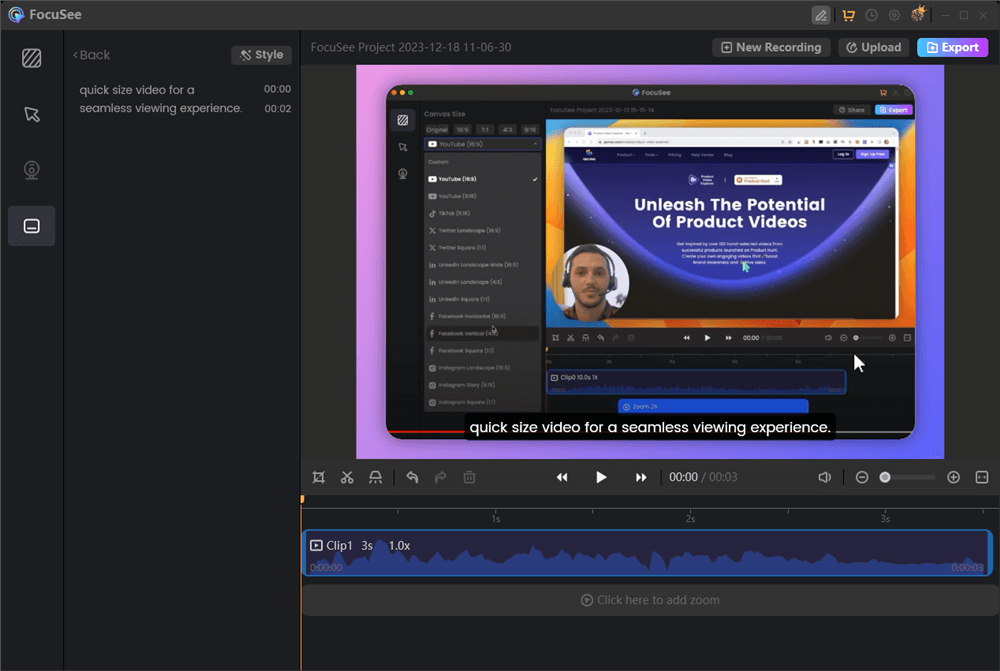
Automatically Generate Captions
Step 4. Then, export your recordings as an MP4 or GIF file or share it with a link easily.
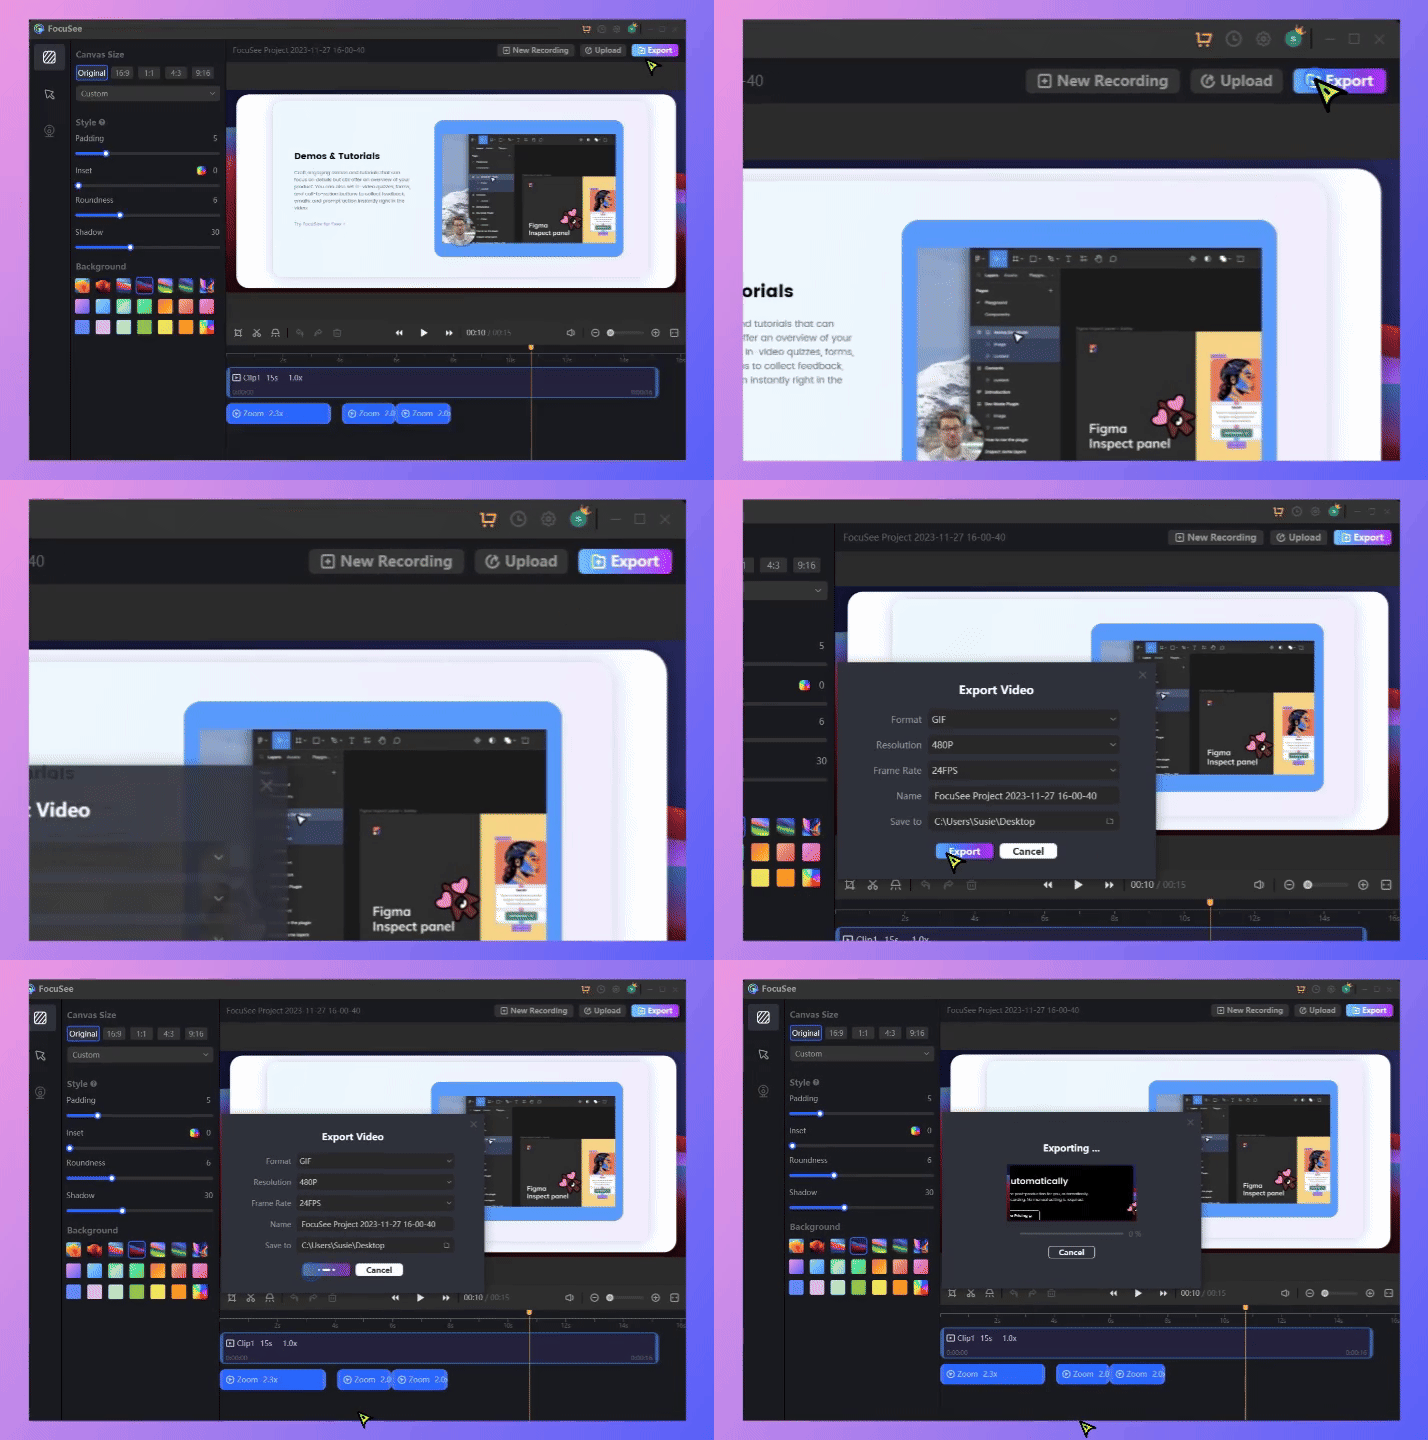
How to Export the Video
Final Thought
In conclusion, various video editing tools are available to get blurred video backgrounds with unique features and capabilities. Choosing the right tool depends upon your specific needs and requirements. We hope this article has helped you determine the best tools for blurring a face in a video. If it did, please share it with your friends and family, we also value your feedback and welcome any suggestions or comments.


