Reduce Background Noise While Recording Video

As a recording expert, the most typical task video producers ask for is to eliminate irritating noises from completed video pieces, such as rumbles or buzzes. It’s tough to get good audio when filming since the dialogue is sometimes muffled by ambient noise, such as the dreaded whir of an air conditioner or fans.
When working with sound effects or other video design components, it is usual practice to reduce or eliminate the ambient noise because it can be super-annoying to have weird noises in your background when you listen to the recorded version.
Although there are ways to eliminate this background noise, a few options are available. Adding background music to your film or using audio or video editing tools might help lessen the noise. How to reduce background noise on Windows, Mac, and Online? Read the article in detail to get started!
Also read: Remove Background Music from Video >
Table of Contents: hide
5 Ways to Reduce Background Noise Manually
How to Reduce Background Noise on Windows?
How to Screen Record without Background Noise on Mac?
9 Screen Recorders to Screen Record without Background Noise
6 Ways to Reduce Background Noise Manually
The following are the five ways that will help you eliminate/reduce background noise manually:
Shorten the distance between the subject and the microphone
To improve the quality of your recordings, it is recommended to decrease the distance between the microphone and the subject while increasing the distance between the microphone and surrounding noise. By minimizing the subject-to-microphone distance, the speech can be captured more clearly and accurately. At the same time, increasing the microphone to noise distance can help reduce unwanted background noise and improve the overall sound quality.
Create a quiet environment
Before recording, try to remove any sources of acoustic noise if you can. The sound may be easily removed in post-production if, for example, an air conditioner is nearby.
Similarly, if the sound of passing traffic bothers you, finding a new abode is the best course of action. This is easier said than done, for the most part. In addition, wind noise must be minimized.
Mic preamplifiers may be damaged by wind noise, resulting in artifacts that are very hard to eliminate. If you’re recording outside, protect your microphones with windscreens. Wind noise, for example, may easily be detected with a fast listen via headphones.
Use directional microphones
Off-axis audio signals, or signals beyond the microphone’s optimal pickup region, are less responsive to cardioid, super cardioid, and shotgun polar pattern microphones.
This characteristic may be used to mute the sounds in the environment. Mics should be positioned such that the noise sources are located in the microphone’s polar pattern’s “null,” or the polar pattern’s area with the least sensitivity.
To determine the precise null angle, the polar pattern must be considered. A cardioid microphone’s null angle is 180 degrees off-axis. The null angle changes to a different location as microphones get more directional. A super-cardioid microphone has a null point between 127 and 233 degrees on the horizontal axis.
Use low-cut filters on the first stage of microphones or amplification
Low-frequency noise is the most common background noise; the higher frequencies are less common. When recording dialog, it’s best to use a high-pass (also known as a low-cut) filter since there’s so little energy in the voice below 100 Hz.
A significantly more aggressive high-pass of up to 320 Hz may be utilized when speech intelligibility is more critical than retaining a natural, full-sounding voice output.
It is important to remember that “telephone-grade audio,” which is tuned for 90% of speech energy, has a frequency response of around 300–3,000 Hz.
The high-pass filters of many microphones are built-in. First, place the microphone filter on it. Activate the preamplifier’s high-pass if an extra high-pass is required.
Both microphone and preamplifier utilize high-pass filters, resulting in a steeper filter slope that reduces low frequencies more quickly.
Reduce the number of open microphones
The term “open” describes microphones that are actively recording. The total background volume in the mix rises by 3 dB as the number of open microphones doubles.
To put it another way: When recording an eight-person conversation with eight microphones open, there is a 9 dB speech-to-noise penalty. For unscripted content, managing a scenario with several talkers is tough to execute manually.
Sound Devices / For sound pros, MixAssist and Dugan automated mixing allows them to concentrate on the overall mix rather than manually opening and closing microphones.
Use real-time noise suppression
Few portable choices have been available for real-time noise suppression in the field, even though there are numerous possibilities for noise reduction through computer CEDAR’s portable real-time noise reduction equipment for sound professionals has been a popular option on site.
First time in production sound history, NoiseAssist from Sound Devices provides adaptive, real-time noise reduction in a mixer recorder. NoiseAssist employs an innovative algorithm to extract speech from background noise in the real-time, single-ended noise reduction algorithm.
How to Reduce Background Noise on Windows?
Gemoo Recorder is a free and easy screen recorder that enables users to screen record without background noise. Its user-friendly interface makes recording video, audio, webcam, and webpages easy and convenient. As a professional screen recorder for both Mac and Windows users, Gemoo Recorder also ensures your recording high quality, eliminating the background noise when you are speaking.
Unique Features of Gemoo Recorder
- Screen record in a high resolution of HD 480/720/1080.
- Come with a built-in video editor to add notes during recordings.
- Support to record your voice in high-definition audio.
- Add mouse-highlighting spotlights to your video.
Here are the detailed steps about how to screen record without background noise on Windows:
Step 1. Free install Gemoo Recorder and choose the Screen Only mode. You can enable the microphone or not under More Settings.
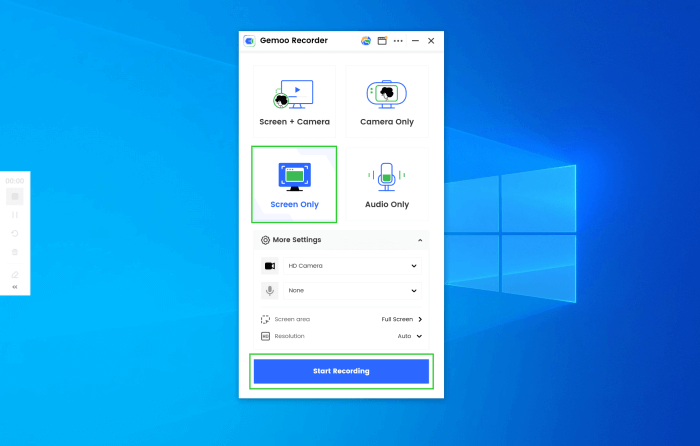
Launch Gemoo Recorder and Choose the Screen Only Mode
Step 2. Click on the Start Recording button and after a 3-second recording countdown, you will see the recording interface as below.
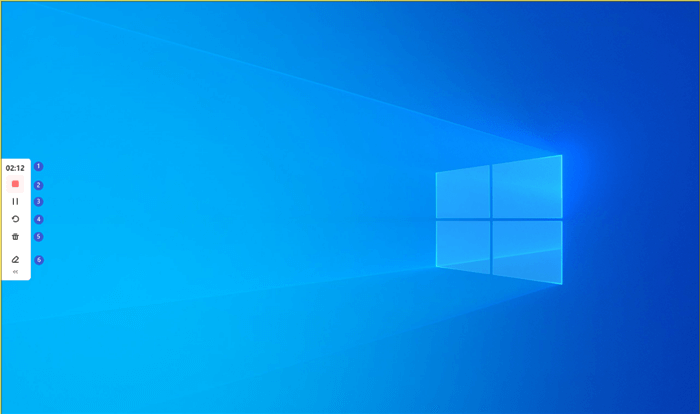
Start to Record the Screen
Step 3. On the left sidebar, you can view the recording consuming time. When you finish recording, you can hit the Red Stop button to stop the recording.
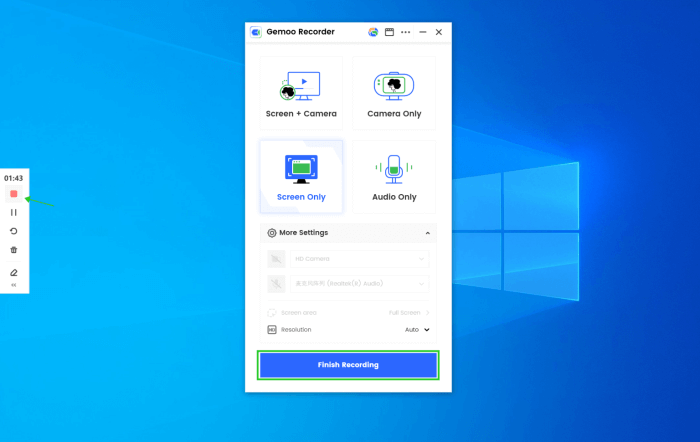
Finish Screen Recording
How to Reduce Background Noise on Mac?
The free QuickTime Player may be your first pick if you’re a Mac user who wants to record the screen for free. Using this application, you can easily record the screen and your voice.
Even if you use a professional noise cancellation program like Krisp to reduce screen recording background noise, you may still need to use a phone or VoIP headset to reduce background noise when speaking.
It’s easy to screen record on a Mac without any background noise using QuickTime Player and Krisp. On to how they reduce screen recording noise, shall we?
Step 1: Set Krisp as your default audio source for recording after downloading and installing it on your Mac.
Step 2: Take a look at the toolbar at the top of QuickTime Player and choose “File” > “New Screen Recording.”
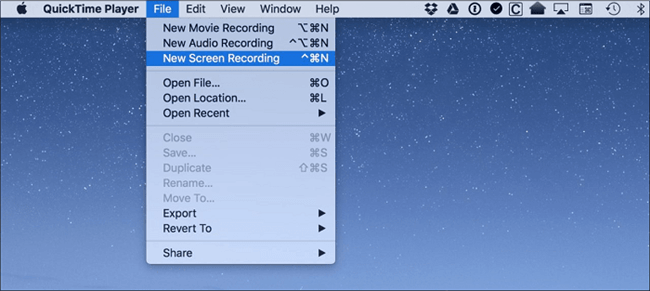
Click on the New Screen Recording Feature
Step 3: Select the audio source by clicking the downward-facing arrow. The Krisp option must be selected here.
Step 4: Click the “Record” button to begin your recording when everything seems to be in order.
9 Screen Recorders to Screen Record without Background Noise
Audacity Noise Reduction
Visit: Audacity website
Audacity is a free and open-source audio editing program that allows users to edit audio files in various formats, do sound frequency analysis, and export, edit, or import them all from a single interface. Using the device toolbar, artists may control numerous playback and recording devices simultaneously.
WAV, MP3, Ogg Vorbis, AU, AIFF, and FLAC are just a few file types Audacity can import, edit, combine, and output for music creators. Studio engineers can edit and manipulate audio tracks and undo or redo previous activities in a session using the audio tool to modify the loudness. Other filter effects include equalization, high-pass, low-pass, bass, and treble or notch, which may be used to adjust pitch or tempo and alter frequencies.
For DJs and podcasters alike, Audacity may be used to make voiceovers, eliminate static and other background sounds from audio recordings, and test LADSPA, LV2, VST, and Audio Unit effects.
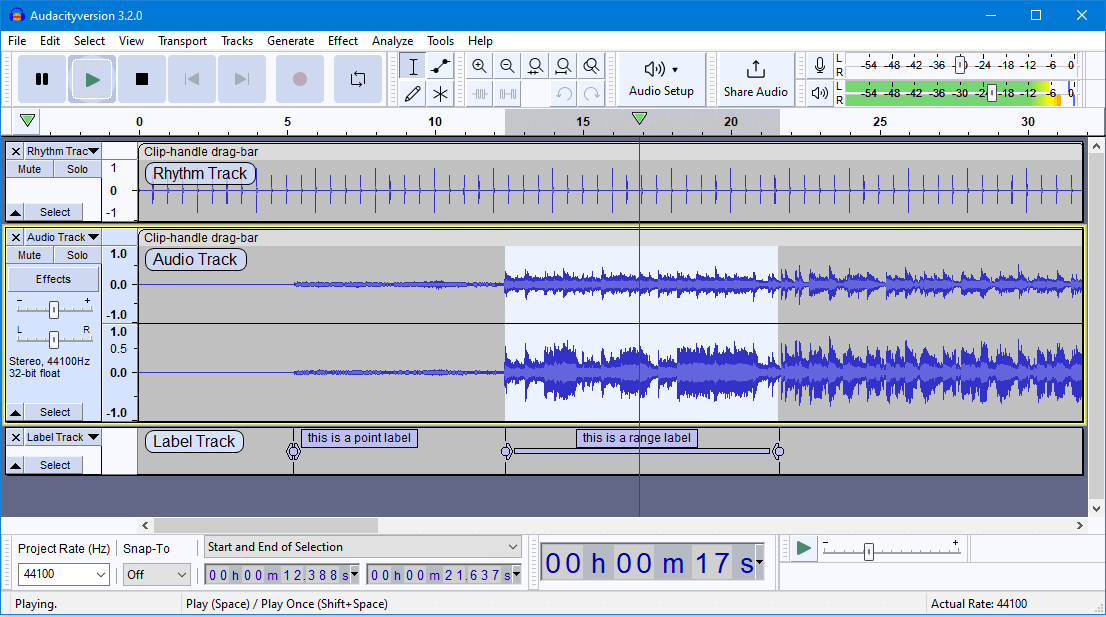
Audacity Interface
Features
- Audio Capture
- Audio Editor
- Mixing the Sounds
- Processing Done in Batches
Method:
Step 1: Import music onto your system.
Step 2: If you want to hear sounds, isolate the section of your voice that includes them. Noise Reduction > Noise Profile > [Effect] is the order in which these actions are performed.
Step 3: Go to [Effect] > [Noise Reduction] > [OK] after selecting the whole range of the voice.
Want to know more about how to record audio on Windows and Mac, let’s see the detail.
Adobe Audition CC
Visit: Adobe Audition CC Website
As an alternative to Audacity, Anybody can use Adobe Audition to record, mix, edit, and restore audio. The platform, which can be purchased alone or as part of Adobe Creative Cloud, contains audio editing capabilities for music, podcasting, and other sound effect creation applications.
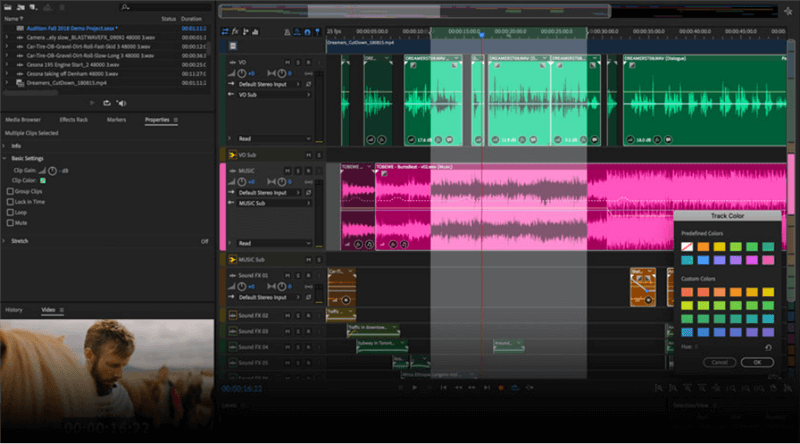
Adobe Audition Interface
Features of Adobe Audition include editing previews and frequency splitting, automated speech alignment, live relinking of assets, and bespoke port channelization. As a result of the inclusion of the Essential Sound panel, users can alter the overall sound and loudness in the audio clip using a multitrack editor.
As well as previewing recorded audio inputs in the recording device before beginning the real process, users may add, remove, and conceal tracks. Adobe Premiere Pro may be integrated with Adobe Audition to enhance timeline-based video editing operations.
Features
- Publish a podcast.
- Adapt your remix to the situation.
- Audio restoration and repair.
- Essential Sound Panel for professional-quality audio.
Method:
Step 1: Open the File.
Step 2: Use the selection tool (T) to choose a section of pure sounds > Effects > Noise Reduction/Restoration > Noise Print Capture.
Soundsoap 5
Visit: Soundsoap 5
SoundSoap is a user-friendly program that fixes audio noise issues such as annoying hiss and background sounds, clicks, pops, crackles, rumble, clipping, and low volume in media files. SoundSoap also removes electrical hum, rumble, and clipping noise from the background while video recording. It is used by hundreds of thousands of consumers as well as professionals all over the globe to generate great audio for their videos and audio projects.
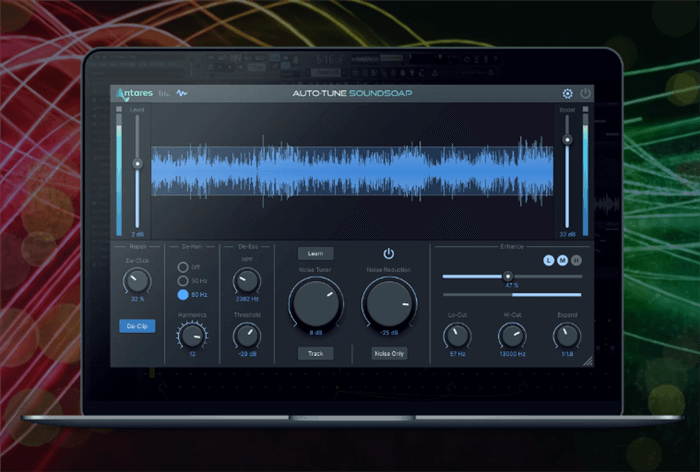
SoundSoap Interface
SoundSoap is so simple to use that even typical customers may use it to remedy audio noise issues without needing any prior experience or knowledge in the field of audio. It is the perfect tool for anybody generating movies, screencasts, podcasts, music, or conversation.
It can even restore vinyl records. And can be used as either a full-featured standalone application or as an audio software plug-in for popular applications such as Adobe Premiere, Final Cut Pro X, Pro Tools, Logic X, GarageBand, Sonar, Adobe Audition, and Digital Performer. SoundSoap supports both modes of operation.
Features
- Automatically eliminates background sounds.
- Generates video, screencast, podcast, LP restoration, music, or conversation.
- Audio meters with a high level of precision.
- Plug-in for audio editing and recording software.
Method:
Step 1: Add audio to the player by clicking on File/Drop Audio.
Step 2: Press and hold [Learn] while listening to learn just background sounds.
Media.io
Visit: Media.io Website
Media.io is one of the greatest background noise removers available online. This tool helps ease your work by removing unwanted noise from audio files. You can quickly and easily eliminate unwanted noise from your video with just a few clicks with Media.io. It doesn’t matter what kind of background sound you have – wind, rain, or traffic – Media.io is always there to help you remove it fast and easily. There are a variety of supported formats, including MP3, M4A, and OGG.
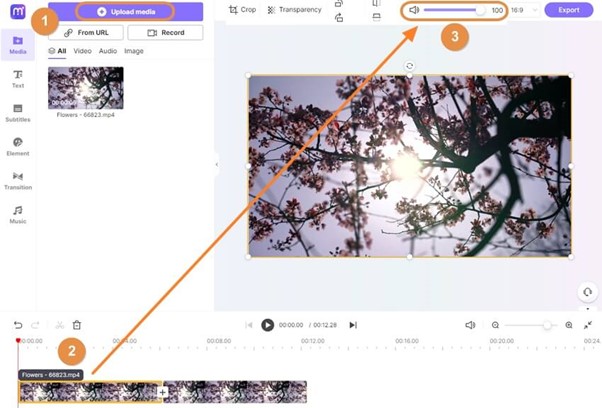
Media.io Interface
Within a few minutes and using strong artificial intelligence technologies, Media.io can eliminate background noise from a video. On Media.io, the DB containing the noise may be modified, and you have more alternatives to choose from. By following these steps, learn how to use the Media.io Noise Reduction tool to clean up various audio formats.
Features
- Converts files from one format to another.
- Highly efficient video editor.
- Reduce the file size for easy transfer.
- Remove image background and noises.
Method:
Step 1: Upload your audio file to Media.io. Please limit files below 10MB.
Step 2: Remove noise. Remove wind or speech noise from audio.
Step 3: Click Start to Process to eliminate audio background noise. Before saving, you may check it.
AudioRemover.com
Visit: AudioRemover Website
Is there a program or software that can remove the background noises in a recording? Audioremover.com is a useful piece of software that may be used. You may get rid of the audio in a movie without having to re-encode it by using this free service. Remove audio from the movie online; the service is compatible with Windows and Mac computers and is accessed via a web browser.
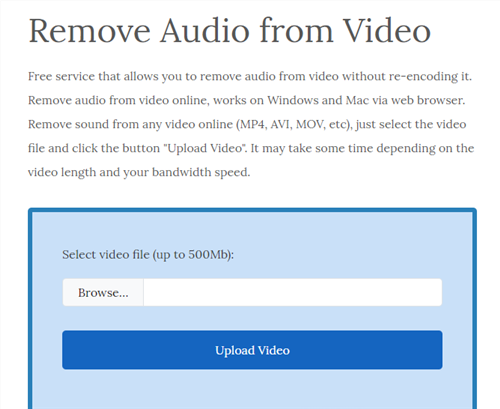
AudioRemover Interface
To remove the audio track from any video hosted online (MP4, AVI, MOV, and so on), choose the video file and click the “Upload Video” option. It might take some time, depending on the movie’s length and the speed of your connection.
Features
- Remove the sound from any video you see on the web.
- In a matter of seconds, you may mute an internet video.
- Easy to understand: Upload the video after picking it out of your library.
- The best service for muting a video.
Method:
Step 1: Go to the homepage of the online video editor by clicking this link. Choose a file on your computer to upload a video and click the Upload Video button. Depending on the size of your video, it may take some time.
Note: Video files are restricted to 500M in size. There are several formats supported, including MP4, AVI, and MOV.
Step 2: Once complete, click the download file to store it on your computer.
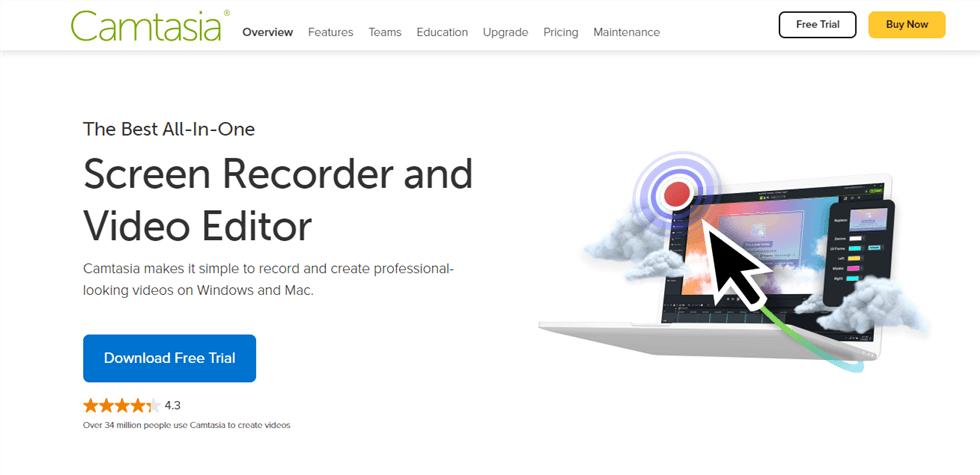
Camtasia
Visit: Camtasia Website
Camtasia is a screen recording and video creation tool that lets you record, edit, save, and share videos. To assist companies in producing tutorials, demonstrations, webinars, and other instructional films, this tool was created. Users may capture software features, video calls, and other information by recording the displays or webcams of their Mac or Windows computers. Annotations, effects, templates, and other editing tools may be added to Camtasia videos to boost audience involvement.
Using Camtasia, you may improve the audio quality of your video for free. Video editing software Camtasia offers a free trial period. It’s easy to use and features a built-in automatic noise elimination capability.
Features
- Animation
- Annotations
- Audio Capture
- Customizable Branding
Method:
Step 1: Using file> Open in Camtasia, go to the video file you’d want to modify.
Step 2: Pick the one that has the noise in the background.
Step 3: From the left-side menu, choose “Audio Effects.”
Step 4: Drag and drop the “Noise Removal” box into the timeline by clicking on it.
Movavi
Visit: Movavi Website
Movavi Video Editor Plus is an effective piece of software that can be used to edit videos on both Windows and Mac computers. It also can reduce the amount of background noise in audio files. This audio and video editor has a user interface that is straightforward to use, making it possible for even inexperienced users to remove background noise effectively. The tutorial that follows will walk you through using Movavi Video Editor Plus to remove any unwanted background noise.
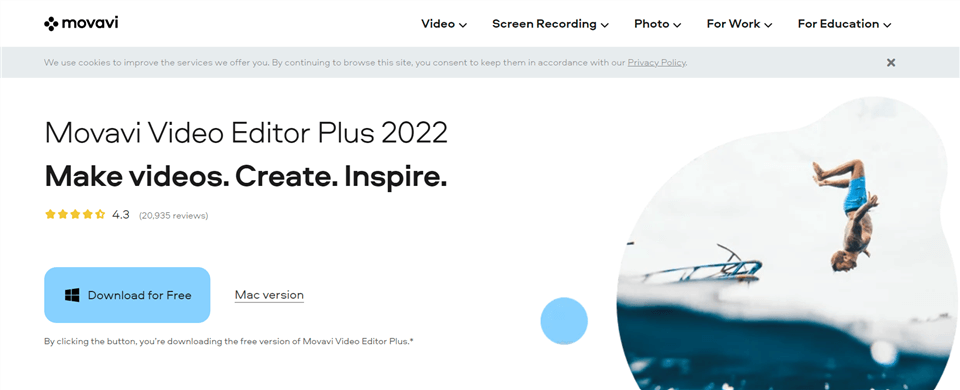
Mac Video Recordig Software – Movavi
Features
- Fast processing of 4K video recordings.
- Timeline markers.
- Keyframe animation.
- Built-in media pack.
Method:
Step 1: Obtain and install the Movavi Video Editor Plus software.
Step 2: Open your video in the software, click the Audio Properties option, and then pick Noise Removal from the drop-down menu.
Step 3: To adjust the background noise level, adjust the slider and click Apply.
VSDC Video Editor
Visit: VSDC Video Editor Website
The video editor’s primary functions are editing existing video files and producing new films of unlimited complexity that use a variety of visual and aural enhancements. You can make films with little effort because of the program’s straightforward and user-friendly interface, despite its comprehensive feature set and extensive capabilities.
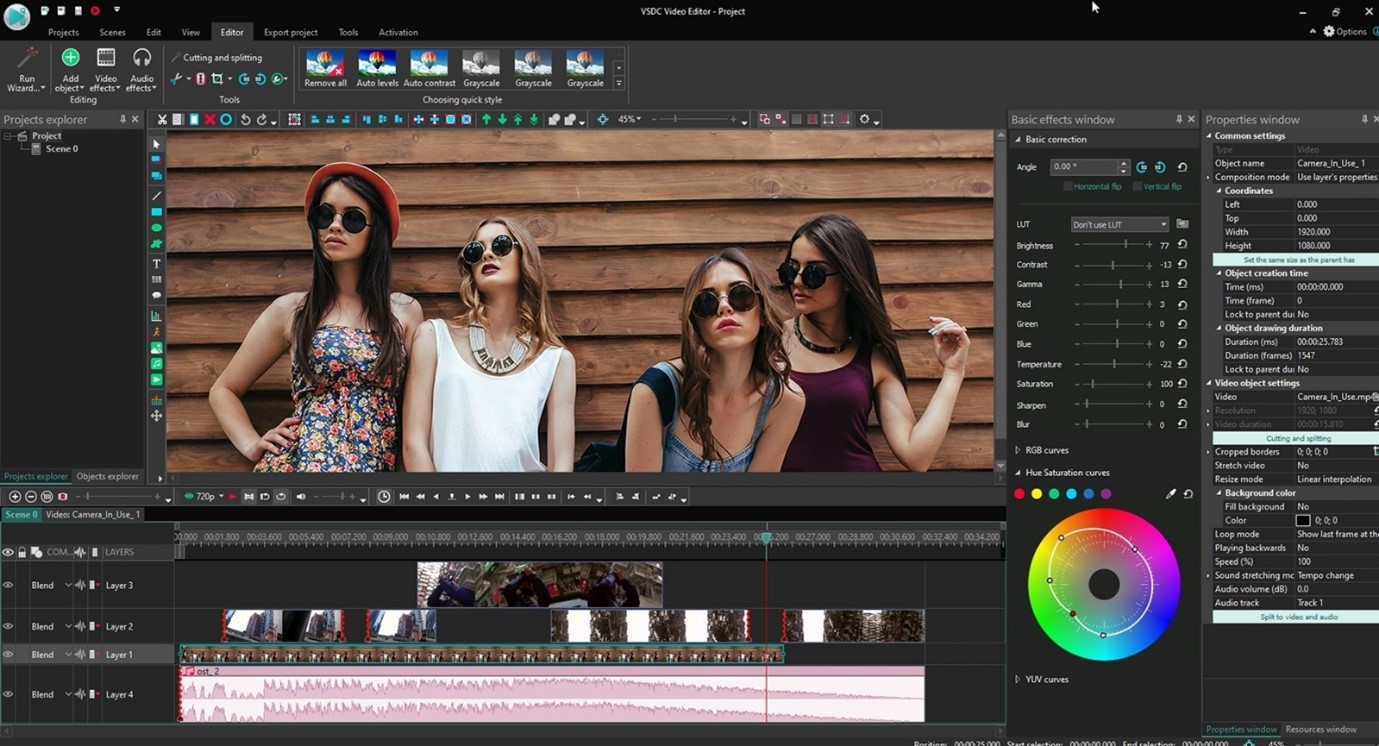
VSDC Video Editor Interface
To get the desired outcome with your films, you may do so by using a variety of visual and audio effects. Because such a large variety of visual effects may be applied, we have partitioned them into the following groups for your convenience: color correction, object transformation, object filters, transition effects, and special fx.
The VSDC Free Movie Editor allows you to generate masks of varying shapes, which you can use to obscure, blur, or emphasize certain aspects of your video. Using this tool, you may add special effects within or outside the masked region. You may give your video a one-of-a-kind and professional look by adjusting various settings inside the editing software. Filters that resemble those on Instagram may be applied with only one click, making them useful for both beginners and those who value their time.
Features
- Video stabilization tool
- Video File Converter
- The non-linear video editor
- Video production tailored to a certain kind of multimedia player.
Method:
Step 1: Right-click on the audio channel you want to use.
Step 2: Go to Effects > Filters > Gate in the Audio Effects.
Step 3: Select the radio option ‘Whole parent duration’ and click OK to eliminate background noise for the duration of the sound channel.
Step 4: Listen to your video to see if there are any noticeable differences.
Final Words
This article will show you many effective methods, from altering the physical surroundings to using specialized software to record your screen without background noise or recording audio with no sound. Depending on your requirements, you can choose any of them to begin recording.
When ease of use is considered, selecting a piece of software from the list is something we strongly advise doing. One easy click is all it takes to record your screen without any noise in the background using any of this software. Simply downloading them will ensure that you are never let down.