Record Screen and Camera
Record “Screen & Camera” mode grants you to record anything (presentation, video, tutorial, etc.) on the screen, camera, as well as audio on your computer. Please refer to the detailed instructions to begin recording. (To start with, please download and install Gemoo Recorder on your computer. )
![]() 2 min
2 min
Select Screen & Camera Recording Mode.
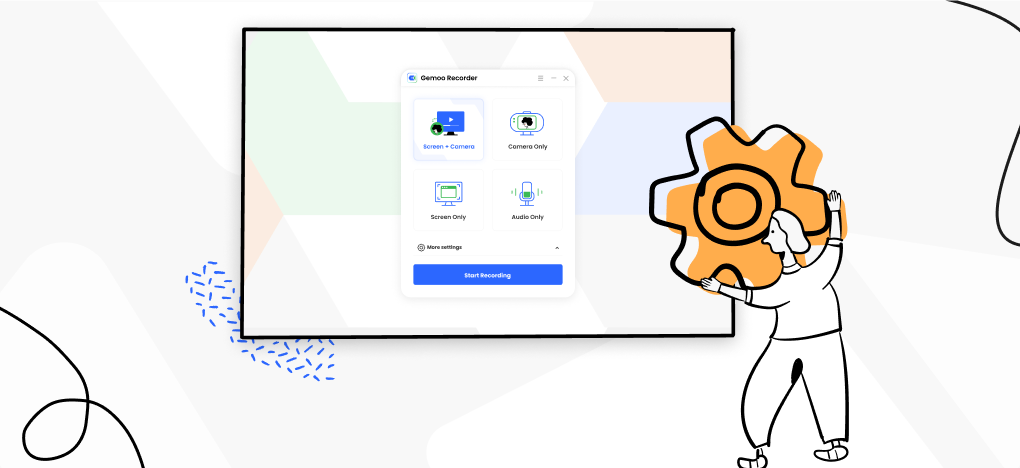
To start with, please download and install Gemoo Recorder on your computer. Launch Gemoo Recorder on your computer, and select “Screen & Camera” mode.
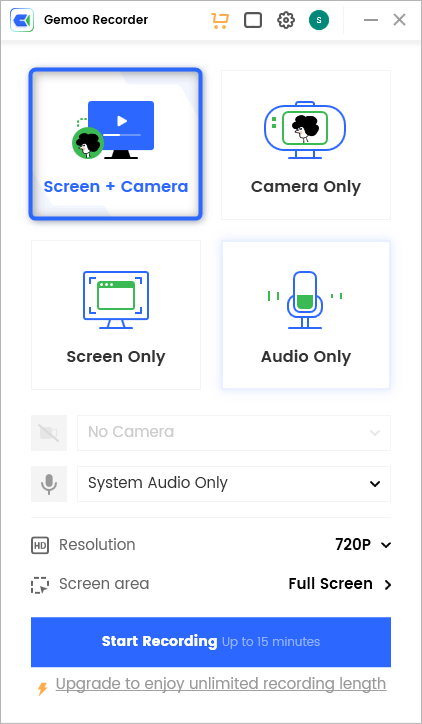
Select Screen & Camera Recording Mode
You can customize the settings before recording by referring to Configure Recording Settings guide. You can also set your camera bubble size and edit the camera effect as you preferred.
Initiate Recording Process.
After choosing the recording mode, please hit the “Start Recording” button to initiate recording.
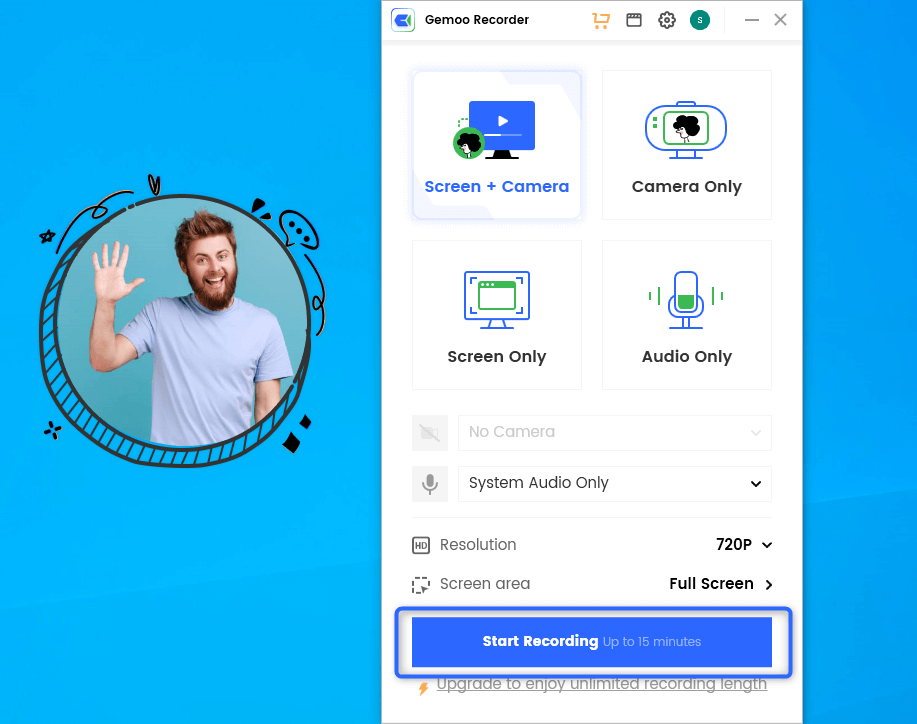
Hit the “Start Recording” Button
Wait for the Recording Countdown.
Once you are ready to start recording, it will pop out a countdown to help you prepare the recording.
Wait for the Recording Countdown
If you would like to see a recording countdown before your recording starts, you can enable the countdown option. Or you can tap it off. Click here to know how to set the countdown option.
Record Your Video.
After a 3-second countdown, the recording will begin. Now, you can record your presentation, video, tutorial etc.

Record a Video
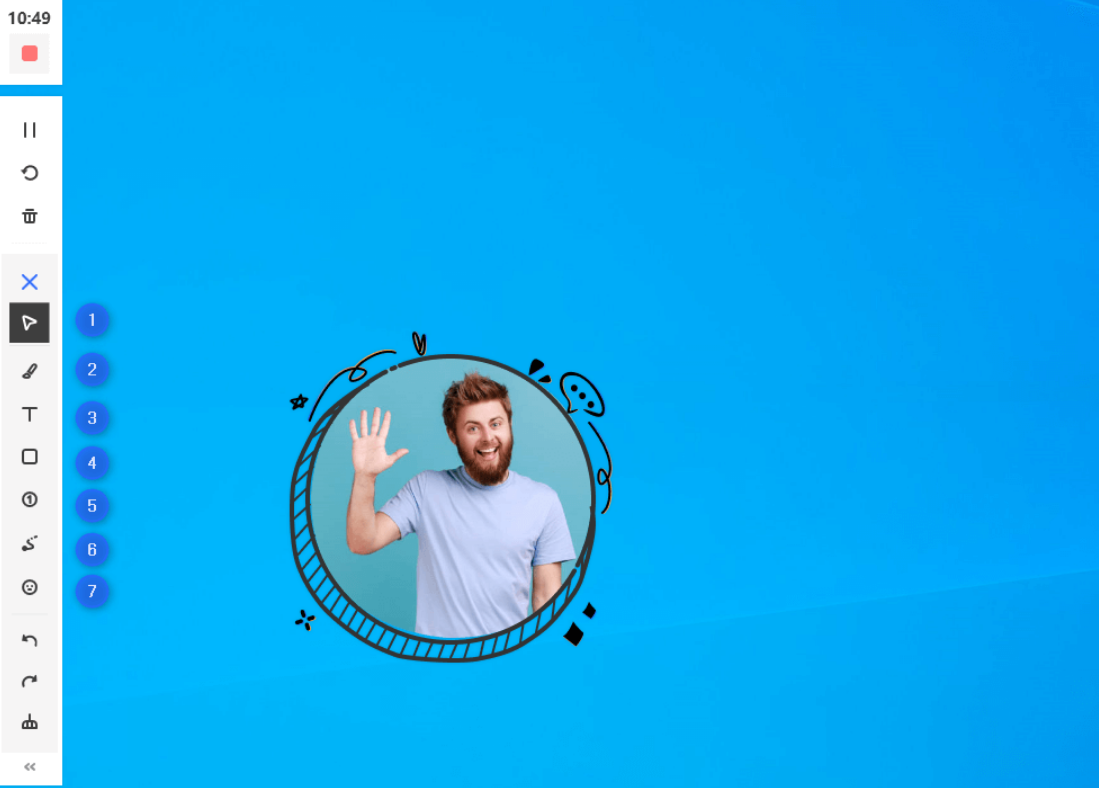
In the left sidebar, you can:
1
View recording consuming time.
2
Finish recording.
3
Pause/resume recording.
4
Restart recording.
5
Delete recording.
6
Add annotations.
Annotate Screen during Recording.
Gemoo Recorder allows you to edit the screen during the recording, too. To access the editing options, you just need to click the “Add Annotation” button directly.
Annotate the Screen
To annotate the screen, you can add
1
Mouse Cursor Effects
![]()
2
Drawing
![]()
3
Text
![]()
4
Shape
![]()
5
Numbers
![]()
6
Stylus
![]()
7
Stickers
![]()
Under the annotating toolbar, you can also click the Undo “↶ “button to revert to the last edit, Redo “↷” button to the forward step, and the “Broom” button to clear the annotations.
Finish Rcording
Once the recording is done, you can hit the red “Stop” button or the “Finish Recording” button to finish it.
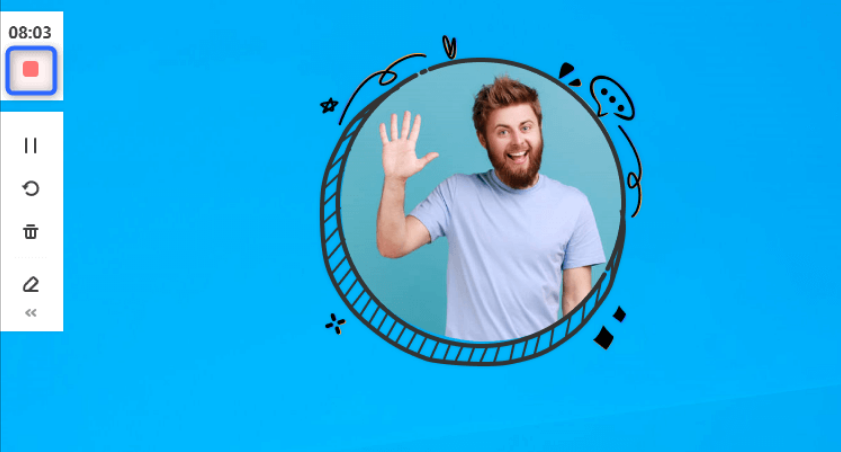
Finish Recording
All the recorded videos will be saved in the library on Gemoo Recorder. Here you can export your videos to edit them or upload the videos to Gemoo Cloud.
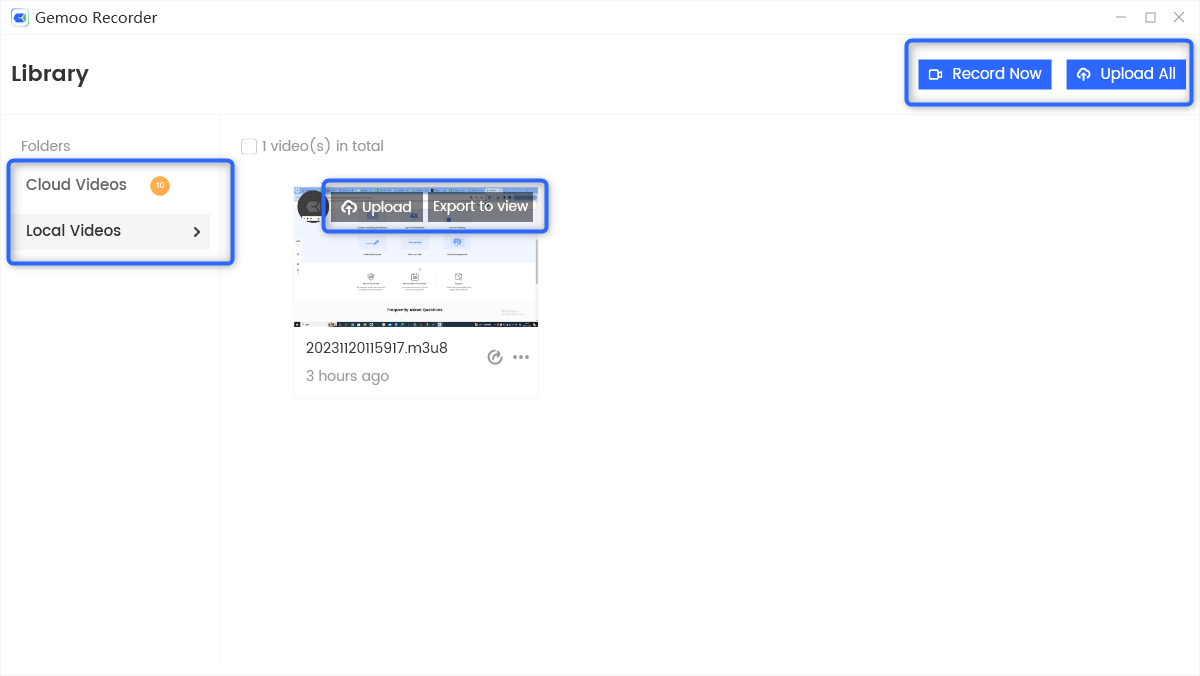
Video Library
Sign in Account
If you want to upload your video to Gemoo Cloud, please click the Upload button and a window will pop out to request sign in for Gemoo. Please enter your account and password to log in Gemoo Recorder.

Sign in Gemoo Recorder
1. If you are a new user, you need to create an account at first. Click here.
2. If you forget your password, go to our Reset Password page type in the email address associated with your Gemoo account and we’ll send you a link to reset your password.
Questions, comments, concerns? Contact us here.
Happy recording! 
Related Guides
Configure Recording Settings
These presets are for you to ensure the recording elements of the recording.
![]() 2 min
2 min