In modern times, with the increasing digitalization trend, many businesses are moving online. Physical meetings once carried out in person, are now conducted using software such as Zoom. This software allows individuals to present their insights and presentations in a virtual environment, making it easier and more convenient for people to attend from different locations. However, it may be necessary to save certain information from a presentation for future reference.

Take a Screenshot on Zoom Meeting
To do this, one can screenshot a video or capture an online presentation. Taking a screenshot is a quick and simple process that can be useful for securing critical information. Windows and Mac computers have pre-installed tools besides Zoom’s built-in capability and allow external software to take screenshots. If you want to know more about taking the screenshot on Zoom, this article will help you, so stick with us!
Recommendation tools:
Table of Contents: hide
Does Zoom Notify If You Screenshot?
How to Screenshot on Zoom for Windows Users?
Does Zoom Notify If You Screenshot?
No. But do you need clarification on whether recording Zoom meetings or taking a screenshot on Zoom will notify the other attendees? Do not worry! Zoom allows you to share your screen, including the option to share a specific application window or your entire screen. However, there is no built-in feature within Zoom to alert you if someone takes a screenshot of your shared screen. This means that someone can take a screenshot during a Zoom meeting without the knowledge of the presenter or other participants.
Additionally, It is worth noting that taking a screenshot during a Zoom meeting is not against the platform’s terms of service and is a common practice for many users. However, suppose you share sensitive or confidential information during a Zoom meeting. In that case, it is always a good idea to be aware of who is in the meeting and to be cautious about what you share on the platform.
Further Reading: Where Do Stardew Valley Screenshots Go?
How to Screenshot on Zoom for Windows Users?
Are you a Windows user looking for a way to screenshot Zoom meetings on your PC? You have come to the right section! People take screenshots for various reasons, including capturing important information, such as a map, a chart, or a set of instructions that can be saved for later reference. It can also be used to document a problem, such as an error message or a bug, that can be shared with technical support for troubleshooting purposes.
Windows users can also take screenshots of the Zoom meeting to benefit from the quick recap advantage. There are several ways you can follow to take a screenshot and save it on your local storage, including using Zoom’s built-in tool and some external software that also fulfills the purpose of it. So, let us look into some of the common ways you can follow to take screenshots on Windows.
Screenshot via Gemoo Snap
Are you tired of using the default screenshot tool on your computer? Do you want a more efficient and user-friendly way to capture screenshots? Look no further than Gemoo Snap! Gemoo Snap is a powerful screenshot tool that allows you to capture screenshots on Zoom with ease. Whether you need to capture a full screen, a specific area of your screen, or even a scrolling window, Gemoo Snap has got you covered.
Free install Gemoo Snap now and learn how to use it to screenshot on Zoom.
Step 1. Log in to Gemoo Snap and navigate to the welcome page as below.

Select Clipboard Screenshot
Step 2. Open Zoom and choose the Clipboard Screenshot mode from the welcome page. Drag the mouse to choose a specific area to take a screenshot.
Screenshot on Zoom via Gemoo Snap
When finish taking the screenshot, you can tap on the right corner frame to copy and paste the screenshot and share your screenshot with your team workers.
Screenshot via Zoom Built-in Tool
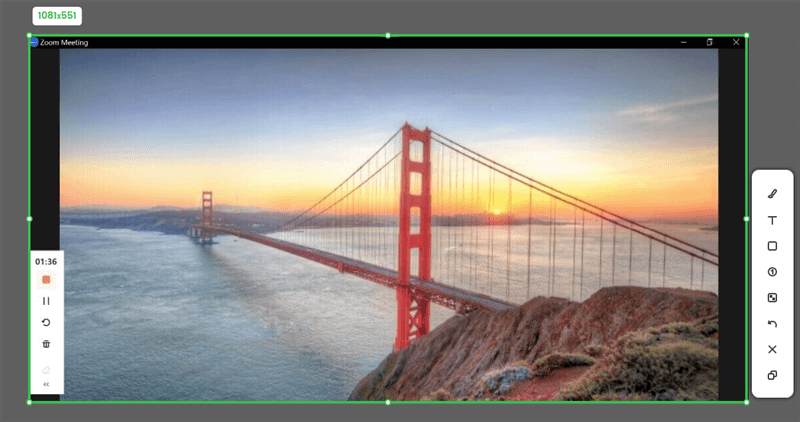
Wondering where to find zoom’s built-in screenshot tool to take a screenshot? Let us help you! Screenshot on Zoom via Zoom’s built-in tool allows for capturing a portion of the window or the entire screen during a Zoom meeting. This built-in screenshot tool provides an easy and efficient way to capture and share important information during a Zoom meeting. To do this, follow the easy-to-do steps mentioned below:
Step 1: Start or join a Zoom meeting and go to the screen or window you want to capture.
r window you want to capture.
Step 2: Now, press on the keyboard “Alt” + “Shift” + ”T” keys.
Step 3: A cursor will appear on the screen, and you click and drag it around your portion and mark a boundary.
Step 4: Lastly, click on the “Capture” button from the bottom menu of the cursor, and your screenshot will be saved in the local storage of your windows device.
Click On Capture
Screenshot via Windows Screenshot Keyboard Shortcut
Another way to take a screenshot on zoom during a meeting is by using a windows keyboard shortcut. These hotkey combinations are handy and quick for taking a screenshot on windows devices. Let us look into how to do it using just a few clicks, as mentioned below:
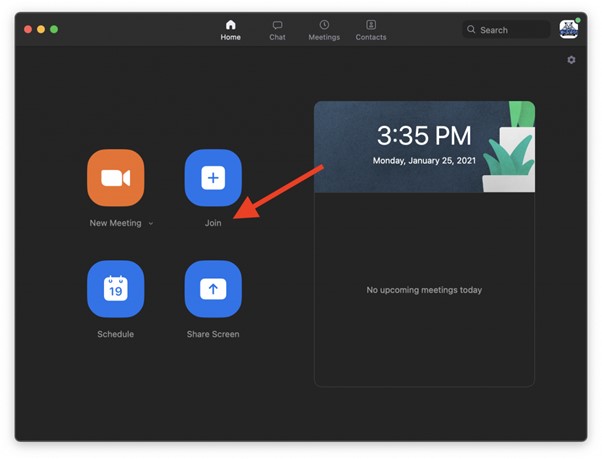
Step 1: First, join a zoom meeting or create one for others to join.
Step 2: During the meeting, click on the “Windows key” + “Shift” + “s” keys.
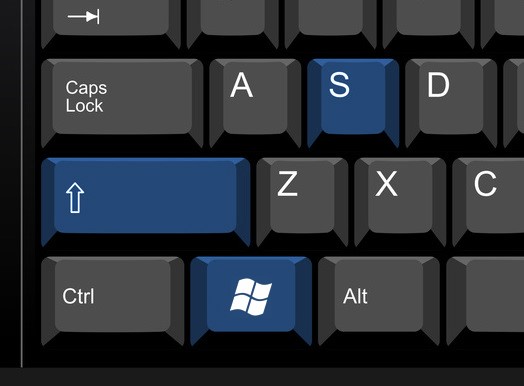
Click on Windows Shift And S
Step 3: A plus-signed cursor will appear, click on it, drag and enlarge the square, and make sure to have your desired portion in its premises.
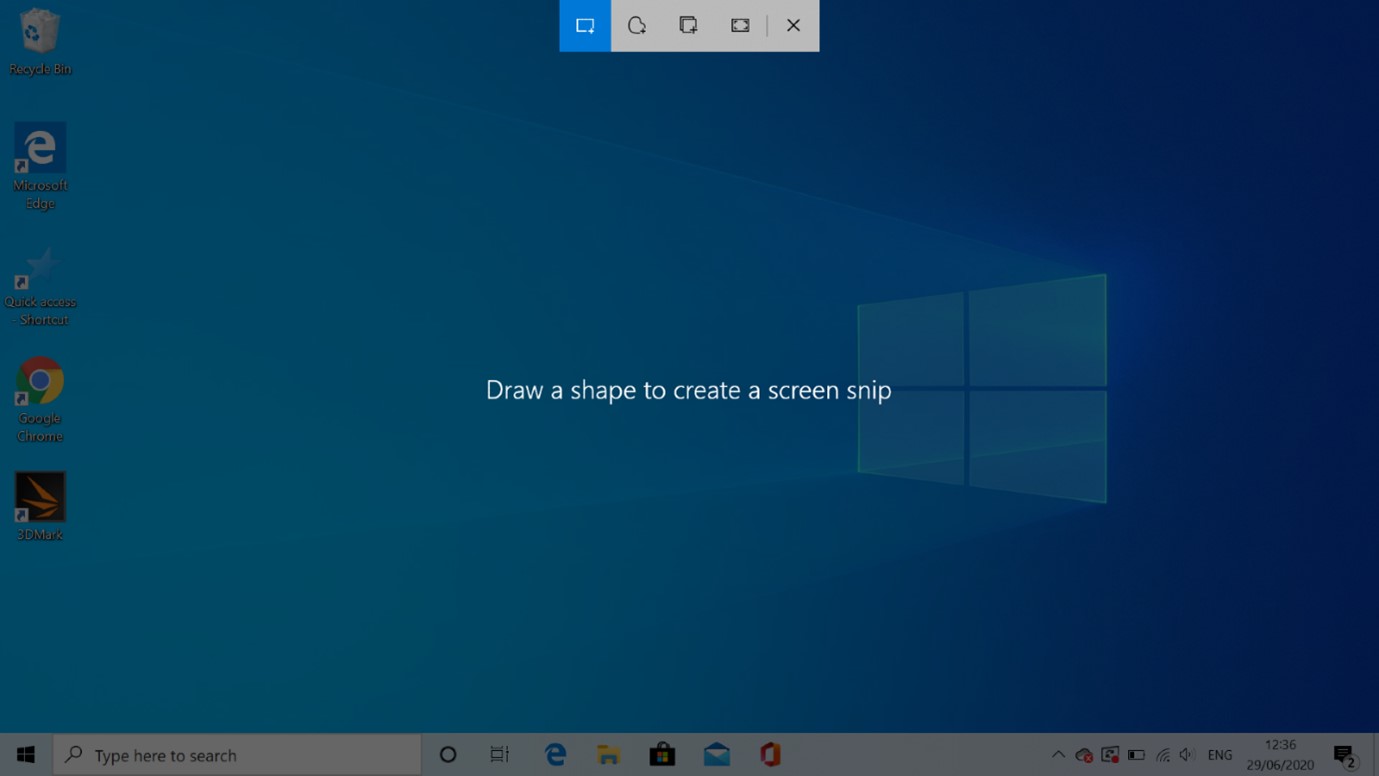
Select Your Desired Screen Portion
Step 4: You can save it by pasting it on your notes using “Ctrl” + “v.”
Screenshot via Snipping Tool
Coming on number three is using a tool called the snipping tool. It is a built-in utility in Windows that allows users to capture screenshots on their computers. With the Snipping Tool, users can select and capture a portion of their screen, including a specific window or the entire screen, and save the screenshot as an image file. Let us look at how we can take advantage of it on a zoom meeting with the below steps:
Step 1: Open the Zoom application and join a meeting.
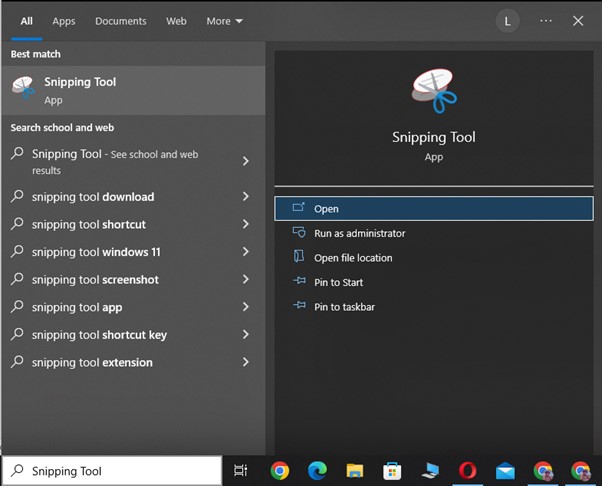
Step 2: Click on the window’s icon in the bottom left, search for “Snipping Tool,” and click on the “Open” button.
Open Snipping Tool
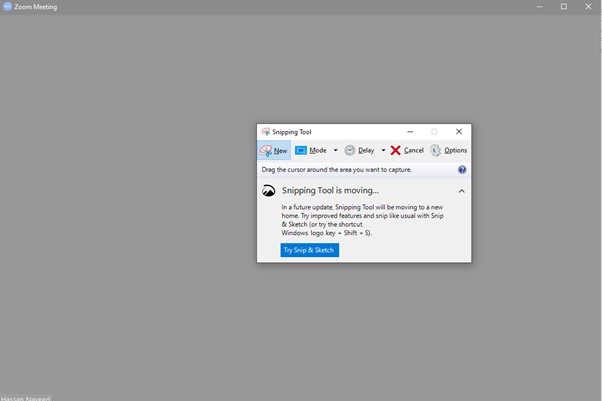
Step 3: Open the application and click on the “New” button from the top left menu of the tool.
Screenshot on Zoom via Snipping Tool
Step 4: Drag the boundary and click “Ctrl” + “S,” and your screenshot will be saved in the local drive.
How to Screenshot on Zoom for Mac Users?
Wondering how to take screenshots of your zoom meetings on your Macbook or iMac? This section will help you out! Screenshots can be used for personal or professional documentation, such as creating a project record or visual tutorial. Ultimately, the reason for taking a screenshot varies depending on the individual and the situation, but they are a useful tool for capturing and sharing information.
Mac leverages its users with its screenshot-taking tool, which can be beneficial in our case. Users can choose between zoom’s built-in feature of taking a screenshot and a couple of other ways to fulfill their requirements. In this section, we will look into the three best ways to take a screenshot during the zoom meeting, from using zoom’s built-in feature to other shortcuts, so let us not wait anymore and look into the solutions mentioned below:
Screenshot on Zoom via Zoom Built-in Tool
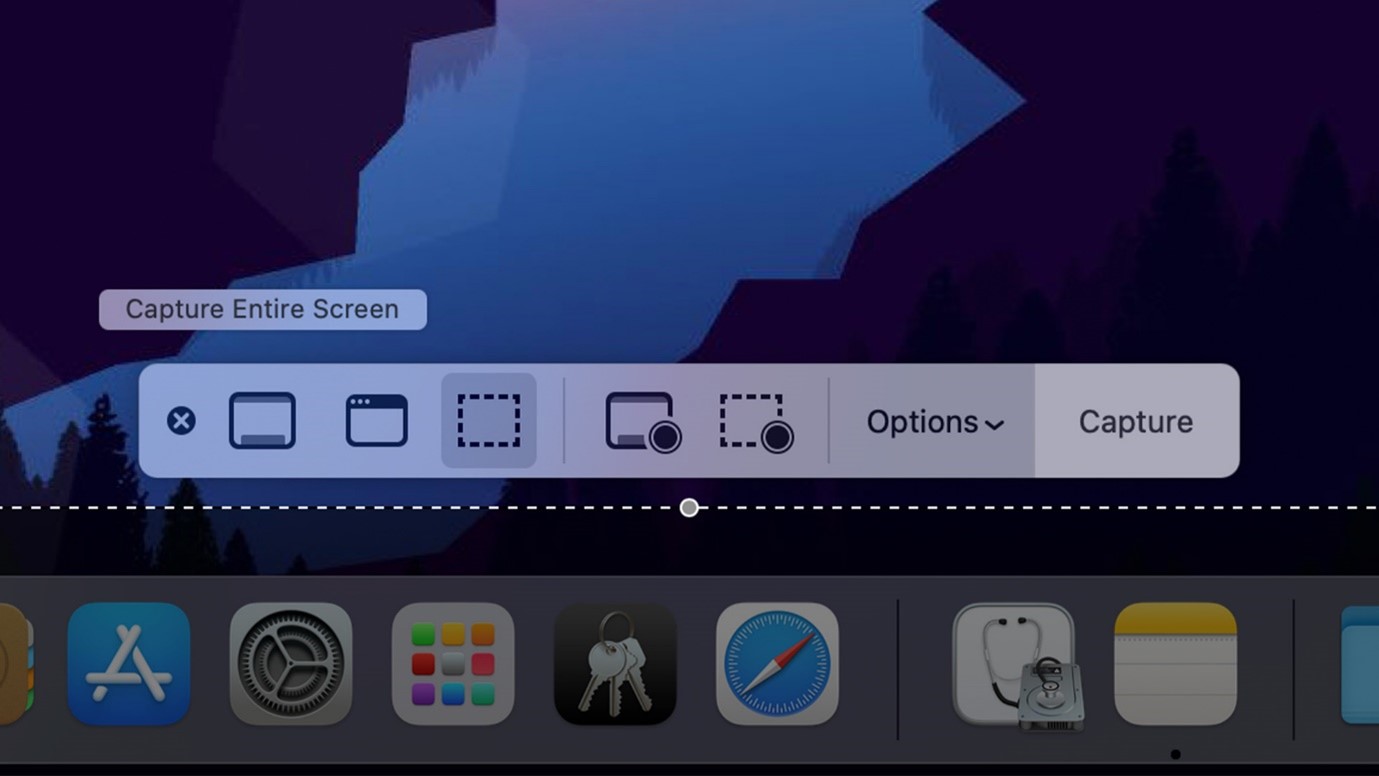
Coming on number one is using Zoom’s built-in tool to take a screenshot of your zoom meeting. Before proceeding, it is important to note that the screenshot feature must be enabled from the settings. Once you have enabled it, you are good to go with the following steps。
Screenshot on Zoom via Zoom Built-in Tool
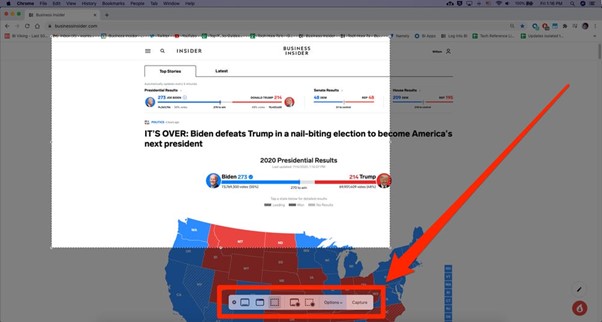
Step 1: Click on the zoom application and join a meeting. Press the “Command” and “T” keys on the keyboard.
Step 2: Drag the cursor around the area of interest and cover your required information.
Step 3: Lastly, a menu will appear, and you have to click “Capture” on it. This will save the screenshot on your mac.
Screenshot on Zoom via Mac Screenshot Keyboard Shortcut
Looking for a short and easy way to take a screenshot? Say no more! This section will guide you with the easy-to-follow tip using the keyboard shortcuts, which you can follow as mentioned below:

Screenshot on Zoom via Mac Screenshot Keyboard Shortcut
Step 1: Enter an already existing zoom meeting or create one. Inside the meeting, click on the “Shift” + “Command” + “4” keys.
Step 2: Use the cursor to select the portion of the screen you want to capture or press the “Spacebar” to capture a specific window.
Step 3: The screenshot will be automatically saved to your desktop, and you can find the screenshot on your desktop and use it as desired.
Screenshot on Zoom via Skitch
In the end, another better option could be using skitch. It is a screen capture and image editing software that allows users to quickly take screenshots and annotate them with shapes, arrows, text, and other elements with the easy and quick steps:
Step 1: Start a Zoom meeting and go to the screen or window you want to capture. Open the Skitch app and click the “Capture” button in the Skitch toolbar.
Screenshot on Zoom via Skitch
Step 2: Use the cursor to select the portion of the screen you want to capture or click on the “Window” button to capture a specific window.
Drag And Enlarge the Area Of Interest
Step 3: Click on the “File” menu and select “Save” to save the screenshot to your computer.
Faqs About Taking Zoom Screenshots
Do you still need clarification and have some questions in your mind? Do not worry! Sometimes grasping new knowledge can create confusion, and it can be difficult to reconcile it with our existing knowledge. This section will help diminish any ambiguity left in your mind by answering commonly asked questions. So, sit back and give it a read to clear any ambiguity left in your mind with the following questions and answers:
How to take a group photo on zoom?
A group photo on Zoom is an image that captures the video feeds of all the participants in a Zoom meeting. Essentially, it’s a screenshot of the Zoom meeting window that includes all the video feeds of the participants. It can be useful for capturing a moment from a meeting, recording the attendance of a virtual event, or as a keepsake for a team.
To take a group photo on Zoom, you can have all participants in the meeting turn their cameras on and use the Zoom built-in screenshot tool or the keyboard Shortcut to capture a screenshot of the video feeds. Alternatively, you can use a third-party app to take a screenshot of a Zoom meeting window and combine multiple video feeds into one image.
Where are zoom screenshots Saved in Windows?
On Windows, the Zoom screenshots are saved in your computer’s default “Pictures” folder. The specific location of the folder can vary depending on your version of Windows and your settings. To find the screenshots, you can go to the “Pictures” folder, search for “Zoom,“ and look for the screenshots saved with the date and time of the meeting.
Where are zoom screenshots Saved on Mac?
The Zoom screenshots on Mac-based devices are saved on the “Desktop” by default. You can use the Mac Screenshot Keyboard Shortcut to take a screenshot, which will be automatically saved to your desktop. You can also use third-party apps like Skitch to take a screenshot and save it in your chosen location. The specific location of the screenshot may vary depending on the app and your settings.
Final Thought
To conclude the article, revising information through zoom screenshots isimportant to ensure accuracy and maintain a complete understanding of a subject. Whether you are a Mac or a Windows user, there can be more than one possible way to screenshot your zoom meeting and save it for recapping information in the future. We hope this article helped you take a screenshot in the 3 finest ways on Mac and windows based devices. If it did, remember to share your experience with us in the comment section below and share this with your family and friends.
