Even in Microsoft Excel, taking a screenshot is essential for conveying and disseminating information. Knowing how to take screenshots in Excel may substantially improve your ability to display data visually, whether you want to record a whole table, chart, or a small portion of your spreadsheet. Here, we’ll go through many approaches for taking screenshots in Excel, making it simple to communicate and archive vital data.

How to Screenshot in Excel
Like taking a screenshot in Word, taking screenshots of your Excel spreadsheets or chosen parts may be helpful in various situations, which is especially given Excel’s strength as a data analysis and visualization tool. Taking screenshots in Excel can help you save time and effort in various situations, including creating training materials, sharing reports, and documenting your work.
In the following sections, we’ll examine various methods built into Excel and externally developed for taking screenshots in Excel. We’ll provide step-by-step guidance and useful hints for taking and using screenshots in your Excel processes. Now is the time to plunge in and learn the ropes of Excel screen capture!
Table of Contents: hide
What Is the Shortcut Key to Take a Screenshot in Excel?
What is a Snapshot in Excel?
A snapshot in Excel is a screen grab that captures the current state of your workbook. You may take a snapshot of your Excel sheet at any given time, preserving its format, data, and calculations. Documentation, presentations, and information sharing are all possible uses for these snapshots.
You may save your data in its present condition using Excel’s snapshot feature for later use. Information such as financial reports, project timetables, or data analysis findings may be captured and stored effectively using this method.
Whether you choose to use Excel’s in-built capabilities, shortcut keys, or other programs, there are several methods to generate snapshots. These techniques provide granular control over what is captured by allowing you to set ranges, add comments, and change picture quality, among other things.
Excel snapshots are a powerful tool for documenting and communicating data, facilitating monitoring changes, exchanging ideas, and presenting results. Excel gives you several tools to take snapshots of your data that are both precise and aesthetically beautiful, whether you need to grab a single cell or an entire page.
What Is the Shortcut Key to Take a Screenshot in Excel?
Taking a screenshot in Excel may be done quickly and easily using keyboard shortcuts. You may copy the contents of the full screen or just a selected window and paste it into your Excel document with the help of a handy shortcut. Follow the steps below to learn:
Step 1: Choose the Excel window or screen to capture.
Step 2: Press the “Alt” key on your computer keyboard.
Step 3: Press “Print Screen” (PrtScn) while holding “Alt”.
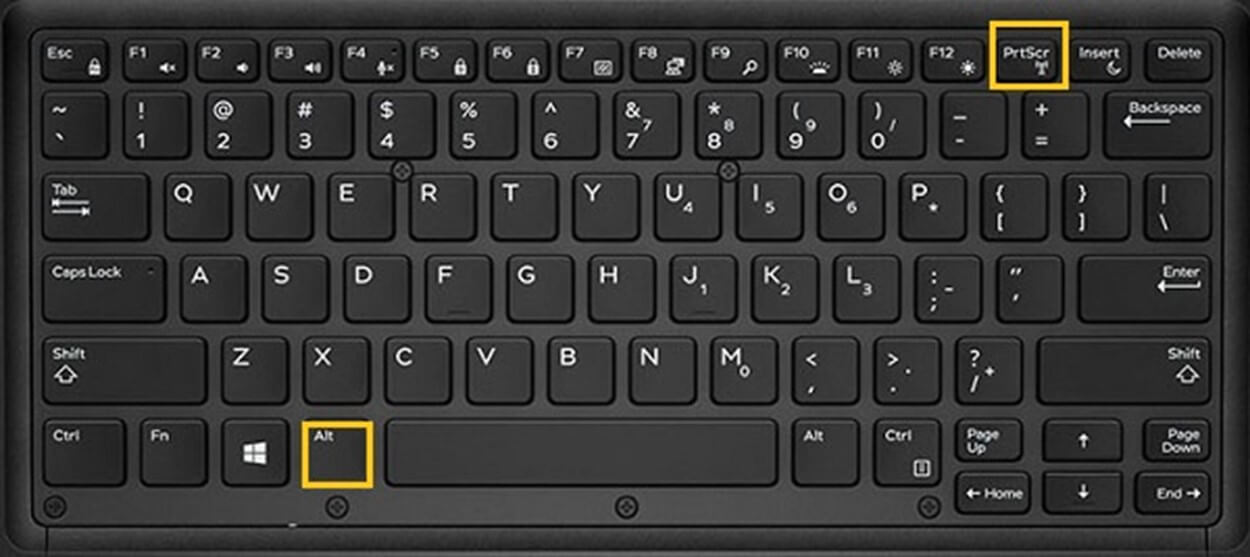
Press Alt + PrtSc
This method of taking a screenshot in Excel copies the current window or screen to the clipboard. Use “Paste” (Ctrl+V) or right-click and “Paste” to put the screenshot into Excel. This keyboard shortcut helps copy and paste data, charts, and tables from another application or window into an Excel worksheet for future reference.
It makes importing data from outside Excel files easier and removes the need for extra snapshot tools. Please note that this shortcut will copy and paste the full screen as an image. In the next sections, we shall examine other techniques if you would rather capture a snapshot of a selected area or range inside Excel.
How to Screenshot in Excel via Gemoo Snap?
Regarding taking screenshots in Excel, Gemoo Snap is a worth-trying option since it combines high power with an intuitive interface. As a handy screenshot tool for Excel that simplifies the process of taking screenshots within the application, you can easily capture and share important data from your Excel spreadsheets. Except for taking a quick screenshot in Excel, Gemoo Snap’s OCR function also enables you to extract words from screenshots. Whether you need to document your work, collaborate with colleagues, or create visual presentations, Gemoo Snap is a valuable tool to have in your Excel toolkit.
To take a screenshot in Excel using Gemoo Snap, do as follows:
Step 1. Install Gemoo Snap on your computer and launch it. Then you can sign in to it with your Google account.

Sign in to Gemoo Snap
Step 2. Start Excel and the desired workbook or worksheet you want to capture.

Launch Excel
Step 3. In Gemoo Snap’s screenshot mode, hit the Clipboard Screenshot option or use the shortcut key to take a screenshot.
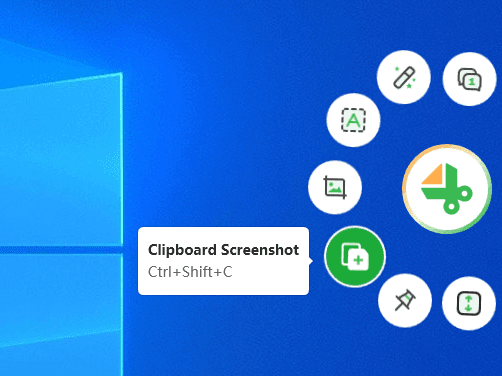
Select Clipboard Screenshot
Step 4. When you pick an area, Gemoo Snap will immediately take a snapshot. After taking a screenshot, you may edit and annotate it with several different tools. You can add text, arrows, shapes, blurring, highlighting, and more.
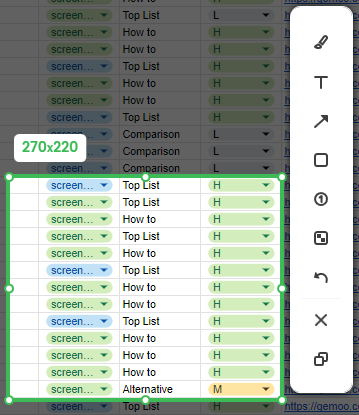
Screenshot in Excel via Gemoo Snap
Gemoo Snap makes capturing screenshots in Excel a breeze by offering a specialized tool with powerful editing options. With Gemoo Snap, you can take a snapshot of your whole Excel window, a selected worksheet, or a specified range with ease and versatility.
How to Take a Screenshot in Excel without Lines?
The problem with capturing a screenshot in Excel is that sometimes the gridlines or cell boundaries are also captured. If you wish to take a snapshot that is free of these lines, you may do it by following the steps below:
- Modify the gridlines by clicking the “View” tab in Excel’s ribbon and then unchecking the “Gridlines” option to remove them. By doing so, you may conceal the worksheet’s gridlines.
- You may modify the cell boundaries by selecting the cells you wish to edit, right-clicking on them, and then choosing “Format Cells.” Select “None” for the border options in the Format Cells dialogue box’s “Border” tab.
- The screenshot you take of your worksheet will be sharper and more focused if you zoom in on it. Use the zoom controls in the bottom right of Excel or the “View” tab to alter the zoom level.
- Get a full-screen screenshot by pressing the “Print Screen” button on your keyboard. An image editings program like Paint or Microsoft Word may crop and modify the photo.
- To grab a region of the Excel window excluding the lines, you may use the Snipping Tool or Snip & Sketch (both included with Windows).
Following these instructions will allow you to take screenshots in Excel without the distracting gridlines or unnecessary cell borders, giving your screenshots a more polished look.
Final Thought
Use Excel’s snapshot capability to record and distribute pivot tables, charts, and other visual representations of data and analysis. We investigated many Excel screen capture approaches, including the in-built snapshot tool, keyboard shortcuts, and other programs like Gemoo Snap. When you know how to use Excel’s snapshot feature, you can easily take screenshots of cells, ranges, or the whole worksheet to send to others.
Taking screenshots using shortcut keys is a time-saving alternative to going through the menus. Gemoo Snap is an excellent choice for taking and improving Excel screenshots because of its sophisticated functionality and editing capabilities. Choose an approach that fits your aims and hobbies. This article describes how to capture any Excel snapshot, from basic to advanced, without modification.