To live in times where things are constantly evolving, revolution is the only way forward. It is significant for us as individuals to keep up with the pace. If not, we might miss out on some important things. In the same manner, there are times when we are forced to attend virtual meetings, even when we can do anything in this world to postpone them. However, you can always record them for the future!

How To Record a Webex Meeting
Now let’s talk about Webex first to get a brief insight into this web conferencing company. Webex is the preferred company for video conferences, video conferencing, and webinars. It provides a smooth experience making communication an enjoyable task. Its app is available on both computers and smartphones, which makes attending a meeting as easy and accessible as it can be. In this article, we’ve provided ways how to record a Webex Meeting anywhere.
Can You Record A Webex Meeting?
How to Record a Webex Meeting as a Participant on Computer?
Record a Webex Meeting as a Participant in Browser?
You can record a Webex meeting as a participant. The following parts will contain all the important information about how to record a Webex meeting. The best thing is that every device lets you record Webex meetings and access them later. The Webex Meeting app itself provides a chance to record the meetings in most circumstances. However, in areas of limitations, you can download third-party software to perform the task. Keep reading to discover the steps to record Webex meetings on your device.
To record a Webex Meeting as a participant on your Windows and Mac computer, try the following tools.
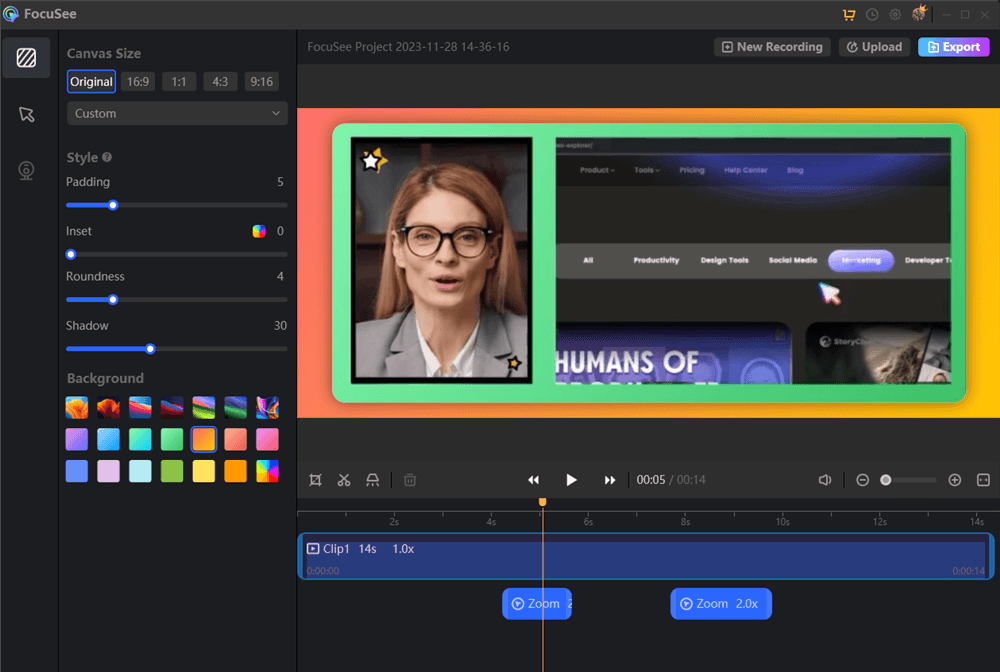
FocuSee is an innovative Webex Meeting Recorder that can significantly enhance the quality of your Webex Meeting recordings. With its user-friendly interface and advanced editing features, you can effortlessly transform your screen, selfie, and voiceover recordings into professional-looking videos.
During the recording, FocuSee automatically tracks cursor movements and applies dynamic zoom effects alongside your mouse cursor movements, saving you hours of manual editing. It’s perfect for creating engaging demos, tutorials, promotional videos, and pitch videos. Plus, it offers interactive features like in-video quizzes and forms and diverse customization options.
Step 1. Free install FocuSee and open it on your computer. Launch the Webex Meeting interface on your computer. Choose the Custom option.
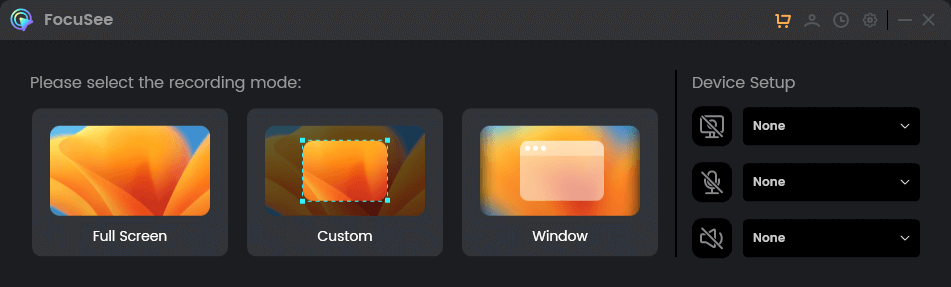
Choose a Recording Mode
Step 2. Frame the area you attempt to record and click the REC button to get started.
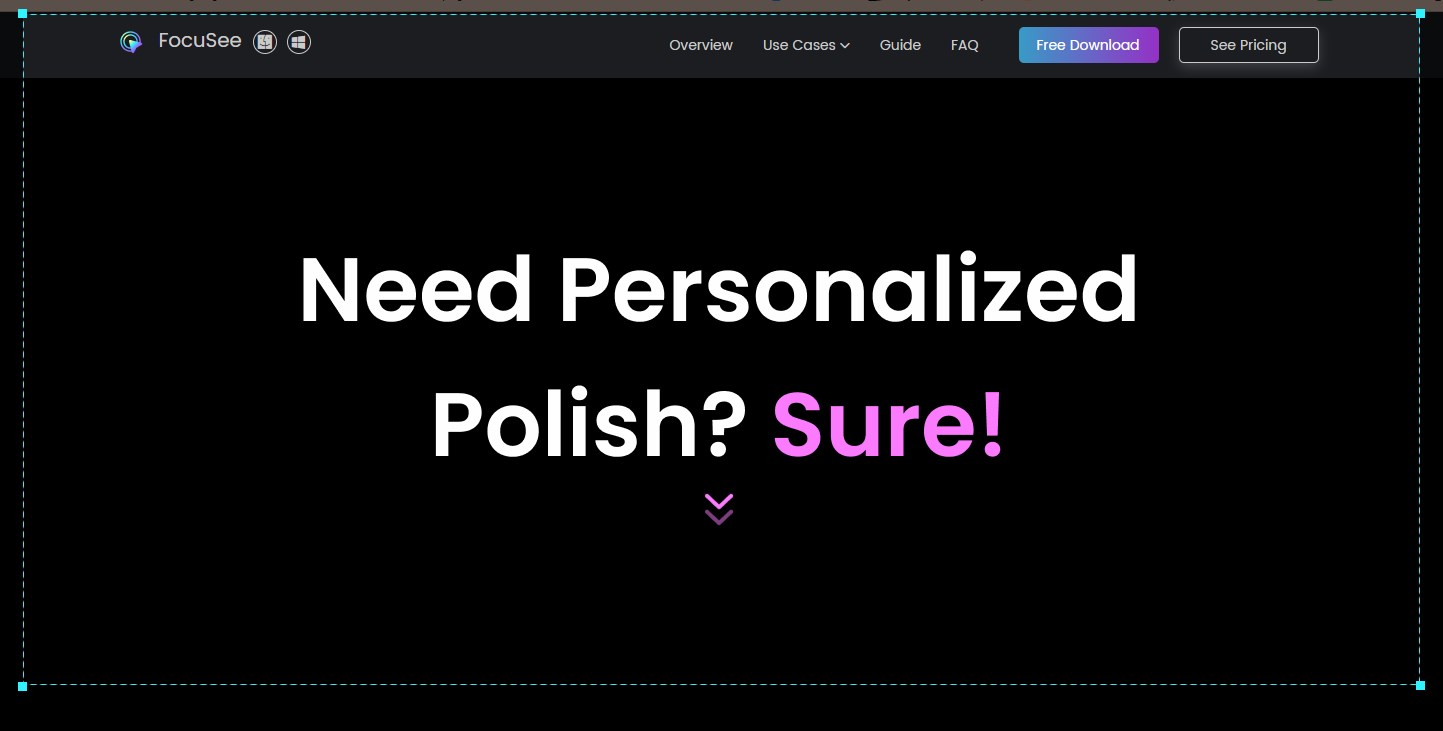
Frame an Area to Record
Step 3. When you finish recording, hit the Stop button.
Edit the Recording
Gemoo Recorder is a must-have tool for recording Webex Meetings on both Windows and Mac operating systems. If you’re looking for reliable third-party software to record Webex Meetings, Gemoo Recorder is the top choice. While Windows and Mac have built-in recording tools, Gemoo Recorder offers more advanced features. It’s a popular screen recording application in 2023 and definitely worth considering. With Gemoo Recorder, you can easily capture your screen and review the recording later. Download and install Gemoo Recorder for free to explore its full range of screen recording capabilities.
To start recording your screen, follow these steps:
Step 1: Download and install Gemoo Recorder on your computer for free and sign in to your Gemoo account.
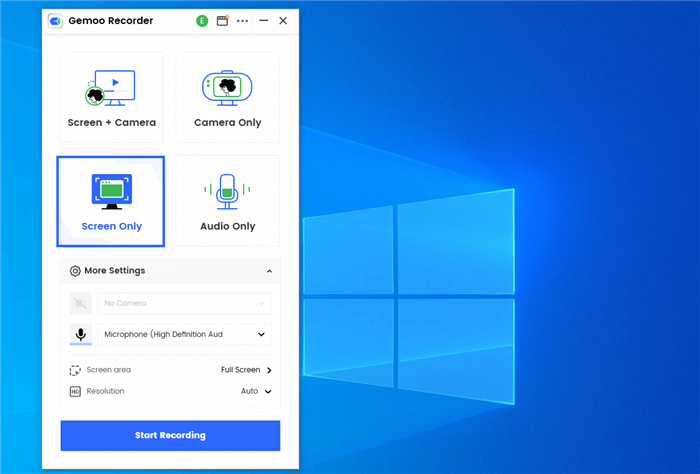
Choose the Screen Only Mode
Step 2: On the welcome page, select the “Screen Only” feature.
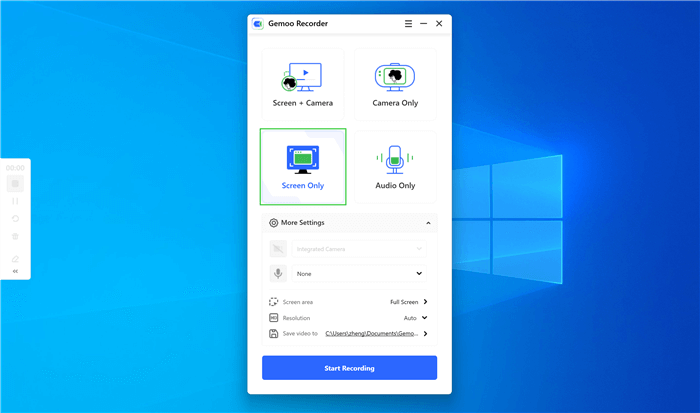
Select Screen Only Mode
Step 3: Click the “Start Recording” button to begin. After three seconds, the screen recording will start. Use the options in the left sidebar to add annotations, animations, or other effects to your recording as it’s being made.
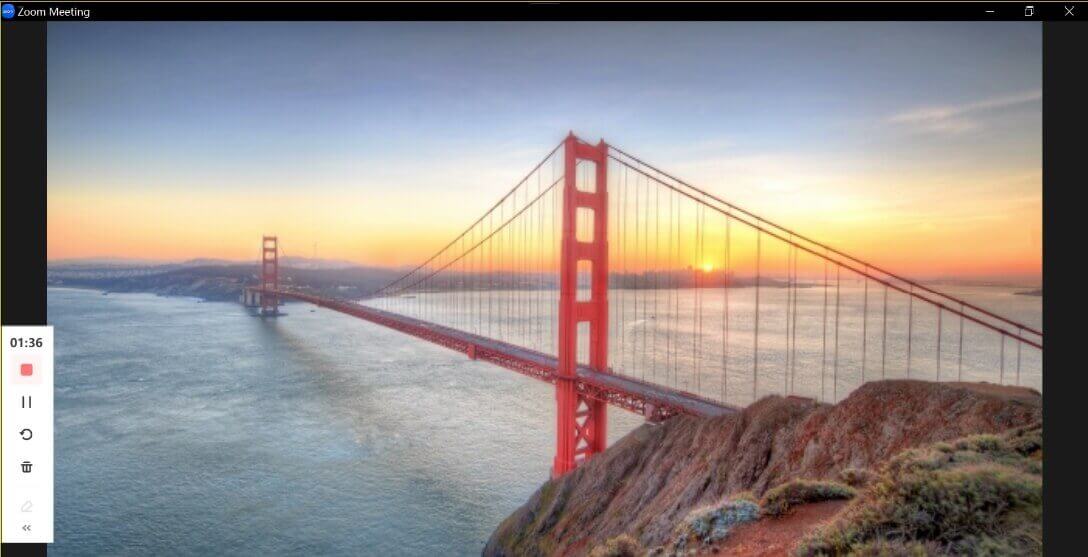
Zoom Meeting Recording via Gemoo Recorder
Step 5: To stop the recording, click the red “Stop” button. Your recording will be saved on your computer, and you can view it at any time.
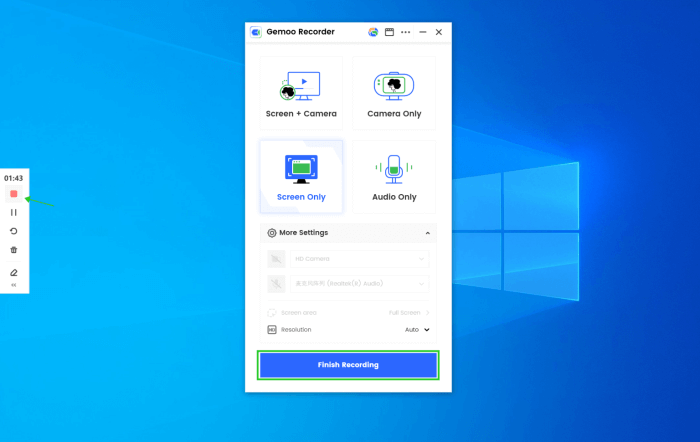
Finish Screen Recording
If you plan to record a Webex meeting on Windows, the Game bar is here to save your back. It is easy to use and offers a smooth recording experience. It is pre-installed on Windows 10, so if you have to capture Screenshots, game videos, and other forms of media. You know what tool to access to fulfill your goal. One setback of this tool is that you cannot record only a selected portion of your screen, so you are left to capture your complete computer screen in all cases.
Now it is time to discuss how to record a Webex meeting step by step.
Step 1: Click on the Gaming option by accessing the Settings option from your desktop.
Step 2: Enable the option to Record game clips, screenshots, and broadcasts using the Game bar.
Step 3: To run the Game bar, click the Windows + G key. Then, navigate to the Gear icon to fix the recording requirements.
Step 4: Once done, access your Webex meeting. Click the Capture option to begin recording your Webex meeting. Similarly, tap on the Stop Recording option once you’re done recording.
Note: You can review your recorded meeting by clicking on the Game Clip Recorded option.
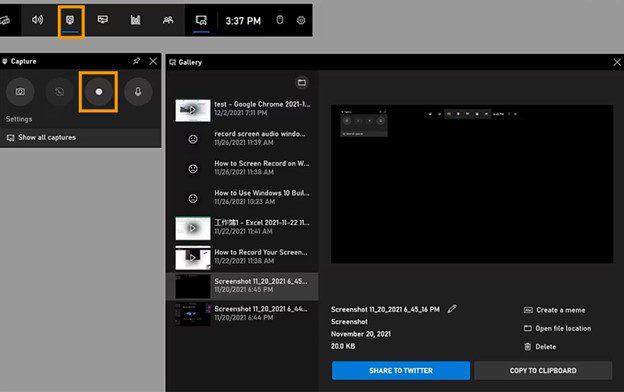
Preview of Your Recorded and Captured Media
Let’s discuss recording a Webex meeting on Macbook. The Mac Quick time player saves the hassle of downloading a tool for recording meetings. It offers the option of recording meetings from desktop software and web-based Webex. One thing to remember while recording meetings with Quick time player is its limited ability to record audio. It only records audio from the internal microphone on Mac. So, if you plan to record it from your computer, you must use a third-party recorder.
Step 1: Open the Webex meeting you want to record.
Step 2: Open the Quicktime Toolbar by clicking Command + Shift + 5 together.

Quick Time Player Toolbar
Step 3: Select the recording area in the Webex tab. You can record the audio by tapping the Microphone button from the Options list.
Step 4: Click on the Record option. You have the options available for recording either your entire screen or a selected portion. After recording the video, tap the Stop Recording option in the top right corner of the Quick Time player.

Quick Time Player Recording Screen Options
Now let us move on to recording your Webex meeting via PowerPoint. Yes, you heard it right. You can record your meetings using it. Although since PowerPoint isn’t specifically designed as a screen recording software, you cannot expect premium quality. But it is a good option if you have no other option and must record the meeting promptly.
Now let us walk you through the steps you must pass through to reach your goal of recording your Webex meeting.
Step 1: Open your Webex meeting on your PC.
Step 2: Access the PowerPoint app and opt for the Blank Presentation.
Step 3: When you look for the options available, click on the Insert Tab and then choose Screen Recording. In turn, your PC screen will become grey.
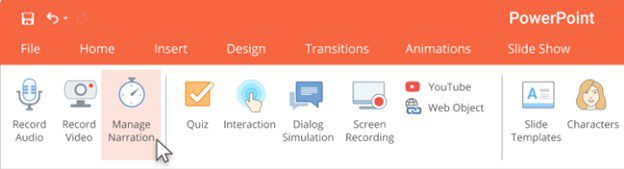
Insert Tab in Power Point
Step 4: Then click the Windows key + Shift + F simultaneously to record your entire screen.
Step 5: A three-second recording timer will appear, followed by the beginning of your recording.
Pre – tips: You can stop and pause your recording at any stage by placing your cursor at the top of the screen
Recording a Webex meeting directly from your browser on a PC is a smooth way to reduce the hassle of downloading third-party tools. You can use Chrome’s extensions to screen record Webex meetings on the browser. One such Chrome extension is Screencastify.
Here’re the steps to follow:
Step 1: Download the Screencastify extension from the Chrome Web Store.
Step 2: Once installed, open the extension’s options from the top-right side of your browser by clicking on the icon.
Step 3: Click on Start Recording to record the Webex meeting and vice versa.
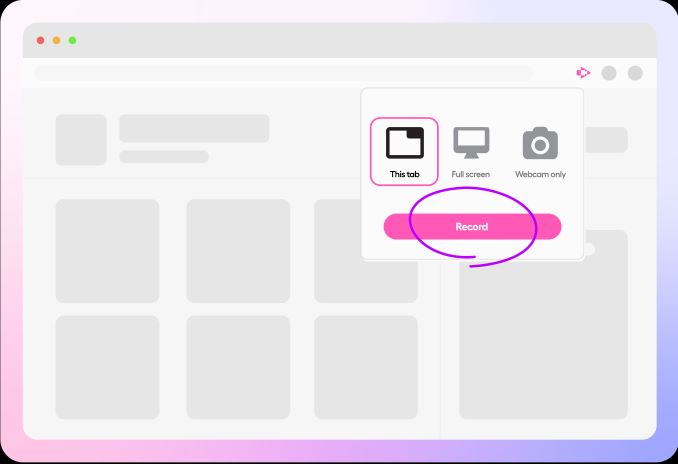
Screencastify Recorder
Sometimes we are on the run, traveling, or doing other important tasks. But then, out of nowhere, we are supposed to attend a meeting. We can screen-record it on our phones to access it later for missed points. Recording your Webex meeting on an Android phone is a very reliable process using its app.
Step 1: Access the downloaded Webex app on your Android.
Step 2: Once you have joined the meeting, tap on the More Option present at the end of the screen.
Step 3: Click on the Record option to begin your recording.
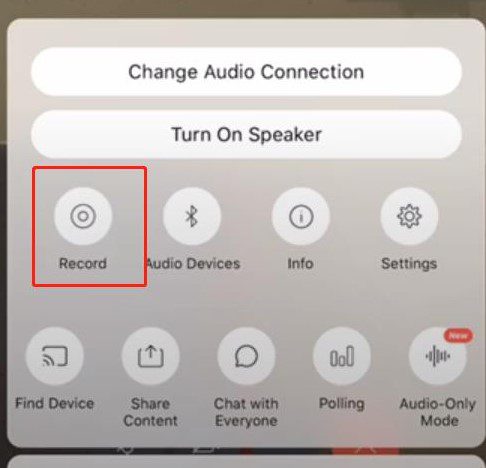
Recording Option In The Webex App
1. Can I record a Webex meeting on my iPhone?
Yes, you can record a Webex meeting as a participant from your iPhone. The iPhone has a built-in screen recording option to do so.
Step 1: Tap on Settings and then Control Centre.
Step 2: Next, tap the + icon close to the Screen Recording option.
Step 3: Go to your Home screen; swipe down the Control Center, tap and hold the Record button. Turn On your mic by tapping the Microphone button.
Step 4: Begin your recording by tapping the circled Screen Recording option. Your recording will start once a three-second countdown ends.
2. How can I record Webex meetings on Windows via a third-party resource?
You can record a Webex meeting or record GoToMeeting using third-party resources like Bandicam. Bandicam is a powerful and updated screen recording tool that records videos while conserving its premium quality. Both host and attendees can record the meeting.
Here are 5 simple steps to record a Webex meeting using Bandicam.
Step 1: Launch the app by first downloading it. Then install it on your PC.
Step 2: Access the app, click the Screen Recording option, and mark the screen area you want to record.
Step 3: Begin your Webex meeting and then access the app again. Opt for the Recording option.
Pre-tip: You can start screen recording by clicking on the F12 key.
3. Can I record the Webex meeting if I am an attendee?
Unfortunately, you cannot record the Webex meeting as an attendee. Webex meeting doesn’t offer attendees to record it. However, you can use a third-party resource if your host isn’t keen on recording it.
With advanced technology and constant updates, recording any meeting and reviewing it later has become so easy. This article contained a step-by-step guide to recording your Webex meeting on Windows, MacBook, iPhone, Android, and browser. If you have any queries, feel free to ask. Don’t forget to share this article with your friends and family so they can also benefit from it.
FocuSee
Can You Record a Webex Meeting If You Are Not the Host?
How to Record a Webex Meeting as a Participant on Computer?
Record a Webex Meeting as a Participant in Browser?
Record a Webex Meeting as a Participant on Android Phone?
Frequently Asked Questions About Webex Meeting Recording
Final Thought
60 seconds, let's create a better FocuSee together ✨
Join 1K+ innovators shaping 30+features✨ & claim your Gift! 🎁

Share your thoughts & earn a coupon instantly!
Warm reminder: This survey does not involve any of your private data.
Page 1 of 10

Coupon Code:
FSUS10
Note: Copy and use the promo code FSUS10 at checkout(valid within 24 hours)