How to Record Screen on Windows 10 without Xbox?

Cool new features, like the built-in Xbox Game Bar, were introduced with Windows 10. Since then, all you must do to begin recording the screen is press the appropriate keyboard shortcut, which is easy. However, issues can arise throughout the recording process. The most frustrating are delays and freezes in the display. Moreover, you won’t be able to use the Game Bar if your graphics card struggles to handle advanced duties while recording, particularly in-game.

Record Screen on Windows 10 without Xbox
However, you can record your Windows 10 screen using other ways. But if you’re unaware of them, you’re at the right place. In this article, you’ll discover 4 proven ways to record screen on Windows 10 without Xbox. Let’s get started!
Table of Contents: hide
Does Windows 11/10 Have Screen Recorder?
How to Record Screen Windows 11/10 without Game Bar?
Way 1 Record Screen on Windows 11/10 via FocuSee – No Watermark/Time Limit
Way 2. Record Screen on Windows 11/10 via Gemoo Recorder – No Watermark
Way 3. Record Screen on Windows 11/10 via OBS Studio
Way 4. Record Screen on Windows 11/10 via Microsoft PowerPoint
Does Windows 11/10 Have Screen Recorder?
Yes, Windows 10 has a built-in screen recorder. The feature is called the Xbox Game Bar, and it is accessible by pressing the Windows + G on your keyboard. The Game Bar allows users to record their screens, take screenshots, and access other gaming-related tools. This feature is built into the operating system, so you do not need to download any additional software.

Record Game on Windows 10 via Xbox Gamebar
The Game Bar can record any open window or the entire screen. It also allows you to specify the recording area, set the recording time, and control the microphone and system audio. However, the recording quality options are limited, and the output video resolution is limited to 720p. It can also not record live stream videos and online games due to the protection of copyrighted material.
Further Reading: How to Record for Longer on Xbox >
How to Record Screen Windows 11/10 without Game Bar?
Now that you know the limitations of Xbox Game Bar screen recording, you wonder how to screen record Windows 10 without Game Bar. You’ll get the answer here! There are ways to record Windows screen without using the Xbox Game Bar.
Record Screen on Windows 11/10 via FocuSee
FocuSee is a remarkable alternative to the Xbox Game Bar for gamers and content creators who are looking to enhance their video recording and editing experience. Although the Xbox Game Bar is a built-in Windows feature that provides basic recording and broadcasting capabilities, the Xbox Game Bar may not work for several reasons. More importantly, FocuSee offers a suite of advanced features that can significantly improve the quality and professionalism of your game and video recordings.
As a comprehensive screen recording tool, FocuSee goes beyond simple gameplay capture. It not only records your screen but also provides video editing features – you can trim videos, add video background, apply zoom-in features, and automatically generate subtitles according to your needs.
Step 1. Free install FocuSee and open it on your computer. Choose a recording mode.
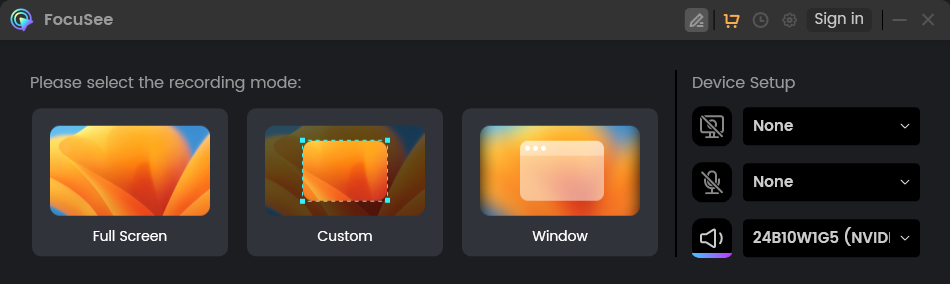
Three Recording Modes of FocuSee
Step 2. Navigate to the interface you want to record and tap the REC button to initiate the recording process.
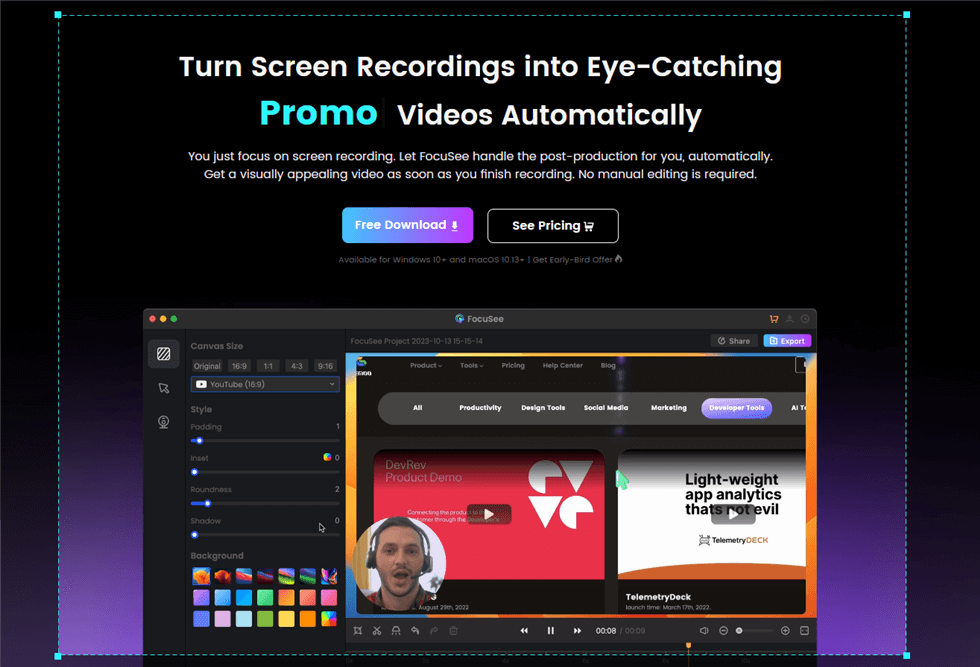
Customize an Area to Record
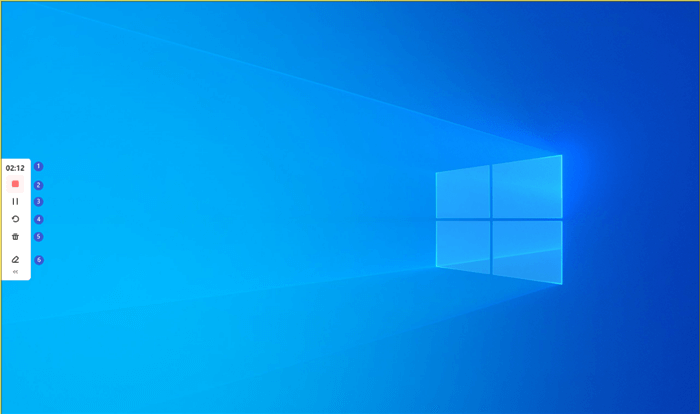
Step 3. Click the red Stop button when you finish recording.
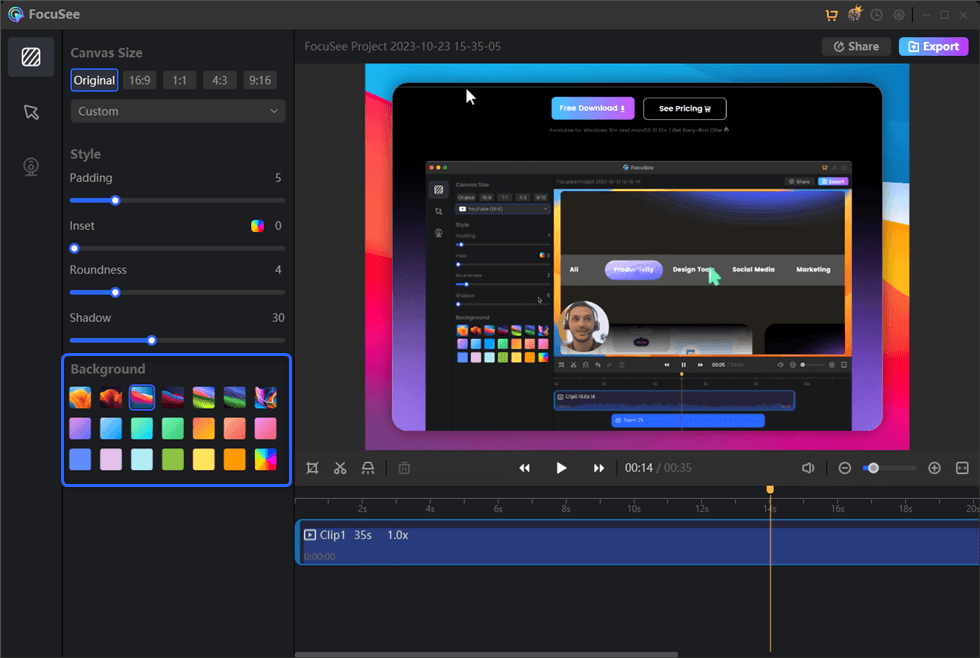
Edit the Recording
Record Screen on Windows 11/10 via Gemoo Recorder
Another way to record screen on Windows 10 without Game Bar is to use Gemoo Recorder. Many popular screen recording solutions give restrictions to users through watermarks, time limitations, video caps, or the amount of recorded pieces. However, Gemoo team has always prioritized its consumers’ needs, and with Gemoo Recorder, you won’t suffer from these concerns.
Gemoo Recorder not only answers customers’ needs with no time limit or no watermarks but also provides powerful screen recording functions, including selective or complete recording of your screen, voice, and face. Therefore, people can experience the full master and independence of screen recording using Gemoo Recorder. To find out how to record Windows 10 via Gemoo Recorder instead of Game Bar, follow the steps below:
Step 1: Free install Gemoo Recorder on your Windows PC. After being installed successfully, launch the tool. In the Gemoo Recorder interface, click on the Screen + Camera option to proceed.
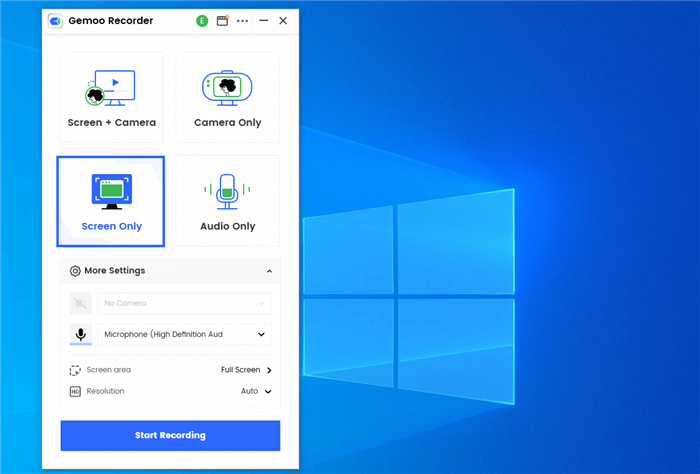
Choose a Recording Mode
Step 2: Now, click the Start Recording button to begin a countdown. After a 3-second countdown, it will begin recording your Windows 10 screen. You can click the red Stop button to halt the recording when you’re done.
Start to Record the Screen
Step 3: When finish recording, you can click on the Stop button on the left side or tap on the Finish Recording button to complete the process.
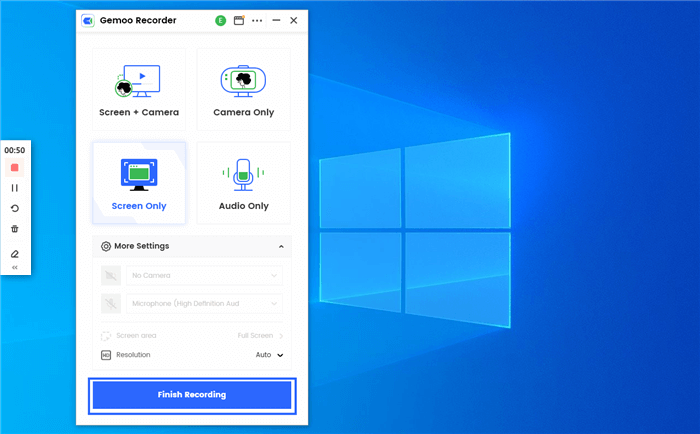
Finish Recording
Record Screen on Windows 11/10 via OBS Studio
Another tool you can use to record Windows 10 screen without Xbox is OBS Studio. OBS Studio is a screen recording program compatible with Windows 10 and offers various useful features. You won’t have to worry about any watermark, advertisements, or time restrictions if you use it to capture or broadcast live video. With this open-source tool, you may record the whole screen, a windowed area, audio from the computer or the microphone, and video from the camera.
You can also record your screen while concurrently streaming live content to platforms like YouTube, Twitch, and others. However, it may be quite intimidating, and those just starting can find it difficult to use. You can discover the right way to record Windows 10 screen via OBS Studio by following these steps:
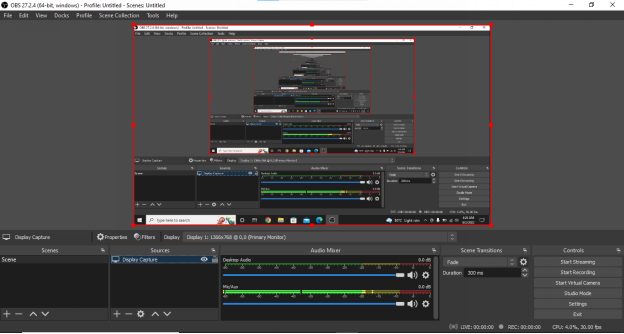
Record Screen on Windows 10 via OBS Studio
Step 1: Get the OBS Studio on your Windows 10 PC from their official site. After installed, launch the tool.
Step 2: At the bottom of the OBS Studio interface, you’ll find the Sources box. Click on the + icon in the Sources box. A pop-up will appear; select Display Capture in it.
Step 3: Select the capture and display method in the next window. Moreover, you can also select a checkbox to display the cursor while recording the screen. Once done, click on OK.
Step 4: Now, click on Start Recording to record the screen via OBS Studio. When done, click on Stop Recording.
Record Screen on Windows 11/10 via Microsoft PowerPoint
The last method to record the Windows 10 screen on our list is using Microsoft PowerPoint. It is commonly used to create and deliver presentations, slideshows, and other visual aids for business, education, and personal use. One of the features of PowerPoint is the ability to record the screen. The screen recording feature in PowerPoint is quite intuitive; you can record your entire screen, window, or a selected portion of your screen.
It also allows you to record your voice and other audio and add webcam footage to the recording. The recording can be stopped and resumed at any time, and you can also add notes and captions to the recording. After recording, the video can be saved in various formats such as WMV, MP4, or AVI, and it can be shared online, embedded in websites, or distributed via email. To record Windows 10 screen using Microsoft PowerPoint, follow the steps below:

Record Screen on Windows 10 via Microsoft PowerPoint
Step 1: Launch Microsoft PowerPoint on your Windows 10 PC. Now, click on Blank Presentation to open a new slide.
Step 2: Click on Insert from the top menu, click on Media, and then select Screen Recording.
Step 3: Now, select the area of your Windows 10 screen using your cursor and click on the red Record button to begin recording.
Step 4: A countdown will start. After 3 seconds, the recording will begin. Once done, press Windows + Shift + Q keys to stop recording.
Faqs About Recording Screen on Windows
In this part, we collect 2 frequently-asked questions about the recording screen on Windows.
What is the shortcut key for screen recording?
On Windows PC, the shortcut key for screen recording is Windows + Alt + R. However, you’ve to open the Game bar by pressing the Windows + G keys before starting the recording.
How to record my screen without the taskbar showing?
To record a Windows screen without the taskbar showing, you can either manually select your area of capture in the Xbox Game Bar or hide the taskbar from Windows Settings. To do that, go to Taskbar settings on Windows and click Advanced. Now, toggle the Hide the System Taskbar switch to ON.
Final Thought
Xbox Game Bar is an essential addition to Windows 10 for people who need to record screens for creating content or recording games. However, it is prone to screen lagging and does not offer advanced features, which is annoying. But we hope this article has provided you with the information you need to know on How to Record Screen on Windows 10 without Xbox. If you found this article helpful, please share it with your friends and colleagues, and don’t forget to leave a comment. Your feedback is valuable to us!