Gamers worldwide have an undeniable desire to immortalize their unforgettable experiences and entertaining mishaps. Gaming consoles like the popular Xbox offer built-in recording features to capture these memorable moments. However, default settings on many consoles restrict the duration of gameplay recordings, leaving gamers yearning for more extensive recording capabilities. Whether you wish to showcase your skills, document epic battles, or share hilarious glitches, the ability to record for longer durations becomes essential.
Record for Longer on Xbox
This article is a comprehensive guide to help you overcome the limitations of default recording settings on Xbox. By exploring various methods and techniques of how to record for longer on Xbox, you will discover how to extend the recording time, ensuring that no moment goes unnoticed or unshared. By the end of the post, we’ll also introduce an effective to record screen without time limit or watermark.
Hence, prepare to start a journey to capture and preserve your gaming adventures!
Can You Record More than 30 Minutes on Xbox Game Bar?
You will encounter a limitation if you intend to record your screen for more than 30 minutes using the Xbox Game Bar. The Xbox Game Bar has an automatic time limit of 30 minutes for screen recording, after which it will stop recording. To overcome this limitation and record screen footage beyond 30 minutes, you will need to explore alternative screen recording software that does not have a time limit.
Various third-party screen recording programs offer extended recording capabilities without time restrictions. These tools provide more advanced features and settings, allowing you to customize your recording preferences and capture gameplay or any other screen activity for longer. However, it’s essential to ensure sufficient storage space on your device to accommodate the larger file sizes associated with longer recording sessions.
How to Record More than 30 Minutes on Xbox?
An external storage device is essential if you’re a Windows 10/11 user looking to record gameplay for over 10 minutes. However, fear not, as the Xbox Game Bar recording feature is also available. This built-in tool offers a convenient solution. With it, you can capture your game window and audio for over 30 minutes, giving you ample recording time. You can also take screenshots with the Xbox Game Bar to recall those memorable moments. You, therefore, have a variety of alternatives to effortlessly record and share your gaming experiences, whether you choose to use the Xbox Game Bar or an external storage device. Follow the procedure below to begin recording right now!
Step 1: To begin, open the game in windowed mode and use your keyboard to press the “Win + G” key combination, which will activate the Xbox Game Bar.

Press Win + G Buttons
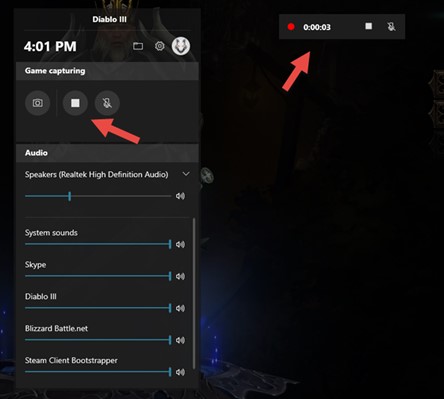
Step 2: Next, locate the “Record” button within the Xbox Game Bar and click on it to initiate the recording of your Xbox One gameplay.
Initiate Recording
Step 3: To stop the recording, access the Game Bar again and select the “Stop” button to bring the recording session to a close.
What’s the Longest You Can Record on Xbox?
You can adjust your game clip resolution and storage settings to determine the duration of your clips. The maximum duration is ten minutes once you save clips directly to your device’s internal storage. However, an external storage device allows you to extend the limit by up to an additional hour. To stop recording and save the clip, refer to the guide and press the X button. You’ll receive a notification once your clip is saved confirming its completion.
Moreover, the duration of gameplay recording is influenced by various factors, including storage capacity and settings. Let’s discuss the key aspects that impact it.
📌 Storage Capacity: The amount of storage space greatly influences the length of the gameplay recording on your Xbox system. Storage sizes for Xbox Series X/S and Xbox One consoles vary, ranging from 500GB to 2TB or more. You can record more footage the more storage space you have.
📌 Game DVR Feature: Xbox consoles utilize the Game DVR feature, which enables users to capture and save gameplay clips. The recording duration depends on the resolution and frame rate settings you choose.
📌 Resolution and Frame Rate: The resolution and frame rate settings you select for recording gameplay footage on Xbox impact the maximum duration you can record. Higher resolutions and frame rates require more storage space and may limit the recording duration.
📌 Storage Management: Managing your Xbox console’s storage effectively ensures sufficient space for recording gameplay. Regularly deleting unwanted clips or transferring them to external storage devices can free up space for longer recording sessions.
📌 External Storage Options: If you require extended recording durations, investing in external storage options, such as external hard drives, can provide additional space for storing gameplay footage. Xbox consoles support various external storage devices that significantly expand your recording capabilities.
By understanding these aspects and optimizing your storage usage, you can ensure longer recording sessions to capture and share your gaming experiences effectively.
Bonus Tip. Record without Time Limit via Gemoo Recorder
If you want to record without a time limit, then Gemoo Recorder is the best option. It is a versatile and user-friendly screen recording tool that empowers users to capture exactly what they need. With Gemoo Recorder, users can easily capture a full page, a selected area, the entire screen, an app window, or even a specific element on their screen. Beyond capturing recordings, Gemoo Recorder offers an intuitive editing feature, allowing users to annotate, edit, and enhance their screenshots effortlessly. Let’s learn to use this tool to record without limit!
Key Features of Gemoo Recorder
- During recording, Gemoo Recorder allows you to insert shapes, texts, memes, and annotations, enhancing your communication by adding visual elements and additional context to your videos.
- It lets you simultaneously record your screen, webcam, and microphone, capturing on-screen activities and yourself in a single recording.
- The platform provides convenient storage and organization options, allowing you to store and arrange your recorded videos within Gemoo.
- With one-click sharing, you can quickly share your recorded videos with others, making it simple to distribute your content and ideas.
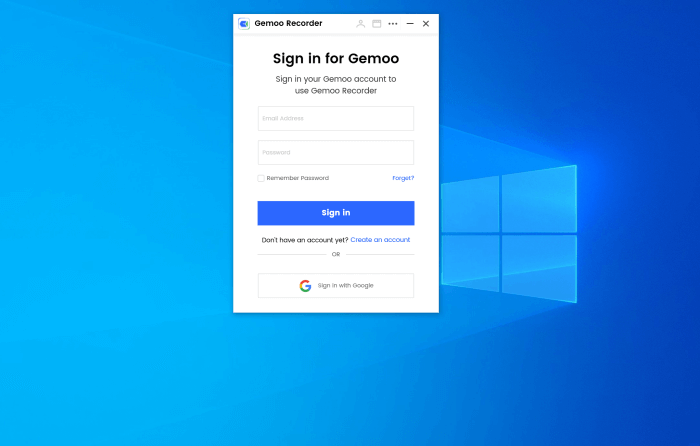
Step 1: Launch the software after downloading Gemoo Recorder, and then log in by entering your account credentials, including your username and password.
Sign in for Gemoo
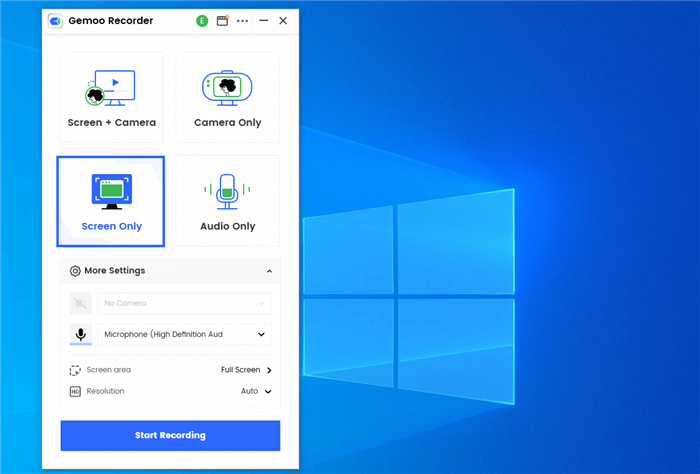
Step 2: Once you have logged into Gemoo Recorder, choose the “Screen Only” recording mode. Simply click the “Start Recording” button to begin capturing your screen.
Choose the Screen Only Mode
Step 3: To give you time to prepare, a countdown will be displayed. After a brief 3-second countdown, the recording will start.
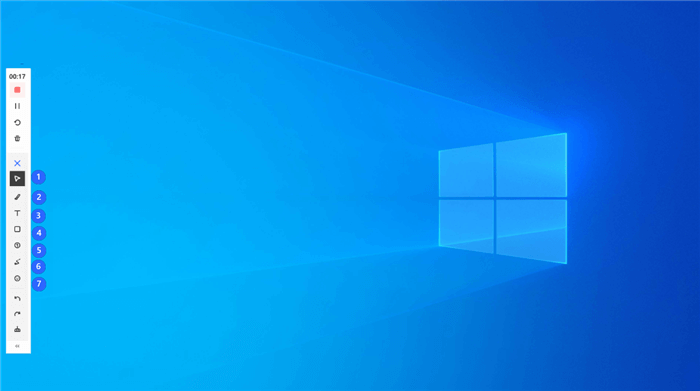
Begin to Record
Step 4: To finish the recording, simply click the red “Stop” or “Finish Recording” button.
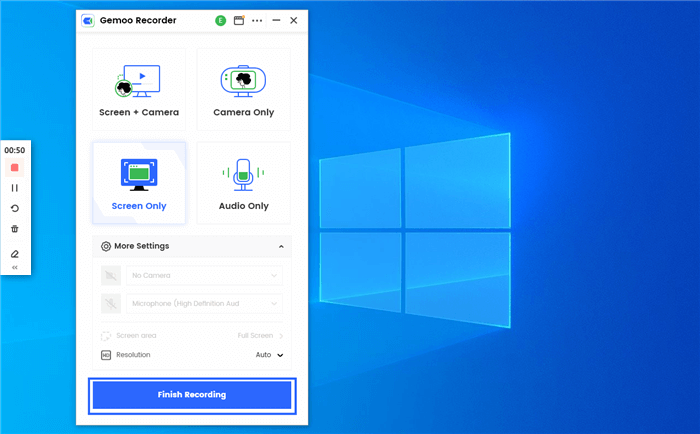
Finish Recording
Final Thought
In conclusion, extending Xbox recording time requires efficient storage management and strategic settings adjustments. Users can increase their recording space by learning how to record for longer on Xbox. Longer recording sessions can be made possible by optimizing video quality settings, changing the recording resolution and frame rate, and minimizing background programs. It’s also crucial to frequently move or delete older recordings to make space for new ones. By employing these techniques, players may make the most of their Xbox recording options and capture their gaming moments without constraints. Furthermore, let us know about your concerns in the comment section below!


