Remove Watermark from Videos
We will walk you through a step-by-step process of using Wipit to remove watermarks from your videos. With its intuitive interface and powerful features, you can remove watermarks, logos, people, and other unwanted from videos, quickly and easily.
Let’s dive in and unlock the full potential of Wipit!
Download and Install Wipit
Download and install Wipit on your computer. Once the installation is complete, launch the software, and you will see the main interface displayed below.
Upload Videos
Drag and drop or simply click on the designated area to upload videos from your computer. We support both MP4 and MOV formats. The uploaded videos will be displayed on the left panel, allowing you to view them in a slide view.
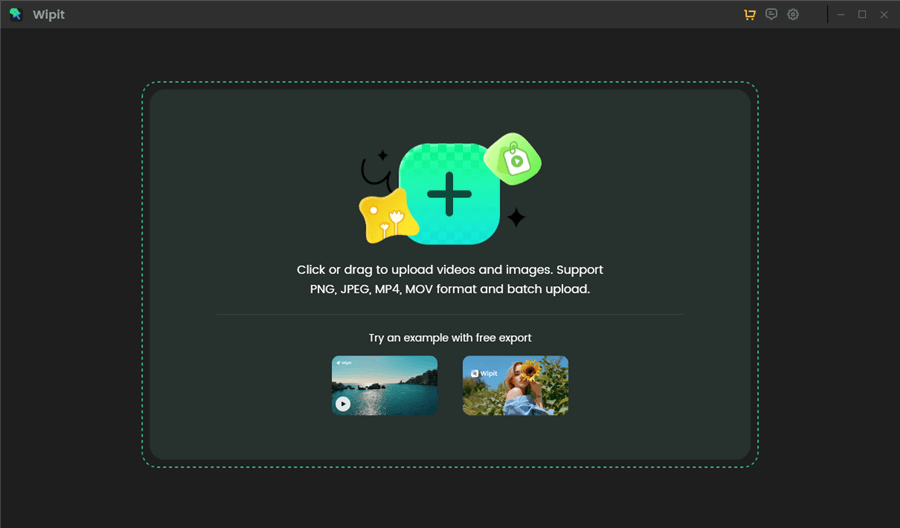
Upload Videos from Your Computer
Select the Watermark Removal Areas
Click on the “Select area” option to frame the watermark removal areas. To specify the duration of the watermark you want to remove, either drag the sliders on the bottom video track to the desired start and end points or manually adjust the selection time on the right panel by entering the start and end times.
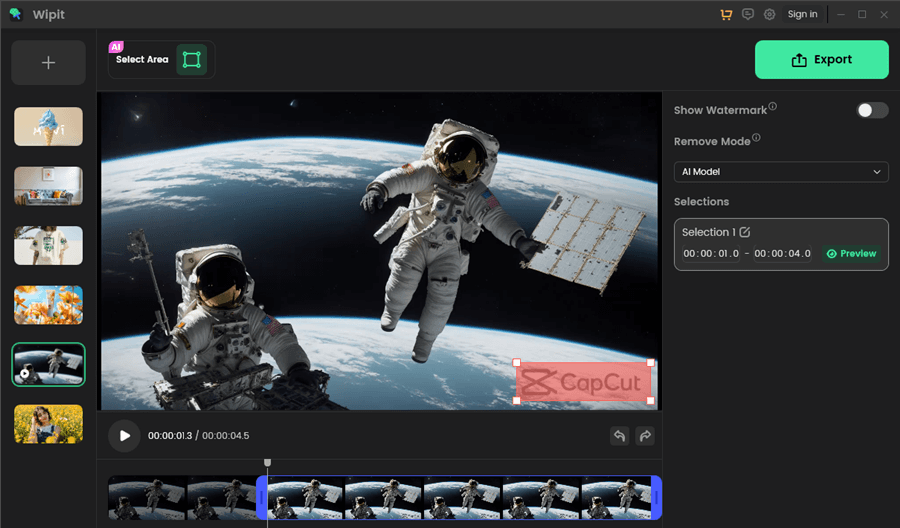
Frame the Area You Want to Remove
Each selection time is treated as a separate entity, and the selection times can overlap with each other.
Select the Remove Model
We offer two models for video watermark removal: AI model and Smooth Filling model. Each model produces different effects in removing video watermarks. Compare these two models and select the one that best suits your needs.
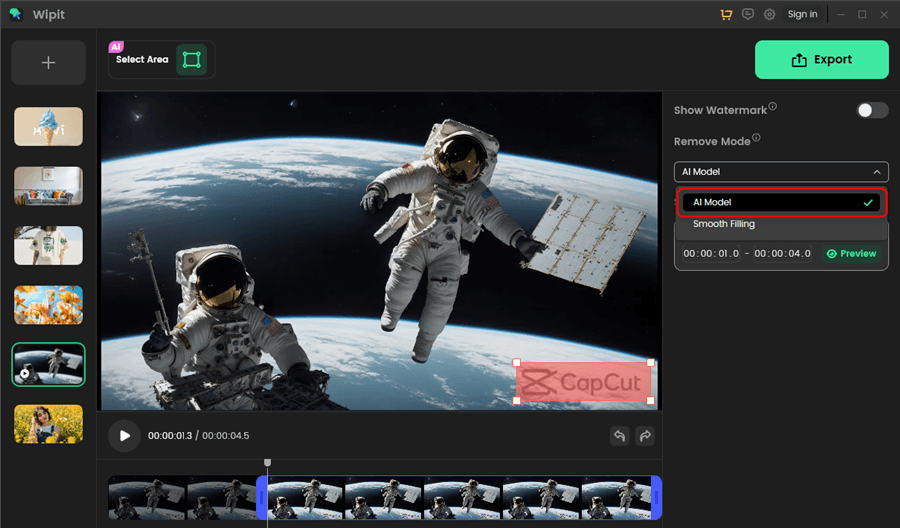
Select the AI Removal Mode
• AI Model: AI Mode employs advanced machine learning algorithms and deep neural networks to analyze and remove watermarks from videos. By leveraging a large dataset of watermark patterns, AI Model can intelligently eliminate watermarks with higher accuracy, although it may require more time to complete the process.
• Smooth Filling Model: The process involves analyzing the surrounding pixels of the watermark region and using that information to generate a smooth and seamless replacement. The algorithm aims to preserve the texture, color, and structure of the original video while removing the watermark. This model will cost less time than AI model.
Remove Watermark from Videos
After selecting the watermark removal areas, selection time, and removal model, simply click on the “Preview” button located on the right panel to preview the effect of each watermark removal.
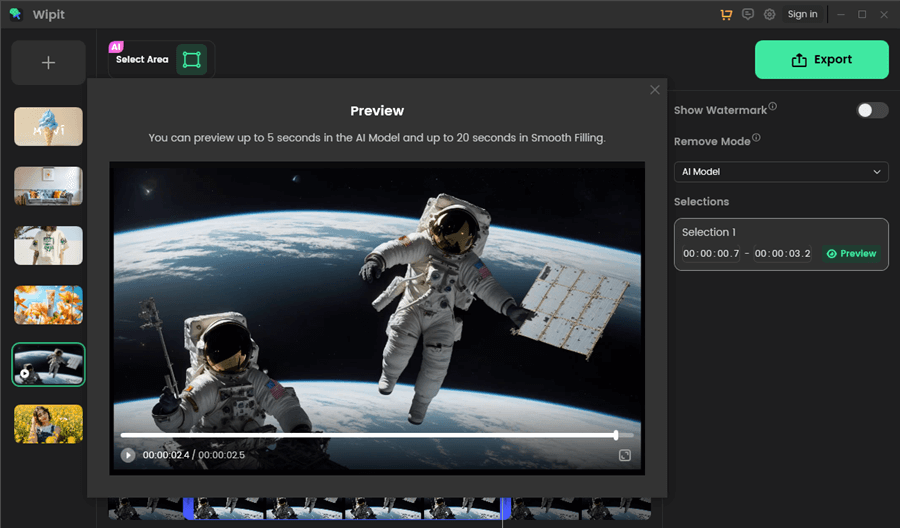
Remove Watermark from Videos and Preview the Effect
With the AI model, you can preview up to 5 seconds of the video, whereas with the Smooth Filling model, you can preview up to 20 seconds.
After removing watermarks or other unwanted objects from your video, you can use Wipit to add a brand logo.
Export Videos
Once you are satisfied with the watermark removal effect, simply click on the “Export” button located in the upper right corner to export the video. Additionally, you can rename and relocate the video file as desired.
To export the video, you need to sign in to your Wipit account. If you want to enjoy unrestricted access to all features, upgrade your Wipit account.