Creating engaging PowerPoint presentations is typical for various purposes, from school assignments to professional presentations. PowerPoint offers user-friendly features, a wide range of themes, and customization options, making it a versatile tool for crafting captivating slideshows. However, a limitation of PowerPoint presentations is their restricted usability. You cannot easily share PowerPoint on Zoom, YouTube, and other platforms. Besides, a presentation without a live presenter can be less impactful as it lacks context and narration.

Turn a PowerPoint into a Video
However, there are methods to make video presentations accessible beyond face-to-face interactions, and one effective way is by converting your PowerPoint file into a video. This approach allows you to maintain the visual appeal of your slides while adding narration and an explanation, ensuring your message resonates with your audience. This guide will explore how to turn a PowerPoint into a video for broader reach and impact.
Can You Convert a PowerPoint to a Video?
Indeed, both Mac and Windows provide users with the capability to convert PowerPoint presentations into video files seamlessly. This process increases accessibility and broader audience reach, as videos are readily shareable and compatible across various devices and platforms. Whether you’re using a Mac or Windows, the built-in features streamline the transformation of your slides into a video format, making it a convenient and versatile option for presentations, tutorials, and more. This functionality enhances PowerPoint’s overall versatility and ensures that a broader range of viewers can easily access and enjoy your content.
Further Reading: How to Embed a Video in a PowerPoint Presentation >
How to Convert PPT to Video?
As you can see, converting a PPT to a video simplifies sharing and playback on various devices. You can quickly achieve this using PowerPoint’s built-in tools. In the following sections, we’ll explain how to convert a PPT to a video on both Windows and Mac platforms. Besides, videos are widely supported on different devices and operating systems. By converting your Google Slides to video, you eliminate the need for recipients to have the Google Slides application or compatible software installed.
Convert Google Slides to Video on Win/Mac
It is known that Google Slides is a popular cloud-based presentation tool that offers a wide range of features. However, there may be instances where you need to convert your Google Slides presentation into a video format for easier sharing or playback on different platforms.
To convert PPT to video with ease, you may need screen recording software. Here, FocuSee is worth you trying. As it allows you to capture and record the movement, position, and actions of your mouse cursor on the screen and automatically applies the zoom-in feature, it helps you to highlight the important components along with your presentation.
Now, let’s learn how to convert Google Slides to a video with FocuSee.
Step 1. Free install FocuSee and open it on your computer. Choose a screen recording mode to get started. Here, you can choose Custom mode.
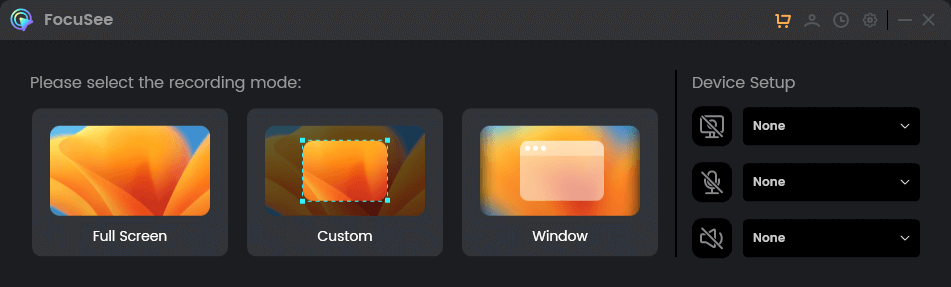
Choose a Recording Mode
Step 2. Open Google Slides and select an area to record.

Record the Google Slides
Step 3. After the recording completes, access the video editing interface and customize the video effects based on your needs. You can adjust and add the zoom-in effects, apply and customize mouse cursor effects, etc.
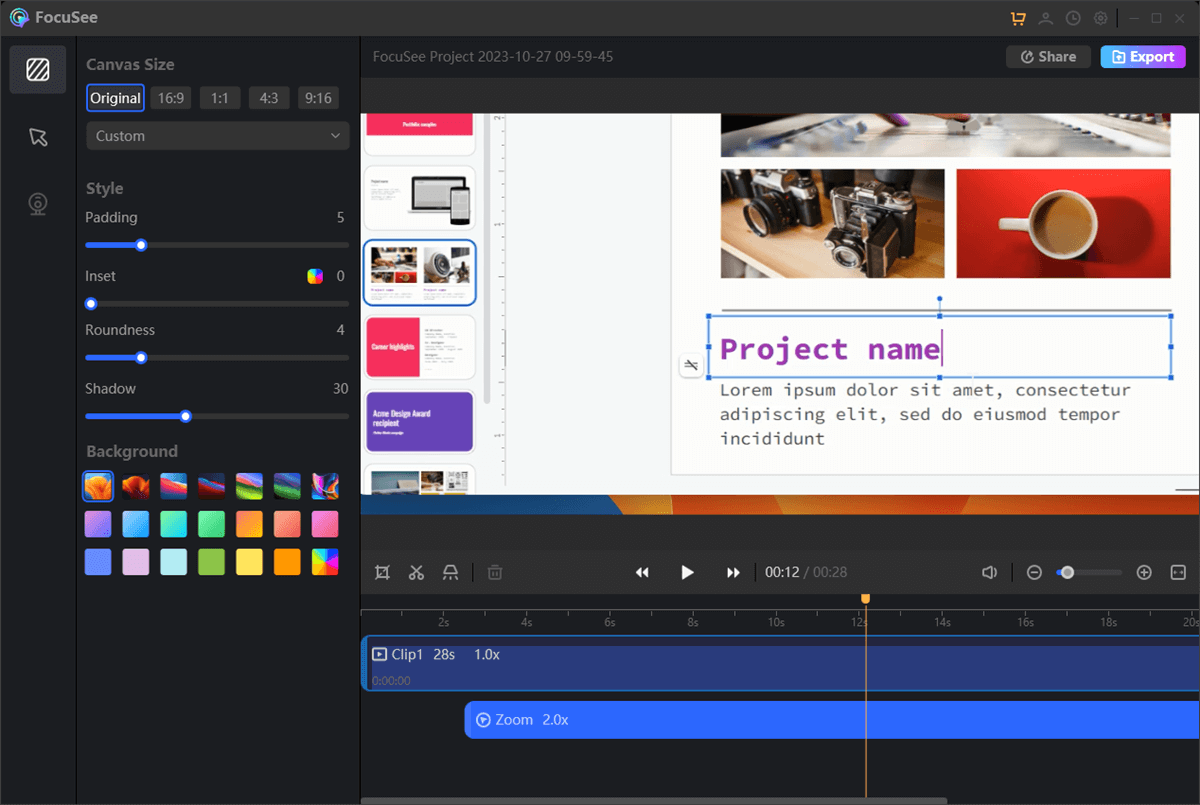
Edit the Google Slides Recording
Step 4. Preview your recording and tap on the Export button to convert Google Slides to video in a simple click.

Convert Google Slides to Video
Convert PPT to Video on Windows
Utilizing Microsoft PowerPoint on a Windows computer, you have the power to transform your standard PowerPoint presentation (PPT) into a dynamic video format. This conversion allows for easy sharing and playback across various devices, making it suitable for multiple applications such as tutorials, advertising materials, or educational content. Our step-by-step guide simplifies the process, making it accessible to novices and experienced users. Following these instructions, you can effortlessly turn your PPT into an impressive video presentation. Let’s dive in!
Step 1: Open your desired PowerPoint presentation.
Step 2: Click “File” in PowerPoint.
Step 3: In the left pane, select “Export,” then choose “Create a Video.”
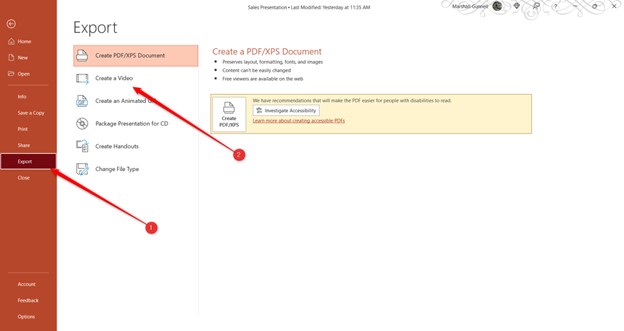
Choose to Create a Video
Step 4: Now, you’ll need to choose from video quality options:
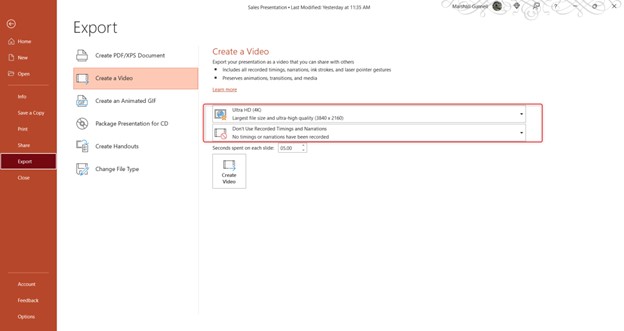
Set Video Quality
- Ultra HD (4K)
- Full HD (1080p)
- HD (720p)
- Standard (480p)
Step 5: After picking your preferred video quality, decide whether to include recorded timings and narrations. You can adjust the slide duration, set at 5 seconds by default, in 1-second increments. When ready, click “Create Video.”
Step 6: Select a location on your computer to save the video. PowerPoint will begin the conversion, and the time it takes depends on your presentation’s size and the chosen video quality.
Step 7: Monitor the conversion progress at the bottom of the PowerPoint window. You’ll receive a notification when it’s finished.
Further Reading: How to Make 480P to 1080P >
Convert PPT to Video on Mac
Converting a PowerPoint (PPT) presentation into a video on a Mac is a helpful way to share your content with others easily. It can be for teaching, business presentations, or sharing online. Turning your slides into a video ensures that people can watch it on many devices without any problems.
You’ll keep all the visuals, animations, and transitions from your original presentation, and you can even add your voice and timing for each slide. Plus, you can choose the video format and quality that works best for you, balancing the file size and its clarity. Let’s look at the simple steps to convert your PowerPoint into a video on your Mac.
Step 1: Begin by opening the PowerPoint presentation you wish to convert. Ensure you’ve saved all recent changes by clicking on File and selecting Save if needed.
Step 2: Access export options by clicking “File” and selecting “Export.”
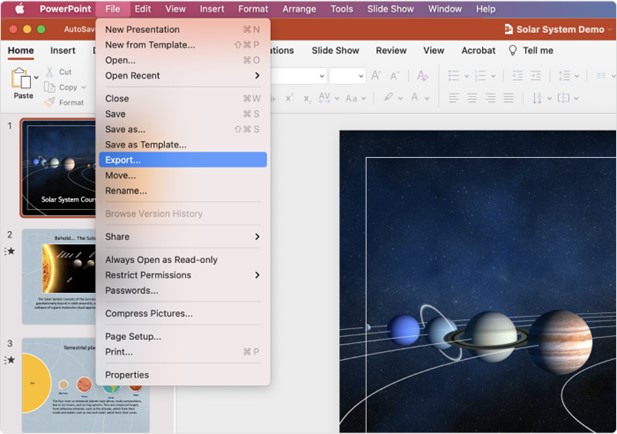
Select Export
Step 3: Find the “File Format” drop-down menu in the export settings. PowerPoint offers two video format choices: MOV and MP4. If you need a different format, you’ll need to use separate video conversion software.
Step 4: Choose your preferred video quality from the Quality menu.
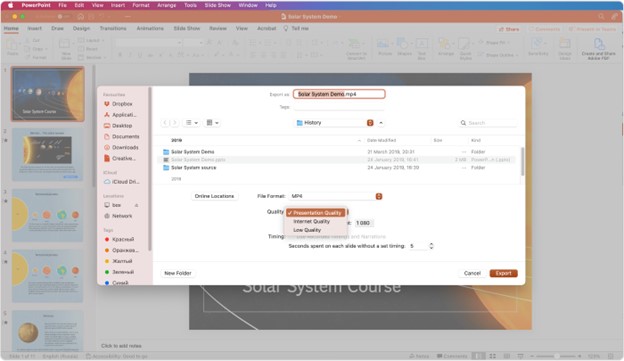
Select Video Quality
Step 5: If your PowerPoint presentation includes recorded timings and narrations you’d like to have in the video, enable the option labeled “Use Recorded Timings and Narrations.”
Step 6: Now, set the duration for each slide in your presentation. You can adjust the timing for individual slides using the arrows labeled “Seconds spent on each slide without a set timing.”
Step 7: Verify your settings for accuracy. When you’re confident they’re correct, hit the Export button.
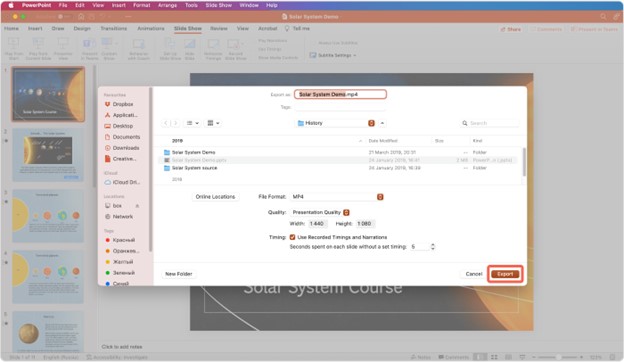
Hit the Export Button
Step 8: Allow the conversion to complete. Your video presentation will be generated and ready for use.
Final Thought
You can make your slides more exciting by learning how to turn a PowerPoint into a video or use special software to turn them into a moving video. This way, you can add talking, cool movements, and smooth switches between slides, which makes your stuff more interesting. When it’s a video, you can share it in lots of places so that more people can see it. It is helpful for teaching, work talks, or making online content. Changing your PowerPoint into a video helps you share your ideas better and quicker. Furthermore, share your thoughts in the comments below!