Taking a screenshot has transformed how we communicate and exchange information. Screenshots, whether catching a humorous meme, saving an important message, or recording key evidence, have become essential to our everyday lives. There are times when screenshots are tainted by unwelcome scribbles, markups, or censorship, hiding the precise facts we seek. Fortunately, with the correct tools and procedures, revealing these concealed screenshot annotations and restoring the Screenshot’s original clarity is feasible.
In this article, we’ll look at how to remove scribbles on screenshots. We will look at different human and technical ways to remove or uncover concealed annotations, enabling you to access pure underlying information. Without further ado, let’s dive right into it!
Also read : How to Read Covered Text in a Screenshot? >
Can You Remove Markup from a Photo Sent to You?
Getting rid of markups from a screenshot is proportional to the amount of the original image that is scribbled out. However, screenshots can be restored to their original state since there exist different ways to get rid of them. Using a screen capture application, such as Windows’ Snipping Tool or Mac’s Screenshot, to take a new screenshot of the same content without the markup is one method. Other devices such as Mac, iPhone, and Android have their ways.
The Windows Snipping tool procedure is simpler and quicker, but it might not be feasible if you do not have access to the Screenshot’s source. You can also use the iPhone’s native editing tools or a third-party app to erase markups from a screenshot. Typically, these tools feature an eraser option that allows you to erase markups by swiping over them.
One method uses an image editing program and the eraser or clone stamp tools to obliterate or replicate the markups. The eraser tool removes pixels from an image, whereas the clone stamp tool allows you to copy pixels from one image region to another.
How to Remove Scribbles on a Screenshot Sent to Me?
There are many ways to remove scribbles on a screenshot. Whether you’re a Windows, Mac, iPhone, or Android, we have got you covered. Read the below methods in detail to remove scribbles from a screenshot.
Further Reading: How to Detect Fake Text Message Screenshot >
How to See Scribbled-Out Screenshots on Windows
If you want to uncover the scribbles on a screenshot, you’d be fortunate to know that there is a simple way to remove them.
The scribbles frequently erase the original pixels of the picture, making recovery difficult. Being Windows users, your best option is to use the Windows Snipping Tool, which is a built-in program that will enable you to capture any section of your display for a snapshot. Once you do this, you will be able to remove screenshots without using any third-party application.
Follow the steps below to use Windows’s Snipping Tool to remove scribbles:
Step 1: Select Start > Windows Accessories > Snipping Tool from the Start menu to launch the application.
Step 2: Click New and choose a snip type, such as Rectangular Snip or Free-form Snip.
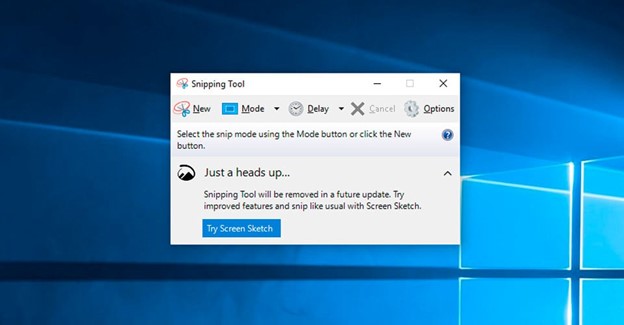
Snipping Tool on Windows
Step 3: Hover the cursor over the area of the display you want to capture, then let go to take the screenshot.
Step 4: After that, it’s time to save your screenshot. To this by going to File > Save As and enter the file location and file name.
See Scribbled-Out Screenshots on Mac
You might wish to uncover the hidden content of a screenshot that scribbles have partially obscured. This is a tricky and unpredictable process since the scribbles typically erase the original picture’s pixels.
For Mac users, the best option to capture an image of any portion of the screen is to use a built-in screenshot feature.
Here are the steps to use this Mac’s function:
Step 1: First, select Shift-Command-5 on the keyboard to bring up the screenshot menu.

Capturing Screenshot
Step 2: Select the option you need from the toolbar, such as “Capture Entire Screen,” “Capture Selected Window,” or “Capture Selected Portion,” to take a screenshot of that area.
Step 3: Either press the Capture button on your keyboard or the Return key to take a screenshot.
Note 1: Check the desktop or the Screenshot folder you specified in the options.
Note 2: Saved screenshots will have the default name “Screen Shot [date at [time].png” on the desktop. If you’re using macOS Mojave or later, the Screenshot app’s Options menu lets you alter the default saving location.
See Scribbled-Out Screenshots on iPhone
If you have a scribbled-out screenshot, you can want to examine what’s behind the scribbles. However, since the scribbles frequently destroy the original pixels of the picture, this is not a simple or reliable procedure. However, you can attempt several approaches to help you uncover some of the buried material.
Markup is another in-built function on the iPhone that lets you modify and annotate photos. You can use the Eraser tool to remove any drawing or annotation on your picture to attempt to clean up your snapshot. The following are the necessary procedures for operating this instrument:
Step 1: Launch the Photos app by tapping the Screenshot or navigating to the appropriate album.
Step 2: Choose the Edit option from the menu at the top right of your screen to begin making changes.
Step 3: Now, it’s time you use the Markup button in the bottom right corner to access the markup mode.
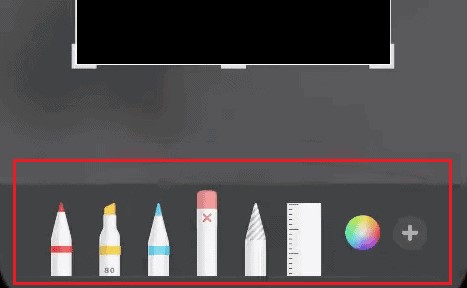
Markup Tool
Step 4: Once you do that, click the Eraser icon in the bottom left of the screen and resize it using the slider.
Step 5: Swipe over them with your finger or stylus to remove the notes from the Screenshot,
Step 6: To permanently save your modifications, touch Done twice.
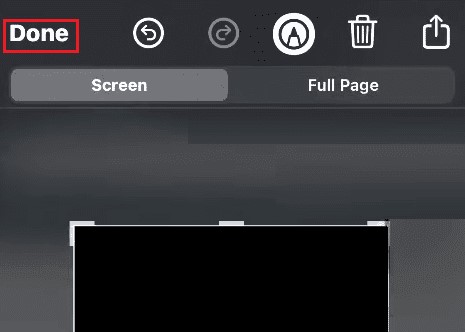
Touch the Done Button Twice
See Scribbled-Out Screenshots on Android
If you have a snapshot with scribbles on it, you can wish to see what is hidden behind them. This is neither simple nor reliable, as the scribbles typically obliterate the image’s original pixels. Nonetheless, you can attempt a few methods that can help you uncover some of the concealed content.
The application for modifying photographs known as Snapseed enables users to see text that highlighters have concealed. This software is mostly used on Android-based mobile devices. Considering this, the ability to remove markup from a screenshot taken on an Android device is a feature that deserves high praise.
The following is a list of the procedures for removing the markup:
Step 1: Find Snapseed in your app drawer and launch it.
Step 2: The app’s UI will prompt you to choose an image once you launch it. Next, you’ll need to tap the display to choose the tagged image you want to use.
Step 3: Once done, choose the picture you want to edit, then go to the Tools menu. Now, select Tune Image from the menu that appears.
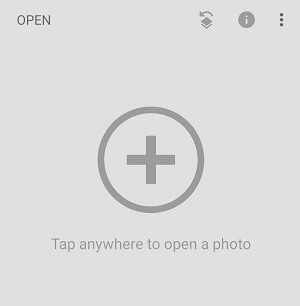
Open Screenshot
Step 4: Now is the time to adjust the pertinent parameters using the sliders. Start by increasing the luminance to at least 100. Afterward, the contrast should be reduced to -100. Then, adjust the luminance and atmosphere parameters to their maximum levels.
Step 5: Finally, the previously concealed portion of the Screenshot becomes visible when the shadows are increased to 30 or more.
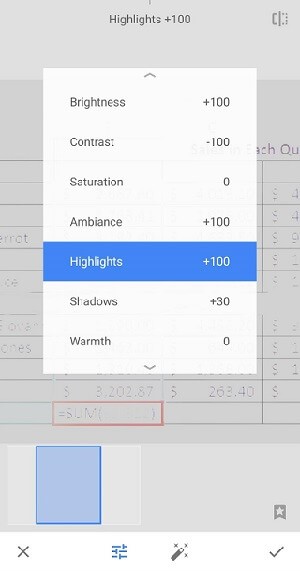
Click the Highlights Option
Bonus Tip. How to Remove Scribbles on Screenshots
Wipit is a powerful and convenient AI Watermark Remover tool that allows you to erase unwanted scribbles from screenshots. As a professional image and video watermark remover, it can also remove watermarks, shadows, emojis, logos, text, dates, and many other unwanted objects from your screenshots. Free try Wipit and figure out its features as below.
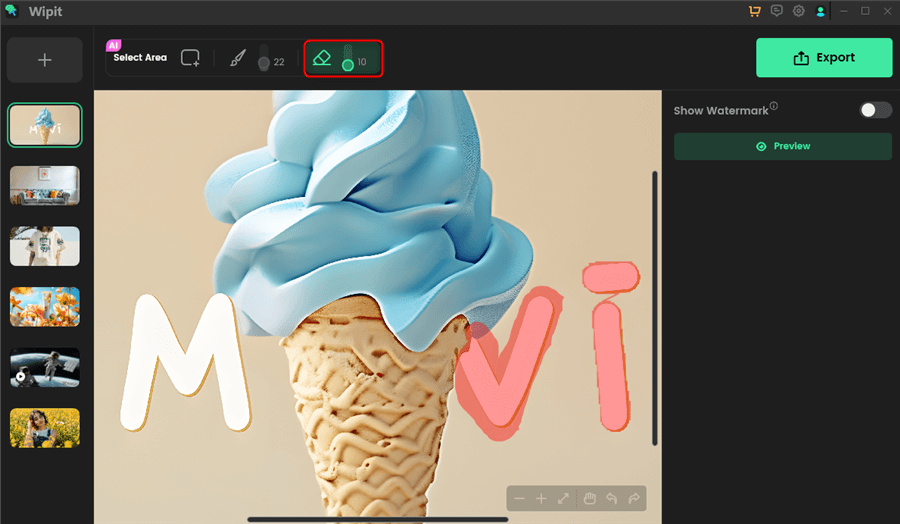
Remove Scribbles from Screenshot with Wipit
Key Features of Wipit
- Use AI tech to identify, separate, and remove scribbles and marks from the image content.
- Automatically remove detected scribbles and marks on screenshots with one click.
- Maintain photo colors, and textures after removal so the outputs look natural and true to the original image.
- Provides the ability to restore or undo the last change, in case you are not satisfied with the output.
Final Thought
It’s frustrating when screenshots are scribbled on, but there are ways to see them. That’s why it’s vital to know how to remove scribbles on screenshots. To attempt to get rid of the scribbles, you can utilize the Screenshot, preview, paint 3D, markup, or picture editing functions on your device.
However, the best solution is to use the Gemoo Snap tool that enables the screenshots to be perfect. The tool makes the screenshot-taking ability easier by delivering crystal-clear screenshots. If you liked this piece of information, let us know in the comments.
