How to Remove Screenshots from Desktop Mac?

Screenshots, digital images capturing the content displayed on a computer screen, serve numerous purposes in today’s world. They offer a convenient way to save and share visual information, facilitating the documentation of significant conversations, moments, or visual content. They are critical in collaboration, troubleshooting, education, and communication within our digitally connected society. However, many users are unaware of how to Remove Screenshots from Desktop Mac.
Remove Screenshots from Desktop Mac
Deleting screenshots from your desktop Mac is easy if you have gathered many of them and want to organize your files. Screenshots no longer needed or relevant can be effectively removed from your computer. By doing this, you can free up storage space and maintain desktop organization. This article will demonstrate how to delete screenshots on a desktop Mac, allowing you to keep your digital workspace neat. So, without further delay, let us get straight into this article.
Table of Contents: hide
Where Screenshots Are Stored on Mac?
How to delete screenshots on MacBook from the Desktop?
Can’t Delete Screenshots on Mac, what to Do?
How to Remove Screenshots from Mac Desktop without Deleting?
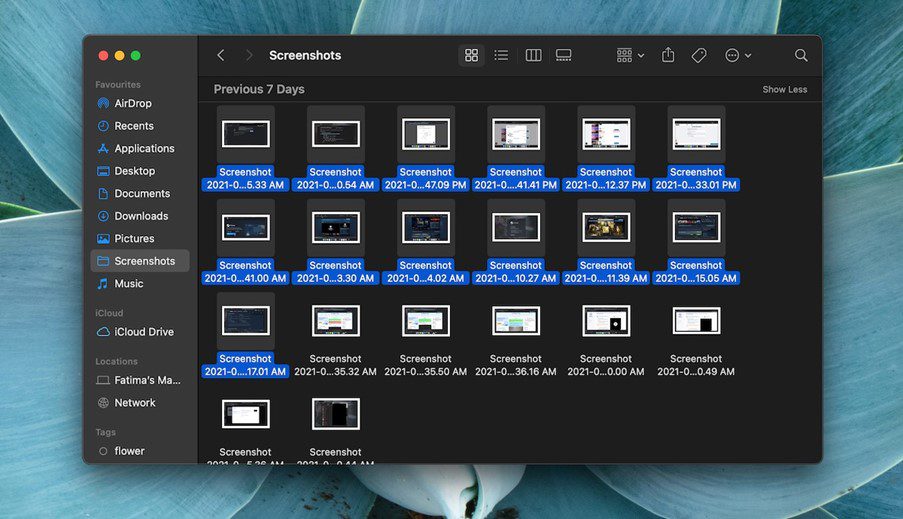
Where Screenshots Are Stored on Mac?
Wondering where your screenshots are saved on your Mac? Let us help you! By default, Mac saves screenshots to the desktop, making it the primary location for their storage. This means that whenever you capture a screenshot, it will be immediately saved as a file on your desktop. This default behavior ensures easy and instant access to your screenshots without navigating through different directories or folders. Having screenshots readily available on the desktop simplifies the process of viewing, sharing, and organizing them according to your preferences and requirements.
Besides this, you can also customize the way screenshots are saved on your Mac to further maintain an uncluttered desktop. By changing the default save location to a designated folder of your choice through the System Preferences, you can ensure that your screenshots are automatically stored in an organized manner. This flexibility allows you to keep your screenshots easily accessible and organized based on your individual workflow and personal preferences.
Where Screenshots Are Saved On Mac
How to delete screenshots on MacBook from the Desktop?
Do you want to clean up your Mac by removing unwanted screenshots? Look no further! Deleting screenshots is an easy and effective method to declutter your system and create more storage space. Whether you have old or unnecessary screenshots occupying your desktop, learning how to delete them will help you keep a tidy and organized workspace. Let us dive into the methods for deleting screenshots on your Mac and regaining control over your files.
Delete single screenshot
If you have mistakenly captured a screenshot and need to delete it from your Mac, there is no need to fret! Removing a single screenshot is an easy and fast task that helps declutter your desktop and reclaim storage space. This section will provide step-by-step instructions to smoothly delete a single screenshot, enabling you to attain a tidy and well-organized desktop:
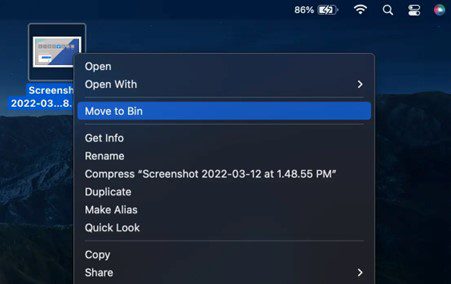
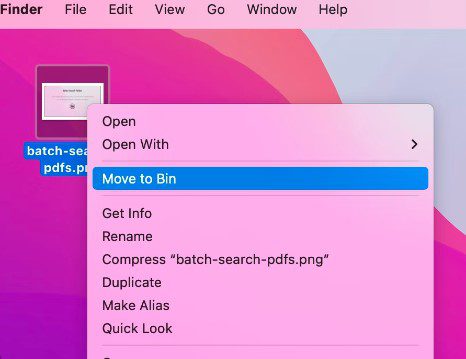
Step 1. Locate the screenshot you want to delete, typically saved on the desktop by default.
Step 2. Click once on the screenshot file to select it.
Step 3. Right-click and choose “Move to Bin.”
Click On Move To Bin
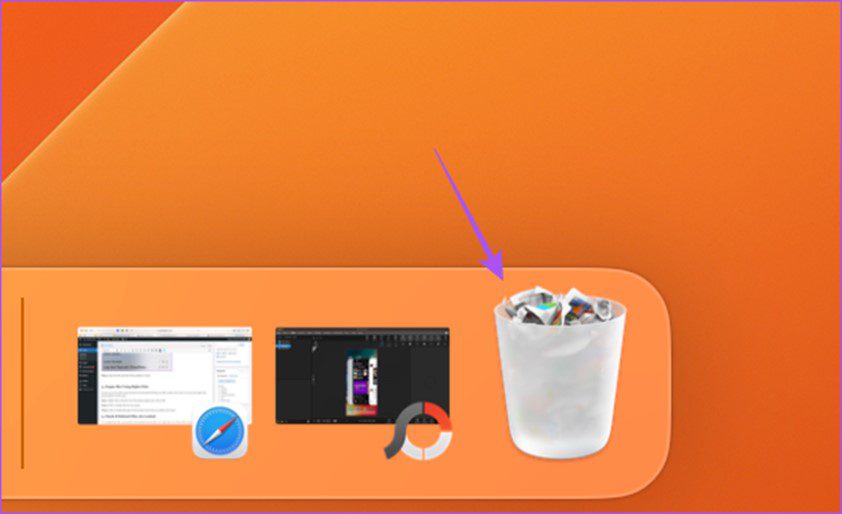
Step 4. Alternatively, drag the screenshot to the Bin icon on your Dock.
Drag The Screenshot To The Bin Icon
Delete multiple screenshots
Worried about deleting screenshots in bulk? Look no further! Deleting multiple screenshots is an uncomplicated and efficient method to declutter your system and maintain an organized file structure. In this section, we will walk you through simple steps to delete multiple screenshots on your Mac. By mastering this technique, you can effectively manage your screenshot library, leading to improved working and increased productivity.
Step 1. Choose the screenshots you want to remove.
Select The Screenshots You Want To Delete In Bulk
Step 2. Right-click the selected images from the dropdown options and click “Move to Bin.”
Step 3. Open the Bin.
Open The Bin From The Dock
Step 4. Click on “Empty Trash” to permanently delete the screenshots.
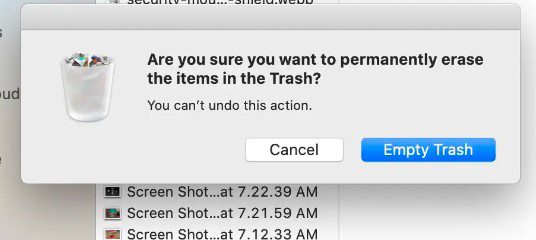
Click On Empty Trash
Can’t Delete Screenshots on Mac, what to Do?
Having a problem deleting screenshots on your Mac? You are not alone! Many Mac users face situations where they can not remove screenshots from their desktops. It can be problematic, especially when you need to free up storage or organize your files. But do not worry; in this guide, we will show you how to gain control over your screenshots and manage your storage space again easily. Make sure to follow these few easy steps, and they will help you in such cases.
Step 1. Right-click the screenshot, select “Get Info,” and ensure delete permissions.
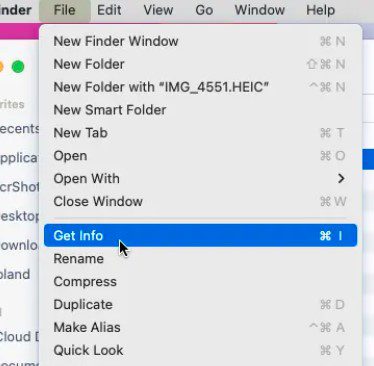
Select Get Info Ensure Delete Permissions.
Step 2. Close any programs that are using the screenshots, such as image editors or preview tools.
Step 3. Restart your desktop to clear any temporary glitches or file conflicts.
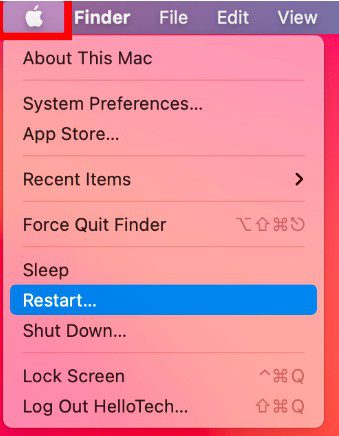
Restart Your Desktop
Step 4. If the problem still exists, open Terminal and delete the screenshot by typing “rm” followed by the file path.
Delete The Screenshot by Typing Rm Followed By The File Path.
How to Remove Screenshots from Mac Desktop without Deleting?
Managing screenshots on your Mac becomes easier when you learn how to remove them without deleting them permanently. This valuable skill allows you to keep your screenshots accessible while freeing up storage space and maintaining an organized digital environment. By knowing how to get rid of screenshots without the fear of losing them, you can confidently declutter your Mac and make room for more important files. You may consider following these easy steps to remove screenshots from your Mac desktop without deleting them permanently.
Step 1. Choose which screenshots you want to remove.
Step 2. Create a “New Folder” dedicated to these chosen screenshots.
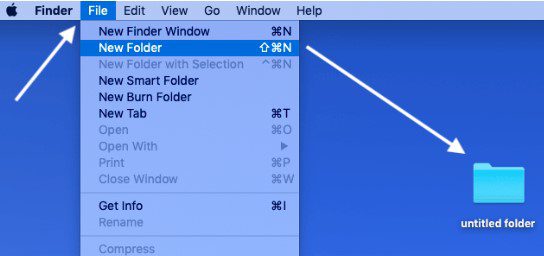
Create A New Folder
Step 3. Move the folder to the required location on your Mac.
Step 4. Finally, delete any remaining screenshots by clicking “Move to Bin” from your desktop
Bonus Tip – How to Screenshot on Mac Easily
Gemoo Snap is a reliable screenshot tool that can come in handy when keyboard shortcuts fail to work on your Mac. With just a few clicks, you can easily copy and paste a screenshot on both Mac and Windows machines. Gemoo Snap offers a wide range of features that allow you to capture your screen in different ways. You can take a quick screenshot, capture a website screenshot, annotate images, pin your screenshots, and even extract text from your screenshots. The captured images can be saved in the cloud and shared via a simple link or by copying and pasting the screenshot. Overall, Gemoo Snap is a versatile tool that simplifies the process of capturing and sharing screenshots.
To copy and paste a screenshot on your Mac using Gemoo Snap, follow these steps:
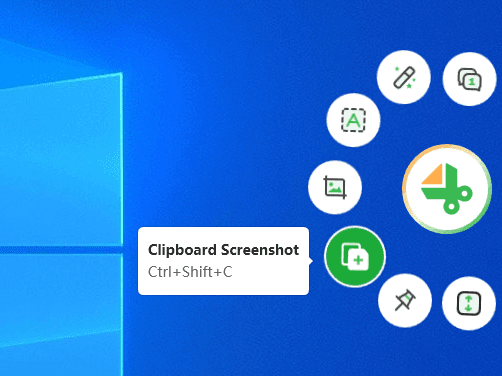
Step 1: Open Gemoo Snap on your computer and sign in according to the on-screen instructions. Select the Clipboard Screenshot mode and capture the specific area on your screen.
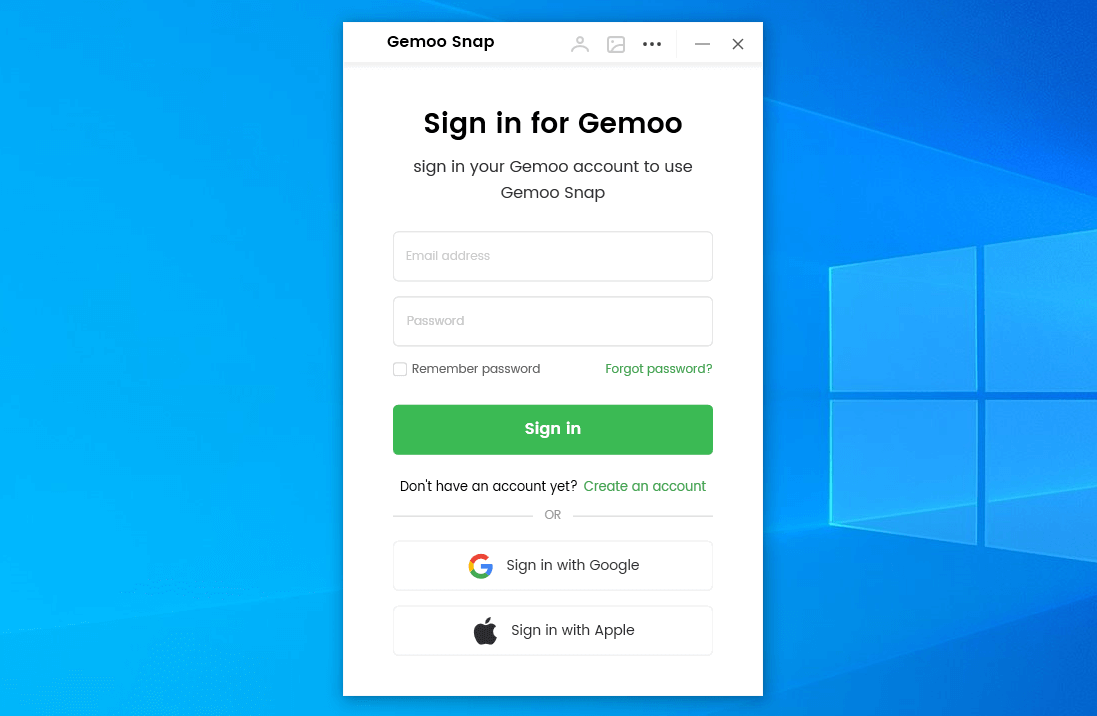
Sign in Account
Step 2: Once you have taken the screenshot, use the tools on the right-hand toolbar to annotate and enhance your screenshot. Then, select the “Copy to clipboard” option to copy the screenshot.
Select Clipboard Screenshot
Step 3: Finally, you can paste the screenshot wherever you want to share it with others.
Conclusion
In conclusion, cleaning up your Mac’s desktop by removing unnecessary screenshots is a small yet impactful step toward maintaining a neat and organized workspace. Whether you are dealing with a cluttered desktop or aiming for a more streamlined working environment, knowing how to delete screenshots from your desktop Mac is a valuable skill. Removing these screenshots can optimize your Mac’s storage capacity and improve overall working. If you found this article helpful, please leave a comment and share it with others so they, too, can benefit from these tips.