Skype allows you to stay in touch with people even when you’re far apart since it facilitates chat via the Internet. It let groups internally communicate and work together throughout the epidemic. Sometimes, as a Skype user, you might want to record a call to listen back and remember everything said. To aid this, Skype comes with a built-in call recording feature, available on desktop and mobile app versions.

How to Record Skype Call
It’s web-based, and the recording will remain in your conversation for 30 days, after which you can store it locally. However, once you begin recording, all participants in the call will be alerted. But if you wish to Record Skype Calls Without Party Knowing, don’t worry. In this article, you’ll find the finest ways to record Skype calls without the other person knowing. Let’s get started!
Table of Contents: hide
How to Record Skype Call with Built-in Tool
How to record Skype Call via FocuSee
How to record Skype Call via Gemoo Recorder
How to Record Skype Call Secretly on Windows
How to Record Skype Call with Built-in Tool
Wondering how to record a Skype call with a built-in tool without letting others know? This section is for you! Since Skype informs everyone in the meeting when you start recording with a built-in tool, there’s no way you can record the call without people knowing using the built-in tool. So, to do that, you can use a professional online screen recorder, i.e., Screen Capture.
Using an online tool, such as Screen Capture, is among the simplest ways to record a Skype call. You can record your screen, your voice, and even your camera. On the other hand, you won’t find any unnecessary settings here. Screen Capture will keep your recordings safe from prying eyes if you don’t make your recordings public. Another perk is the app’s ability to function in Incognito mode, which prevents your browsing history from being tracked. This online service is preferred over desktop recorders by customers who don’t require complex recording settings due to its speed and ease of use.
To understand how to record Skype calls without the other party knowing using Screen Capture, follow the steps below:
Step 1: Join or create the Skype meeting you wish to record and go to Screen Capture on your preferred web browser.
Step 2: You can record your microphone by clicking the Microphone option. There are other options as well. Select according to your needs. Once adjusted, click on Start Recording to proceed.
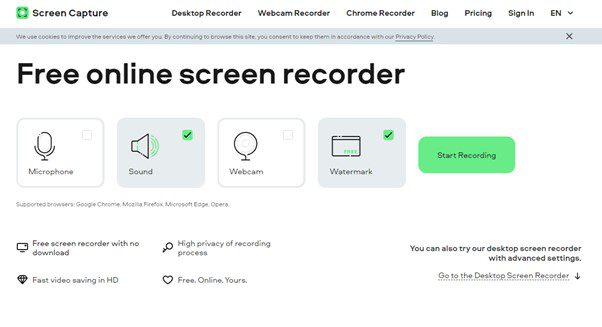
Click on Start Recording
Step 3: Select the Skype tab and click Share in the popup to initialize the recording.
Step 4: Once done recording the Skype conversation, stop the recording in the Screen Capture interface. After that, you can save the recording to your local device by clicking the Download button.
How to record Skype Call via FocuSee
FocuSee is a versatile screen recording tool that can be adapted for various purposes, including the recording of Skype calls. Although it focuses on features like automatic and dynamic zoom-in effects, its core functionality can extend to capturing Skype conversations effectively. You can leverage FocuSee’s screen and voiceover recording capabilities to capture Skype calls, applying the same level of video recording and post-production to ensure high-quality audio and visual output.
Step 1. Free install FocuSee and launch it on your computer. Open the Skype Call you want to record.

Choose a Recording Mode
Step 2. Make sure your microphone and internal audio are enabled. Tap the Custom option to frame the region you want to record. Hit the REC button to initiate the recording process.

Frame an Area to Record
Step 3. After complete the recording, you’ll navigate to the video editing interface.
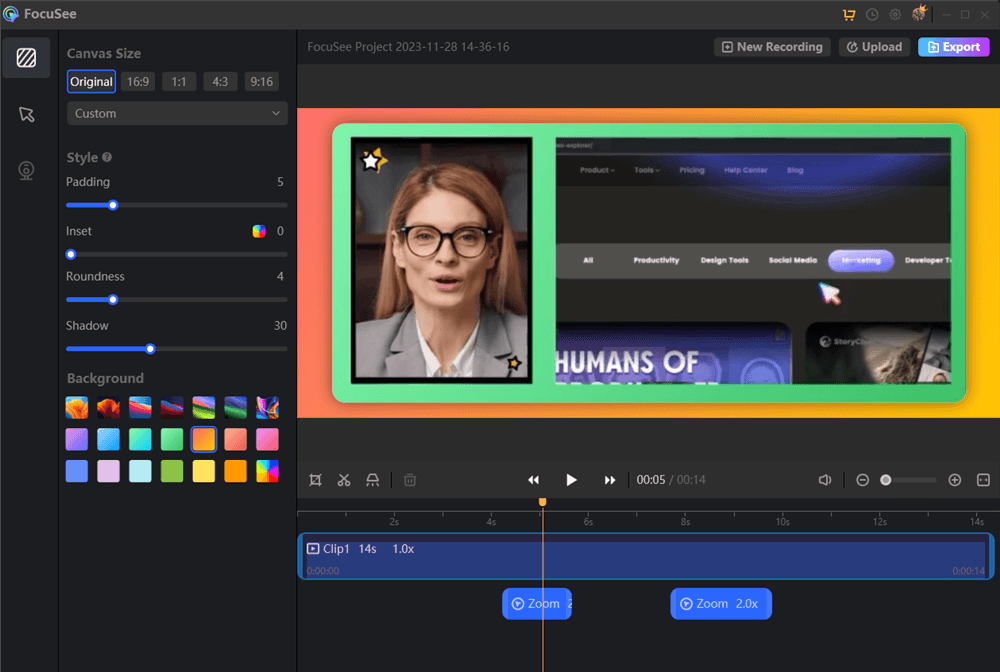
Edit the Recording
How to record Skype Call via Gemoo Recorder
Gemoo Recorder is a widely recognized screen recording app with a multitude of features. This app makes it simple to record your Skype calls with a few clicks, and it also has a website platform that allows you to capture your screen and audio. The desktop and website platforms are perfectly integrated, and your recordings are automatically uploaded and stored securely in the Gemoo cloud. If you need a dependable and professional screen recording solution, Gemoo Recorder is certainly a contender. To record a Skype call on your computer, follow these simple steps:
Step 1. Download and launch Gemoo Recorder on your computer. If you don’t want to appear on camera while recording, select the “Screen Only” feature. Click the “Start Recording” button to begin.
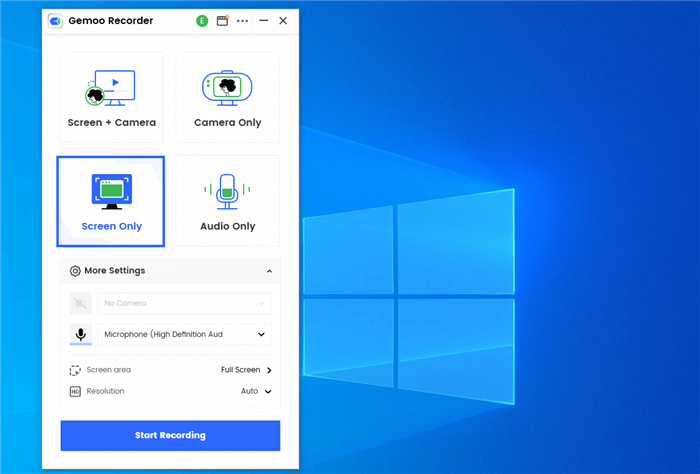
Choose the Screen Only Mode
Step 2. Once the 3-second countdown timer concludes, the recording will start. Use the toolbar on the left-hand side of the screen to add annotations and customize your video.
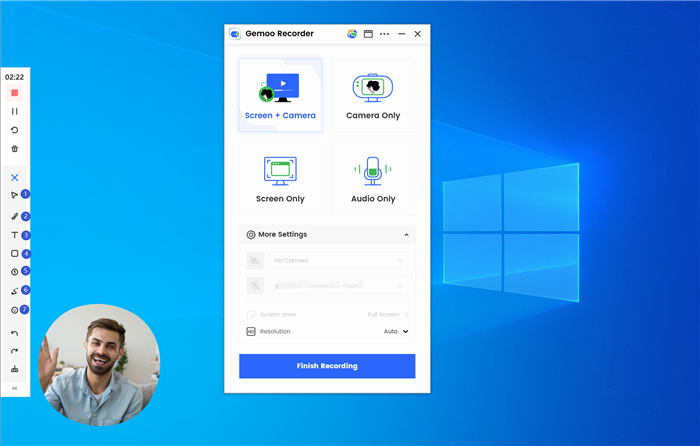
Best Screen Recorders for PC Games – Gemoo Recorder
Step 3. The left-hand toolbar also provides options to pause, stop, or restart the recording as needed. When you’ve finished recording, click the red “Stop” button or the “Finish Recording” button to complete the process.
How to Record Skype Call Secretly on Windows
Want a way to record Skype call secretly on Windows? You’ll get the answer here! Since Skype notifies the people in conversation about the recording when you use the built-in feature to record secretly, you need a professional screen recording tool to record Skype calls on your Windows PC. And as a matter of fact, Windows has a built-in screen recording tool, known as Xbox Game Bar, to record screen and, in this case, Skype conversations without the other party knowing.
You only need Windows 10/11’s Xbox Game Bar Recording function to record a Skype call. This is one of the best methods you will come across for capturing Skype conversations secretly on a Windows PC. This built-in recorder makes recording Skype calls a breeze. It can be simple to grasp and apply. However, before jumping to the recording part, ensure the Xbox Game Bar is enabled on your PC.
For recording Skype calls on your Windows PC using the Xbox Game Bar, follow these steps:
Step 1: Open Xbox Game Bar by pressing the Windows + G keys on the keyboard. You can select whether you wish to record your microphone using the available options.
Step 2: Now, join or create the Skype meeting or call you wish to record. Next, press the Windows + Alt + R keys on the keyboard or click on the white circle button in the Xbox Game Bar window to start recording.
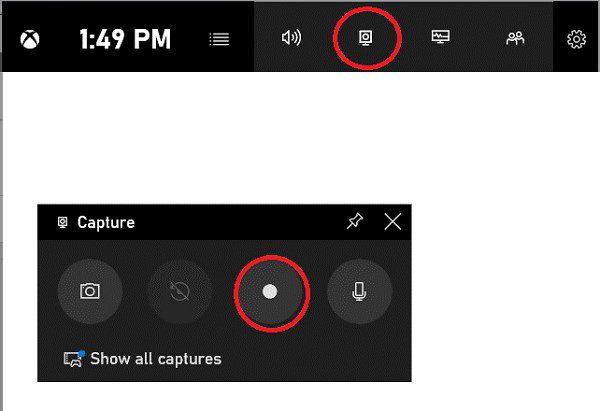
Start Recording
Step 3: After you’re done recording the Skype call, you can click on the blue rectangle button to stop the recording. The recording will be saved in the Captures inside your PC’s Videos folder.
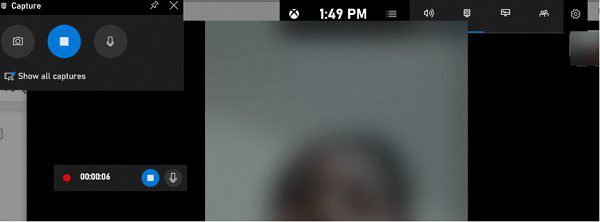
Stop Recording
How to Record Skype Video Calls on Mac
If you’re a Mac user and wish to find out how to record Skype calls without others knowing, you’re at the right place. The policy of Skype, i.e., notifying users about recording when the built-in feature is used, goes the same for Mac users as well. Due to this, they wonder about how they can secretly record Skype calls. And most people are unaware that they can pull this out using Mac’s built-in screen recording tool, QuickTime Player.
When it comes to watching, recording, and editing movies on a Mac, QuickTime Player is like having a Swiss Army Knife. Playback quality is very clear, making movies appear their finest, and it can handle practically any multimedia file you throw at it. With QuickTime Player, you can easily record everything that happens on your screen, even Skype conversations. Simply clicking a few buttons, you may record your Skype calls in great quality for later playback, editing, or storage.
To understand how to record Skype video call on Mac using the QuickTime Player, follow the steps below:
Step 1: Turn on your Mac and open QuickTime Player. It is accessible through Spotlight Search or the Applications folder. After launching QuickTime Player, click on the File option. From there, choose New Screen Recording.
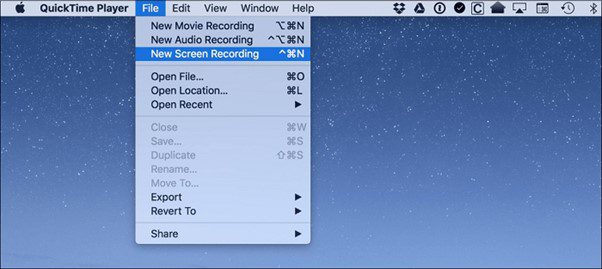
Select New Screen Recording
Step 2: Click the arrow in the screen recording window to adjust recording options. You can capture from whatever microphone input you like, adjust the level, and even opt to have mouse clicks shown. Then, start or join the Skype video call you want to record.
Step 3: Now, start screen recording by clicking the red record icon. You will be asked to highlight the area of the display that you want to capture. Click the Start Recording button after you’ve selected the recording area.
Click on Record Icon
Step 4: Once done, click the Stop button in the window’s upper-right corner or use the Command + Control + Escape keys. Select File from the menu bar, then Save, and pick a spot on your computer to save the recording.
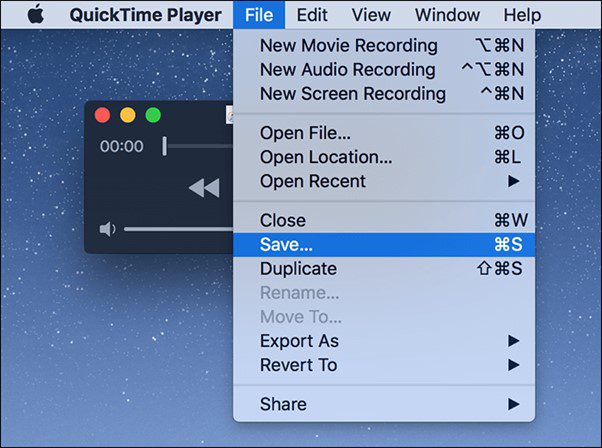
Click on Save
How to Record Skype Calls on iOS/Android
Do you wish to record Skype calls on iOS/Android smartphones without letting others know? This section has got you covered! Using the built-in recording feature of Skype, all the members will get notified about the recording. To avoid that, you can use the best screen recorder incorporated in your iOS/Android smartphone to record a Skype meeting. However, if you’re unaware of how to use your phone’s built-in screen recorder, these steps will help:
For iOS
Step 1: Join or create a Skype call you wish to record on your iPhone.
Step 2: Swipe up the screen to open the Control Centre (for iPhone 8+ or earlier) or swipe down from the top right to launch it (for iPhone X and later models).
Step 3: Tap on the white circle button in the Control Centre and turn on/off your microphone, depending on your requirements. After that, tap the Start Recording option to initialize recording your Skype call.
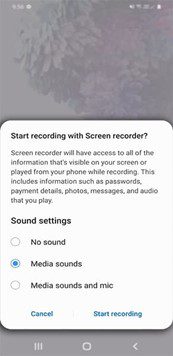
Tap Start Recording
Step 4: After recording the Skype call successfully, open the Control Centre and tap the circle button to stop recording.
For Android
Step 1: Connect to the Skype call you wish to record. Access your Notifications Centre on the Android screen by swiping down from the top.
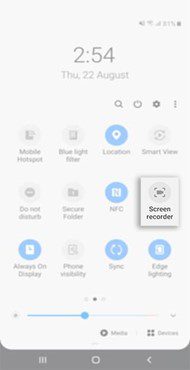
Tap Screen Recorder
Step 2: In the Notifications Centre, tap on Screen Recorder and select your required screen recording options in the popup menu.
Step 3: After adjusting the settings, tap the Start recording button to start recording your Skype call.
Step 4: You will get a 3-second countdown before the recording. Once done with the Skype call, tap on the rectangle icon in the recording menu to stop the recording.
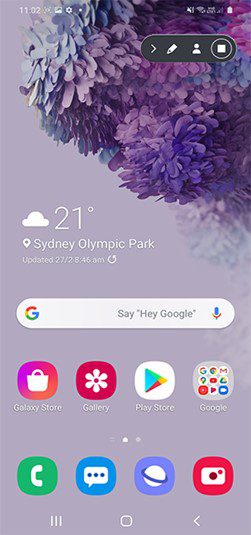
Stop Recording
FAQs-How to Record Skype Video/Audio Calls
1. Is it possible to record Skype audio/video calls?
Yes, you can record Skype calls using its built-in recording features. Skype offers a built-in recording feature that allows you to record essential calls and later refer to them. However, it notifies the people on the call once you start the recording.
2. Can you record Skype audio/video calls without notifying others using the built-in feature?
No, the built-in recording feature of Skype notifies the people on the call about recording. Since Skype maintains users’ privacy, they send notifications so the users not comfortable with recording can leave the recording immediately.
3. How to record Skype audio/video calls?
To record Skype audio/video calls using the built-in recording feature, follow the steps below:
Step 1: Open Skype and connect to the call you wish to record.
Step 2: Now, click the three dots option in the call and select the Record button to start recording.
Step 3: Once done, select the three dots option again and click on Stop Recording.
Final Thought
Skype calls may be secretly recorded for several purposes, including taking notes during an important session or making videos for a YouTube channel. And we hope you know how to Record Skype Calls Without Party Knowing after reading this article. However, a call should only be recorded without the other party’s knowledge or permission to protect their privacy. Moreover, please share your experiences and advice on capturing Skype calls in the comments section.


