Stable Diffusion is one of the best AI art generators currently available to the public. With a short text prompt written in normal language, users can use Stable Diffusion to direct the algorithm to create any image they can imagine.
As opposed to some of its main competitors that operate strictly in the cloud, Stable Diffusion can be installed on a local PC running Windows OS. This allows users to experiment with this amazing AI algorithm and fine-tune it for specific types of images. There are several ways to complete the installation process, and even though some technical knowledge is necessary this is not a huge obstacle.
We will show you a couple of different installation methods that can be quickly executed to give your PC the full power of AI image creation. While the procedure may be more complicated than for most other software products, having Stable Diffusion on your PC is definitely worth the trouble.
Also read:
How to Fix Stable Diffusion Errors? >
How to install and Run Stable Diffusion on Mac? >
What is Stable Diffusion Negative Prompt Meaning? >
System Requirements
In order to run Stable Diffusion locally on your Windows computer, you need to have a sufficiently powerful PC configuration at your disposal. It doesn’t have to be the latest machine – any computer running Windows 10 or 11 that has at least 8 GB RAM will be able to run the AI algorithm quite well. The performance of the graphics card is the most important requirement, and GPUs with at least 6 GB VRAM are recommended. However, it’s better to go above the bare minimum and use a machine with 16 GB RAM and 12 GB VRAM (or more) to get to most out of Stable Diffusion. Don’t forget that you will also need 10-20 GB of free space on your hard drive to fit the installation and all associated files.
Installing Stable Diffusion Manually
It’s possible to manually set up Stable Diffusion on your PC without any installers, but there are a few conditions that need to be met. Notably, you will need to have both Python 3.10.6 programming framework and 64-bit Git for Windows already present on the PC. Both of those programs are free to download, and it won’t take long to get them functional. After you have Python and Git installed, just follow all the steps described here and you will be able to manually install Stable Diffusion:
Step 1 – Open File Manager, go to the boot drive, and create a new folder named debut
Step 2 – Launch Run by pressing Windows + R key combination, then enter cmd to start the command Stable Diffusion prompt, and then type cd \ and press OK, followed by cd \ debut and OK again
Step 3 – Clone the web interface of Stable Diffusion by using the command line in the image bellow

Clone the web interface of Stable Diffusion
Step 4 – Download Stable Diffusion to your computer, then move the .ckpt file into the debug folder
Step 5 – Find the webui.bat file in the folder and execute it, then wait for the necessary files to be downloaded to your computer
Step 6 – Copy the URL next to Running on local URL field and paste it into a web browser to run Stable Diffusion from your local installation
Using the Official Automatic Installer
Perhaps a less complex method for installing Stable Diffusion on your Windows PC involves the use of an official auto installer created by Stability AI. This method may be preferred by less experienced users since it doesn’t require the use of a command prompt and has fewer total steps. The automatic installer does most of the heavy lifting instead of you, and you simply need to download and execute this program. If you decide to use the officially sanctioned installer, go through the following steps to get Stable Diffusion to work on your PC.
Step 1 – Visit the GitHub website and find the file named Easy-Diffusion-Windows.exe
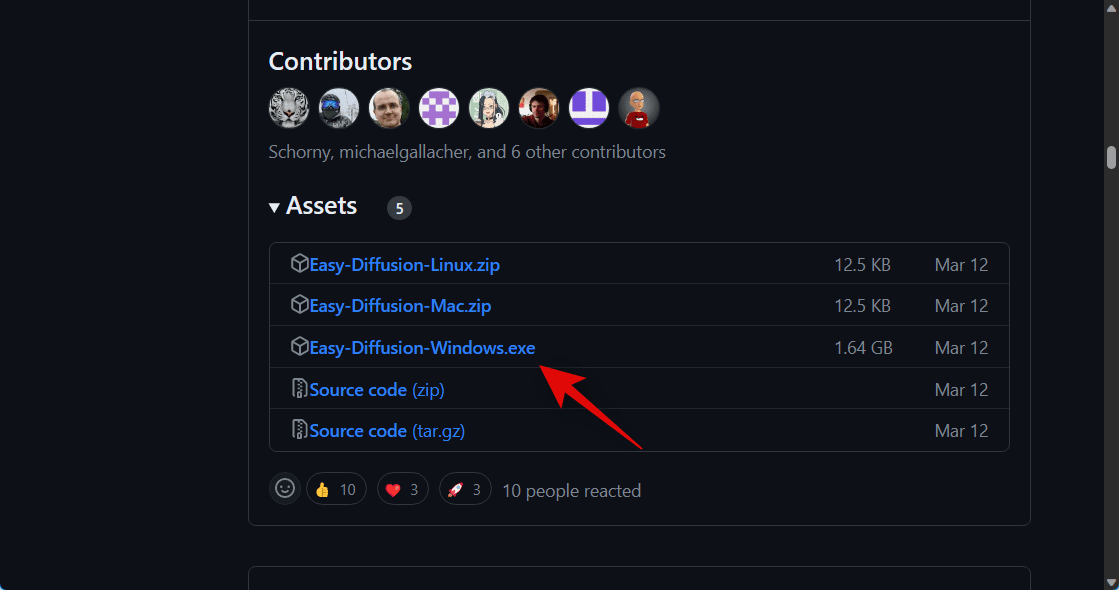
Visit the GitHub Website
Step 2 – Download the installer to a selected folder on your PC and run the .exe file
Step 3 – If your Windows is trying to prevent you from running the .exe file, click Run anyway
Step 4 – Agree to the Terms and conditions and follow the on-screen instructions to complete the setup for Stable Diffusion
Step 5 – Select the folder where you want Stable Diffusion to be stored and create a desktop shortcut
Using the free NMKD Installer
There is an alternative installer that can accomplish the same task very efficiently, and it’s also free to use. Some people prefer the NMKD installer for Stable Diffusion to the official method, and there are a couple of reasons for this attitude. With this installer, it’s possible to run Stable Diffusion on computers with AMD graphic cards, while the automatic installer supports only machines with Nvidia graphic chips. NMKD is also very user-friendly, and it won’t be hard to learn how to install Stable Diffusion on Windows with it. Just follow these steps.
Step 1 – Use your browser to navigate to GitHub.com\n00mkrad\text-2-image-gui and download this file to your computer
Step 2 – After the download completes, find the archive file in Downloads and unzip it
Step 3 – Locate the StableDiffusionGui.exe file in the extracted folder and double-click to launch it
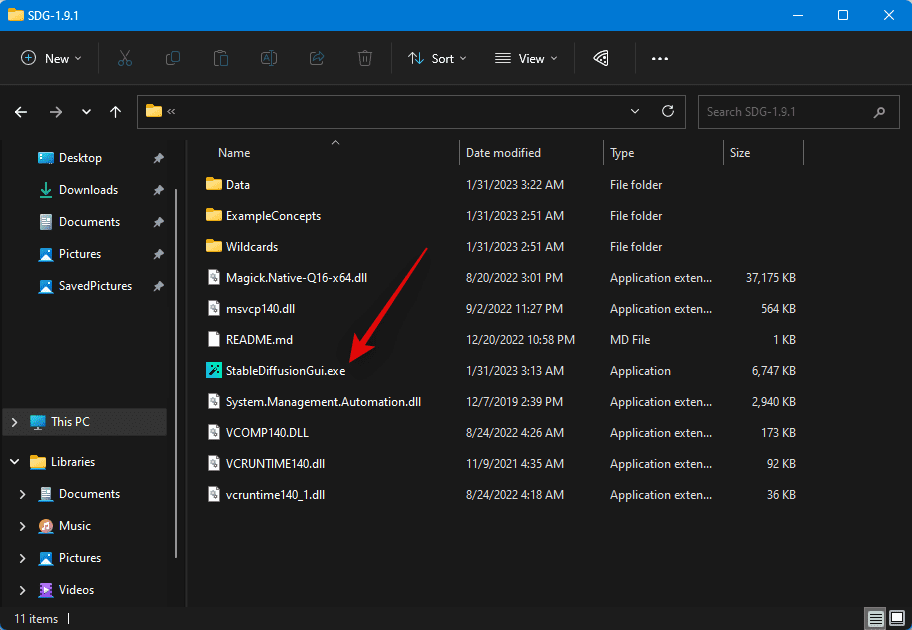
Locate the StableDiffusionGui.exe File
Step 4 – After you run this file, you will be able to use Stable Diffusion on your PC
Frequently Asked Questions about Stable Diffusion Installation
1. Which graphic card is the best if I want to run Stable Diffusion on my computer?
It’s highly recommended to use a dedicated GPU rather than a CPU with integrated graphics, although the latter could conceivably run Stable Diffusion, albeit slower. Any Nvidia graphic card used for gaming will do really well in this role, while better AMD GPUs can be used as well.
2. Is it necessary to know how to code to set up Stable Diffusion on a PC?
None of the methods described above requires any programming ability, although a basic understanding of software installation is desired. Users who are feeling unsure about their technical capacity should probably avoid the manual method and use one of the two available installers for Stable Diffusion.
3. Is Stable Diffusion free to download and use?
One of the main benefits of using a local installation of Stable Diffusion is that you don’t have to pay the per-image fee that online access typically requires. You can download all the necessary software for free and run this powerful AI tool on your own hardware without having to rationalize usage.
Final Thoughts
Having Stable Diffusion on your Windows computer is a great way to explore all the possibilities that generative AI opens. If you have good enough hardware and some free space, you should definitely consider this line of action. With multiple installation methods to choose from, you can make sure that the procedure is executed correctly and that the AI tool interface can be accessed from your PC. Let us know which method you find the most convenient and share this article with your friends who are interested in creating stunning images with AI!