How to Edit Uploaded / Published YouTube Videos?

Where content creation reigns supreme, video editing versatility is critical. You’ve published your film, but what if you notice a mistake or want to add the finishing touch? This article reveals the power of YouTube post-upload video editing, enabling you to adjust and enhance your footage easily.
Edit Uploaded / Published YouTube Videos
We’ll look at YouTube’s varied tools, which range from basic cuts to redoing modifications and even obscuring critical information. While YouTube’s editing options are useful, they do have certain restrictions, which we’ll go through. By the conclusion of this trip, you’ll be well-versed in improving your video content, making it more interesting and accurate, and ultimately providing a better viewing experience for your audience. Let’s open the doors to post-upload editing and make your YouTube clip sparkle.
Also read: How to Edit Uploaded / Published YouTube Videos? >
Table of Contents: hide
Simple Editing of YouTube Videos
How to Undo Trims in YouTube Studio
Simple Editing of YouTube Videos
YouTube Studio has many editing tools that allow content producers to improve their posted videos. This tool enables you to make changes and adjustments to your work without re-uploading it, a game changer in online video. YouTube Studio’s user-friendly interface provides many tools to let you cut and tweak your video to perfection.
Here’s a step-by-step introduction to utilizing YouTube Studio to conduct easy editing on your YouTube videos:
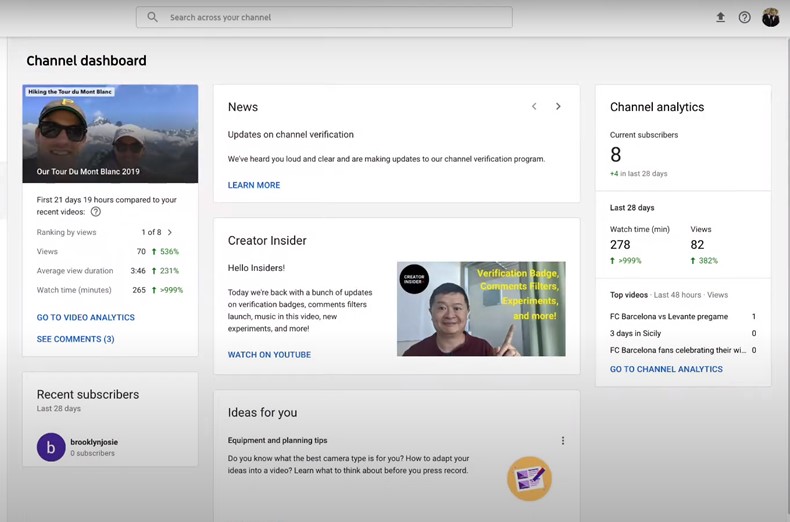
Step 1. Access YouTube Studio’s dashboard. Click your profile symbol and choose ‘YouTube Studio.’
Step 2. Go to the left-hand sidebar ” Videos’ tab in YouTube Studio. Browse your posted videos here.
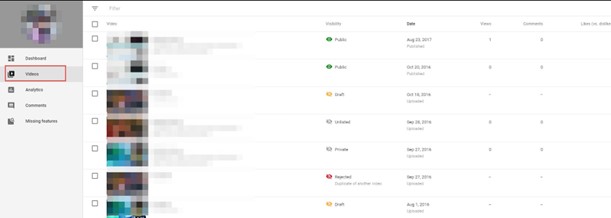
Select Videos Tab
Step 3. Find the video you want to modify and click its title or thumbnail to see its information.
Step 4. The ‘Editor’ tab is at the top of the video details page. The editing interface opens when clicked.
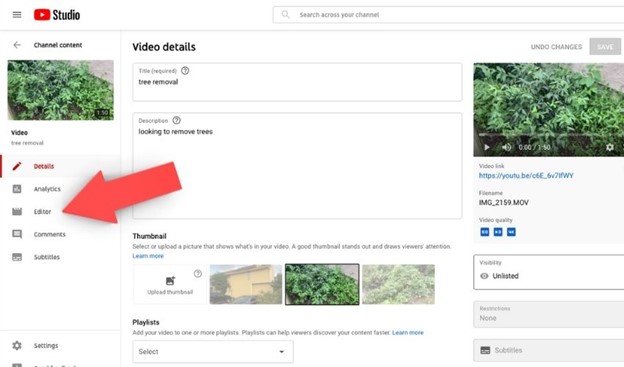
Select Editor Tab
Step 5. The YouTube Studio editor lets you cut your video’s start and finish points, add or delete portions, filter it, and modify brightness and contrast. Use these options to improve your content.
Step 6. Click ‘Preview’ to preview your edited video. Make sure everything appears right. Click ‘Save’ to confirm your changes. The video details page will show the updated video.
YouTube Studio’s easy editing options are great for tweaking material without re-uploading. This lets you curate a polished video collection for your viewers.
How to Undo Trims in YouTube Studio
You may have cut too much from your YouTube video while editing. The “undo” tool in YouTube Studio saves you in such circumstances. This portion will show you how to reverse cuts in YouTube Studio to save your video easily. Here’s how you can undo trims in YouTube Studio:
Step 1. Log onto YouTube and open YouTube Studio. Click your profile symbol and choose “YouTube Studio.”
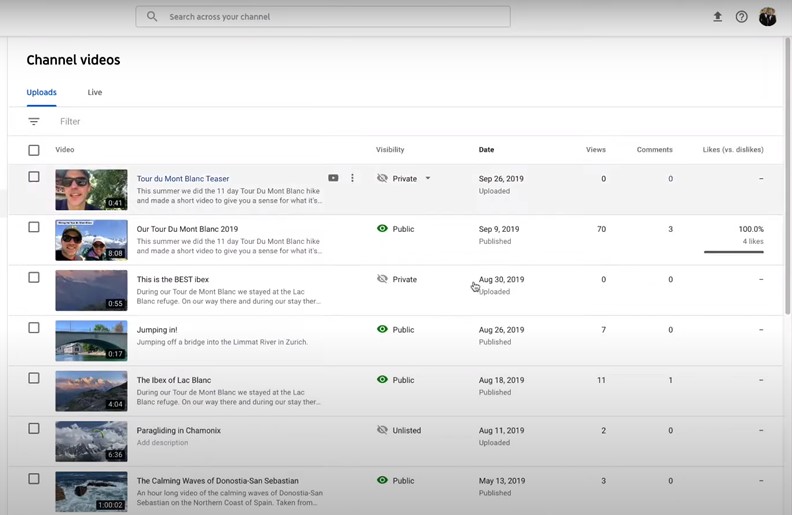
Step 2. On YouTube Studio, click “Videos” on the left sidebar. Your submitted videos are listed.

Open Videos Tab In Youtube Studios
Step 3. Find the video you wish to modify or undo cuts in the list. Click its title or thumbnail to see video information.
Step 4. Click the “Editor” button at the top of the video information page. Launch the video editor.
Open Editors Tab
Step 5. In the editor, your video’s timeline shows clipped chunks. Press the 3 dots on the top right corner and select “revert to original” from the options. After pressing the revert option, a prompt window will appear; select “revert to original.”
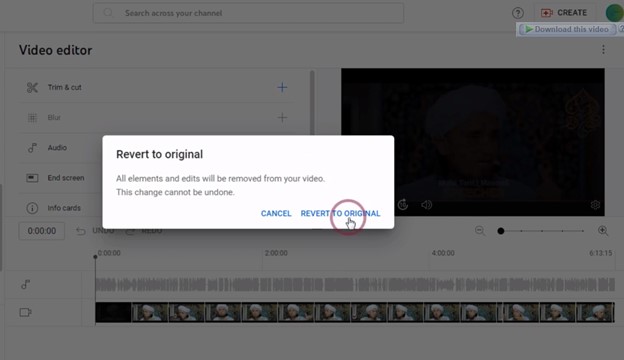
Click revert to original prompt
Step 6. Click “Save” to confirm the undo if everything seems OK. Updates and modifications will be made to your video. Finally, click “Save” to publish your updated movie with the restored part.
Blurring Parts of Your YouTube Video
YouTube Studio may let you hide critical information or obfuscate features in your video. This section will help you obscure areas of your YouTube video to make it viewer-friendly and compliant with privacy and content restrictions. Here’s how to blur sections of your YouTube video:
Step 1. Log onto YouTube and visit YouTube Studio. Click your profile symbol and choose “YouTube Studio.”
Step 2. Go to YouTube Studio’s left sidebar “Videos” tab. Click it to see your uploaded videos.
Step 3. Click the title or thumbnail of the video you wish to alter in your video list. Go to the video’s information page.
Step 4. Launch YouTube Studio’s video editor.
Step 5. The editor displays your video’s chronology and editing choices. Select the video segment you wish to blur by clicking on it.
Select video to edit
Step 6. After choosing the section, click “Blur parts of your video” in the editing tools.

Select blur parts of your video
Step 7. You may resize and move a box over your video to blur it. Adjust the box’s size and position with the handles on its edges. Adjust blur intensity to your liking. Adjust blur intensity using the slider.
Step 8. To test the blurring effect in your video, click “Preview” before applying it permanently. You can guarantee the blurring hides the desired information this way.
Step 9. You may save your blurring modifications by clicking “Save.” The edited version will follow the publication of the blurred video.
Limitations to Post-Upload Editing on YouTube
While YouTube Studio offers useful editing tools, there are certain limits to be aware of when it comes to post-upload video modification. These limits must be considered since they may influence your editing skills and the ultimate output of your YouTube clip. Here are some of the limits of YouTube post-upload video editing:
1. Limited Time Frames:
The inability to modify videos older than 90 days is a major constraint. You cannot clip or cut any material from your video after this deadline. As a result, it’s critical to assess and make any required changes as soon as possible.
2. Video Replacement:
YouTube Studio does not enable the entire replacement of an uploaded video. You can make changes but can’t delete the video and replace it with a new file. Replacing the video requires uploading it separately, which may lose views, comments, and statistics.
3. Limited Undo Options:
Although you may clip areas of your movie, the procedure is not reversible. If you delete material by mistake, you cannot reverse the action in YouTube Studio. You’d have to re-upload the original video and make the appropriate changes.
4. Annotations Removal:
YouTube no longer allows video annotations; they were ceased, and existing ones were deleted. You may utilize YouTube’s latest feature, “End Screens,” to add interactive features like this.
5. Transitions and effects:
The video editor in YouTube Studio is limited to basic editing tools. You’ll need to utilize third-party video editing software and re-upload the altered movie if you want more complicated video transitions, special effects, or text animations.
Final Thought
YouTube Studio makes it easy to make post-upload adjustments to your videos, allowing producers to improve their material after it’s gone live. You may improve your videos by trimming, blurring, or modifying features to better interest your audience and rectify small errors. However, consider the limits, such as time constraints and the impossibility of completely changing movies. Consider third-party video editing software for more extensive editing options. Nonetheless, YouTube Studio is useful for content producers who want to make their videos more engaging and attractive. So, use it to improve your YouTube video and keep your viewers returning for more. Remember to urge visitors to share and offer important comments.