Taking screenshots on Mac comes in handy on many occasions. However, when it comes to cropping one, it’s a bit complicated to get the cropped version right. These cropped screenshots on Mac can record anything from an error message, a website, or a document. Cropping is the process of removing an image’s background, menu bar, or other windows. This article will look at cropping screenshots on Mac and the several apps that can help you do it. So, let’s not waste any time and get straight to it.
Also read: How to Crop Image in Figma? >
Crop a Screenshot on Mac with Built-in Tool
You can crop a screenshot on a Mac without installing any additional software or apps
if you know the proper keyboard shortcuts and techniques. The easiest way to crop a screenshot is by making use of the brand-new cropping tool that is already incorporated into every Mac.
When you take a screenshot on macOS, a floating thumbnail of the captured image appears in the lower right-hand corner of the display. The screenshot you just captured has been condensed into this thumbnail and picking it will make the cropping tool available to you.
Follow the steps below:
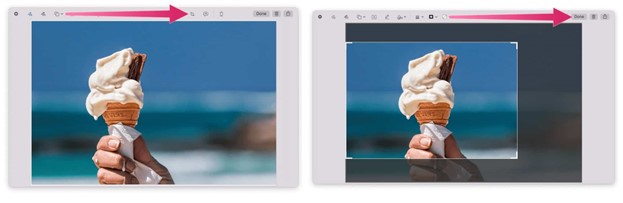
Step 1: Select the area on the display you want to crop.
Step 2: Once you’ve snapshotted the area, click the Crop icon on the popped-up display.
Step 3: Remove the undesirable portions of your screenshot.
Step 4: Once you do that, click the Done option.
Crop Button
Capture a Cropped Screenshot on Mac with Shortcuts
Mac users prefer keyboard shortcuts to crop screenshots since they are quicker and handier than the built-in utility. Shortcuts allow you to take a cropped screenshot on Mac in a single step without launching the screenshot toolbar or the screenshot editor. You must hit a few buttons and pick the region you want to crop.
Here, we’ll teach you how to use shortcuts to take a cropped screenshot on Mac. Here are the methods to take a cropped screenshot on Mac using keyboard shortcuts:
Step 1: Begin by holding down the Shift+Command+4 on your keyboard.
Step 2: Hold and drag the crosshair to make a box around the desired cropped region.

Cropping Screenshot Using Shortcuts
Step 3: Release the icon on your mouse or trackpad to capture a screenshot. You will hear a camera shutter sound, and a preview of the screenshot will appear in the bottom-right corner of the screen.
Crop a Mac Screenshot with the Preview app
Using the Preview app is another alternative for cropping a screenshot on a Mac. Preview is a built-in application for viewing and modifying images and PDFs. Furthermore, the Preview app makes cropping, resizing, rotating, annotating, and editing screenshots all possible. Preview can also access and modify screenshots captured using other techniques. This tutorial will demonstrate how to crop a Mac screenshot using the Preview program.
Here’s how to crop a Mac screenshot using the Preview app:
Step 1: With Preview, open the snapshot file you wish to crop. Double-click the screenshot file on your desktop or Finder to open it.
Step 2: Select the Show Markup Toolbar option towards the top of the Preview window. It’s a pencil tip surrounded by a circle.
Step 3: In the toolbar, choose the Rectangular Selection tool. It is a dashed rectangle.
Step 4: Drag your mouse over the screenshot to pick the region you wish to crop. You can also modify the selection by dragging the handles at the corners and edges.
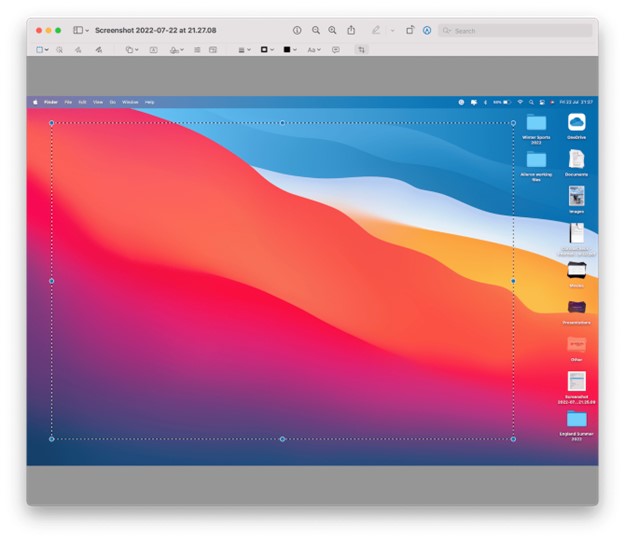
Dragging Rectangle in Preview
Step 5: In the toolbar, click the Crop button. It looks like a pair of overlapping squares joined together by a straight line.
Step 6: Click File > Save or press Command + S to save your trimmed photo. Select File > Export to export it to a new place or file format.
Crop a Screenshot on Mac using the Photos app
The Photos app, a system-wide tool for managing and enhancing image and video files, can also be used to crop a screenshot on a Mac. Photos’ user interface makes it easy to trim, rotate, flip, and otherwise modify screenshots. Additionally, Mac users can also use the Photos app to share screenshots across devices and apps.
You may crop a screenshot on a Mac using the Photos app as follows:
Step 1: Launch the Mac’s Photos application. It’s either in your computer’s Applications directory or the Dock.
Step 2: Choose this option from the window’s menu to import.
Step 3: Click Review for Import after choosing the screenshot file you wish to crop from your desktop or Finder.
Step 4: To add the screenshot to your Photos collection, choose Import All New Photos or Import Selected.
Step 5: To see a full-screen screenshot, double-click it in your Library.
Step 6: Choose the Edit menu item from the window’s toolbar to begin editing.
Step 7: Select Crop from the menu bar. You can adjust the image’s proportions by dragging its corners and borders. The Aspect button lets you choose a predefined aspect ratio for your screenshot crop.

Dragging Cursor in Photos
Step 8: To save your cropped screenshot, choose the Done button.
How to Take a Cropped Screenshot on Mac?
Keyboard shortcuts on the Mac make capturing a cropped screenshot easy without installing third-party software. You can simply capture screenshots of areas on your Mac’s display by using these keys. On a Mac, you can take a screenshot with a customized crop using the following keyboard shortcuts:
- Whole screen screenshot– Shift-Command-3. Using this key combination is one of the easiest ways to take a cropped screenshot on Mac. This can save a snapshot of your Mac’s display. All you need to do is then save a file on your system for later usage.
- Window or menu capture– Press Shift + Command + 4 + Space. This key combination comes in handy for those Mac users who want to take a screenshot of any current active window or menu, such as editing videos, etc. The cursor on your Mac’s display will turn into a camera to take capture a screenshot.
- Partial screen capture– Shift-Command-4. Shift-Command-4. Once you use this key combination on your Mac’s display, you will able o choose the region on your screen that you want to capture simply by clicking the dragging the cursor along the screen.
Screenshot on Mac Using Gemoo Snap – Quick Screenshot Function
Make screenshots look their best with Gemoo Snap, a powerful and flexible screen capture tool. With Gemoo Snap, you can easily take screenshots of anything you need, whether the whole screen, a window, a region, or an element. With Gemoo Snap, you can do more than take screenshots; you can annotate, edit, share, pin, and even identify text inside them.
With Gemoo Snap, you can take a cropped screenshot on a Mac with a single mouse click. Hit the appropriate keyboard shortcut and choose the region to be cropped; no additional software or toolbars are required. The options tab also allows you to change the shortcut for taking screenshots and where they are stored. Here, we’ll demonstrate how to use Gemoo Snap’s one-click screenshot cropping feature on a Mac. The rapid screenshot capabilities in Gemoo Snap include the following:
Key Features of Gemoo Snap
- Cropping, resizing, blurring, and highlighting are already available as editing tools.
- Keyboard shortcuts can be configured to capture screenshots or quickly start a video.
- Cloud storage and file sharing that is encrypted and password protected.
- Making animated GIFs from video clips using the software.
- You can capture the most useful area with this innovative, smart mode.
Here’s how you can take a cropped screenshot on Mac using Gemoo Snap:
Step 1: Go to the official website of Gemoo Snap and click on the Download button.
Step 2: The next step is to enter your login information into Gemoo Snap.
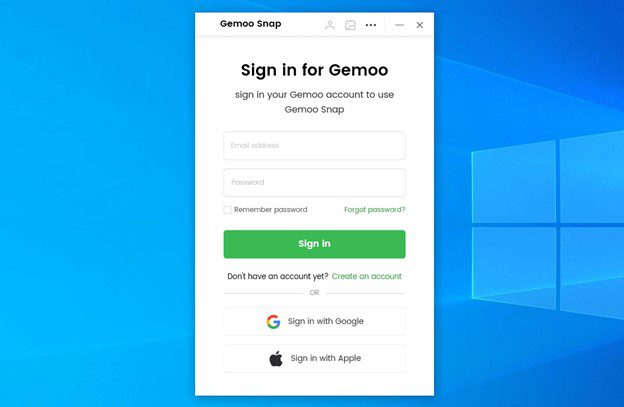
Sgin in Gemoo Snap
Step 3: Take a fast screenshot with the help of the fast Screenshot button on the main menu. The keyboard shortcut “PrintScreen” can also activate the function.
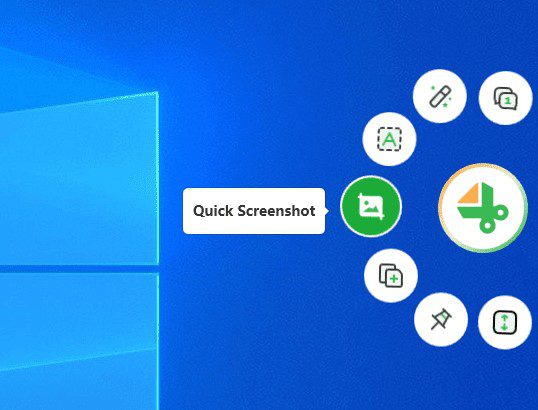
Click Quick Screenshot
Step 4: To proceed, click and drag the mouse to the appropriate location before releasing it. Gemoo Snap centers on the location of the mouse by default.
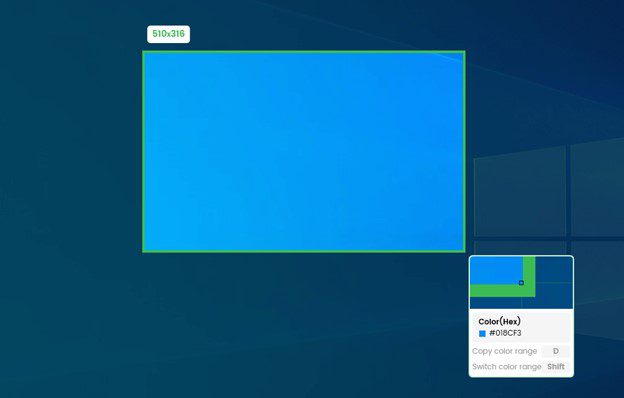
Framing The Screen
Step 5: The image will be immediately downloaded to your clipboard and posted to Gemoo Cloud. Once the image has been posted to the Cloud, it will not take up any more space on the user’s local machine and can be accessed anytime.
Step 6: Gemoo Snap will automatically send the finished snapshot to Gemoo Cloud if the option to Upload a Quick snapshot picture is selected. There are little sample shots over on the right.
Final Thought
We hope you’ve learned something new aboutcropping a screenshot on Macnow. Before or after capturing a screenshot, you can crop it using the shortcuts, tools, and programs installed on your Mac. You can alternatively use the Preview or Photos programs to see and modify your screenshots. However, we suggest using Gemoo Snap for a more robust and flexible screen capture solution. With Gemoo Snap, you can take a cropped screenshot on a Mac with a single click and access a wide variety of additional features and functionalities. To begin capturing professional-quality screenshots on your Mac, visit the official website and download Gemoo Snap for free.