In today’s digital age, visual aids are vital in effective communication and presentation. Screenshots can significantly enhance the visual impact of your slides, whether you are making a formal presentation, recording a training video, or just sharing information. The popular presentation software PowerPoint provides multiple methods to seamlessly capture and insert screenshots, enabling you to effortlessly include relevant visuals within your presentations.
This article will explore 3 simple techniques for capturing screenshots and seamlessly inserting them into PowerPoint. These methods enable you to effortlessly capture specific content from your screen, including websites, documents, or software interfaces, and integrate them smoothly into your slides. Discover how to utilize the power of screenshots in PowerPoint to enhance your presentations’ effectiveness and visual appeal. Continue reading to learn how to take a screenshot, paste it into PowerPoint, and unleash your creativity.
Table of Contents: hide
Is There a Snipping Tool in PowerPoint?
Is There a Snipping Tool in PowerPoint?
No, there is no built-in Snipping Tool specifically in PowerPoint. The Snipping Tool is a screen capture utility designed for capturing screenshots or snips of specific areas on the screen. It is a built-in feature in the Windows operating system, starting from Windows 7 and onwards.
In contrast, Microsoft PowerPoint is presentation software used primarily for creating slideshows and presentations. The fundamental screenshot editing tools in PowerPoint, such as cropping and scaling, are available, but there isn’t a specific snipping tool like there is on Windows. However, PowerPoint has a shortcut and many alternative methods to capture screenshots and incorporate them into your presentations.
What Is the Shortcut for Screenshots in PowerPoint?
Capturing screenshots in PowerPoint is a convenient method for preserving and sharing specific content from your presentation. Whether you wish to save an image, a slide, or a specific area of your screen, PowerPoint offers a shortcut that can assist you in achieving this.
Following a few simple steps, you can quickly incorporate screenshots into your presentation, improving your visuals and enhancing communication. To take a screenshot in PowerPoint, follow these steps:
Step 1: Open the window whose screenshot is to be captured.
Step 2: Go to the slide in your PowerPoint presentation where you want to insert the screenshot and click on the “Insert” tab.
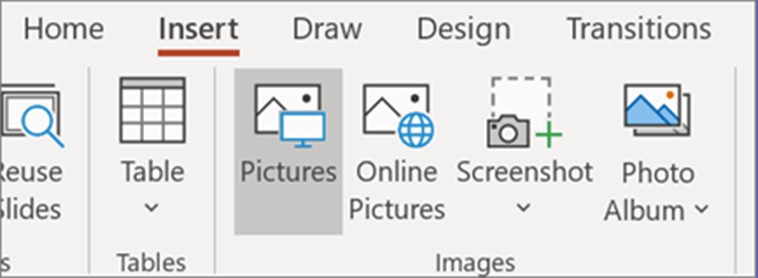
Click on Insert Tab
Step 3: Click the “Screenshot” button in the Images group. This button has a small camera icon.
Select Screenshot
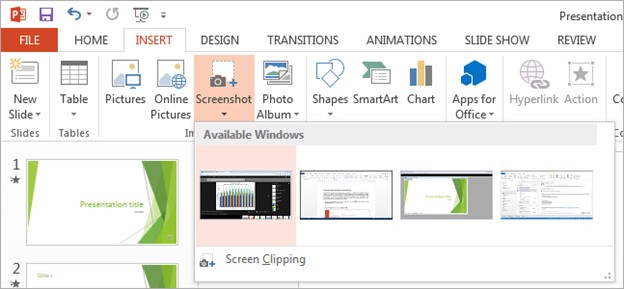
Step 4: From the drop-down menu, select the thumbnail of the desired window to capture an entire window and insert the screenshot onto your slide.
Step 5: Select the “Screen Clipping” option to capture a specific area in your PowerPoint presentation. It will minimize your presentation and change your cursor to a crosshair. Click and drag to highlight the desired area for capture.

Selecting Screen Clipping
Step 6: Release the mouse button to capture the selected area. PowerPoint will automatically insert the screenshot onto your slide.
3 Ways to Take a Screenshot and Paste in PowerPoint
Are you ready to elevate your PowerPoint presentations with gorgeous screenshots? Let’s explore these game-changing methods and unlock the potential of visual communication in PowerPoint.
Take a Screenshot via Gemoo Snap
Gemoo Snap is a feature-rich and intuitive screenshot tool specially developed for Windows and Mac users. Through its desktop application and Chrome extension, it provides a diverse set of functionalities that enable you to customize and enhance your captured screenshots.
With Gemoo Snap, you can easily incorporate text, lines, shapes, window mockups, backgrounds, and shadows, among other elements, to make your screenshots more visually appealing and personalized. Additionally, it offers useful options like quick screenshot capture, screenshots taken from the clipboard, and even OCR text recognition. Let’s look at how to capture, save, and insert screenshots into PowerPoint presentations with Gemoo Snap.
Step 1: Free install Gemoo Snap on your computer. Click on the icon to open it. Sign in to your Gemoo account using your credentials.
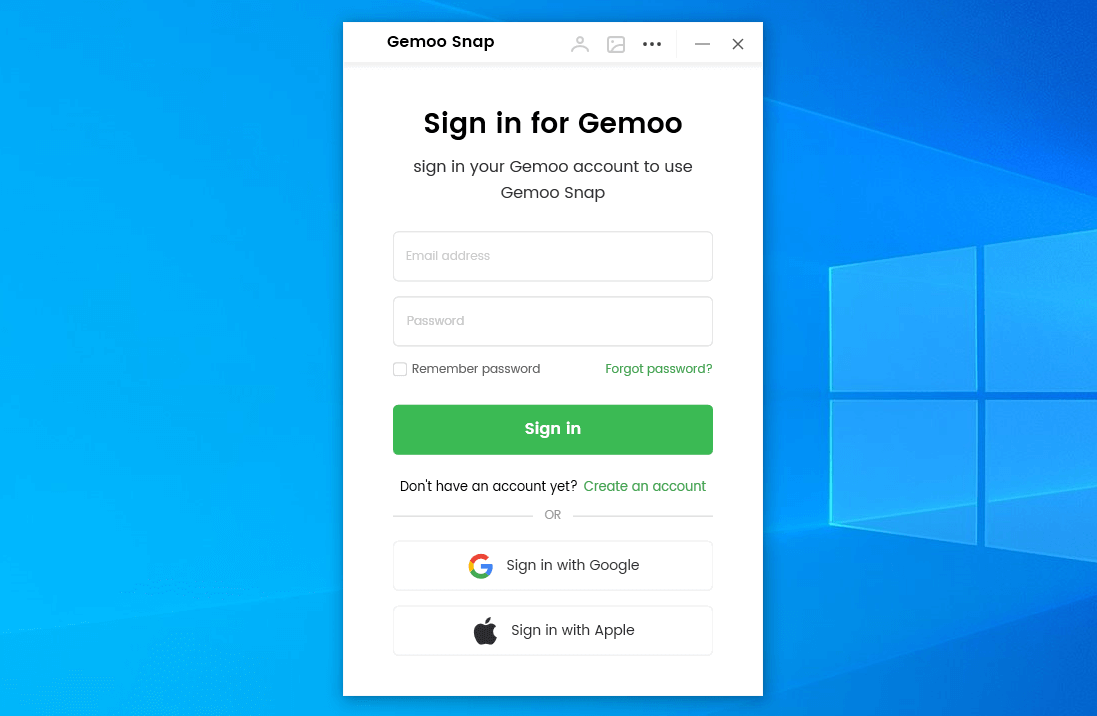
Sign in to Gemoo Snap
Step 2: Select the Quick Screenshot mode from the available options, and capture the screenshot.
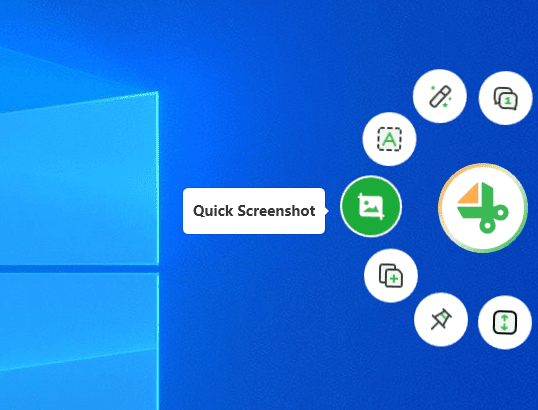
Quick Screenshot
Step 3: After capturing the screenshot, you’ll be redirected to a new tab within the Gemoo Snap extension. To copy the screenshot to your clipboard, click the Copy icon within the interface. This will save the screenshot to your clipboard for further use.

Frame The Screen
Select PowerPoint and navigate to the desired slide. Then, use the “Paste” function to add the captured screenshot seamlessly.
Take a Screenshot via Windows Snipping
To quickly take a screenshot and paste it into PowerPoint, use the Windows Snipping Tool. This tool, which is accessible on the majority of Windows operating systems, allows users to save particular screen areas as image files swiftly. The Snipping Tool offers a convenient solution within the Windows ecosystem by replacing the need for external screenshot applications. It is an easy-to-use tool that can quickly take and insert screenshots into PowerPoint. This speeds up the process of creating interesting and informative slides.
Step 1: To begin, access the “Windows Snipping Tool” by locating it in the Start menu or Accessories folder.
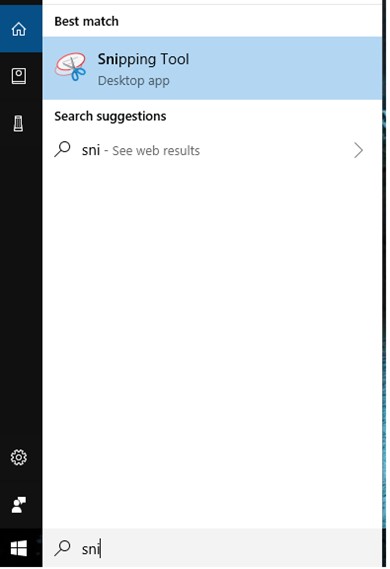
Access Windows Snipping Tool
Step 2: In the Snipping Tool, click “Mode,” and a drop-down menu appears. Select your preferred capture mode among the Free-Form, Rectangular, Window, or Full-Screen Snip.
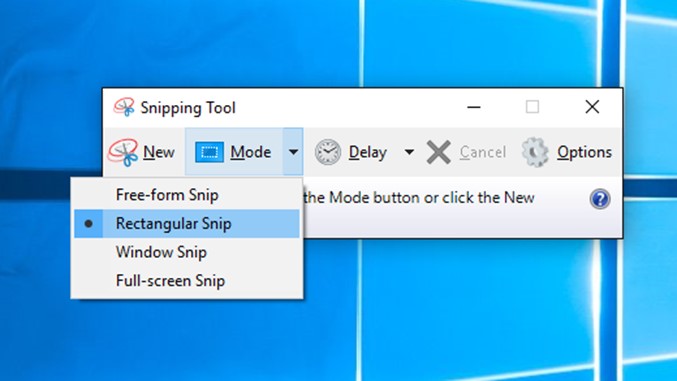
Choose Mode in Snipping Tool
Step 3: After outlining the desired region, click the “Save Snip” button to save the captured area as an image file.

Click on Save
Step 4: Open PowerPoint and utilize the “Paste” function to insert the captured screenshot into your desired slide.
Take a Screenshot via Mac Snipping Tool
Using the Mac Snipping Tool to take a screenshot gives Mac users a flexible and simple way to capture specific areas of their screen. This tool simplifies taking and saving screenshots for various uses, such as presentations and documents because it enables precise selections.
The Mac Snipping Tool provides a simple solution whether you need to copy a complete webpage, a specific area of an image, or an error message. Let’s look at the steps of taking screenshots via the Mac Snipping Tool!
Step 1: Press the Shift+Command+5 buttons to access the Snipping Tool on your Mac (MacOS Mojave and later).
Step 2: To capture a specific area, click the “Capture Selected Portion” option or choose “Capture Entire Screen” to capture the complete screen.
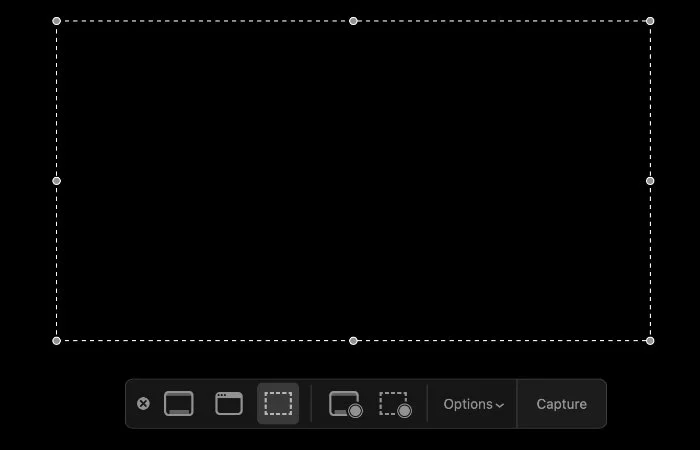
Mac Snipping Tool
Step 3: Once satisfied with the captured screenshot, click on the “Options” button within the Snipping Tool to save the screenshot.
Step 4: For incorporating the saved screenshot into a PowerPoint slide, open PowerPoint and select the “Paste” function.
Final Thoughts
Incorporating screenshots into your PowerPoint presentations can enhance your content’s visual impact and clarity. Although PowerPoint does not have a built-in snipping tool, several efficient methods are available. These options provide flexibility and ease in capturing and inserting screenshots in PowerPoint seamlessly. Experiment with these methods to elevate your PowerPoint presentations and effectively convey your message. We welcome you to share your valuable experiences and feedback in the comments section below!