The pandemic has caused a significant change in how people work and learn, with many activities now taking place remotely. People depend on technology more than ever to stay connected, from online classes to virtual meetings forming a social ecosystem. Having a method for taking swift and effective notes is crucial because so much information is shared online. Using a screenshot is among the best ways to accomplish this, as it allows you to store information on the screen at a specific time so that you can refer to it later.
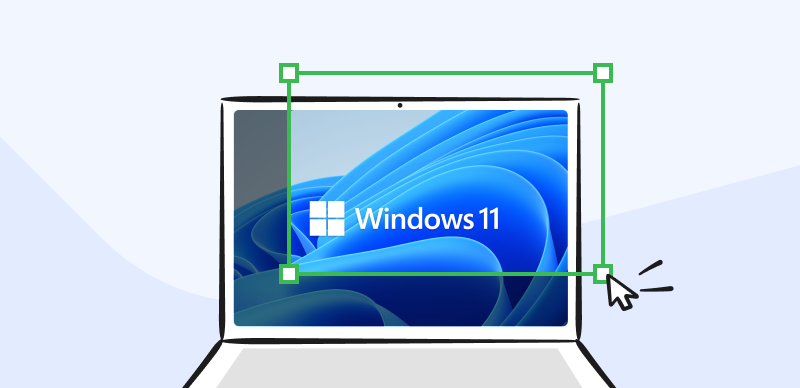
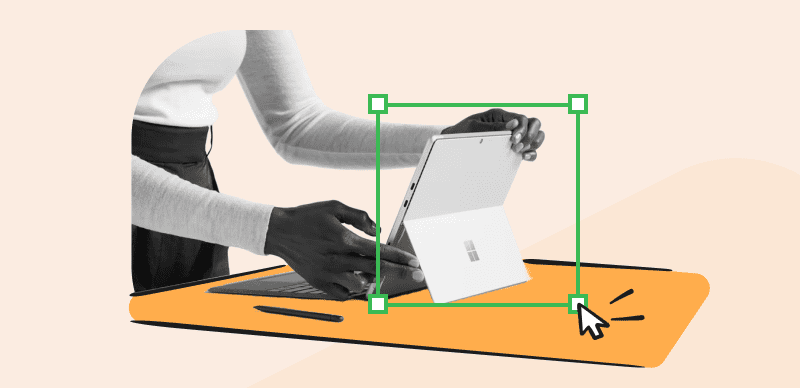
How to Screen Capture on Windows 11
Taking a screenshot is an easy process that can be done using multiple methods ranging from the Snipping Tool to the Windows + Print Screen shortcut, etc. It lets you quickly and easily capture important information, such as a phone number or address. Besides this, it enables you to save and share images and videos you may want to refer to later. In this article, we will explain five different methods to help you understand how to screen capture Windows 11, so stick with us to learn how to take and use screenshots effectively.
Screenshot with Gemoo Snap
Looking for a third-party tool to screenshot? This part is for you! Gemoo Snap is software designed for capturing images by the Gemoo team. Its main objective is to make it easier for the user to take screenshots, and edit pictures by giving them access to various annotation tools, filters, and effects. The various capture modes offered by Gemoo Snap, including full-screen, window, scrolling, and region capture, allow users only to capture certain portions of their screen.
The built-in editor of Gemoo Snap provides a selection of annotation tools, filters, and effects to personalize screenshots efficiently. Besides this, users can share their captures directly to social media, email, and remote servers. The program is great for developing presentations, tutorials, and educational content. Thanks to its adaptable capture modes and editing tools, it is a good choice for various users, from students and educators to design and software development professionals.
Let’s Check the steps to know how to capture screenshots on Windows 11 with Gemoo Snap:
Step 1. Open the Gemoo Snap app on your PC and log in to it.
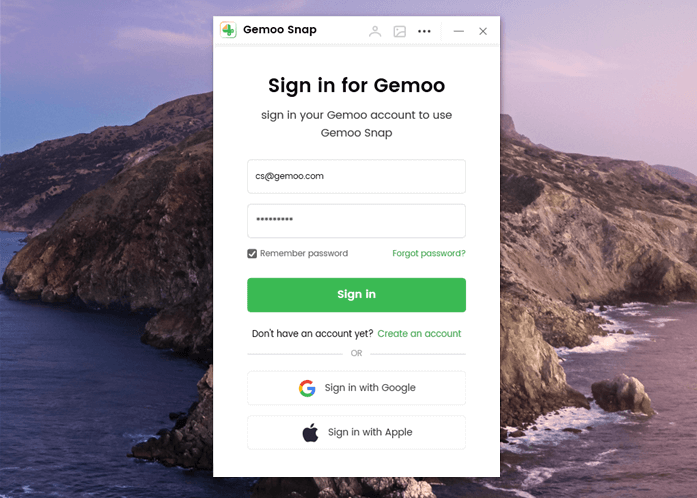
Sign in Account
Step 2. To choose a function, simply tap on it. You can also use the PrintScreen shortcut key to quickly take a screenshot. After that, drag your mouse over the area you want to customize and release it.
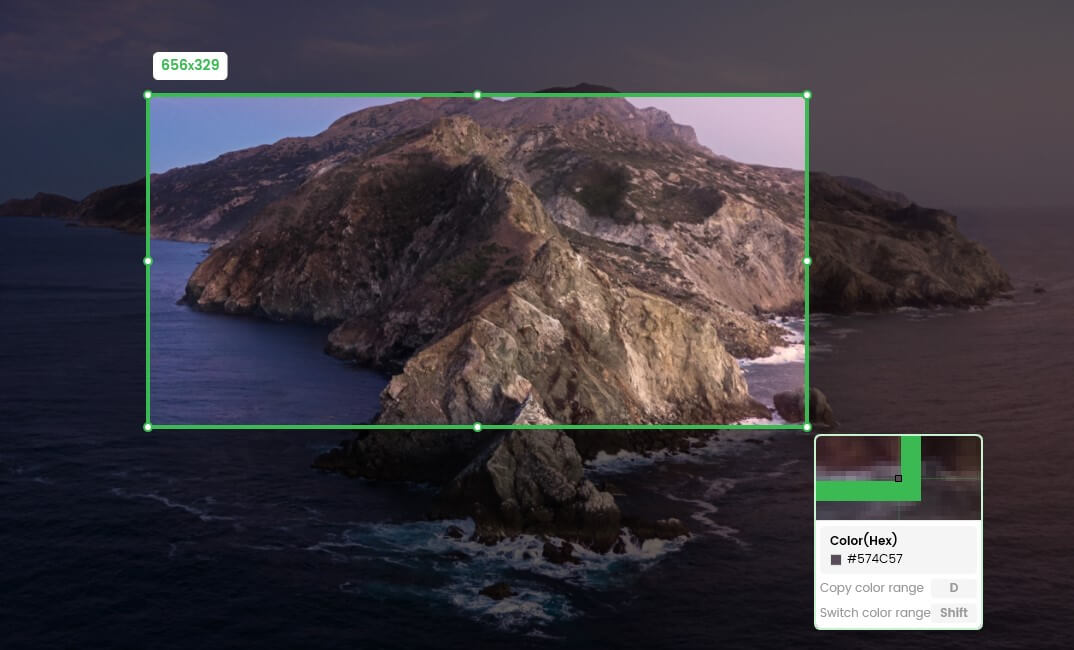
Frame the Screen
Step 3. After you complete the screenshot, Gemoo Snap will upload it to Gemoo Cloud automatically.

Uploading to Gemoo Cloud
Step 4. You can edit the screenshot in the Gemoo cloud by using various editing tools.
Click the PrtSc (Print Screen) Key
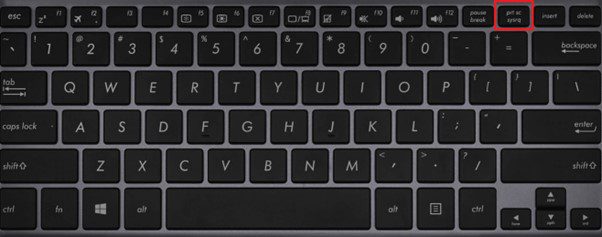
Wondering how to capture potent information without going through a third-party tool? This method is for you! You can take a screenshot of whatever is displayed on your screen by pressing the PrtSc (Print Screen) key, typically found in the upper-right corner of a computer keyboard. You might also have a secondary key on your keyboard with the letters “PrtScn” or “PrtSc SysRq” that serves the same purpose, depending on your keyboard.
Taking a screenshot of what is currently visible on your screen without additional software or tools is simple and convenient when using the PrtSc key. Now, let us not wait anymore and jump into the step on how to capture the screen :
Step 1. Launch the application or window you want to capture on your Pc.
Step 2. Press the “PrtSc” (Print Screen) key on your keyboard.
Click On The PrtSc Button
Step 3. Open the designated application or document in which you want to save the screenshot.
Step 4. To paste the screenshot from your clipboard into the document or application, press the “Ctrl” + “V” keys or right-click and select “Paste.”
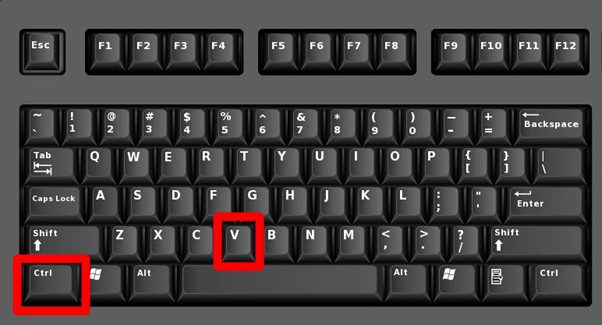
Click Ctrl And V Simultaneously
It is important to note that this method is useful when you want to take a screenshot of the entire page. If you need to capture a targeted portion of your screen, such as a window, table, or multimedia document, use the other methods listed below.
Press the Windows + PrtSc at the Same Time
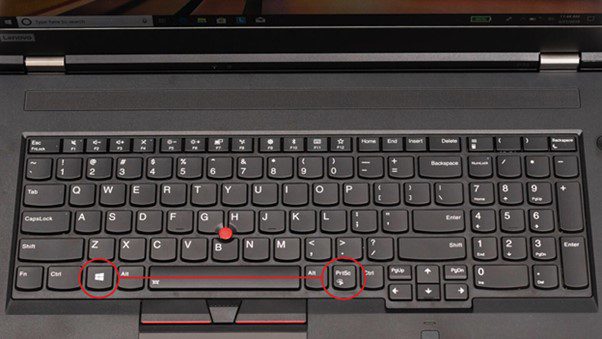
Looking for a method to capture a portion of your screen but do not know how? Let us help you! The Windows + PrtSc key combination on Windows is a keyboard shortcut that takes a screenshot of your entire screen and saves it to your computer’s default “Screenshots” folder. When you press the Windows + PrtSc keys simultaneously, the screen briefly dims to indicate that a screenshot has been captured and saved.
For instance, you can use this shortcut to quickly take a screenshot of important information if you are working on a research project and need to reference an online article or webpage. This is particularly helpful if you need to refer to the information later because you can quickly retrieve the screenshot without returning to the website. Besides this, this shortcut lets you easily review and study the information by capturing images or diagrams from lectures or presentations.
Step 1. Open the tab or document you want to screenshot.
Step 2. Press the “Windows + PrtSc” keys simultaneously.
Press Windows And PrtSc Keys
Step 3. Wait until the screen stutters and dims out for a few seconds.
Step 4. The screenshot has been saved into the “Screenshots” folder.
The default saving format for screenshots made with the Windows + PrtSc keyboard shortcut is PNG (Portable Network Graphics). Transparency and high-quality graphics are supported by the lossless image compression format known as PNG. However, using third-party software or changing the Windows Registry settings will allow you to alter the screenshot’s default format.
Use the Snipping Tool to Screenshot
Microsoft Windows has a built-in screenshot-taking tool called Snipping Tool. Users can use this handy tool to take different screenshots, such as of a particular area or an entire window on their screen, and save them as image files. Windows 7, 8, 10, and 11 all come with the Snipping Tool, which can be located by searching for it in the Start menu or by pressing Windows + Shift + S. Basic editing tools in the Snipping tool comprise a highlighter, pen, and rubber for adding notes or annotations to the screenshot that was taken.
For instance, if you are using Microsoft PowerPoint to create a potent presentation and you need to include a screenshot of a particular chart or graph, you can use the Snipping Tool only to take a screenshot of that area of the screen rather than the whole slide with the help of few simple clicks. By doing so, you can maintain the order and cleanliness of your presentation and keep your audience from being distracted by unrelated material.
Step 1. In the search menu, search and hit “Snipping Tool.”
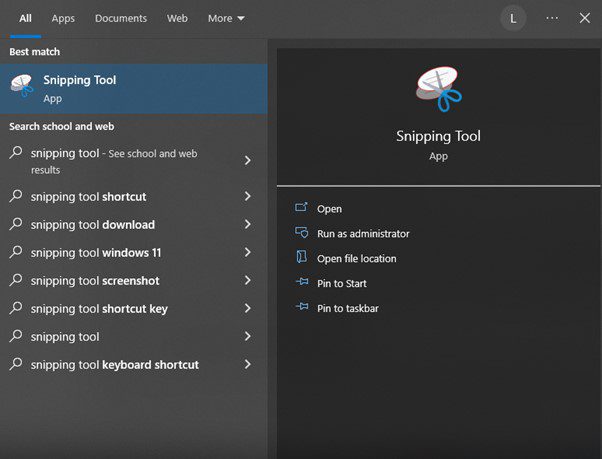
Search And Click On the Snipping Tool
Step 2. Launch the tool and click the “Mode” drop-down menu to select the snip you want to take a screenshot.
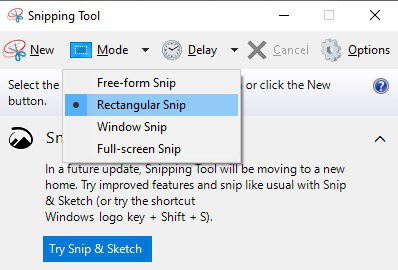
Select Option from the Drop-down
Step 3. Use your mouse to stretch a rectangle around the area or window you want to capture.
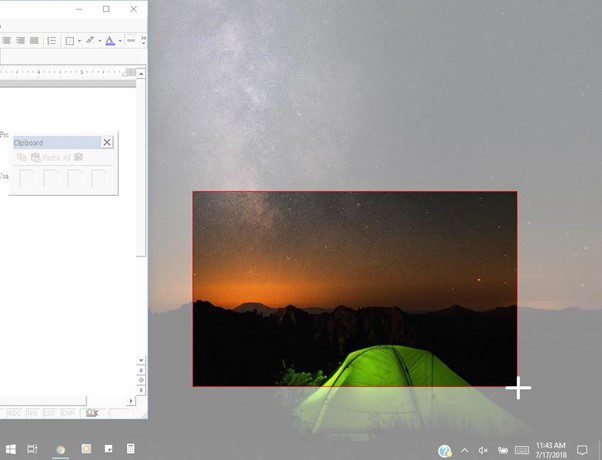
Stretch Rectangle Around Targeted Area
Step 4. Press “Ctrl + V” on your keyboard simultaneously to save the screenshot as an image.
Additionally, the Snipping Tool offers simple editing options like crop, highlighting, or annotating the screenshot taken. This can be useful when you want to edit the screenshot and add remarks or other details before sharing it with others. In general, the Snipping Tool is helpful for screenshots in a range of office and productivity scenarios.
Screenshot with Game Bar
Are you a gamer and wish to save your game’s important achievement to share with friends? We have got you! The Game bar is a practical resource for gamers who desire to take screenshots or record gameplay videos. By allowing them to capture screenshots and record gaming activities without the requirement of external software, the Game bar streamlines the procedure of creating gaming content.
The Game bar can be helpful for other tasks that call for screen recording or capturing in addition to gaming. Its recording tools, for instance, can be used to record your screen and audio if you need to make a tutorial video or demonstrate a software feature. This offers a quick way to produce content. The Game bar is a flexible tool for various use cases because it can also take screenshots of websites or applications not for gaming.
Step 1. On your Windows 11 computer, launch a game or gaming application.
Step 2. The Game bar will open when you press the “Windows key + G.”
Alt: Open Game Bar using Windows And G keys
Step 3. To capture a screenshot or begin recording gameplay, select the camera or record icons, respectively.
Step 4. Click the stop icon to stop recording or capturing once you are done.
Moreover, the broadcasting feature of the Game bar empowers gamers to share their gaming experience with other players in real-time, providing an excellent opportunity for those who want to form connections with other gamers and establish a fanbase. It is critical to remember that the handy Game bar might not function properly with all games or applications and might need particular hardware for optimum performance.
Final Thought
In conclusion, learning to take a screenshot on Windows 11 is a useful skill that can be applied to various situations. In this article, we have covered native ways to take screenshots and outside tools ranging from using the PrtSc key to snipping using PrtSc + Windows keys, the snipping tool, and the game bar. Lastly, we mentioned a third-party tool called Gemoo Snap to help you enhance productivity. Each method has advantages and disadvantages, so selecting the one that best satisfies your needs is potent. Please share this article with your loved ones if you found it useful by leaving your thoughts in the comments section.

The Gemoo Team The Gemoo Team is committed to building products that help people effectively communicate and collaborate.