Images are very important in digital content creation. We see them everywhere on social media, websites, presentations, blogs, and so on. People cannot imagine their lives without visualization and it is a fact that they respond better to this form of content than text. This is why it is very important to know how to resize an image without losing quality. We don’t want our customers to see blurry photos as they might change their perception of us.
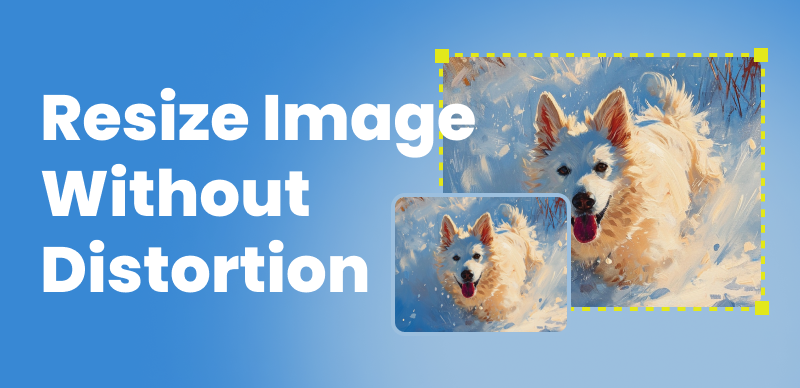
How to Resize Image without Distortion?
Resizing involves changing the dimensions of an image. Maybe the image is too big or too small, and all this can cost you a lot. When we expand an image, we expand its pixels, and it will be clearer as this happens. Image resizing can be very exhausting, which is why we will explain why this is important and how to do it in the easiest way.
Also read: How Can I Resize Image in Figma Without Cropping? >
Table of Contents: hide
Does Resize Image Cause Distortion?
Why It’s Important to Resize Image Without Distortion?
Does Resize Image Cause Distortion?
We need images to create engaging presentations, but at the same time, we often need to resize them, so we keep wondering if this will cause distortion. We often notice that our image looks blurry and distorted whenever we drag its corners to change the size.
Resizing is not the same as cropping. The original image is maintained but it is just made larger or smaller. However, expanding a picture can result in distortion because it ends up stretching the image’s pixels. This is more obvious when the size increases. Distortion cannot be avoided if you want to increase the size of an image, but you can avoid it when decreasing an image.
Why It’s Important to Resize Image Without Distortion?
Enlarging and reducing an image will affect its quality and result in a blurry picture. An improper aspect ratio can make an image distorted, even worsening its quality. This change in the resolution is called pixelation and is especially obvious when you see the image on a larger screen.
Imagine seeing your favorite clothes shop presenting a new collection, and the images are blurry. Then you see another one with nice images. You would probably choose one with better images as it showed more professionalism and effort in presenting its products. How can you trust the products if the images are not good? These images also don’t look good on websites, so they will also not perform well. Larger sizes often end in the browser taking more time to load them. This is why we have come up with the best ways to resize images without distortion.
Understand Image Types Before Resizing
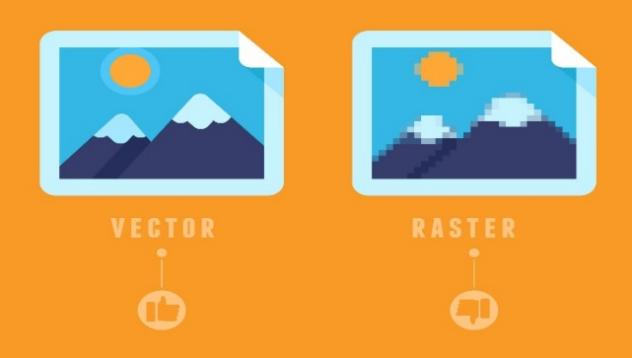
The types of images you choose will influence the resizing, so that’s why it is important to know what you are dealing with. We will present you now two main types: vector images and raster images.
Vector images
Vector images consist of shapes, curves, and lines that can be defined mathematically and they are often used for illustrations and logos. We can get important information from them and businesses love using them as a creative way of reconnecting with the audience. Their versatility is great for many projects and they can adapt to different needs of any company. Vector images do not include pixels, so they can be changed without losing their quality. The most common formats are .odg, xml, .SVG, and so on.

Vector Images
Raster images
Raster images are two-dimensional pictures able to capture high-quality screenshots They consist of pixels that can make many mixes and tones. These images can become blurry or distorted when we resize them. Adobe Photoshop can edit pixels and change how photographs look like. They are not good for logos or illustrations because of pixelation caused by increasing the size of an image. Popular files are GIF, PNG, and JPEG images.
Raster Images
The Easiest Way to Resize Image without Distortion
When it comes to resizing photos, we also find ourselves giving up on their quality. Sometimes there is a need for additional software, and we often are not satisfied with the results. Either an image is too large and not suitable for our website, or too small that it cannot even capture people’s attention. However, with Gemoo Image Resizer, this is not a problem anymore.
Gemoo Image Resizer is a perfect tool for resizing photos imported from Facebook or any other place. With this tool, you can change the size easily, and even their orientation, and then organize them into different folders. These are the steps that you should follow:
Step 1: Upload or drop an image
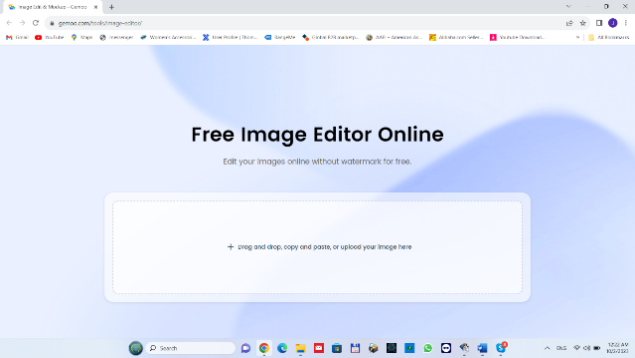
Upload an Image
Step 2: Choose an image that you want to resize for some posts or profile pictures, and have a look at dimensions
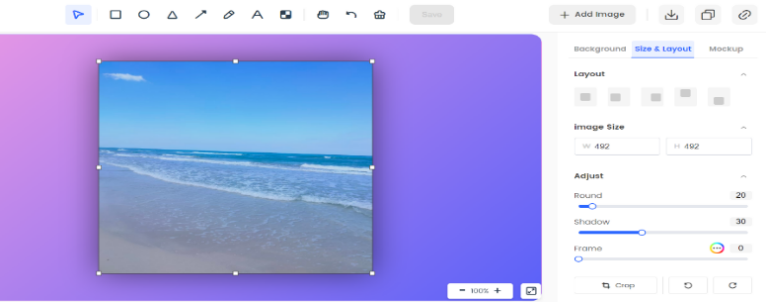
Resize a Image
Step 3: Download, save, or share (save it in JPG or PNG)
Image Resize Taboos
People have always had a lot of questions when it comes to image resizing, so that’s why for a long time many didn’t know how to do that properly. Besides the one related to image quality and how much it will be affected by resizing, there are also some other common taboos that we often come across. These would be:
- Can the size be changed without stretching it?
- Will a smaller photo look blurry?
- Can scanned documents also be resized?
- Why is it important to resize pictures?
- Is resizing the same as compressing?
This article deals with some of these issues, so have a look again and draw your own conclusions.
Final thought
We can’t deny that resizing has become very popular and that it is used everywhere. The practice is crucial to how your business is perceived, and thus tweaking the images you share with your audience can make all the difference between success and failure. Even though images are important for creating engaging promotional materials, resizing them the right way can be very tricky. You want your image to look clear and presentable without causing distortion.
To get the best results in image altering you should choose Gemoo Image Resizer which can best suit your requirements, and this article also covers how that can be done. If you have any other concerns, please leave them in the comments below!