
You know how it goes – you’re all set to showcase your video creation, and then you notice that grainy footage. It can be quite a downer, making your content seem less than top-notch. But hey, no worries! 🤗 Video grain, or those tiny, random pixel that gives your video a rough look, is something we can totally tackle.
In this nifty guide, I’m going to walk you through what causes those grainy bits and how to bid them adieu. You’ll be left with videos that are as clean and polished as a Hollywood production. Let’s get to it! ⬇️
Hey there! Let’s chat about video grain, something you might have come across when making your cinematic masterpieces. You see, video grain and video blur happen when your camera’s sensor picks up those unwanted, random fluctuations in brightness and color – you know, those specks that can sometimes make your footage look a bit rough around the edges. This grainy effect tends to show up more in videos shot in low light or when your camera’s ISO is cranked up high.
Now, there are two main kinds of this grain that can pop up in your videos:
But don’t fret! Understanding what causes video grain is the first step to dealing with it.
Further Reading: What Is Pixel Motion Blur >
Video grain, also known as noise, can significantly impact the visual quality of your footage. In this section, we’ll explore the common causes of video grain and how understanding them can be the first step toward achieving a cleaner, more polished video.
Video grain removal is a straightforward process when using a traditional video editor. However, it becomes even easier with an AI-powered grain remover like AnyEnhancer, which automatically eliminates grain and noise from your videos. AnyEnhancer utilizes AI technology to not only fix grainy footage but also enhance overall video quality. Here are the key features of AnyEnhancer:
Key Features of AnyEnhancer:
Steps for Using AnyEnhancer to Remove Grain from Videos:
Step 1. Download and Launch AnyEnhancer:
Download AnyEnhancer for free on your computer and open the program. On the main interface, click the ‘Upload Video‘ button to upload your video.

Upload a Video
Step 2. Select the Denoise Model:
From the available AI models, select the ‘Denoise AI Model’. AnyEnhancer will then automatically detect and remove grain from your video, resulting in a smoother playback without speckles.

Choose the Denoise AI Model
Step 3. Preview the Results:
Click the ‘Preview’ button to review the video quality before and after the denoising process.

Preview the Results
Step 4. Export the Enhanced Video:
Once you’re satisfied with the preview, click the ‘Export’ button to save your video. Complete the export settings as needed and then finalize the export.
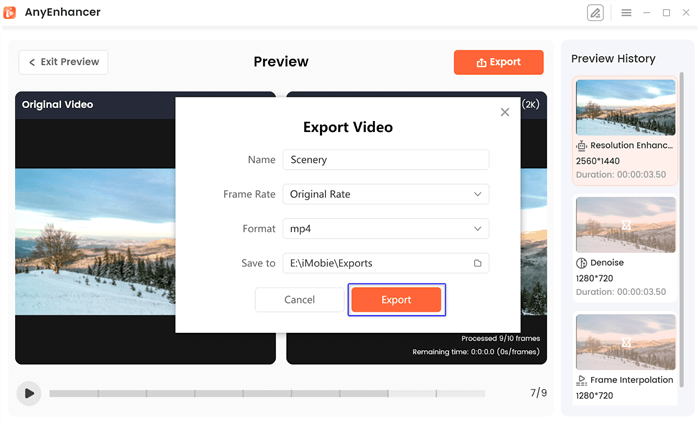
Export the Video
Adobe Premiere Pro offers a powerful Grain Reduction effect that can effectively remove grain from your video footage. Follow these detailed steps to apply the effect:
Step 1. Import Footage:
Load your video into Premiere Pro and place it on the timeline.
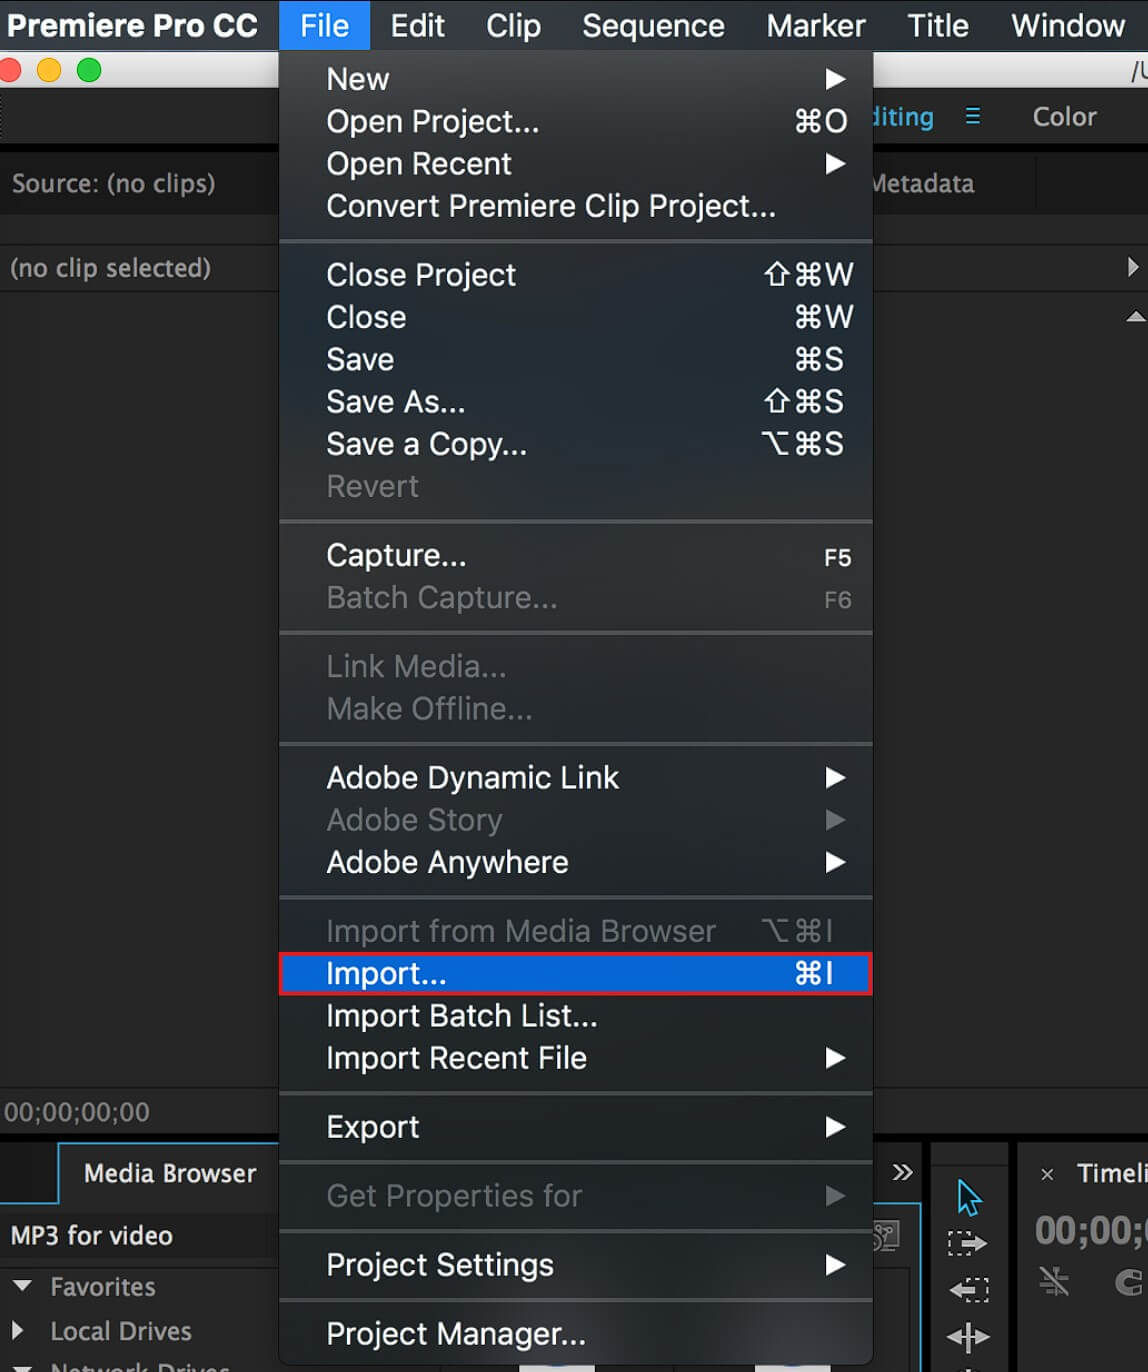
Import Your Shaky Video to Premiere Pro
Step 2. Apply Grain Reduction:
Find and drag the “Grain Reduction” effect onto your clip.
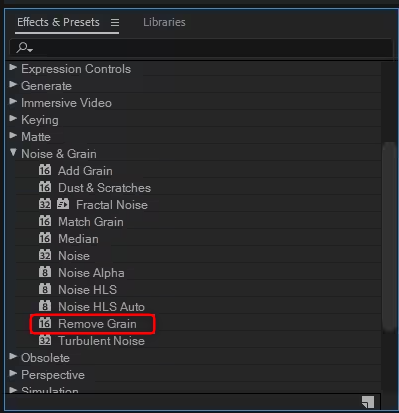
Apply Grain Reduction
Step 3. Adjust Noise Reduction:
Fine-tune the “Noise Reduction” slider for desired grain removal. Use “Noise Reduction Smoothness” for a smoother appearance. Tweak “Reduce Color Noise” to address color graininess. Customize “Chroma” and “Luma” sliders for specific noise types.
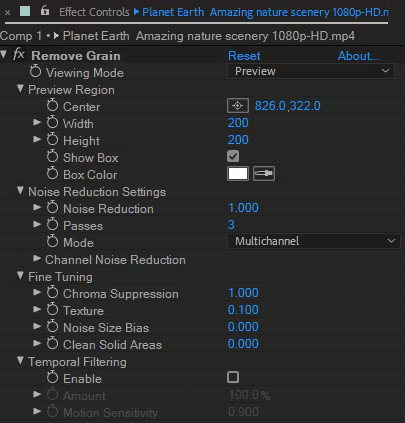
Adjust Noise Reduction
Step 4. Sharpness Restoration:
Utilize “Unsharp Mask” to counteract the loss of sharpness.
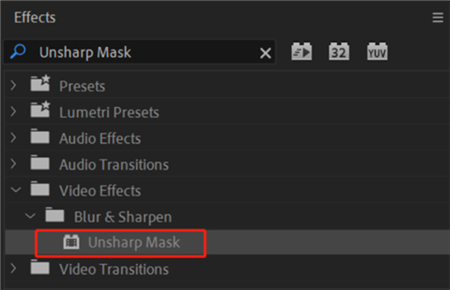
Apply the Unsharp Mask Effect
Step 5. Review and Refine:
Playback and make further adjustments for optimal results.
DaVinci Resolve provides a comprehensive set of noise reduction tools that can effectively remove grain from your video footage. Follow these steps to apply noise reduction in DaVinci Resolve:
Step 1. Bring your video into Resolve and add it to the timeline.
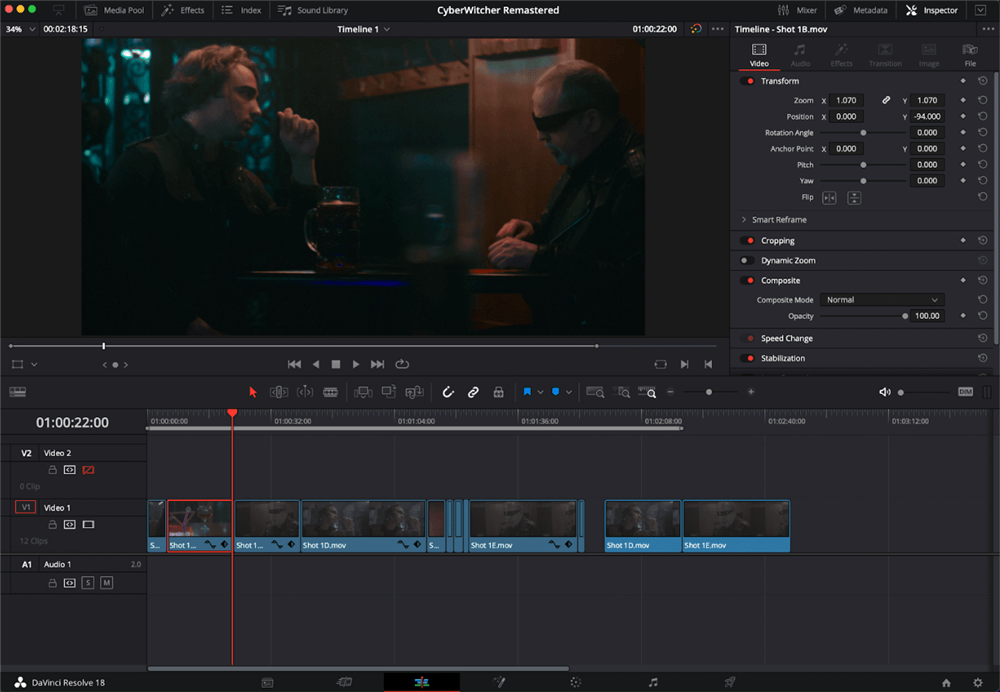
Create a New Timeline and Add Your Video
Step 2. Navigate to the ‘Color‘ workspace and open the ‘Motion Effects‘ panel by selecting your clip.
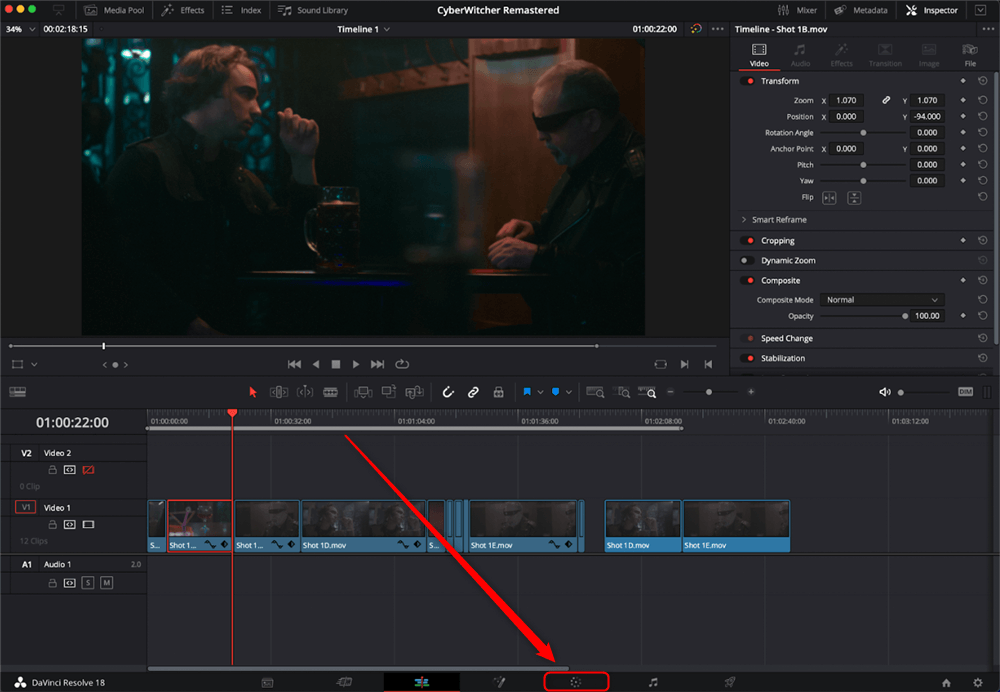
Color Workspace in DaVinci Resolve
Step 3. Select the number of frames for noise reduction in the Temporal NR section. Adjust the motion estimation settings to avoid unwanted effects on moving objects. Fine-tune the Luma and Chroma sliders to control the amount of noise reduction applied to brightness and color. Use the Motion slider to determine which pixels are considered in motion.
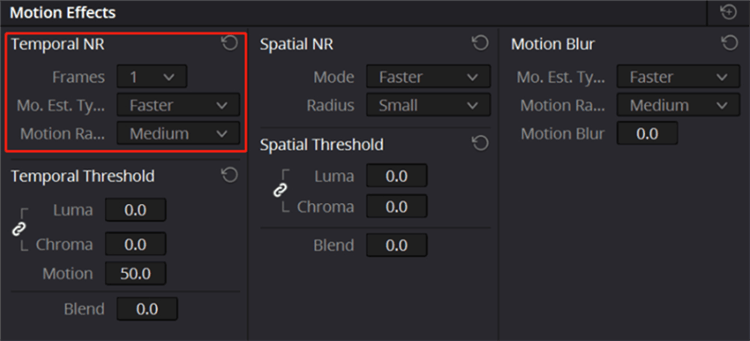
Adjust Temporal NR Settings
Step 4. If noise remains, use Spatial NR to smooth out high-frequency noise within the frame. Similar to Temporal, adjust the Luma and Chroma sliders for Spatial NR.
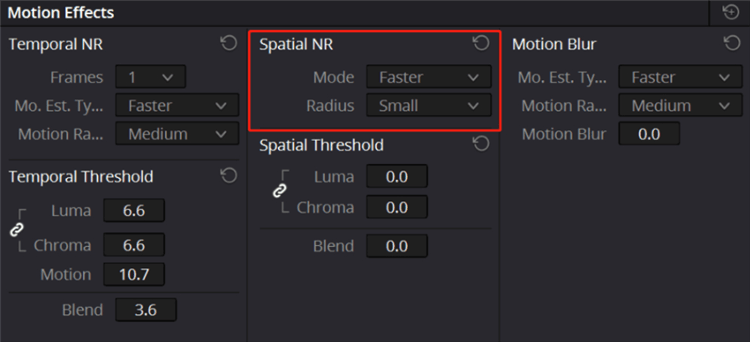
Adjust Spatial NR Settings
Step 5. Review your footage and make necessary refinements
For more advanced grain reduction capabilities, you can turn to dedicated software designed specifically for this purpose. Programs like Neat Video, Red Giant Denoiser III, and Topaz DeNoise AI offer powerful algorithms and advanced settings to effectively remove grain while maintaining image quality. These specialized tools often provide more control and better results compared to built-in video editor tools, but they may come at an additional cost.
While post-processing techniques can help remove grain, it’s always best to minimize its occurrence during the shooting stage. To reduce grain, use the lowest ISO setting possible while still maintaining proper exposure. Ensure your scene is well-lit, as low-light conditions often lead to increased noise. Investing in high-quality cameras and lenses can also help minimize grain, as they typically have larger sensors and better low-light performance.
Can grain be completely removed from the video?
While it’s possible to significantly reduce video grain, completely removing it may not always be achievable without sacrificing image quality. The goal is to find the right balance between noise reduction and preserving detail.
What is the best software for removing video grain?
The best software for removing video grain depends on your specific needs and budget. Dedicated grain reduction software like Neat Video and Topaz DeNoise AI offer advanced features, while built-in tools in Adobe Premiere Pro and DaVinci Resolve provide a balance of accessibility and effectiveness.
How can I prevent grainy footage in the first place?
To prevent grainy footage, use the lowest ISO setting possible, ensure your scene is well-lit, and invest in high-quality cameras and lenses. Proper shooting techniques can go a long way in minimizing grain before the post-processing stage.
Is it possible to remove grain from old or vintage videos?
Yes, grain reduction techniques can be applied to old or vintage videos. However, the effectiveness may vary depending on the severity of the grain and the overall quality of the footage. Specialized software like Neat Video and Topaz DeNoise AI can be particularly helpful in restoring older, grainy videos.
Removing grain from video is an essential skill for any video creator looking to produce high-quality, professional-looking content. By understanding the causes of video grain and exploring various post-processing methods, such as using built-in video editor tools, dedicated grain reduction software, and techniques in Adobe Premiere Pro, and DaVinci Resolve, you can effectively minimize noise and enhance the overall appearance of your footage.
Remember, the key to achieving the best results is finding the right balance between grain reduction and preserving detail. Experiment with different methods and settings to find the approach that works best for your specific needs. Additionally, by implementing proper shooting techniques and investing in quality equipment, you can minimize grain occurrence during the recording stage, making the post-processing work more efficient.
With the knowledge and techniques provided in this comprehensive guide, you’ll be well-equipped to tackle grainy footage and elevate the quality of your video projects. Happy editing!
FocuSee
What is Video Grain or Grainy Video?
What Causes Video Grain?
4 Methods to Remove Grain from Video
Tips for Minimizing Grain During Video Shooting
FAQs on Remove Grain from Video
Conclusion


