A good number of people are using Instagram to share exciting moments from their lives. The good thing is that Instagram also has the option for sharing multiple videos or photos at the same time. Such combined images are called slideshows, and they allow you to post up to 10 images at once.

How to Make a Slideshow on Instagram
Slideshows are a great way to share various memories in just one post and have been used a lot in marketing as well for amazing presentations. Potential clients love to see new ideas presented in this way, as they can understand your business better without having to rely on lengthy papers. We process images faster than words, so going over a slideshow is a very useful way to learn something new. You can tell people more about yourself, your business, your success and your future aspirations. with just one slideshow. In this article, we will guide you through the ways to make appealing Instagram slideshows, so get ready to have some fun!
Also read: How to Add Voiceover on Instagram Reels >
What is the Difference between a Carousel and a Slideshow?
Carousels and slideshows are a great way of presenting visual contents. You probably come across many examples of these formats daily. People love carousels and slideshows because they look appealing, and it is easier to engage with the audience in this way because lots of information can be presented with just one post. Both carousels and slideshows show a lot of content within a limited space. Different elements can be rotated, which makes them perfect for promoting products, homepages and various portfolios. Their function is very similar, but there are still some differences we should pay attention to.
Instagram influencers often find themselves thinking how one post is just not enough, and this is where carousels come in handy. This multi-image feature can hold up to ten videos or photos that viewers can move through by swiping. Next and back arrows will allow you to go from photo to photo if you are viewing the carousel from a computer.
Carousels also have unique technical requirements. In the top right corner, you will see a stacked layer icon that allows you to upload the images. The recommended image size should be 1080 x 1080 pixels with a 1:1 ratio, though some other sizes are allowed. Videos are usually less than 60 seconds long and the maximum file size is 4 GB.
On the other hand, making a slide show allows adding many videos or photos to a single story. It also consists of slides that users can move through, each of which can include different elements, like texts or stickers. A crucial distinction of Stories that also applies to slideshows is they are only temporary and will disappear from feed automatically after 24 hours. Another difference is that a slideshow usually uses image transitions like wipe and fade, while a carousel uses sliding transitions. Slideshows also have thumbnails or buttons for previous and next image, and carousels don’t rely on any such interaction drivers.
Also read: Accessibility for All: Creating Inclusive Video Content >
Make Slideshows on Instagram App
This process is very simple, and you can do it with just the Instagram app. The following part will offer you a step-by-step guide to making slideshows for Instagram Story, Feed, and Reels.
Make Instagram Slideshows For Instagram Story
Instagram stories are one of the most popular Instagram features that allow people to share photos or videos that will disappear after a day. A lot of brands have started using this feature to engage with their clients in a more personal manner. This dynamic way of connecting with the audience also includes music, which is great for improving online presence.
Slideshows on Instagram Story can tell someone’s story via so many videos and images. Slides attract more attention because they have interactive elements, such as CTAs, links, and quizzes. You can combine a lot of content in one slideshow, thus giving more variety to the viewers.
Making a slideshow on Instagram stories is a simple process, and this is what you need to do.
Step 1: Open the Instagram app and then just swipe right to go to the Stories camera.
Step 2: Choose multiple images: you will see the camera icon at the bottom left, then on the right there is a select button, tap on it and choose the images and video clips you want to have in your slideshow.
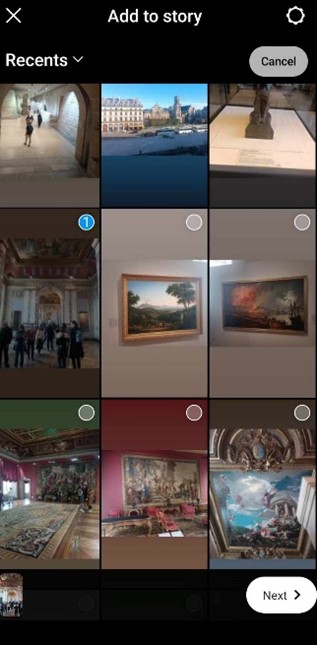
Choose multiple images on Instagram
Step 3: Arrange the photos or videos in any order that fits your purpose
Step 4: Edit and Enhance: You will be offered a variety of editing tools, so you can add GIFs, stickers, or text.
Step 5: Publish: You can publish the desired slideshow by clicking on the ‘Your Story’ button.
Make Instagram Slideshows for Instagram Reels
Users are often more engaged if they watch videos, and this is why Instagram has come up with Instagram Reels. Reels are short and engaging vertical videos that are usually very fun and don’t disappear after 24 hours. Moreover, they include stickers, backgrounds, subtitles and filters, so let’s now have a look at steps to creating entertaining slideshows for Instagram reels.
Step 1: Click on the ‘+’ icon on your Instagram app. Once you enter the camera screen, click on the ‘Reel’ element
Step 2: Choose the video or photo from your gallery or take a new one with the phone camera
Step 3: By clicking on the overlapping squares button, you can choose up to 10 photos and order them according to your needs
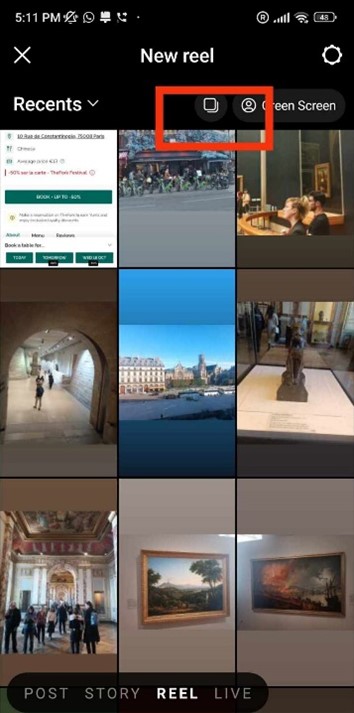
Clicking on the overlapping squares button
Step 4: Add sound effects, music, text or stickers
Step 5: When you are done with this, click on the bottom right arrow to move on, then click on the ‘Share’ button to publish this Reel.
Make Instagram Slideshows for Instagram Feed
Slideshows can also be deployed on your Instagram feed, where they will pop up organically on the screen of your closest followers. Like in the other formats, slideshows can greatly boost engagement when they are frequently added to the feed to highlight key events. This is how you can make a nice looking slideshow for Instagram Feed:
Step 1: Open the Instagram app on your phone or go to Instagram homepage on your PC
Step 2: Click on the ‘+’ button, then select the ‘Post’ button

Choose the ‘Post’ button
Step 3: Choose ‘Select multiple’ (the icon with overlapped squares)
Step 4: Choose the photos you want to share and click on the ‘Next’ button
Step 5: Choose any filters you want, then click on the ‘Next’ button.
Step 6: Tag people or add a caption and location, and share the post when you are ready
FAQs about How to Make a Slideshow on Instagram
What are the most common mistakes people make with Instagram slideshows?
You should try not to use too much text because that can overwhelm viewers. Instead, use slideshows that have a short and clear message, but are presented in an interesting way. Another thing influencers often ignore are the comments related to their slideshows. Each comment, even a negative one, can be constructive.
What to take into consideration when creating the most engaging slideshows?
Avoid blurry images because they don’t look appealing at all. High quality images, together with additional elements will get people’s attention. Try also to limit the number of slides since quality is better than quantity.
When does it make sense to make a slideshow that automatically disappears?
In most cases users prefer to have their slideshows permanently added to their profiles, but in some cases it may be better to use the Stories feature and have the images removed after one day. This is a smart options whenever the content is of personal or sensitive nature.
Final Thoughts
Creating engaging Instagram slideshows has become a popular artform as well as attention-grabbing strategy used by many influencers and brands to boost their online presence. If you master the tools Instagram offers and use some additional apps, you will be able to create amazing slideshows that will convey the right message in the best possible way. So, find your inspiration, follow the steps we outlined, and try to have fun at the same time!