If you’re a newbie who wants to learn how to annotate photographs, you’ve come to the correct spot. Annotation may seem to be a complicated phrase, but it is merely the addition of significant labels and annotations to photographs to make them simpler to comprehend and study. This beginner’s tutorial will have you annotating like a pro in no time, whether you’re an aspiring computer vision enthusiast, a data scientist, or simply someone wondering about the magic underlying picture recognition.

How to Annotate an Image
This article will walk you through the process of image annotation and screenshot annotation. From knowing what annotations are and why it is important to learn about the many sorts of annotation tools, we have everything for you here. We’ll break down the procedure into manageable chunks, tossing some useful tips and techniques along the way. Let’s get right in and learn how to annotate an image!
What Is Image Annotation?
Annotating an image entails adding titles, descriptions, and arrows to make it useful. Consider transforming your images so everyone, including computers, can easily comprehend what’s happening! Annotations add a layer of meaning and context to images, whether you’re scribbling arrows and labels on a vacation photo or emphasizing objects in a scientific image.
In the world of AI and machine learning, image annotation is of paramount importance. It’s like giving computers superpowers, enabling them to recognize objects, detect patterns, and comprehend the world as we do. By adding annotations, you’re teaching computers to interpret visual data and perform tasks such as identifying cats in a multitude of dog images or detecting potential hazards in the environment of a self-driving vehicle.
Let’s look at some of the common types of image annotation today:
✔️ Bounding Boxes – Like drawing neat rectangles around objects of interest, bounding boxes help identify where something is in an image. They are handy for object detection and localization tasks, making it easier for computers to pinpoint the exact spots of interest.
✔️ Polygons – For those who love a bit of freehand creativity, polygons let you draw shapes with multiple sides around objects. Be it outlining intricate structures or irregular objects, polygons provide detailed annotations that are incredibly useful in various computer vision applications.
✔️ Lines and Splines – Sometimes, you only need a simple line to convey valuable information. Lines and splines are handy for annotating roads, lanes, or even the curvy shape of a river. They bring a streamlined approach to image annotation without compromising accuracy.
✔️ Semantic Segmentation – This exciting technique involves coloring different regions of an image based on their category, creating a pixel-wise understanding of the scene. It’s like creating a colorful world map within an image, allowing computers to distinguish between various objects and their backgrounds.
✔️ 3D Cuboids – If you’re stepping into augmented reality or robotics, 3D cuboids will be your new best friend. These annotation gems allow you to outline the 3D boundaries of objects, paving the way for precise spatial understanding and realistic interactions.
What Is an Image Annotation Tool?
An image annotation tool is a clever piece of software that simplifies the process of adding annotations to images. It’s like having a virtual artist’s canvas, except that instead of paintbrushes, you use intuitive tools to designate, label, and emphasize objects within an image. This terrific tool is designed for a broad range of curious minds, from novices anxious to investigate the world of image annotation to seasoned experts utilizing the power of computer vision and machine learning.
Utilizing an image annotation tool opens a universe of opportunities. It is the same as teaching computers to see and comprehend the visual universe like humans! With annotations, you can add valuable information to images, making them simpler for computers to analyze, recognize objects, and perform tasks. This utility is the key to unleashing the true potential of visual data, whether you’re working on thrilling projects such as autonomous vehicles, medical imaging, or even spectacular augmented reality experiences.
How to Annotate an Image Online for Free
Online Gemoo Image Annotation Tool is a terrific online image annotation tool that makes it simple to annotate photographs! With its diverse tools like arrows, brushes, words, and lines, you may annotate any picture that best meets your requirements and thoughts. One of Gemoo Image Annotation Tool’s notable features is its bulk annotation functionality. Say goodbye to the time-consuming job of uploading images and annotating photographs one by one; now, you can upload and annotate many images at a time, saving you valuable time and effort. This is very useful when dealing with a large number of images and need to guarantee that they are all tagged on time.
Furthermore, the handy slide view preview makes organizing and storing all your annotated photographs simple, guaranteeing a seamless and effective process. Gemoo Image Annotation Tool provides more than picture annotation; it allows you to add notes to photos and export them in PNG, JPG, and PDF formats. This makes it an invaluable resource for both students and professionals. You may make your study materials more accessible and organized by exporting photos with notes.
💡 Key Features of Gemoo Image Annotation Tool:
- Gemoo Image Annotation Tool offers various annotation tools like arrows, brushes, and text.
- Batch annotation lets you upload a group of images, annotate them and preview them in a slide view.
- Add notes to images and export them in PNG, JPG, or PDF formats.
- Convenient slide view preview for easy management and quick access to annotated images.
- Alternative to ImgBB, it can generate image URL anonymously in seconds.
💡 Here’s how to use the Gemoo Image Annotation Tool:
Step 1: Go to the Gemoo Image Annotation Tool landing page, where you can upload, copy, paste, or drag and drop an image from your computer.
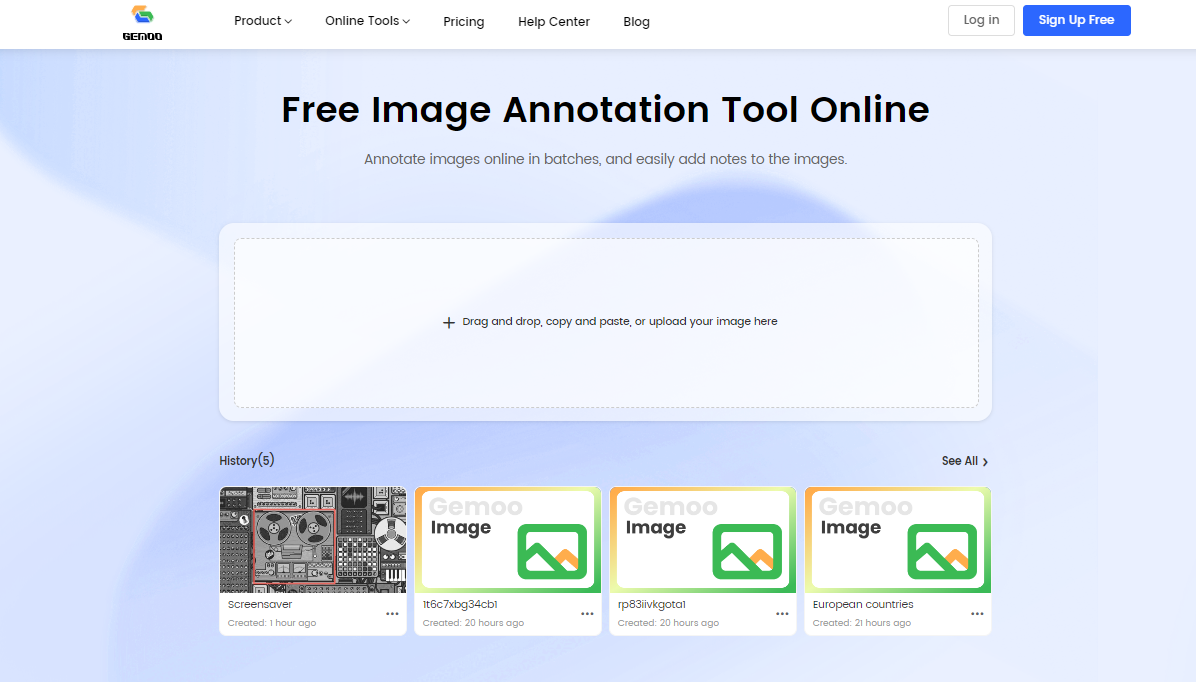
Gemoo Image Annotation Tool Landing Page
Step 2: Utilize the toolbar to add various annotations to the online image. You can also easily add annotations to your image.
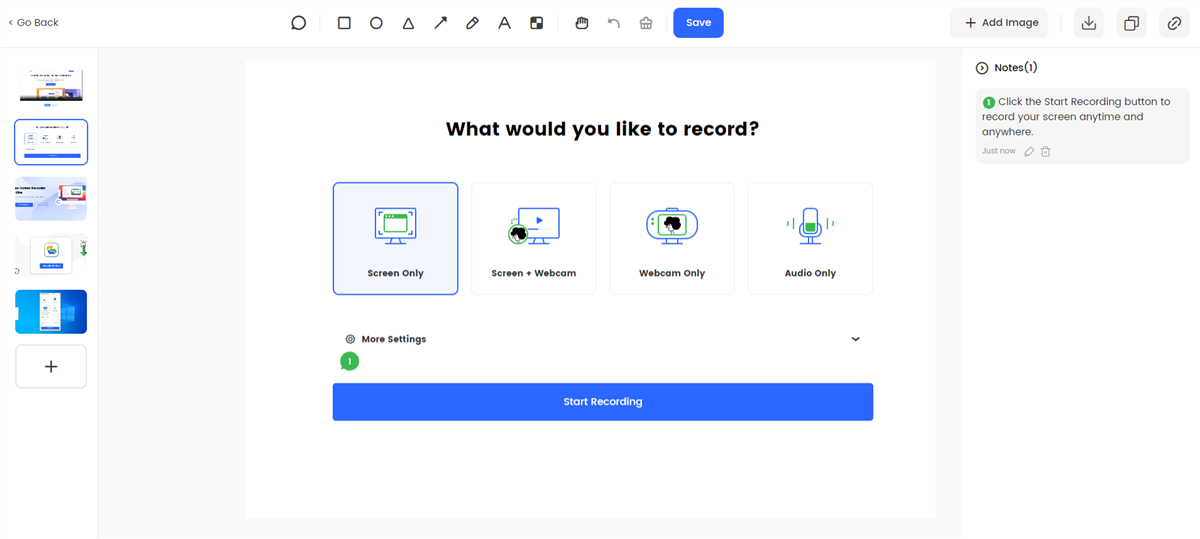
Upload Images to Annotate
Step 3: Click on Download to save the image, click on Copy button for copy/paste feature, or Upload the image to automatically generate the link to share your image with others. You can also share the image link.
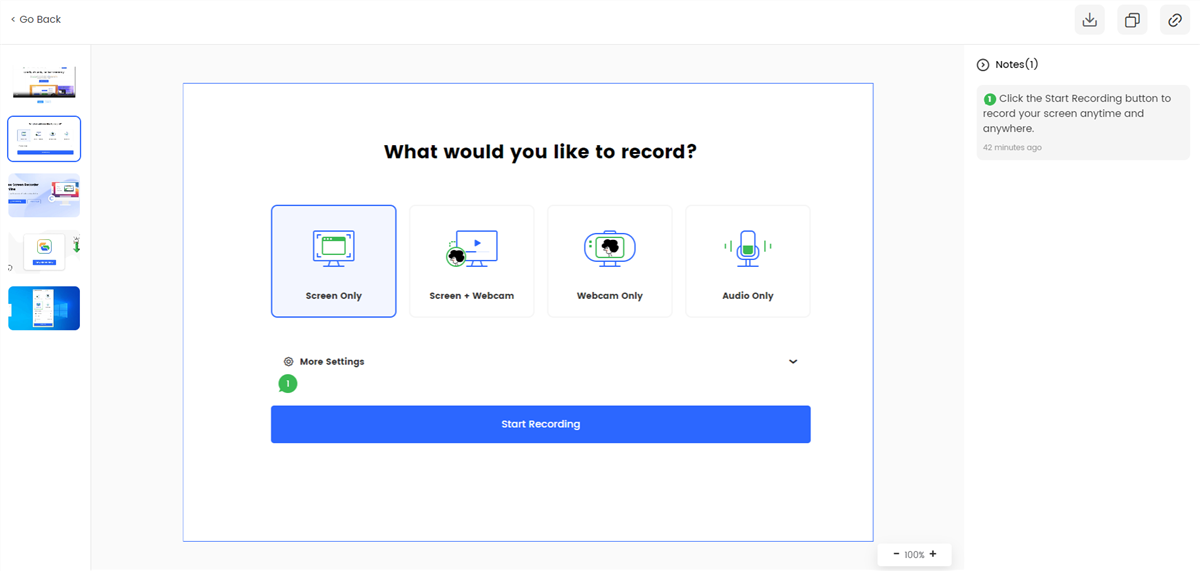
Image Annotation Sharing Page
How to Annotate an Image on PC for Free
Microsoft Paint, already installed on your computer, is an excellent free alternative for annotating photographs. With this well-known and user-friendly program, you may let your imagination run wild and annotate photographs easily. Whether you’re a newcomer to picture annotation or a seasoned pro needing a simple solution, Microsoft Paint is here to make your annotating experience pleasant.
Microsoft Paint’s basic and straightforward interface makes drawing arrows, adding text, highlighting objects, and much more easier. Its simple interface and well-known toolbar make it ideal for those who are new to the process of annotating images. Microsoft Paint is a versatile tool that can be used for everything from annotating screenshots at work to creating eye-catching images for presentations.
Here’s how to use it:
Step 1: Start Paint by clicking the Start icon. Choose All applications on the Start menu. Click Paint at the bottom of the menu.
Step 2: Next, you must open a captured photograph in Paint to annotate it. Choose the Open option from the File menu in Paint’s window. Choose a screenshot and click the Open icon.
Step 3: Scribble on your images using any of Paint’s brush options. Click the arrow on the Brushes icon to access the brush selection menu. The default Brush option is comparable to the ballpoint pen of the Snipping Tool.
Step 4: Select Brush, then click Edit Colours to select its hue. Then, while holding the left mouse button, draw on the image by dragging the cursor.
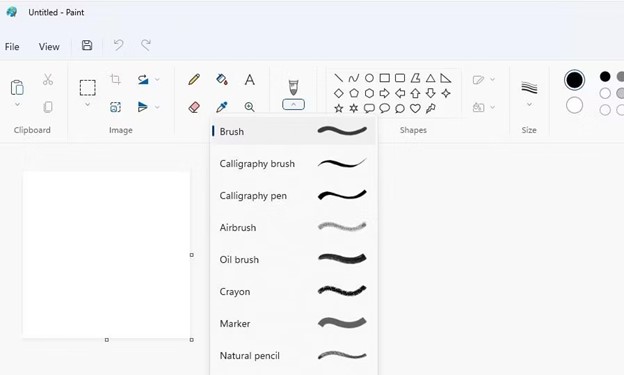
Choose the Brush
Step 5: Choose the Marker option to highlight an image. Marker is among the most see-through brushes available. Choose a highlight color of light yellow from the Paint palette.
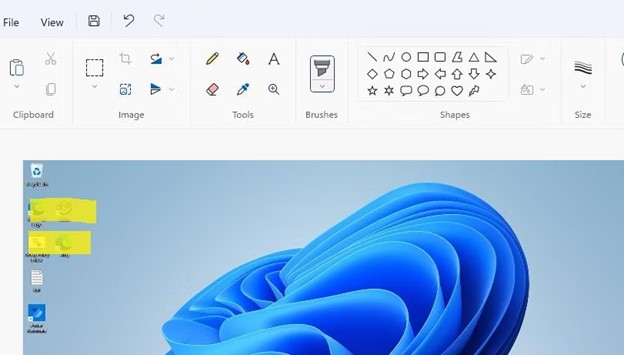
Choose a Highlight Colour of Light Yellow
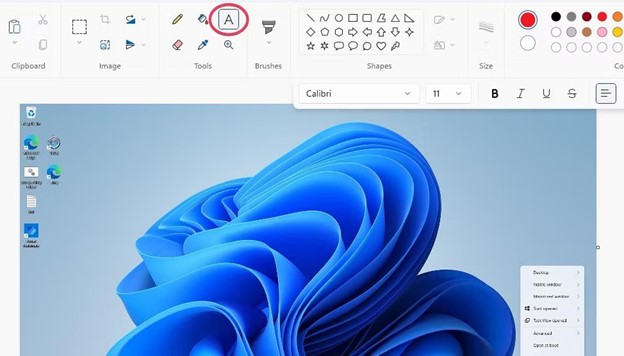
Step 6: Click the A icon below to add text annotations to your screenshot. Place the text box on the image by clicking anywhere on it. Select the desired font and size from the formatting bar. Then enter your text in the box provided.
Save the File
Step 7: Click File and Save As to save an image in a specific format. Enter a file name, then select Save.
Final Thought
If you’re starting with picture annotation and want a robust but intuitive tool that won’t break the bank, Gemoo is your best bet. Gemoo’s Online Image Annotation Tool provides a one-stop-shop for your image annotation requirements with its flexible collection of annotation tools, bulk annotation capabilities, and ease with which you can add comments and export photos in several formats.
Start with this Online Image Annotation Tool’s power and embark on an annotation adventure that will profoundly affect your professional life, academic pursuits, and imaginative output. If you liked this article, comment and let us know if the instructions were helpful!