Google Chrome is a widely used web browser renowned for its powerful combination of fast performance and camera access for seamless online interactions. Whether you’re looking to join a video call, stream live, or capture special moments, allowing camera access on Chrome is essential and useful for multi-purposes. Furthermore, at times, camera access may be blocked. This can happen due to various hardware as well as software-related reasons.
However, it is possible to fix this issue and allow camera access to the browser. This guide will show you How to Allow Camera Access on Chrome on all devices, including windows, Mac, and IOS. We will provide detailed and easy-to-follow instructions to help you overcome any camera accessibility issues on Chrome. Following this, you can unlock the full potential of Chrome and enhance your online experiences to record video or capture screen. So, without further ado, let’s jump into details!
Also Read: How to Enable Camera on Omegle >

How To Allow Camera Access On Chrome
Table of Contents: hide
Why My Cameras Not Working in Google Chrome?
Why Chrome Can’t Recognize My Camera?
Part 1. How to Allow Chrome Camera Access on a PC or Mac?
Part 2. How to Allow Chrome Camera Access on an iOS Device?
Why are My Cameras Not Working in Google Chrome?
Frustrated with your camera not working with chrome? This section is for you! Camera access on Chrome may be unavailable due to device incompatibility issues resulting from various shortcomings. These factors include physical damage to the camera due to an unforeseen incident or using outdated camera drivers. This can result in the camera not being recognized by the browser and being unable to function properly, causing distress among users.
Another common issue is that camera access may be blocked in Chrome’s settings. This can prevent the camera from being used within the browser, resulting in error messages when initiating a video call or using other camera-dependent features. There may be a case where access to the camera is enabled, but it is not working within chrome. This happens when the camera app is opened, or another website uses the camera in the background.
Further Reading: How to Fix Missing Screen Capture Permission Mac >
Why Chrome Can’t Recognize My Camera?
Now that you have known the possible reasons why your camera does not work in chrome, it is time to discuss some of the internal factors that lead to chrome being unable to recognize your camera. This can occur due to the presence of third-party tools, security software, and firewalls. These programs can have settings that restrict access to the camera, which may need to be adjusted to allow Chrome to utilize the camera.
Additionally, the device’s operating system plays a crucial role in the camera’s functionality. An outdated operating system version may not be compatible with the latest version of Chrome, and you may need to install the necessary updates to support the camera. Furthermore, the browser version is also important in the camera’s recognition. It is necessary to keep your browser up to date with its latest version to ensure it has the latest features and security fixes.
Part 1. How to Allow Chrome Camera Access on a PC or Mac?
Need help getting your camera to work on Chrome? Look no further! Allowing camera access on Chrome for Windows or Mac-based devices is a clean and straightforward process that can be accomplished by changing the settings within the browser. By default, Chrome will prompt you for permission to access the camera when visiting a website that requires it.
However, if you have previously denied access intentionally or unintentionally or if your settings have been altered, you may need to adjust them to allow Chrome to access the camera manually. This allowance can be given for a particular website as well as for all websites on the browser. So, if you wish to know the steps for enabling the camera access, follow the detailed instructions below on how to do that:
Step 1: Open “Chrome” on your PC or Mac.
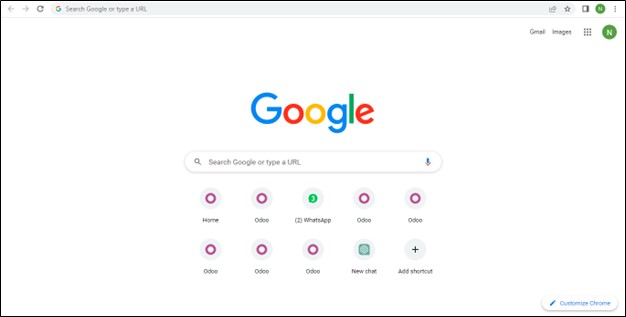
Open Chrome
Step 2: Click the “Three dots icon” at the top right corner of the navbar. After that, select “Settings.” From there, click “Privacy and Security” and go to “Site settings.”
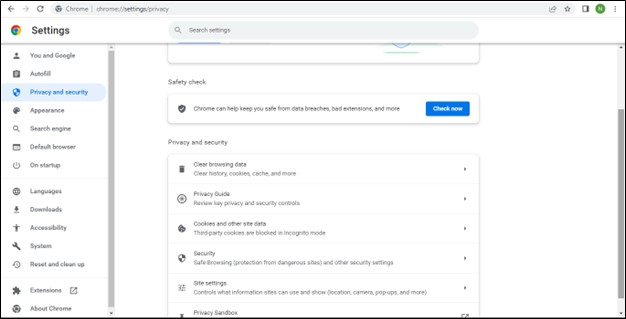
Click Privacy And Security
Step 3: Look for “Camera” and enable the “Sites can ask to use your camera.”
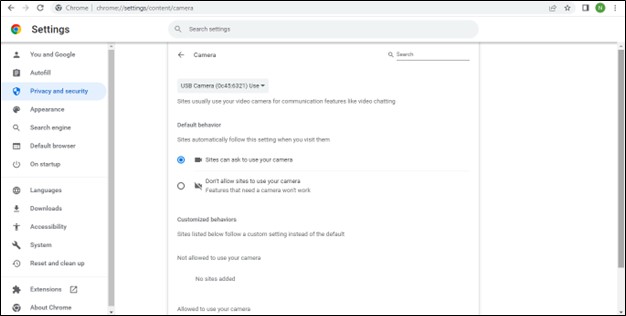
Enable Sites Can Ask to Use Your Camera
Step 4 (optional): In case you want to allow permission to a specific site, in “Site settings,” click “View Permissions and data stored across sites.” Select the site and
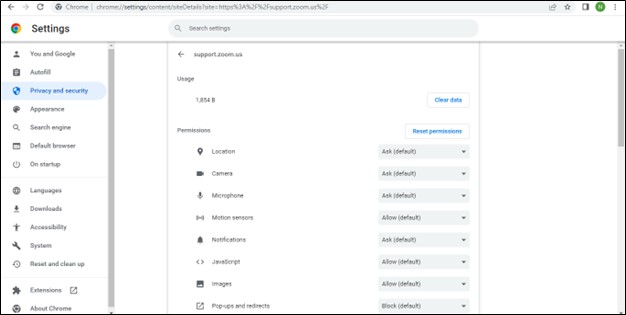
enable Camera permission
Part 2. How to Allow Chrome Camera Access on an iOS Device?
Are you an IOS device user and wondering how you can enable camera access for your google chrome application? You have come to the right place! It is a simple process that can be done through the Chrome app settings or through the iOS device’s settings. Once your camera access is enabled, you can use it within the Chrome app for various required services.
Using the camera on your iPhone or iPad’s chrome application can be a handy way to attend video meetings on the go and perform biometric verification of your google account, besides many other useful services. However, if you are unable to access the camera on Chrome on your iOS device, then this section will guide you with easy-to-follow steps as mentioned below to overcome this hurdle:
Step 1: Open “Settings” on your iPhone.
Open Settings on You Phone
Step 2: Type “Google” in the search bar present at the top and click “Search.”
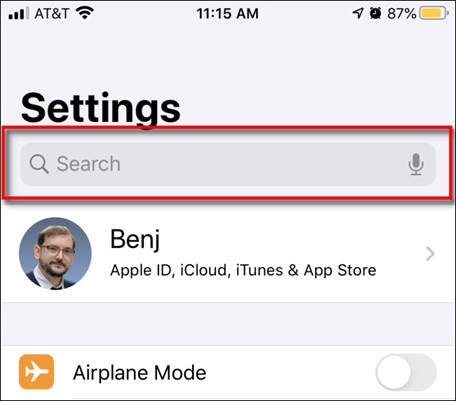
Search For Google
Step 3: Now, Click on “Google.”
Step 4: Here, you will see the “Camera” option, which you have to enable.

Enable Camera
Part 3. How to Allow Chrome Camera Access on an Android?
Are you stuck on the camera access error message and unable to think of what to do next? Well, you have come to the right section if you are an android user. Enabling camera access for the Google Chrome app on your Android device can open the doors for many functionalities, such as capturing images and videos for online shopping, scanning QR codes to claim discounts, or even taking photos or videos of yourself as part of an online application process.
As a result, you can take advantage of various online services that require using a camera through this process. Now, If you are thinking about how you can do that through your device’s settings, then follow the steps mentioned below properly, and you will be able to overcome this issue without much effort. Follow these steps:
Step 1: Click on “Settings” on your mobile or through the notification panel.
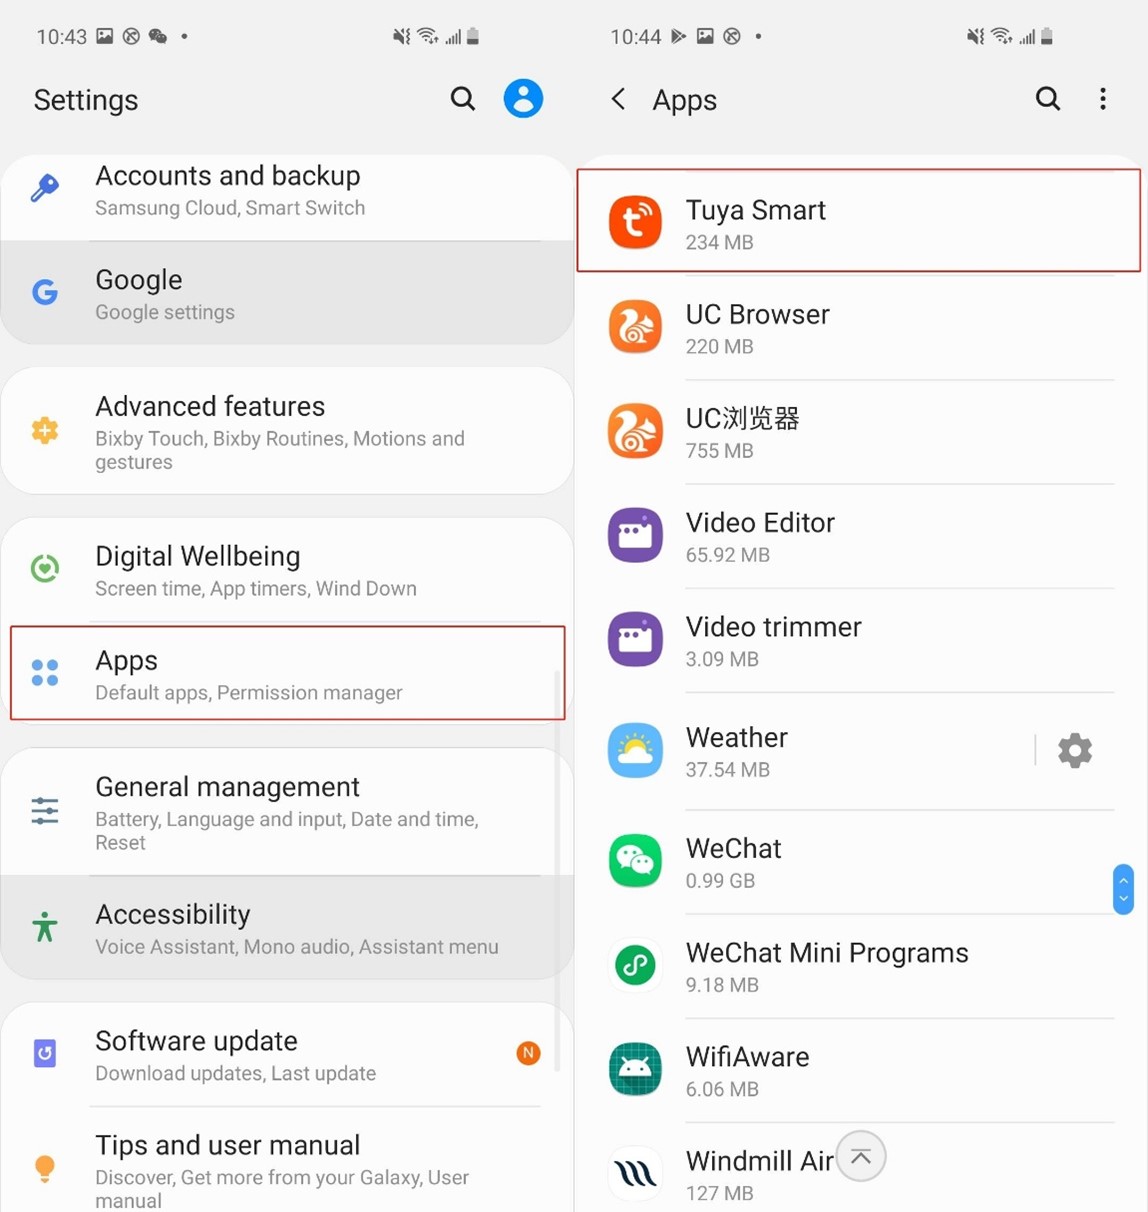
Click On Apps
Step 2: Now, you have to scroll down and tap on the “Apps” or “App Manager” option.
Step 3: Find and select the Google “Chrome” app in the list of apps.
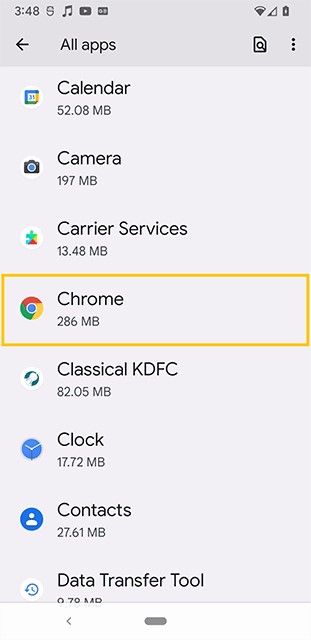
Click On Chrome
Step 4: Finally, tap on the “Permissions” option and click on the “Camera” permission, then select “Allow only While using the app.”
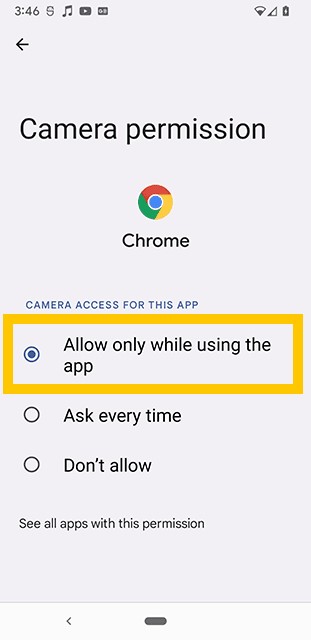
Enable Allow Only While Using The App
Part 4. Frequently Asked Questions
1. How do I Give Permission for My Web Browser to Use the Camera?
You can explicitly permit your web browser to use the camera for various purposes. It is worth noting that the camera is disabled by default to maintain the privacy of the user surfing on the browser. To achieve this for the Google Chrome browser, you can follow the below steps below:
Step 1: Open the Chrome app and click on the “Three-dots icon” > “Settings.”
Step 2: Search and press on “Privacy and security” > “Site Settings.”
Step 3: Inside the Site settings, search and look for “Camera.” You must enable “Sites can ask to use your camera.”
By now, you have successfully enabled camera access for every website that uses cameras for providing different services.
2. How do Select a Different camera in Chrome?
Google chrome browser supports the functionality of allowing users to select any camera. It may be an internal or externally integrated camera that can be used for the camera-based services provided by various websites. To select a different camera on your browser, you can follow the steps below:
Step 1: Click on “settings” under the “three-dots icon” in your google chrome application.
Step 2: Now, inside the settings, search for “Privacy and security” and click on it. Inside, you must click on “site settings” and then click on “Camera.”
Step 3 In the final step, you can select from the dropdown option present at the top and select your desired camera.
After selecting the camera of your choice from the options, your browser settings will be stored. The next time you visit any website with a camera-based feature, your preferred camera will be automatically opened.
3. How Do I Disallow camera access from the above Devices?
Disallowing camera access on devices is necessary to ensure customers’ trust and privacy are maintained. This is the sole reason why camera access is given to the user. Users may disable it at times based on their needs. To disable the camera access on an android device, follow the below steps:
Step 1: Tap on “Settings” > “Apps.”
Step 2: Scroll and tap on “Chrome” > “Permissions.”
Step 2: Lastly, tap “Camera” and select “Don’t allow.”
Similarly, to know more about how you can disable camera access on other devices like Mac, Windows, and iOS, you can take assistance from part 3 and part 4 of this article, respectively.
Final Thought
With the advent of IT and the wide range of camera-based services available today,browser users can use cameras for numerous purposes to make their life easier. However, it is up to the user to explicitly allow camera access to Google, from which the question “How to Allow Camera Access on Chrome?” arises. Moreover, we hope this article helped you answer your question and turned out to be informative for you. If it did, please feel free to share it with your family and friends, and do not forget to leave a comment with your thoughts or feedback in the comment section.