How to Add Captions in Canva: A Step-by-Step Guide

How to Add Captions in Canva
In today’s digital landscape, visual content plays a crucial role in engaging audiences and conveying messages effectively. Captions are an essential element of visual content, providing context, improving accessibility, and enhancing overall comprehension. Canva, a popular graphic design tool, offers a user-friendly platform for adding captions to your images and videos. In this guide, we’ll explore the benefits of using Canva for adding captions and walk you through the process step by step
Also Read: How to Add Caption in CapCut >
Key Features of Canva
Canva is a versatile design tool that offers a wide range of features for creating visually appealing content. Some of its key features include:
- Drag-and-drop interface for easy design creation
- Extensive library of templates, images, and graphics
- Collaboration tools for teamwork and sharing
- Mobile app for designing on the go
- Integration with various social media platforms
Steps to Add Captions to Videos in Canva
Captions are essential for making videos accessible and engaging. Canva simplifies the process of adding captions to your videos with these steps:
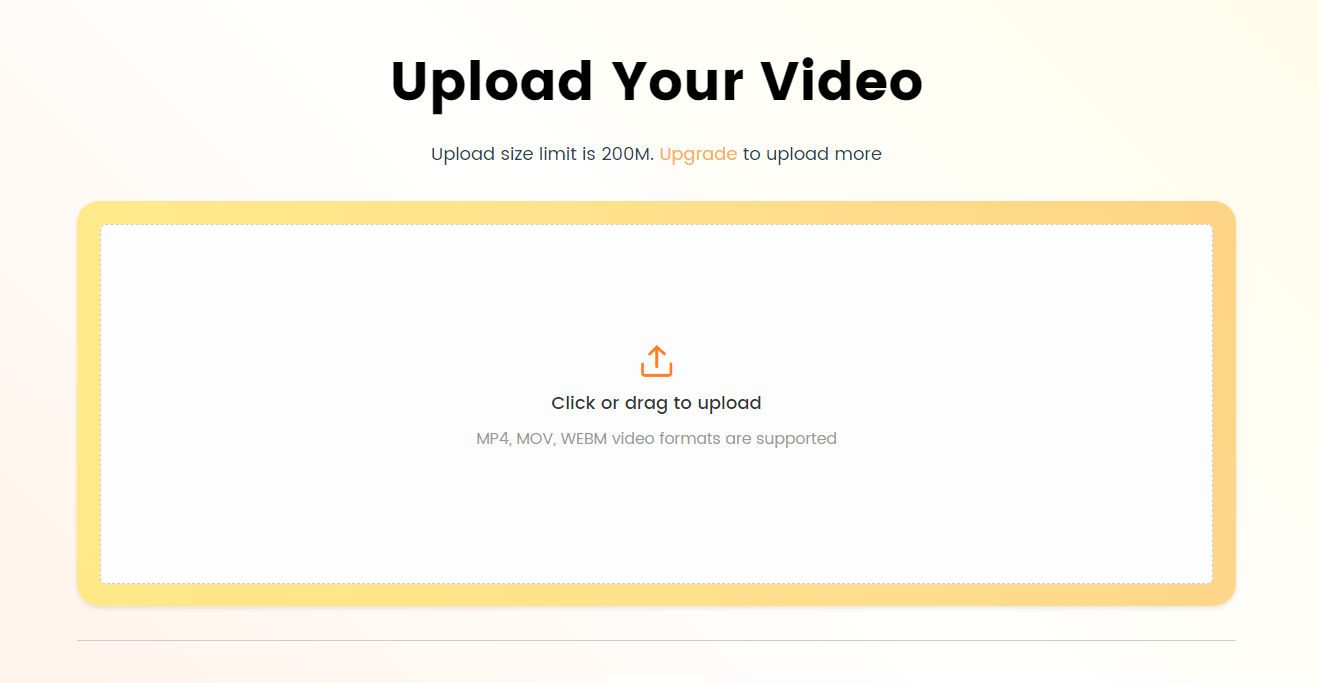
Step 1. Uploading your video to Canva
Free Design Apps – Canva
Canva supports various video formats, including MP4, MOV, and GIF. Ensure your video meets the recommended size and resolution for optimal performance. You can easily upload your video from your computer or import it directly from online sources such as YouTube, Vimeo, or Dropbox.
Trimming and splitting your video (if needed):
Canva’s built-in video trimming tool allows you to select the desired portion of your video, removing any unnecessary segments. If your video consists of multiple scenes, you can split it into separate segments to add captions more precisely.
Step 2. Adding Captions to Your Video
1. Creating a new caption box
To add captions, click on the “Text” button in the Canva editor. Canva offers a variety of pre-designed caption styles, or you can create a custom style to match your brand’s aesthetic.
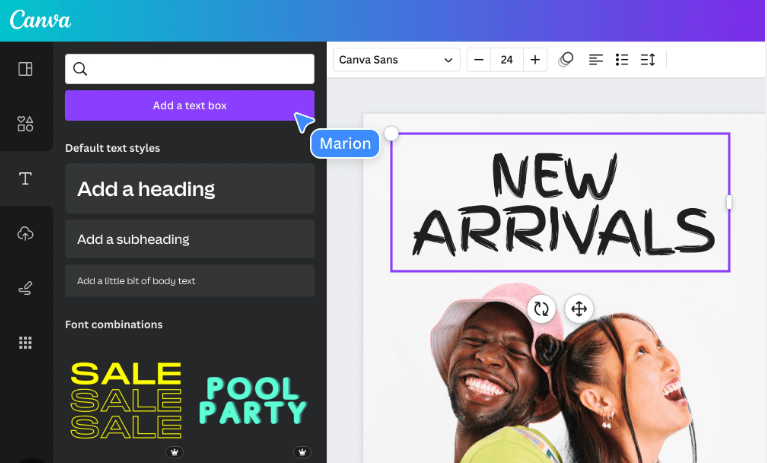
Creating a New Caption Box
2. Transcribing your video
Watch your video and manually transcribe the spoken content into the caption boxes. Some Canva plans to offer a speech-to-text feature that automatically transcribes your video’s audio into captions.
3. Synchronizing captions with the video
Ensure each caption appears on the screen long enough to be comfortably read by viewers. Precisely set the start and end times for each caption to synchronize them with the corresponding video segments.
Step 3. Styling Your Captions
1. Customizing caption font and size
Select a font that is easy to read and complements your video’s overall aesthetic. Ensure your captions are large enough to be easily read on various devices and screen sizes.
Customizing caption font and size
2. Selecting caption color and background
Choose caption colors that provide adequate contrast against the video background for optimal readability. Apply a semi-transparent background to your captions to make them stand out without obscuring the video content.
3. Positioning captions on the video
Position your captions in a way that doesn’t interfere with important visual elements of your video. Utilize the Rule of Thirds composition technique to place captions in visually appealing and balanced positions.
Step 4. Enhancing Your Captioned Video
Elevate the visual appeal of your captions with Canva’s built-in transition effects, effortlessly creating smooth transitions between each caption. Additionally, leverage Canva’s vast library of graphics and icons to enhance your captions with relevant visuals. For added impact, design custom animations that align with your video’s theme, further amplifying the message conveyed by your captions.
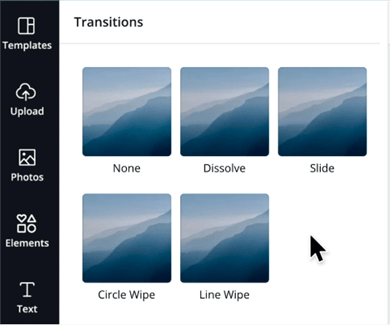
Choose a Transition Effect
Step 5. Exporting and Sharing Your Captioned Video
To ensure proper synchronization and readability of your captions, watch your captioned video attentively. Next, choose the ideal resolution and quality settings based on your intended distribution platform. Finally, export your captioned video in a widely compatible format like MP4 or GIF. You can then easily share your captioned video across multiple social media platforms or embed it on your website directly from Canva.

Export your Captioned Video
Alternative Way to Add Caption to Video without Canva
If you prefer creating short videos with a 9:16 aspect ratio, like TikTok, Instagram Reels, or YouTube Shorts, then there’s an AI caption generation tool perfect for you. CapUp is an auto video caption generator that lets you quickly and easily add compelling captions to your videos.
Here are the key features of CapUp:
- Automatically caption generation: Driven by AI technology, it can accurately convert speech in videos to text. Enables you to create video captions swiftly and effortlessly, eliminating the need for manual transcription.
- Personalize Your Captions: Adjust the text, font, colors, and styles to suit your preferences.
- Incorporate Emotion and Emphasis: Liven up your captions with automated emojis and highlight key points using keyword emphasis.
- Auto Zoom for Highlights: Maximize engagement and emphasize pivotal video moments by employing auto zooms for highlight words.
Step 1. Log in and Upload Your Video
Sign in to the CapUp platform > Upload your video by either dragging and dropping it into the designated area.
Log in and Upload the Video
Step 2. Select the Video Language
Choose the language of your video from the dropdown menu, which includes a variety of options such as English, German, Spanish, French, Portuguese, and more > Allowing CapUp to automatically create captions for your video.
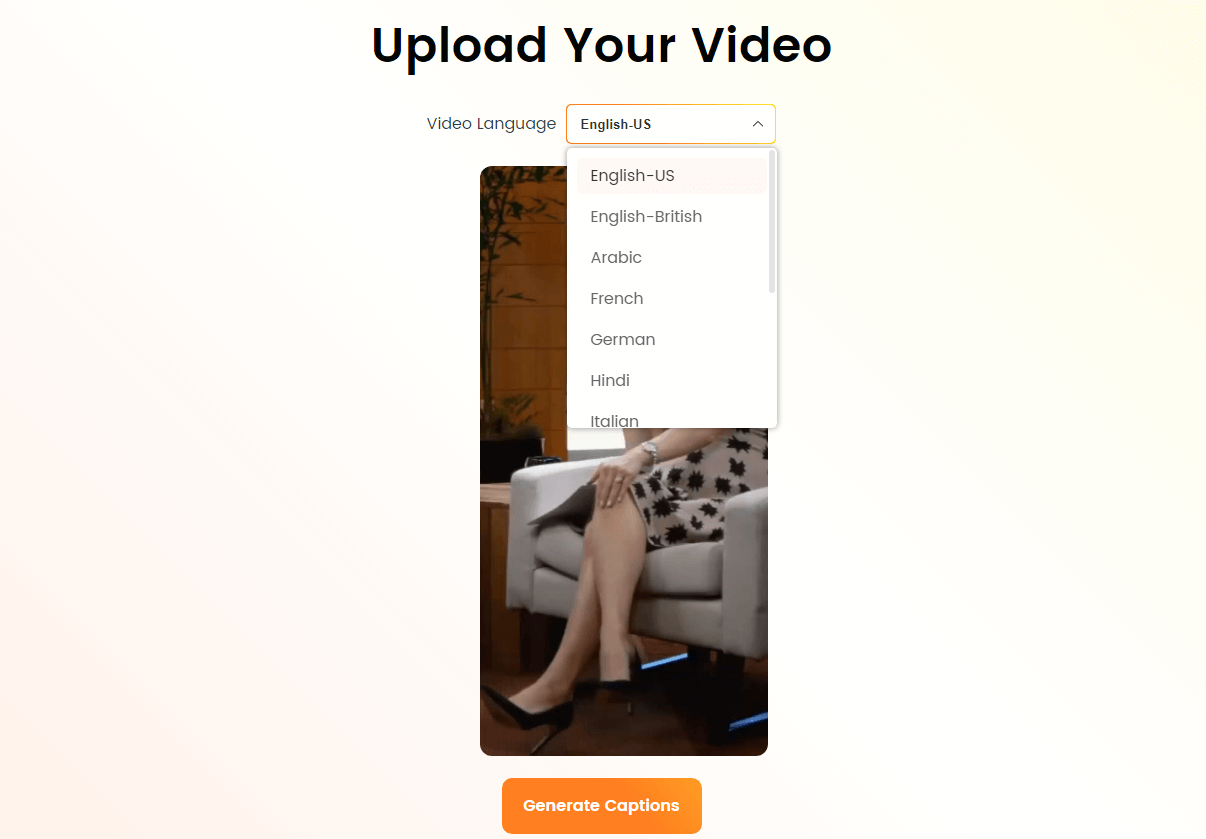
Select the Language that Matches Your Video
Step 3. Choose a Template
CapUp will apply the first “Hormozi” template for your video default. Click on the “Template” button to browse and select another design template inspired by top influencers.
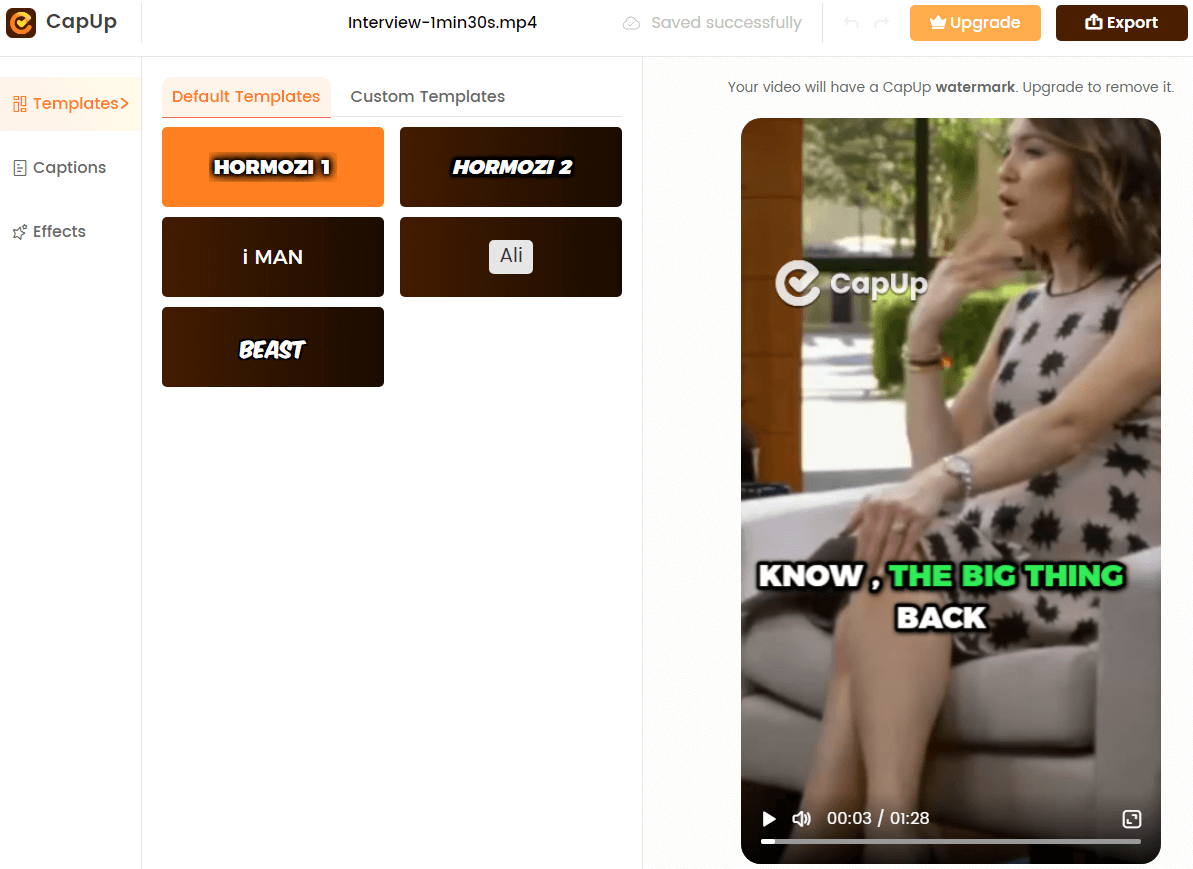
CupUp – Select a Default Template
Step 4. Customize and Edit
After generation, you can edit the captions by clicking on “Caption” and “Effect” to customize the font, add emojis, and incorporate sound effects as desired.
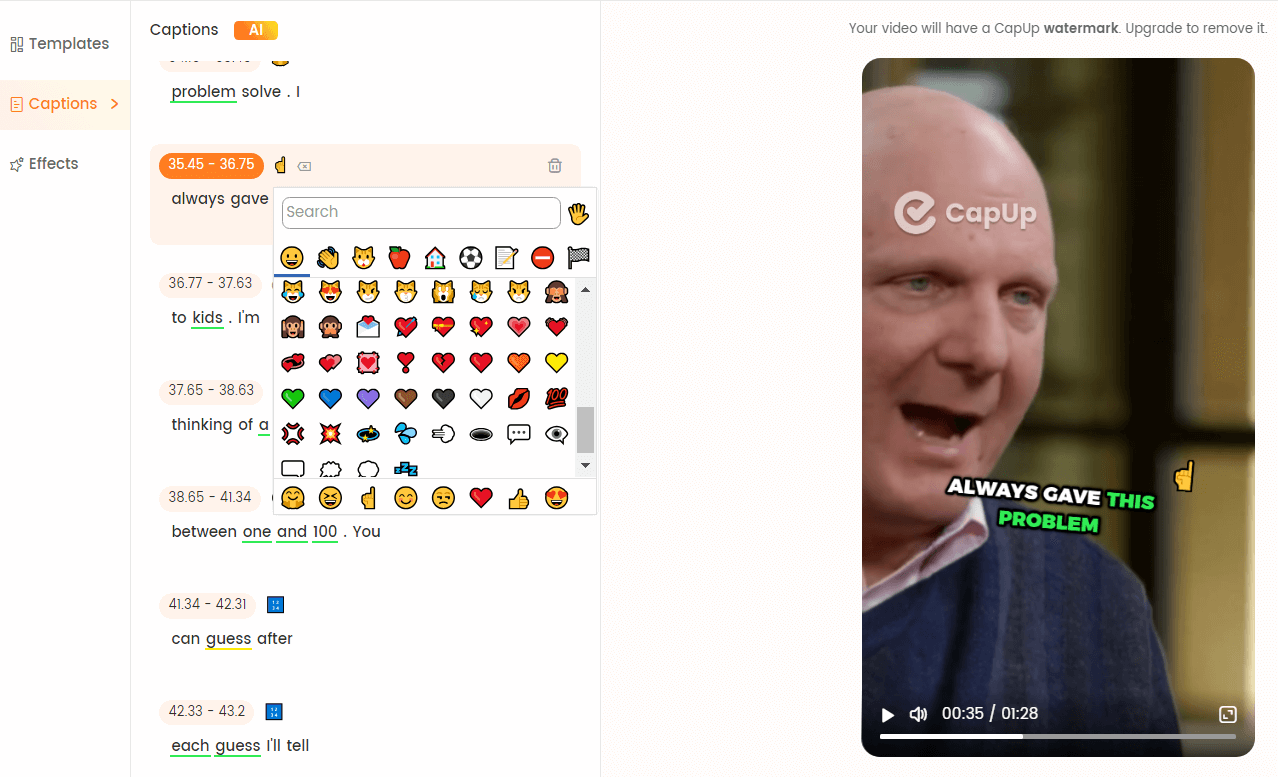
Add Subtitles to Videos
Step 5. Add a Cover and Export Your Video
To add a cover to your video, either upload an image from your device or select a frame directly from your video content. Once you are satisfied with the cover and all edits, click “Export” to save and download your newly captioned video.
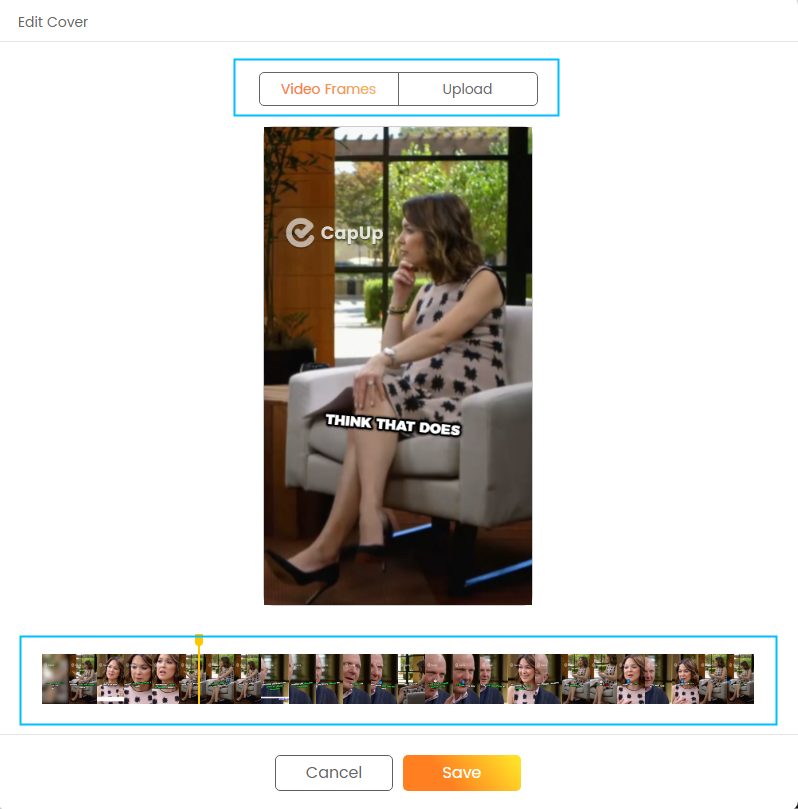
CapUp – Two Ways to Edit Video Cover
Best Practices and Tips for Adding Captions in Canva
- Keeping captions concise and readable: Aim for captions that are brief, clear, and easy to understand.
- Ensuring proper color contrast for accessibility: Follow accessibility guidelines for color contrast to ensure your captions are readable for all viewers, including those with visual impairments.
- Maintaining brand consistency in caption style: Use consistent font, color, and positioning choices for captions throughout your videos to establish a cohesive brand identity.
- Testing and previewing captions on different devices: Preview your captioned videos on various devices and platforms to ensure optimal readability and functionality across different screen sizes and resolutions.
FAQs on How to Add Captions in Canva
Can I add captions to existing videos in Canva?
Yes, you can upload your existing videos to Canva and add captions using the steps outlined in this guide.
How can I ensure my captions are accessible to a wide audience?
To make your captions accessible, use a legible font, ensure sufficient color contrast, and keep the captions concise and easy to read. Additionally, consider providing alternative text descriptions for your videos.
Can I collaborate with others when adding captions in Canva?
Canva offers collaboration features that allow you to work together with your team members in real-time, making it easier to add and review captions collaboratively.
Conclusion
Adding captions to your videos using Canva is a straightforward process that can significantly enhance the impact and accessibility of your visual content. By following the step-by-step guide outlined in this article, you can easily prepare your video, add and style captions, and export your captioned video for sharing. Remember to keep your captions concise, ensure proper color contrast, and maintain brand consistency throughout your videos. Don’t hesitate to experiment with Canva’s various caption features and design elements to create engaging and effective video content. With well-designed captions, your videos will captivate and inform your audience, leaving a lasting impact on their viewing experience.