How to Convert Horizontal Video to Vertical?

In our digital age, the way we consume video content has dramatically shifted. The rise of mobile viewership has introduced a new era where vertical videos have become more prevalent than ever before. This shift is especially notable on platforms like Instagram, Snapchat, and TikTok, where vertical content dominates. But what happens when you have fantastic content captured in horizontal orientation? That’s where learning how to convert horizontal video to vertical becomes essential.
Convert Horizontal Video to Vertical
For content creators, understanding how to manoeuvre between different video orientations can significantly enhance their content’s appeal. The versatility of transitioning from landscape to portrait mode allows content to be shared across various platforms, improving overall reach and engagement. In this guide, we’ll cover different methods to help you convert horizontal videos to vertical ones, making them ideally suited for your platform of choice.
Also read: How To Make Facebook Reels That Attract an Audience >
Table of Contents: hide
Can You Change a Horizontal Video to Vertical?
Can You Change a Horizontal Video to Vertical?
Changing a horizontal video to a vertical one is possible, but knowing that the process is more than just rotating the video 90 degrees is essential. It’s about effectively reorienting the video’s composition and framing to suit a vertical perspective.

Convert Horizontal Video To Vertical
So, what is video orientation exactly? Simply put, it’s how your video is presented, horizontally (landscape mode) or vertically (portrait mode). Most professional and cinematic videos are shot horizontally to match television and cinema screens. However, the vertical format has grown in popularity with the surge of mobile video consumption on platforms like Instagram, TikTok, and Snapchat.
In the conversion process from horizontal to vertical, you should remember that there might be some loss of framing or details. Why is this? Well, imagine you’ve shot a video in landscape format, capturing a broad, panoramic view. When this footage is switched to a vertical format, the sides of the video will be cropped out to fit the narrower frame. As a result, any critical action or detail happening at the sides of the original frame could be lost in the process.
While it may not be ideal for every scenario, transitioning from horizontal to vertical is not only possible but practical, given the proper context and tools. When deciding whether this conversion makes sense for you, you’ll need to consider your original footage, target platform, and audience’s viewing habits. And don’t worry; in the following sections, we’ll dive into the nitty-gritty of how to carry out this process using various platforms and tools.
Further Reading: Does Instagram Notify When You Screen Record >
Can You Make a Horizontal Video Vertical for YouTube?
The answer is a resounding yes! The process, however, demands some thoughtful consideration, primarily because YouTube traditionally favours a 16:9 horizontal aspect ratio. When converting to a vertical 9:16 aspect ratio, it is vital to ensure that the key elements of the video remain visible and not cropped out. Therefore, while the transformation is technically achievable, the content’s framing and composition are crucial to remember.
Furthermore, YouTube’s varying display formats across different devices may also impact how your vertical video appears to viewers. Thus, previewing the video across various devices before publishing is essential to ensure optimal viewing. Understanding these platform-specific considerations will help creators adapt their content appropriately for YouTube while catering to the increasing demand for vertical videos.
Further Reading: How to Mirror YouTube Videos >
How Do You Convert Horizontal Video to Vertical?
So, you’ve understood the whys and wherefores, and now it’s time for the hows. Let’s dive into the various ways to convert horizontal and vertical videos.
Convert Horizontal Video to Vertical in iMovie
iMovie is a powerful tool for creating and editing videos, but it’s traditionally designed for making landscape videos. Here’s how you can use it to make vertical videos without black bars:
Step 1: Open iMovie and choose the clip you want to convert on the timeline.
Step 2: Once you’ve selected your clip, click the ‘Crop’ button in the preview window. From the drop-down menu, select ‘Rotate Right.’ This action rotates your vertical video into a horizontal orientation.
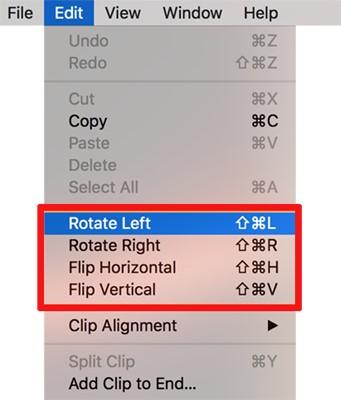
Rotate Left in iMovie
Step 3: Continue editing your video in iMovie as you usually would. Remember that some iMovie themes and titles may not be suitable for vertical videos due to the orientation change.
Step 4: After editing, export your video. You’ll get a landscape video, but it won’t have black bars.
Convert Horizontal Video to Vertical on Instagram
With its portrait-oriented feed, IGTV, and Stories, Instagram often requires users to convert their horizontal videos to a vertical format. Instagram automatically converts horizontal videos to vertical before you post them; however, scaling it to fit the screen might crop the edges.
Here is the guide on how to post a video in vertical dimension:
Step 1: Ensure you have the Instagram app opened on your device. Locate the bottom centre of your screen, and you will find a handy ‘+’ button there.
Step 2: Following this, you will be prompted to select a horizontal video from your gallery that you wish to upload onto Instagram.
Step 3: Choose the option you want to post your video as – Feed, IGTV, or Reels. Each option allows for different video orientations and sizes. For IGTV and Reels, tap on Scale to crop your video to a vertical format.
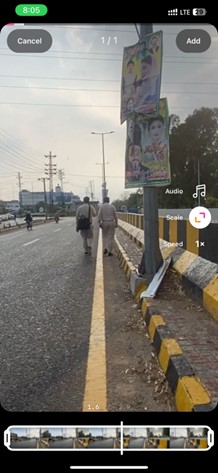
Tap Scale
Step 4: Adjust your video’s size using the resize button at the bottom left. Drag the corners of the video to fit the vertical format. Note that you may lose some of the left and right sides of the video in this process.
Step 5: Once the video’s format is satisfied, click ‘Next’ and proceed with the usual post-creation steps. This will end up giving you the vertical video.
Remember, converting horizontal videos to vertical on Instagram may result in cropping some parts of the video. Therefore, consider the frame composition before making the switch. And there you go – your horizontal video is now Instagram-ready in a vertical format!
Please note that Instagram currently does not provide a tool to convert a video’s orientation after posting it. Therefore, ensure your video is in the correct format before posting.
Convert Horizontal Video to Vertical for YouTube
Although YouTube was traditionally a platform for widescreen horizontal videos, increasing video content consumption on mobile devices has shifted the trend towards vertical videos. Here is a simple guide to directly convert horizontal videos to vertical format on YouTube without needing extra tools or apps.
Step 1: Sign in to YouTube and click on your account icon at the top right corner. Select “YouTube Studio” from the dropdown menu.
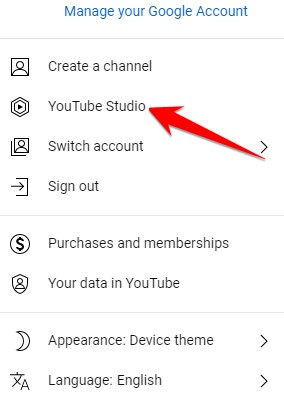
Select YouTube Studio
Step 2: Once you’re inside YouTube Studio, take note of the left-hand panel. Locate and click on the tab labelled “Videos.” This will grant you access to the videos management section where all your uploaded content resides.
Step 3: Select the video you want to convert from horizontal to vertical. This will open the video details page.
Step 4: Click the “Editor” tab on the left. Here you can preview your video and make changes.

Click the Editor Tab
Step 5: In the editing interface, you can rotate your video horizontally to vertically. Remember that simply rotating a horizontal video might not create the best viewing experience due to the potential loss of framing or details. Therefore, consider repositioning and resizing the video elements to suit the vertical frame.
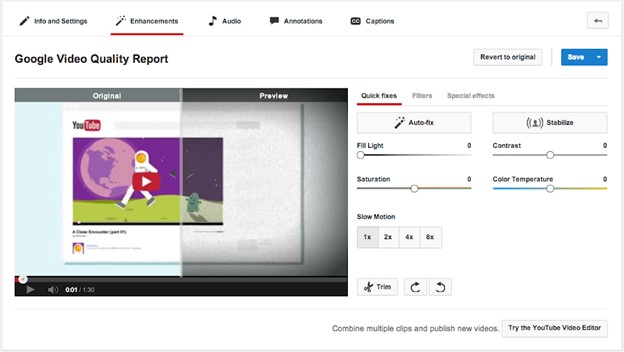
Rotate Your Video
After you’re satisfied with the results, don’t forget to save your changes. You have successfully converted your horizontal video to a vertical format using YouTube!
Convert Horizontal Video to Vertical in Canva
Canva, renowned for its user-friendly interface and myriad design options, is a fantastic tool for converting horizontal videos into vertical ones. The online design platform caters to professionals and novices, allowing you to resize your videos with minimal effort. Now delve into the process.
Step 1: Log into your Canva account.
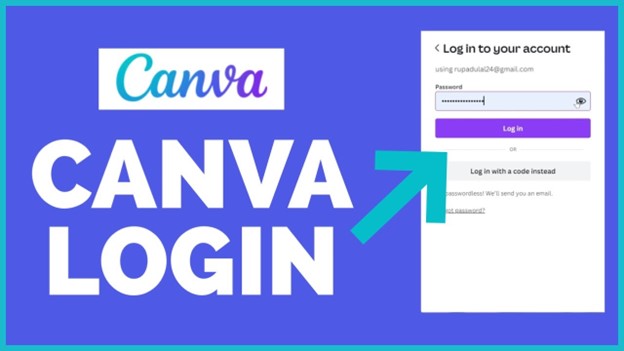
Sign In To Your Account
Step 2: Click the “Create a design’ button. A drop-down menu will appear with different options.
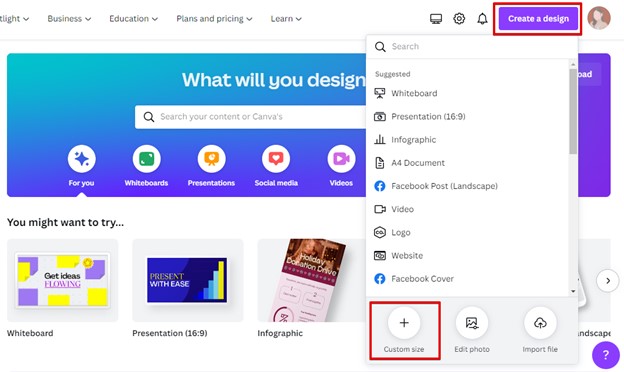
Create a Design Button
Step 3: Select ‘Custom dimensions,’ then input your desired video dimensions for the vertical format, typically 1080px by 1920px.
Step 4: Click on ‘Uploads’ from the left-side toolbar. Hit the ‘Upload an image or video’ button, and select the horizontal video you wish to convert from your device.
Step 5: Drag and drop the video onto your canvas once the video is uploaded. Resize the video to fit the canvas by dragging its corners. Click resize to adjust the dimensions as required.
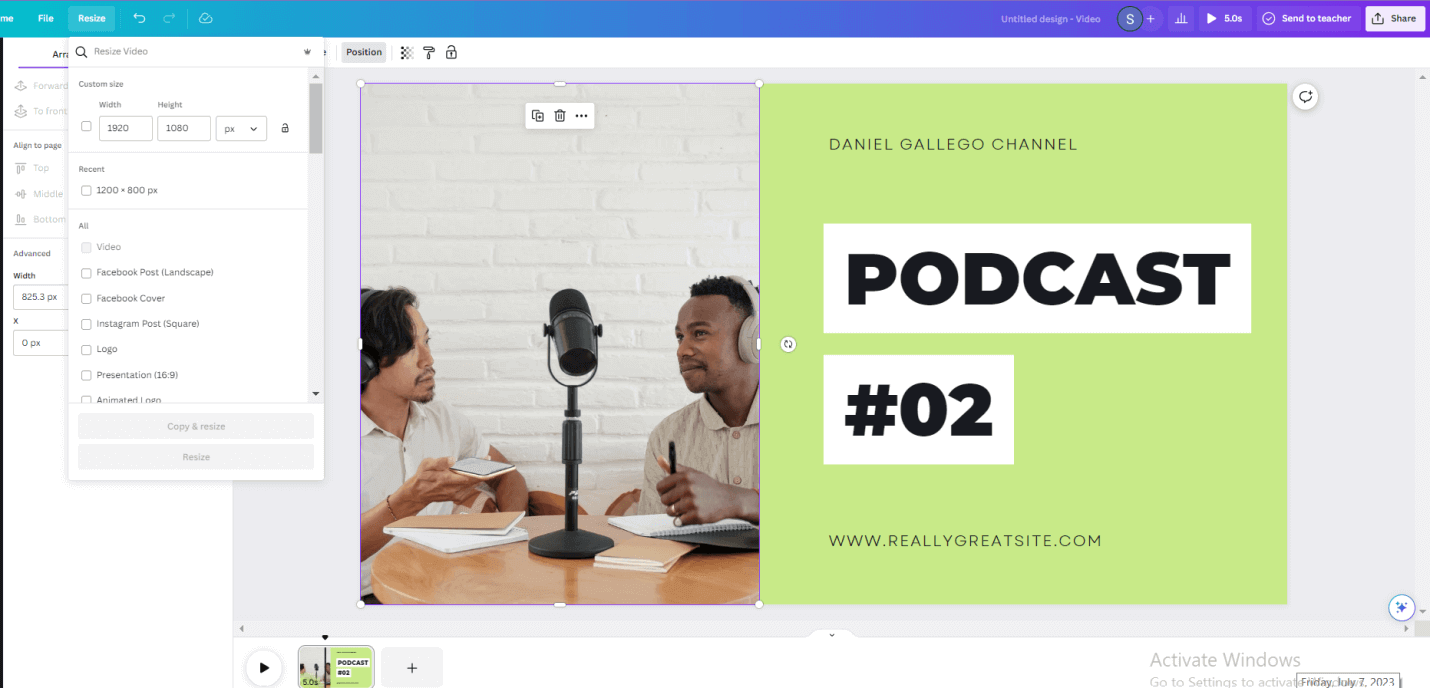
Resize to Rotate
Step 6: After creating the required video, choose MP4 video as the file type and click ‘Download’ again.
Convert Horizontal Video to Vertical in Premiere
Adobe Premiere Pro, a professional video editing tool, provides robust options for converting your horizontal videos into vertical format. Ready for the transformation? Follow these simple steps:
Step 1: Launch Adobe Premiere Pro and initiate a new project.
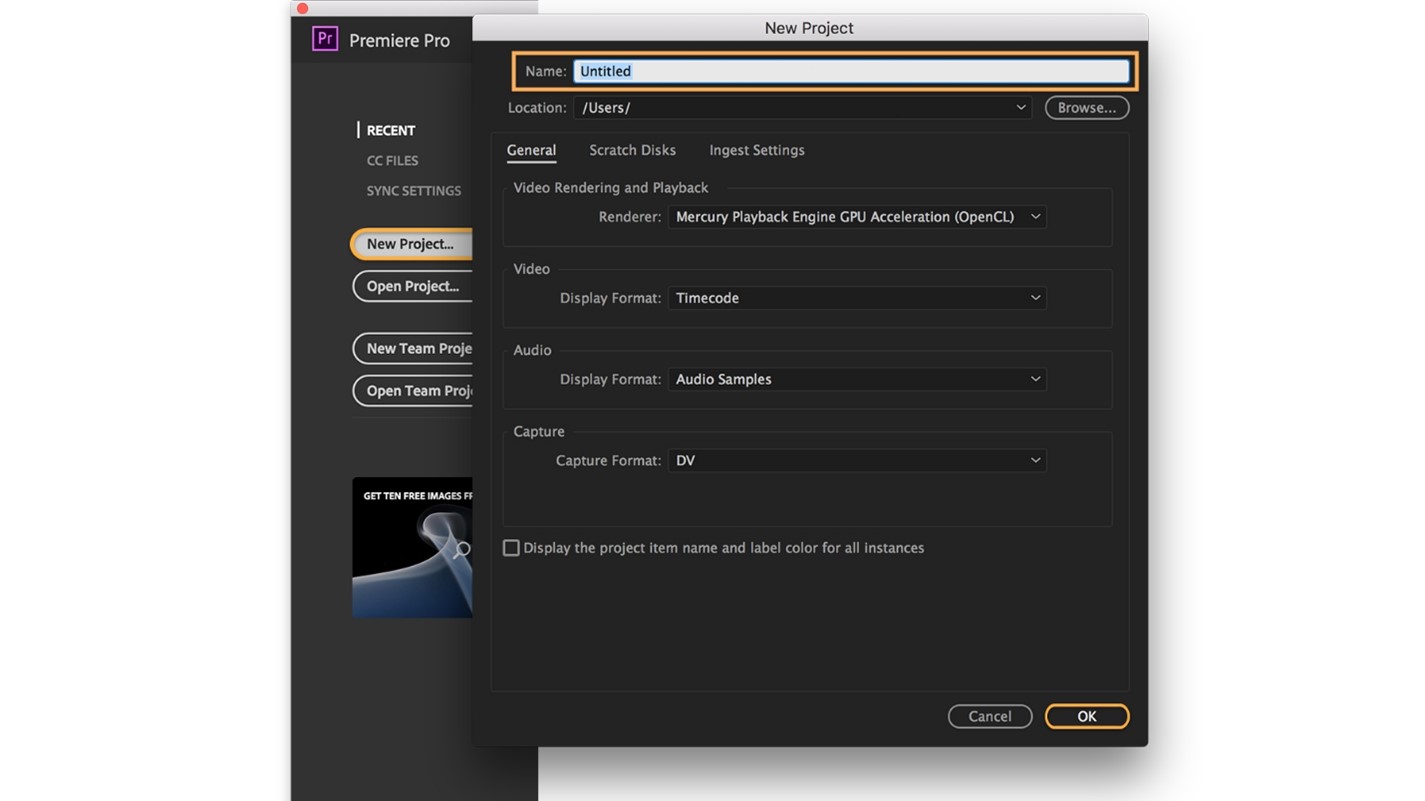
Open a New Project
Step 2: Navigate to the ‘File’ option, click ‘Import,’ and select the desired video from your files.
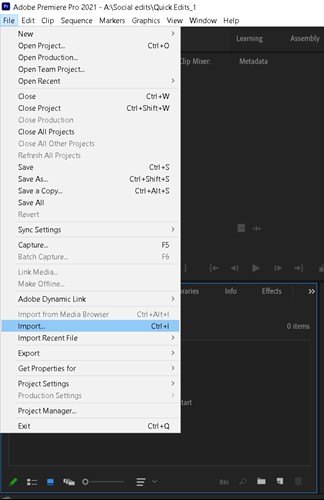
Click Import Option
Step 3: Drag and drop the imported video onto the timeline. Click on ‘Sequence’ in the menu bar, then select ‘Sequence Settings.’
Step 4: In the ‘Frame Size’ section, input your desired vertical dimensions. Commonly used vertical dimensions are 1080×1920 for a 9:16 ratio.
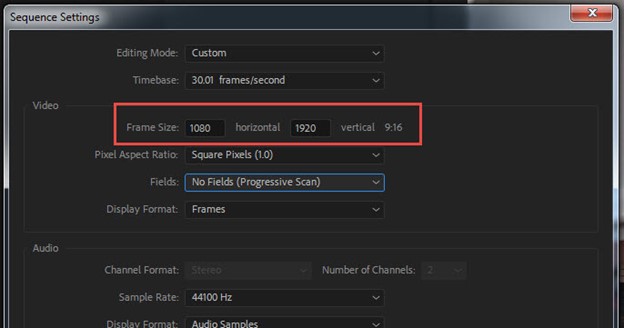
Choose Vertical Dimensions
Step 5: Hit ‘OK’. You’ll notice that your sequence is now in vertical format. Adjust your video’s position within the frame by selecting the video on the timeline and playing around with the ‘Position’ and ‘Scale’ settings in the ‘Effect Controls panel.
Final Thought
As we conclude this comprehensive guide on converting horizontal videos to vertical, it’s essential to recognize that content creation is ever-changing. With the increasing prominence of mobile-first platforms, the significance of vertical videos cannot be overstated. Being familiar with the conversion process across various tools like iMovie, Instagram, Canva, or Premiere enables us to adapt and deliver captivating content that resonates with our audience.
We sincerely hope this guide has proven valuable in your content creation journey. We invite you to share your experiences and recommendations in the comments below. Whether you have utilized these techniques or uncovered alternative methods for converting videos, your insights will contribute towards collective learning and growth in this dynamic world of digital content.